Cyberark Idaptive: Configuring Forcepoint Data Security Cloud | SSE as a SAML SP
You can add Cyberark Idaptive as an external IdP via SAML SSO integration with Forcepoint Data Security Cloud | SSE. Forcepoint Data Security Cloud | SSE offers both IdP-initiated SAML SSO (for SSO access through the user portal or Idaptive mobile applications) and SP-initiated SAML SSO (for SSO access directly through the Forcepoint Data Security Cloud | SSE web application).
You can configure Forcepoint Data Security Cloud | SSE for either or both types of SSO. Enabling both methods ensures that users can log into Forcepoint Data Security Cloud | SSE in different situations such as clicking through a notification email. Refer to the Cyberark's documentation for more information.
Before you begin
Steps
-
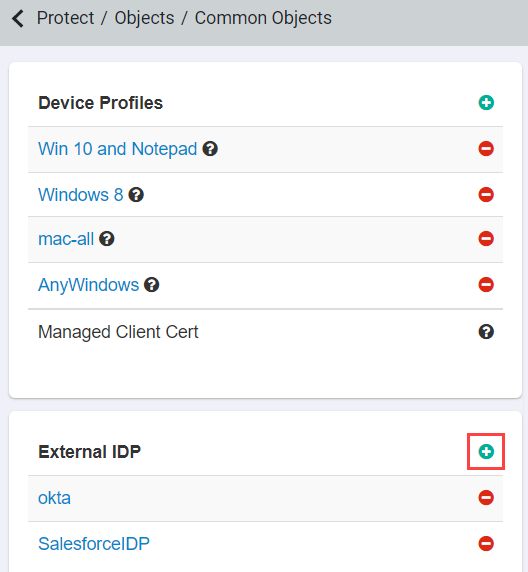
In the Forcepoint Data Security Cloud | SSE admin portal, navigate to . Click the green plus icon to add a new IdP object. Make note of the SAML Entity ID as you will need this for step 7. It's recommended you
keep this window open for the Forcepoint Data Security Cloud | SSE Setup section
below.
-
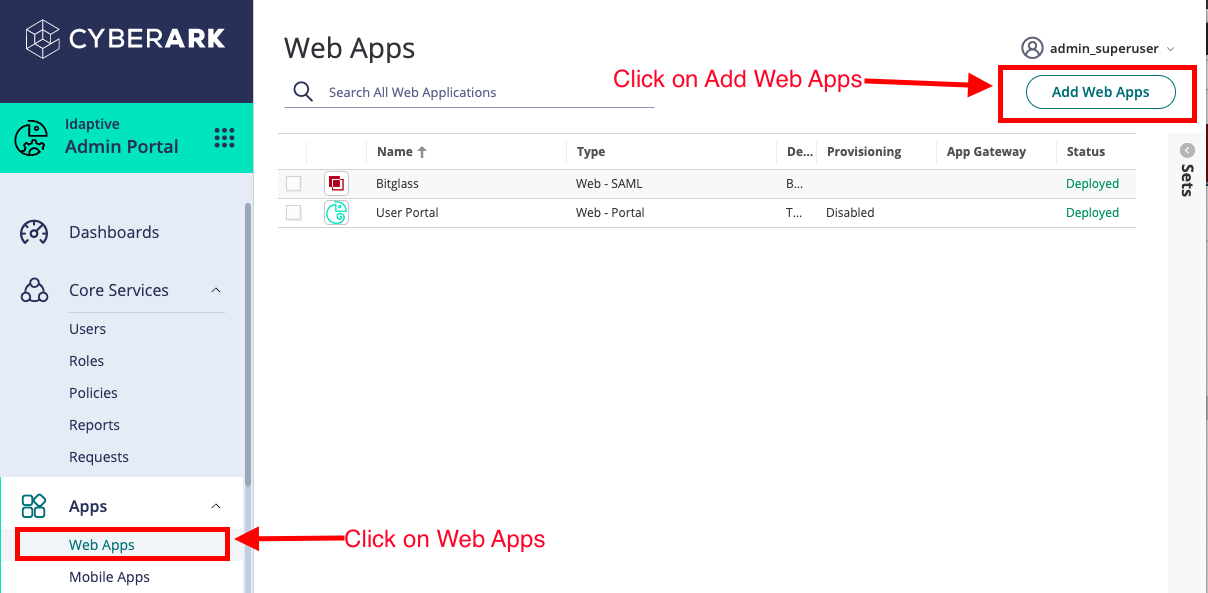
Navigate to the .
-
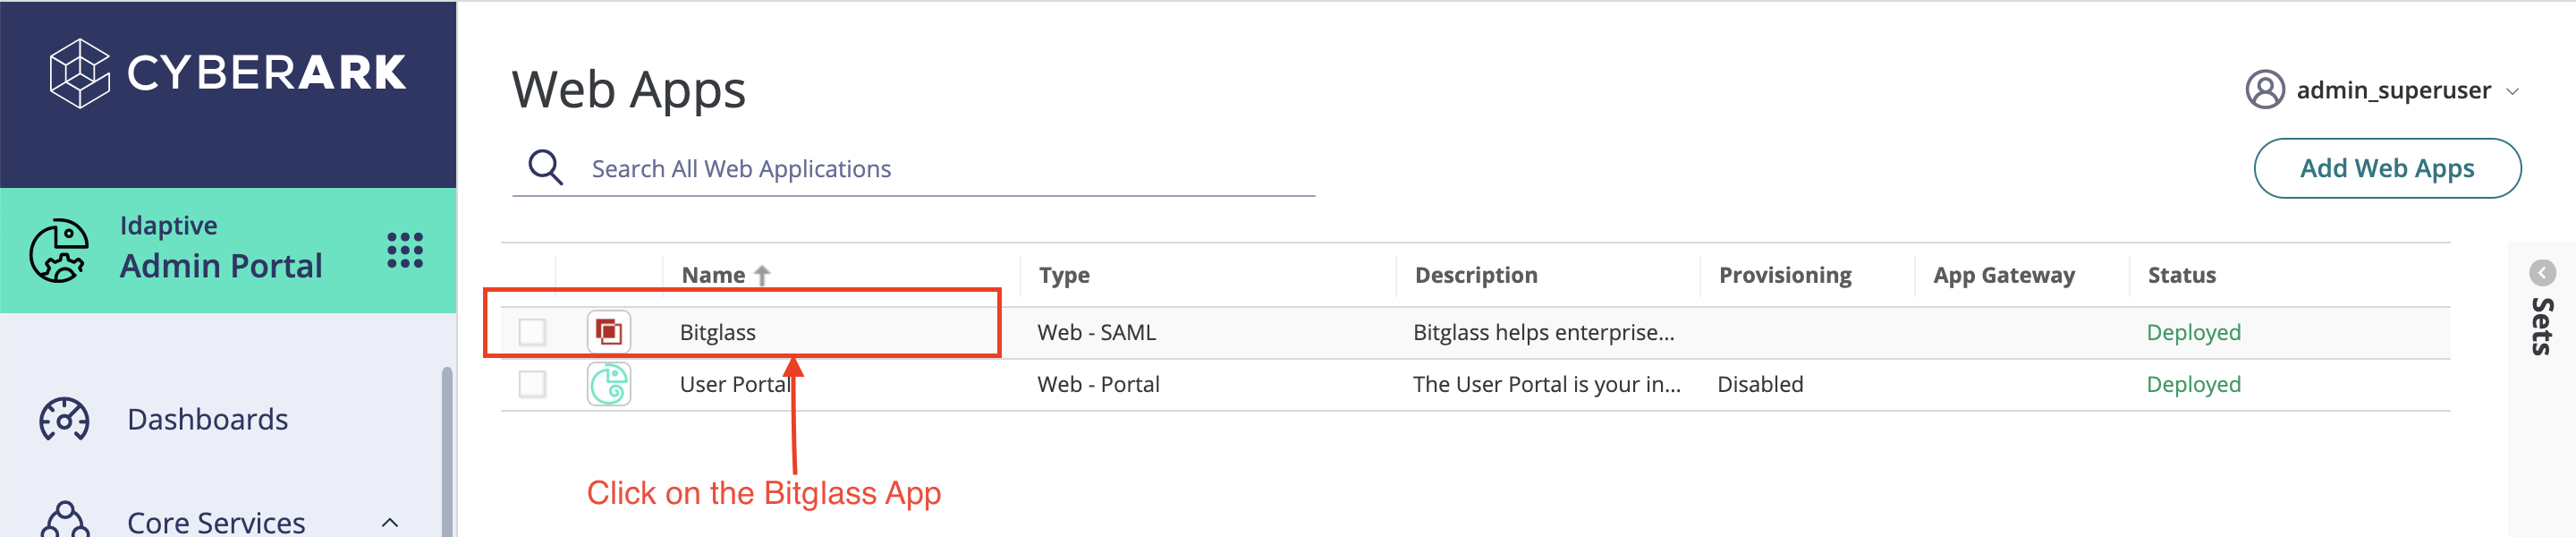
On the Add Web Apps page, use the search function to find Bitglass SAML app and click on Add.
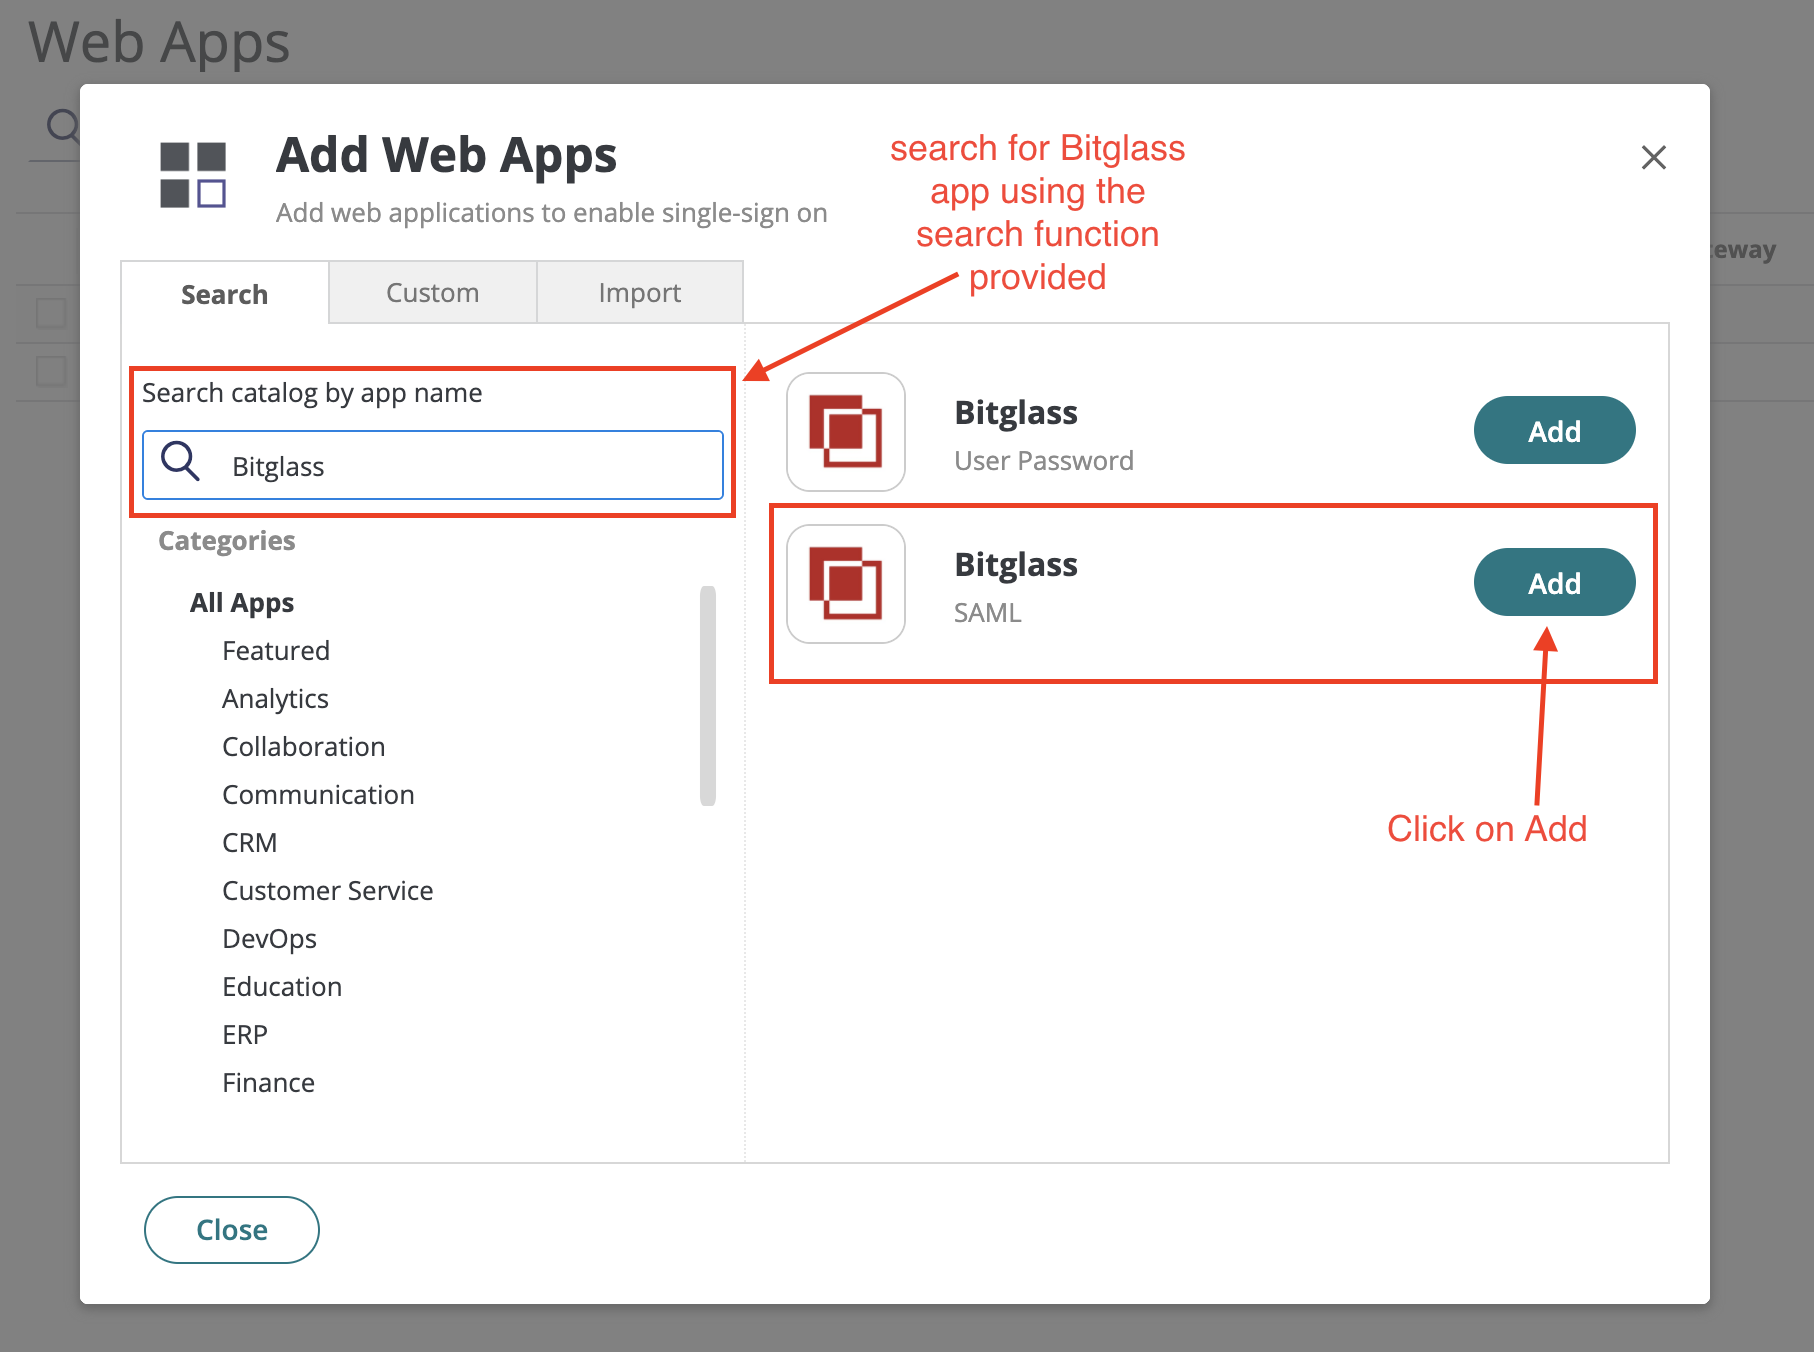
You should now see the Bitglass app under the page.
-
Click the Bitglass app to start configuration.
-
On the Trust tab, under Identity Provider Configuration:
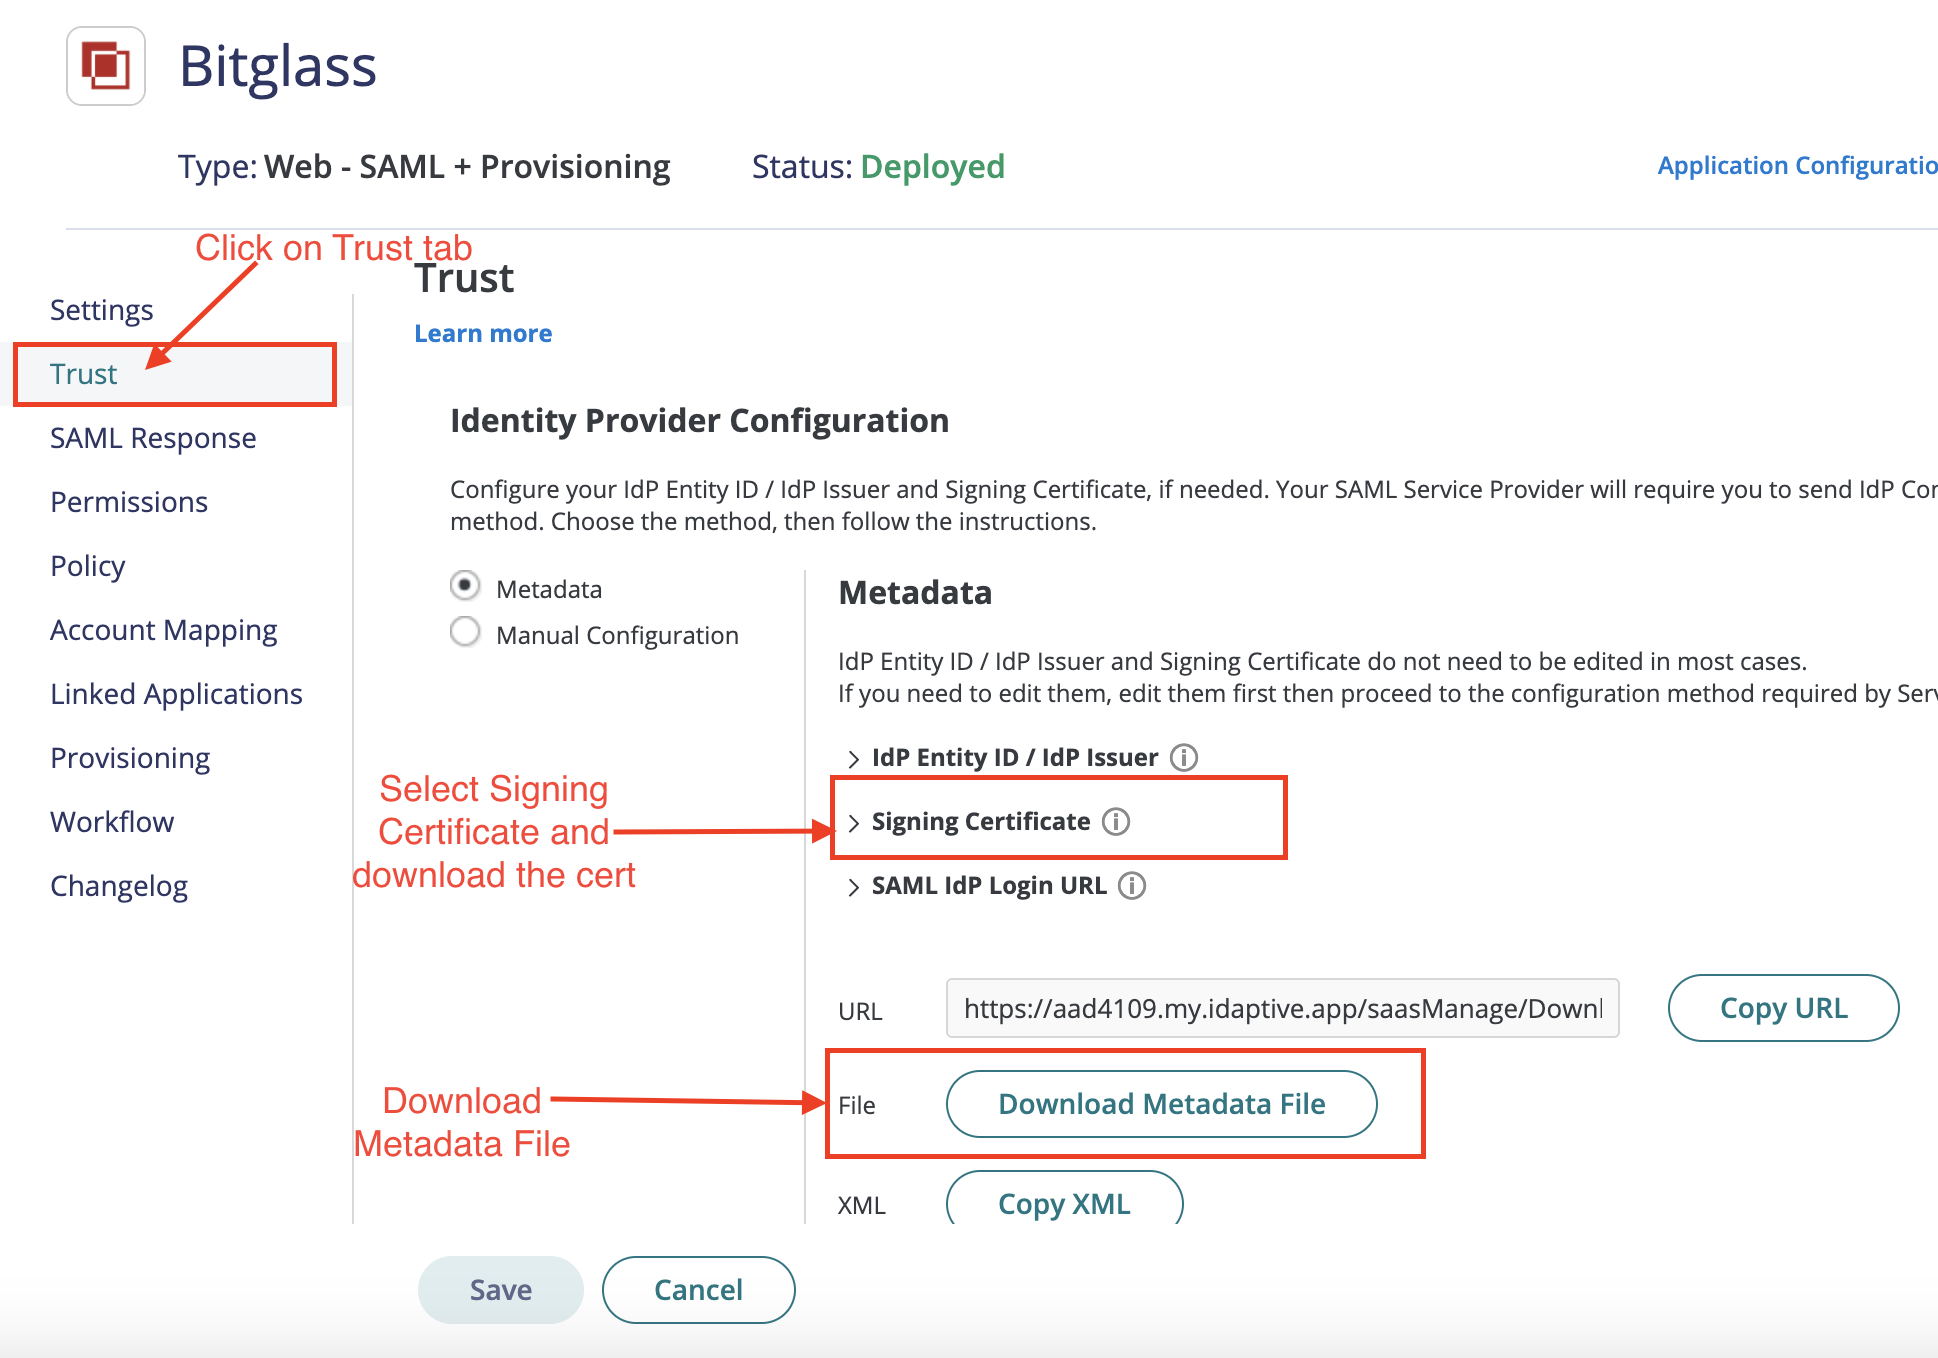
- Click Signing Certificate and download the certificate.
- Click Download Metadata File to download the file which you will be using later to configure Idaptive as an IdP on the Forcepoint Data Security Cloud | SSE Admin Portal.
-
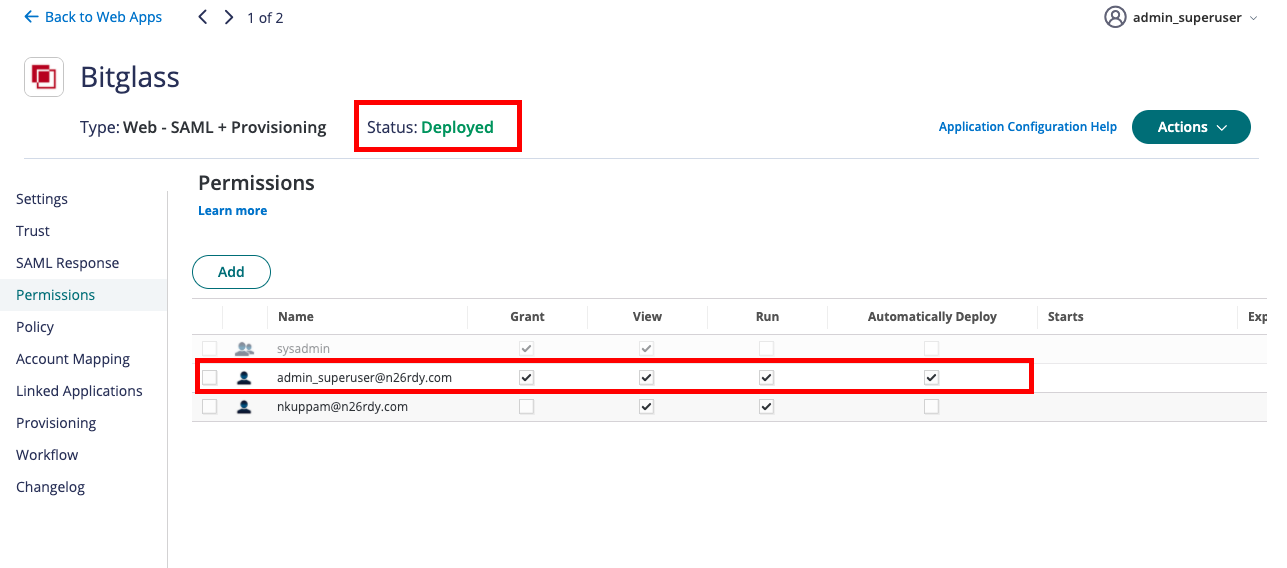
After saving, navigate to the to the Permissions section in the left hand side sub-menu. The status of the Bitglass App will be Ready to
Deploy. To deploy Bitglass app, click the Add button, select the Admin user and then under permissions, ensure Grant,
View, Run and Automatically Deploy permissions are selected and save. This should now change the status of
the application to be Deployed.
-
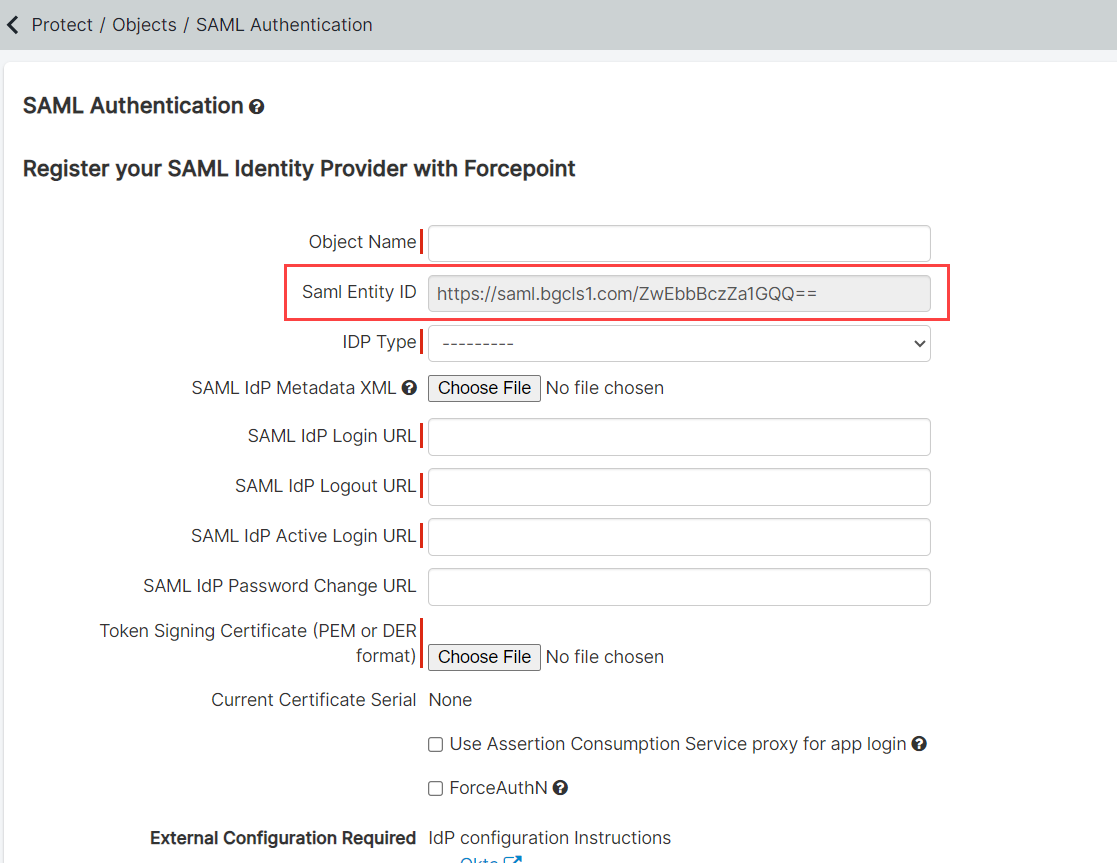
Navigate back to the window that you opened up in Step 1. You will need to fill out the rest of the configuration fields, and save when done:
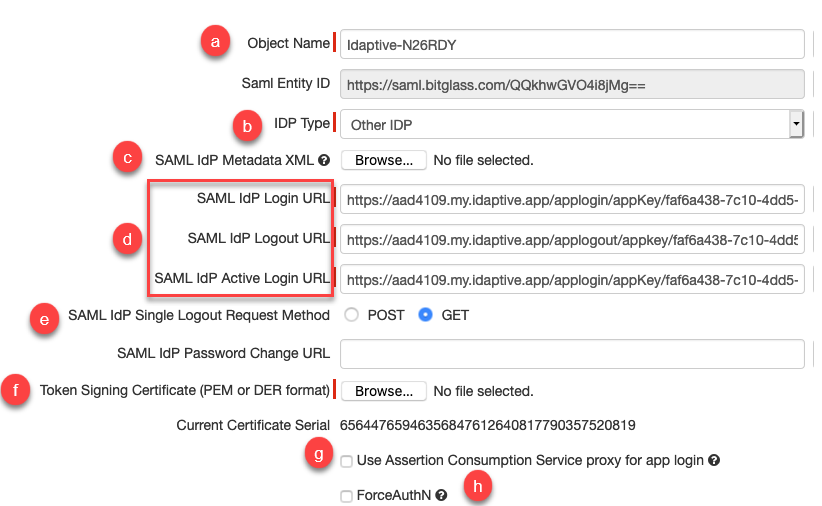
- Object Name: Enter a recognizable name for the IdP object.
- IdP Type: Select Other IdP
- SAML IdP Metadata XML: Upload the SAML metadata file you downloaded in step 6.b
- SAML IdP URLs: For the 3 URLs just verify they are filled out correct from the metadata file that you uploaded.
- SAML IdP Single Logout Request Method: Set this to Get
- Token Signing Certificate: Upload the cert you downloaded in step 6.a
- Use Assertion Consumption Service proxy for app login: This is not required but can be used when customers want to configure an app's SSO settings to point directly to an existing Identity Provider (IdP). The IdP must support alteration of the ACS login URL so the SAML response can be sent to Bitglass' ACS Proxy endpoint.
- ForceAuthN: Also not required right now. This setting will force your external IDP to re-authenticate the user.
-
With the IdP object created, you can now set the IdP to be the default authentication mechanism for our domain. Navigate to and select your domain from what you have configured in the top domain card.
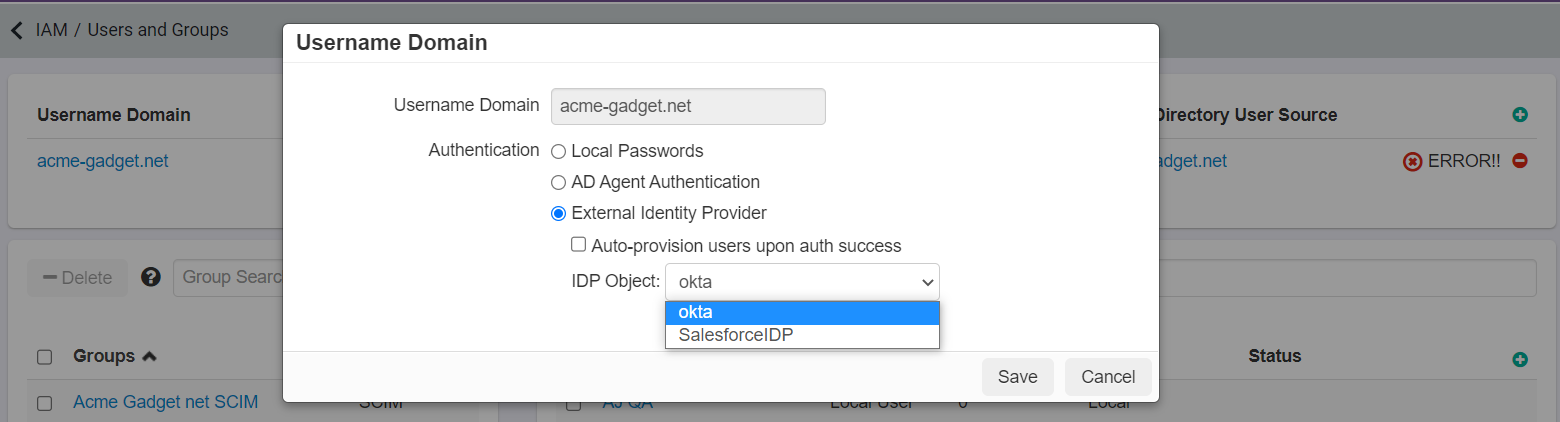
In the pop-up window, select External Identity Provider and use the drop-down list to select the Idaptive IdP Object and save.