PingOne: Configuring Forcepoint Data Security Cloud | SSE as a SAML SP
You can configure PingOne as an external IdP inside of Forcepoint Data Security Cloud | SSE.
Before you begin
Note: Forcepoint Data Security Cloud | SSE UI supports UTF-8 characters. However, the SAML
assertion only supports low-ASCII characters as attribute values. If an attribute value contains characters that are not low-ASCII, then SAML sign-in failures occur.
Note: When attempting to setup a new SAML app inside of PingOne, the option will be grayed out until you complete the initial setup.
Steps
-
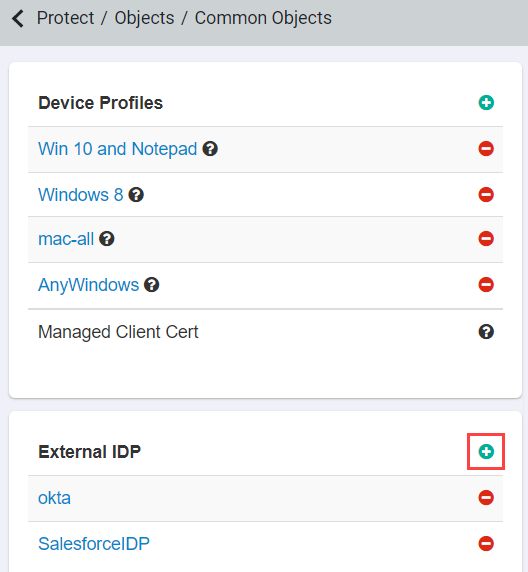
Login to Forcepoint Data Security Cloud | SSE as an admin and navigate to and locate the External IDP card. Click the green plus icon to add a new IdP object.
-
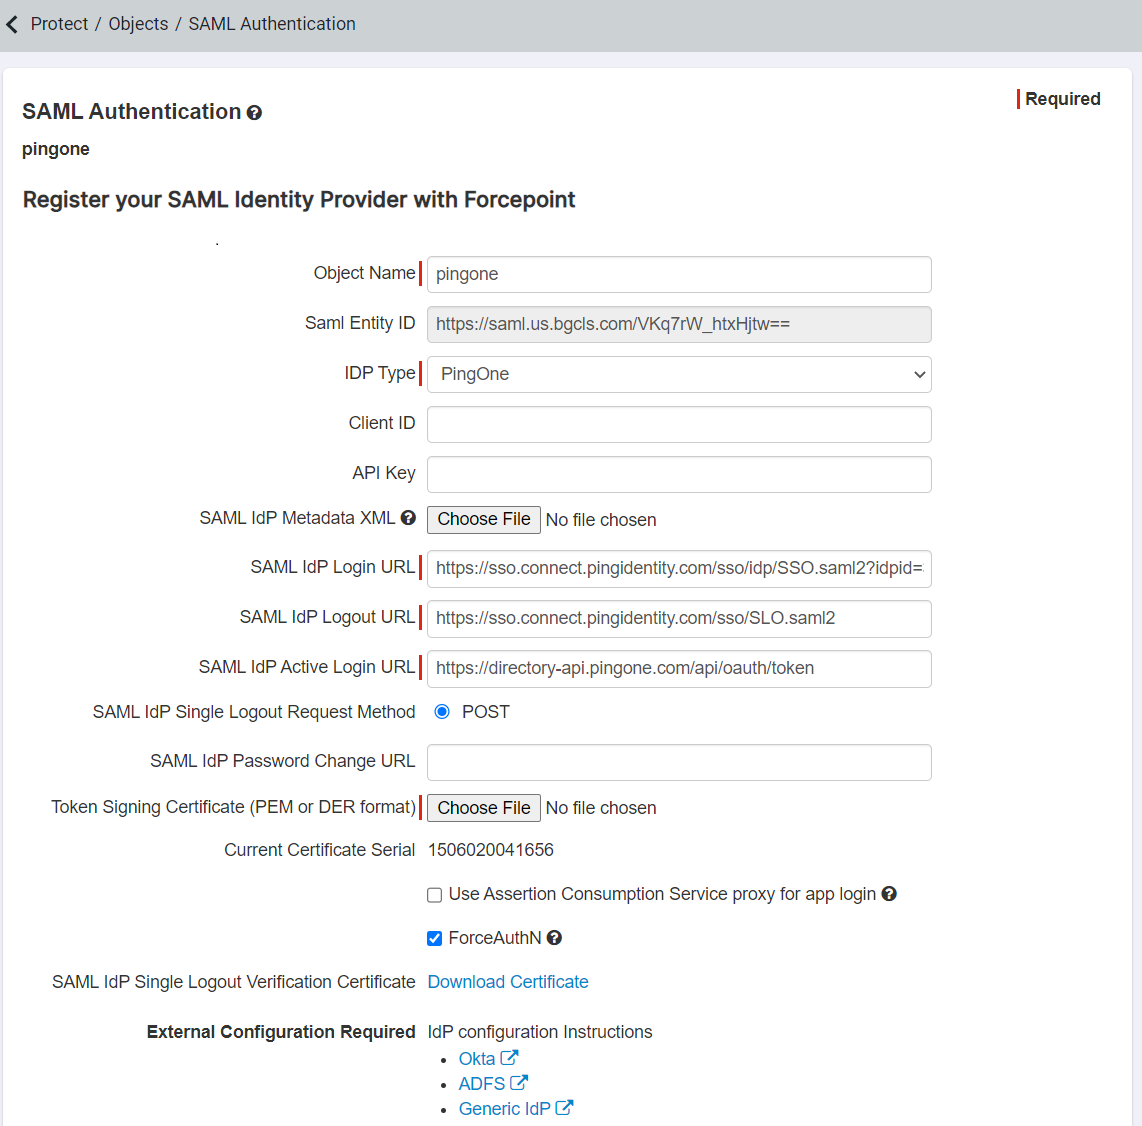
Provide an Object Name (PingOne) and select PingOne from the IDP type drop-down.
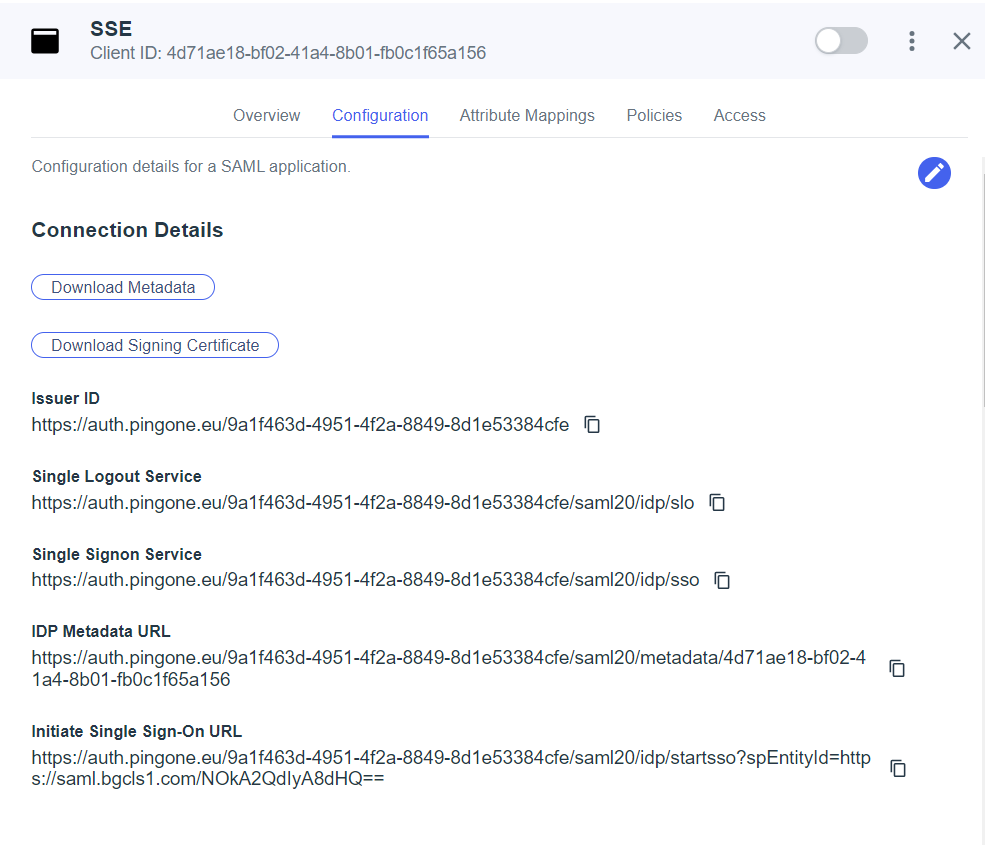
In addition, download the SAML IdP Single Logout Verification Certificate at the bottom and save it for later. Leave this page open in it's own tab or window as you will need information from here later on. To configure the rest of the settings on this page, you will need to begin your configuration inside of PingOne.
-
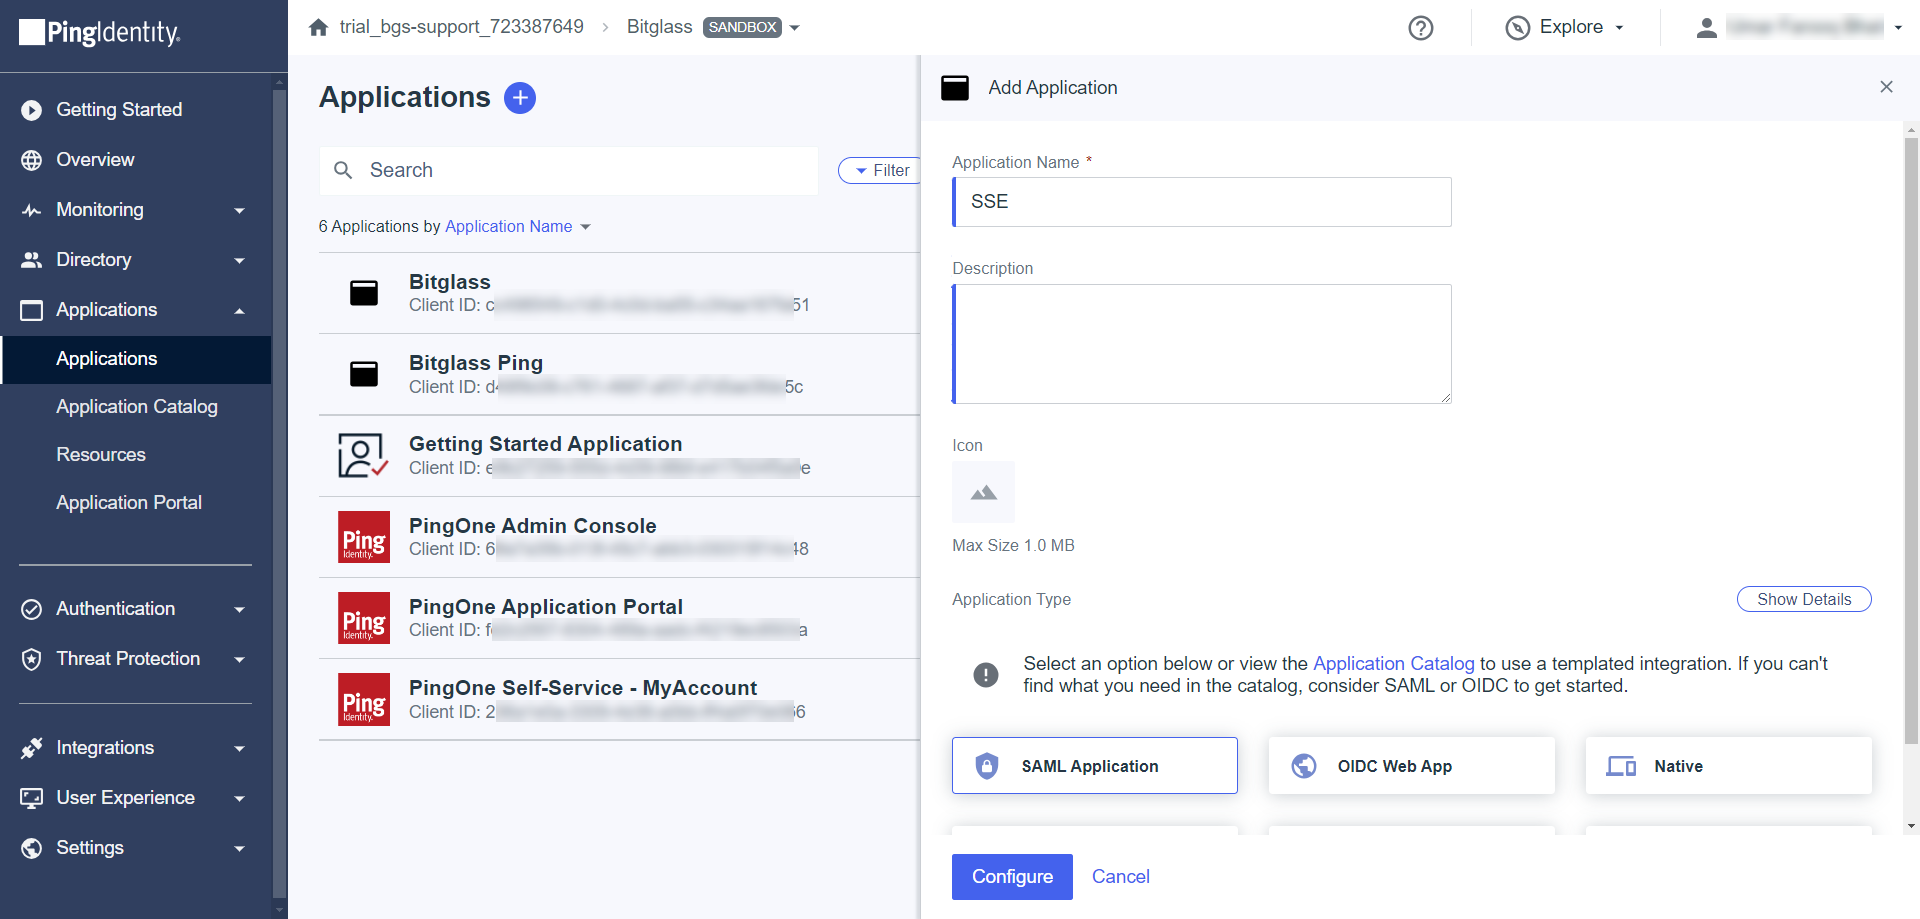
From the left pane, expand Application and click on the Applications tab:
-
On the Add Application section, enter Application name, description, icon for application, and set the Application Type to
SAML Application.
-
On the Add Application section, enter Application name, description, icon for application, and set the Application Type to
SAML Application.
-
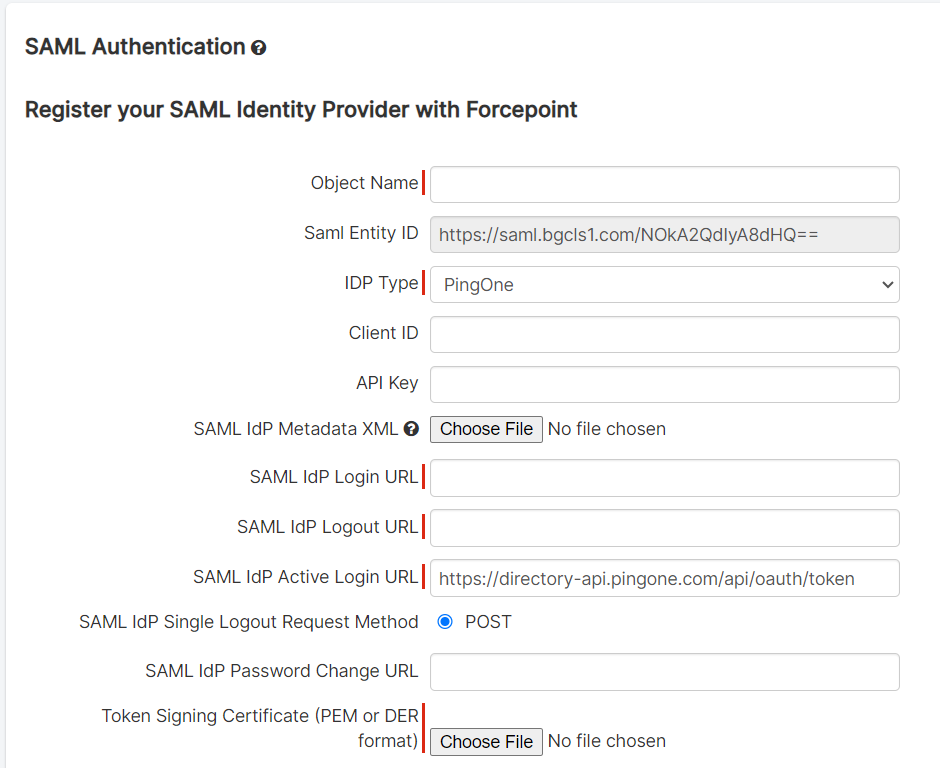
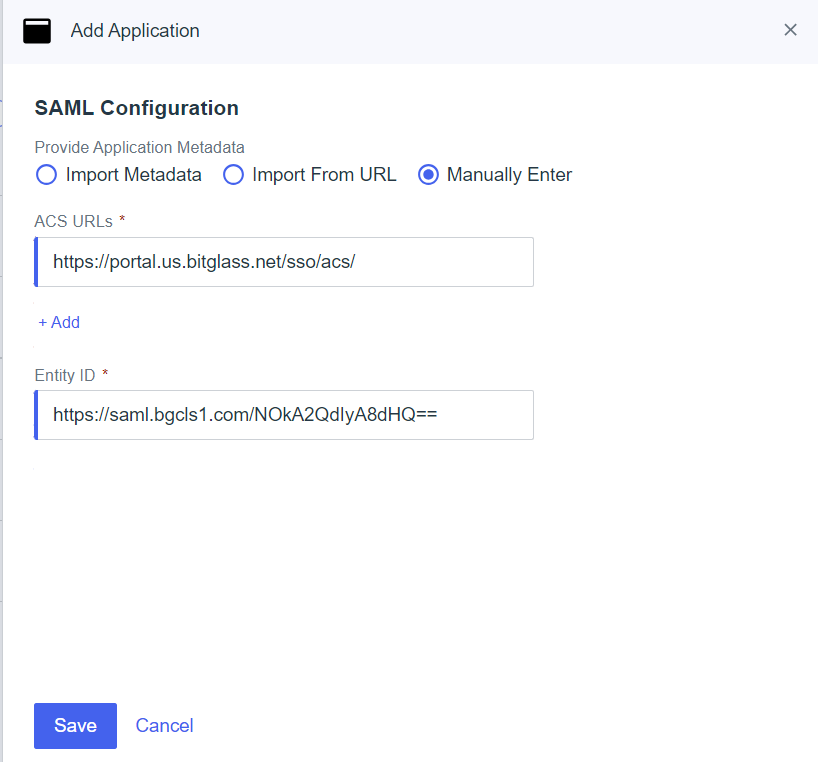
On the SAML Configuration tab, set Provide Application Metadata to Manually Enter option, add ACS URLs and
Entity ID:
- ACS URLs: https://portal.bitglass.com/sso/acs/
- Copy the Entity ID from your Forcepoint Data Security Cloud | SSE IdP setup page and paste it here.
-
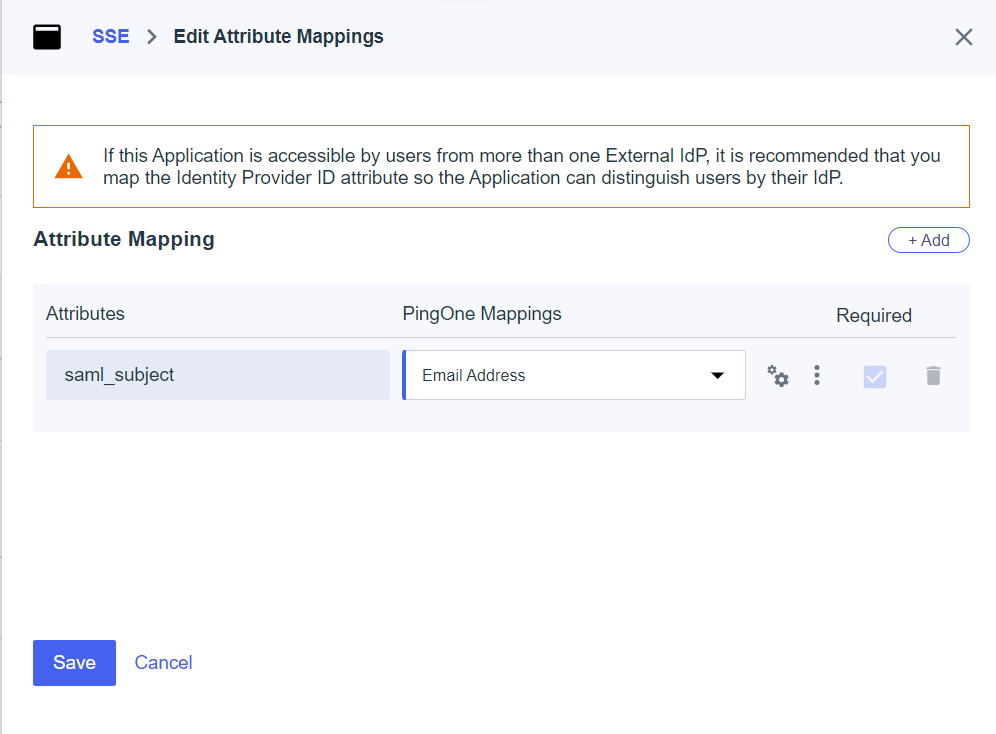
On the Attribute Mappings tab:
-
Under pre-existing saml_subject attribute, select Email Address.
-
Under pre-existing saml_subject attribute, select Email Address.
-
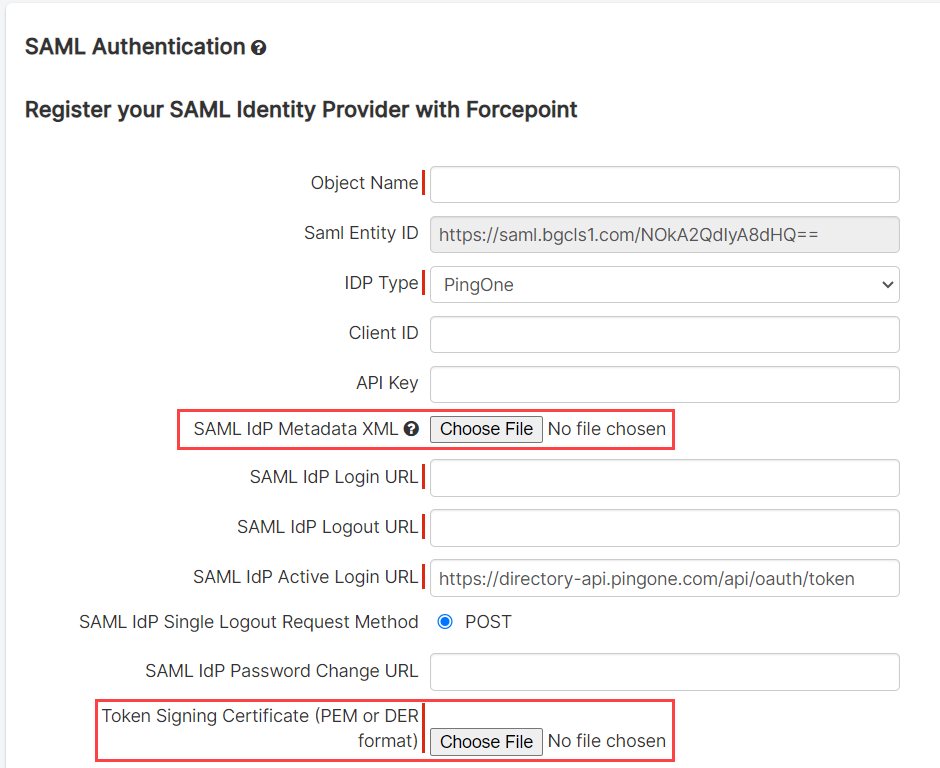
Back on Forcepoint Data Security Cloud | SSE browser tab that is still open, upload the following:
-
Upload the Token Signing Certificate that you just downloaded.
Note: Refer to the PingOne guide page as there are different logout behaviors depending on the SLO URL you choose to use. -
Upload the Token Signing Certificate that you just downloaded.