Adding custom locations

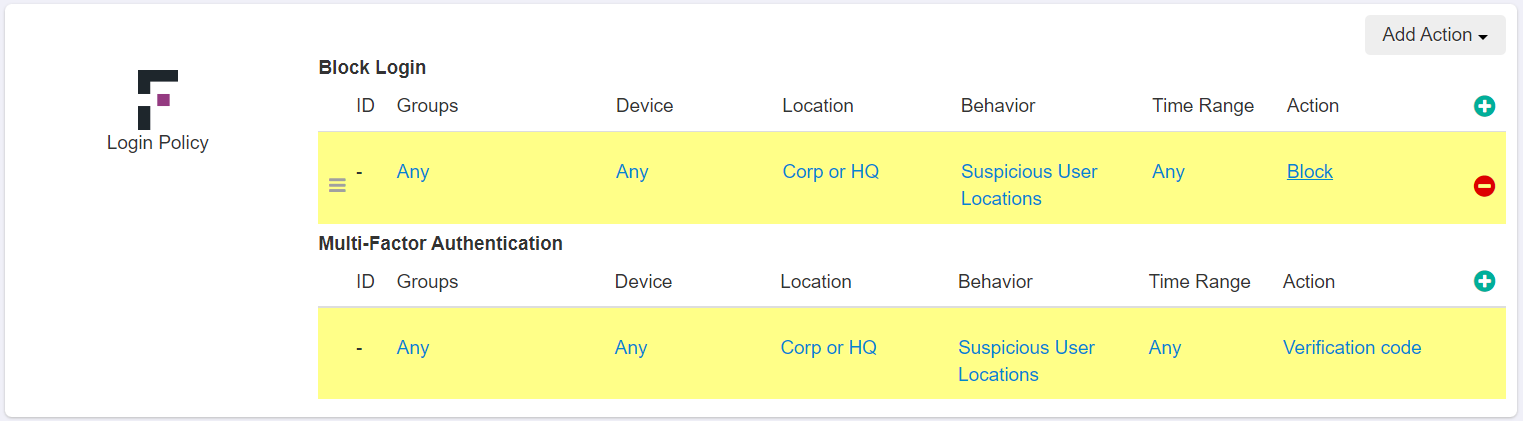
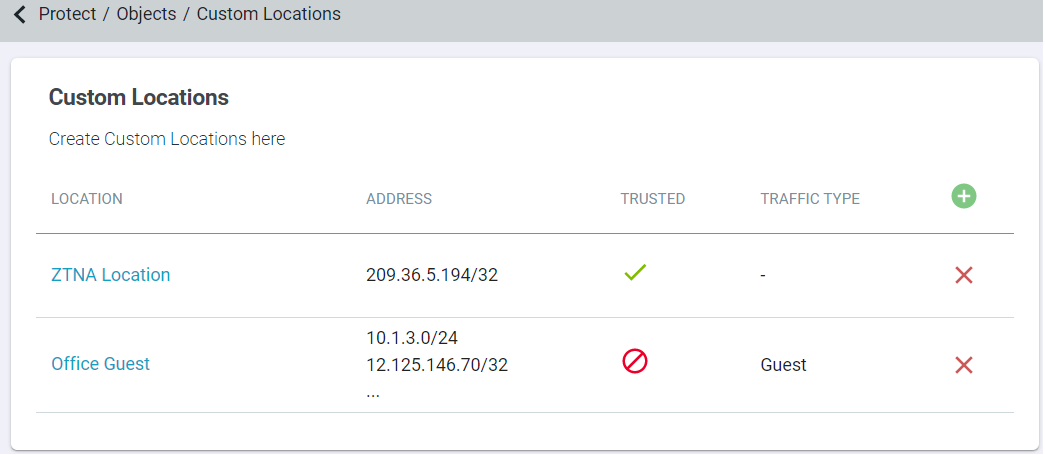
The Custom Locations page located under Protect > Objects is where you can define custom locations that can be used on the policies page for controlling and performing actions in protected applications.

You can create and manage your own custom locations, which allows you to add your own corporate network and VPN as known locations to use in policy matching.
Note: The Custom Locations page also displays Subnets that you have created during Sites creation (Protect > Objects > Sites).

To add a new custom location, follow the steps below:

Steps

  1. Navigate to Protect > Objects > Custom Locations page.


  2. Select the green plus icon to add a new location.
  3. On the Custom Location dialog:
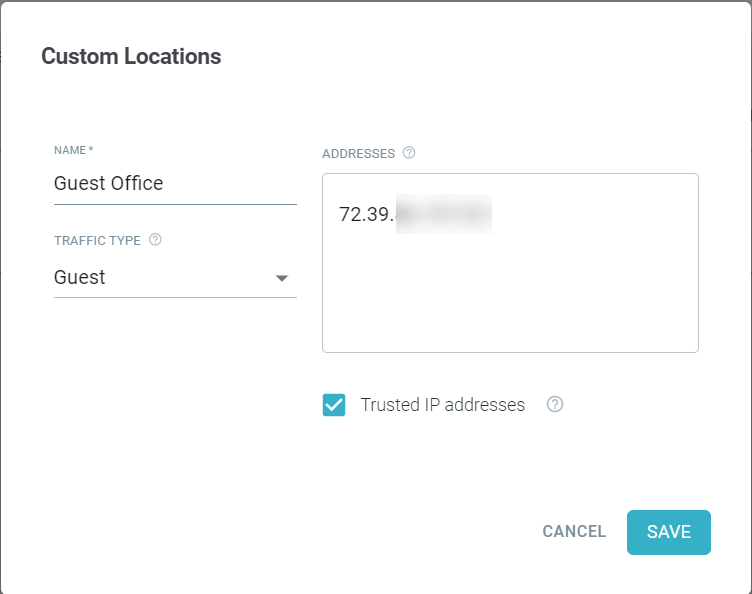
    1. Enter a unique Name of the location for easy identification.


    2. Select the Traffic Type for the subnet addresses in the custom location.
    3. Enter the IP Address one per line in CIDR notation.
      Custom locations should be external internet facing addresses and can be an IP address, subnets, or ranges on individual lines.
  4. Select the Trusted IP addresses checkbox to ignore trusted IP addresses when Forcepoint ONE SSE looks for suspicious user logins from distant physical locations.
    Leave the Trusted IP addresses checkbox unchecked if the custom location is for the Cloud SWG.
  5. To save the custom location details, click Save.

Next steps

You can configure the action to be taken by adding a rule to Protect > Policies page with User Locations as the condition (for example, Two-Factor Auth).