You should download the (predefined and custom) URL categories from Forcepoint Data Security Cloud | SSE and upload them on FSM. These URL categories can be used while
configuring DLP policies for SWG channel.
Steps
-
On Forcepoint Data Security Cloud | SSE, navigate to page.
-
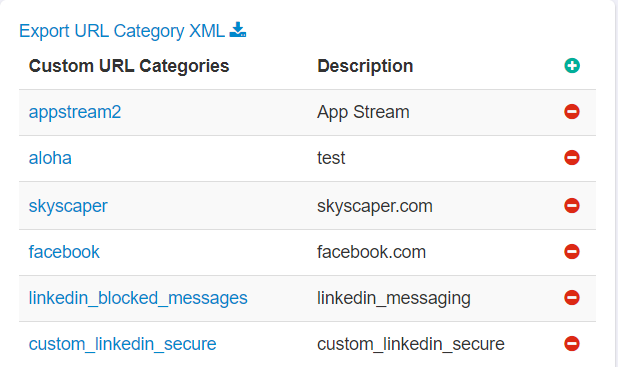
In the Custom URL Categories tile, click the Export URL Category XML link to download the pre-defined and custom URL
categories.
-
On the FSM, navigate to page.
-
On the URL Categories tab:
-
Under URL category mapping, select the check box and then select the Upload URL category XML file option from
drop-down.
-
Under URL Categories Mapping File section, click Choose File, and browse to the location of the XML file with the URL
categories.
-
Select the file, and then click OK. The file is uploaded to the server.
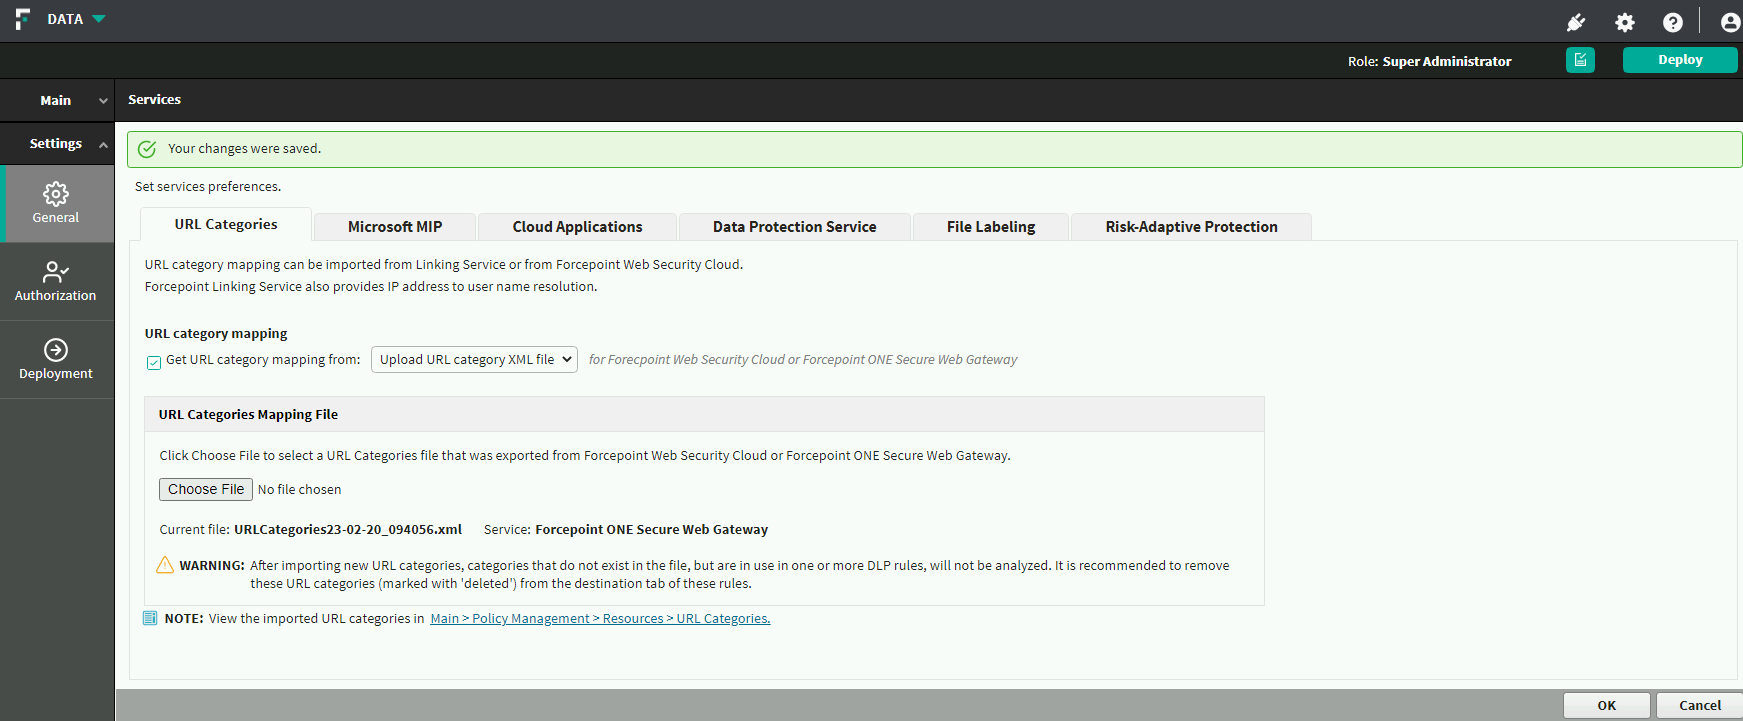
To view the imported URL categories, click the link present in the bottom of the page.
-
Repeat as many times as needed (multiple files can be uploaded, one by one).
Important:
- If you previously worked with Linking Service, and thus already have URL categories in your rules, and now want to import URL categories using an XML file, note
that categories imported via XML from Forcepoint Data Security Cloud | SSE will override the existing rules. This can cause missing categories or
conflicts, and it is highly recommended that you review your rules after importing new URL categories and make sure they are using valid categories.
- If any of the following properties are missing for a URL category in the XML file, the DLP manager ignores the category, and it is not added to the database nor
is it listed in the Security Manager:
- Name
- Predefined/Custom
- Parent (note that “root” is a valid value)
- If a URL category is corrupted (for example, is missing an ID number), it is recommended that you remove it from the XML file before uploading.