Configuring SAML Profile with Google Workspace
This process includes creating a custom SAML app in the Google Admin console, and mapping user attributes to enable secure, seamless authentication across services.
- Create a new SAML profile in Forcepoint Data Security Cloud. Refer to Creating a new SAML profile section.
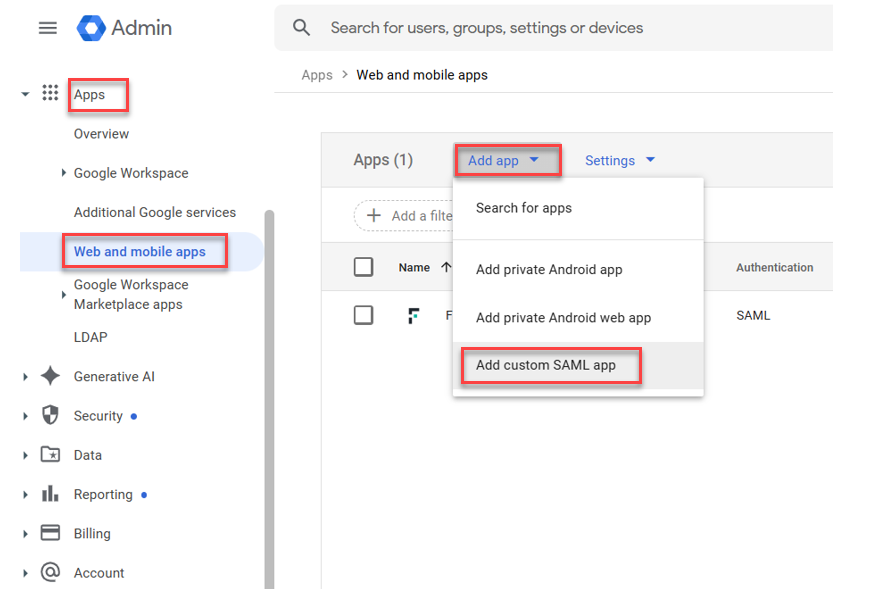
- Create a custom app in Google Workspace.
- Navigate to and select .
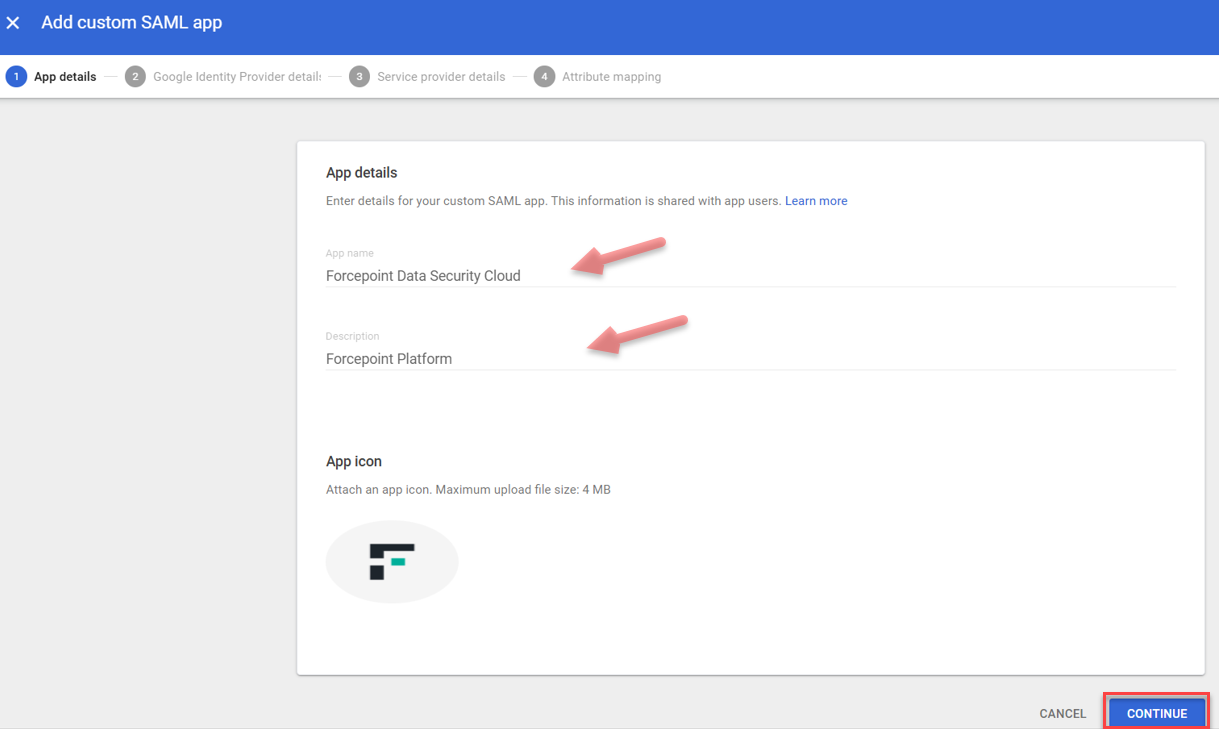
- Provide a name and description to custom app and click CONTINUE.
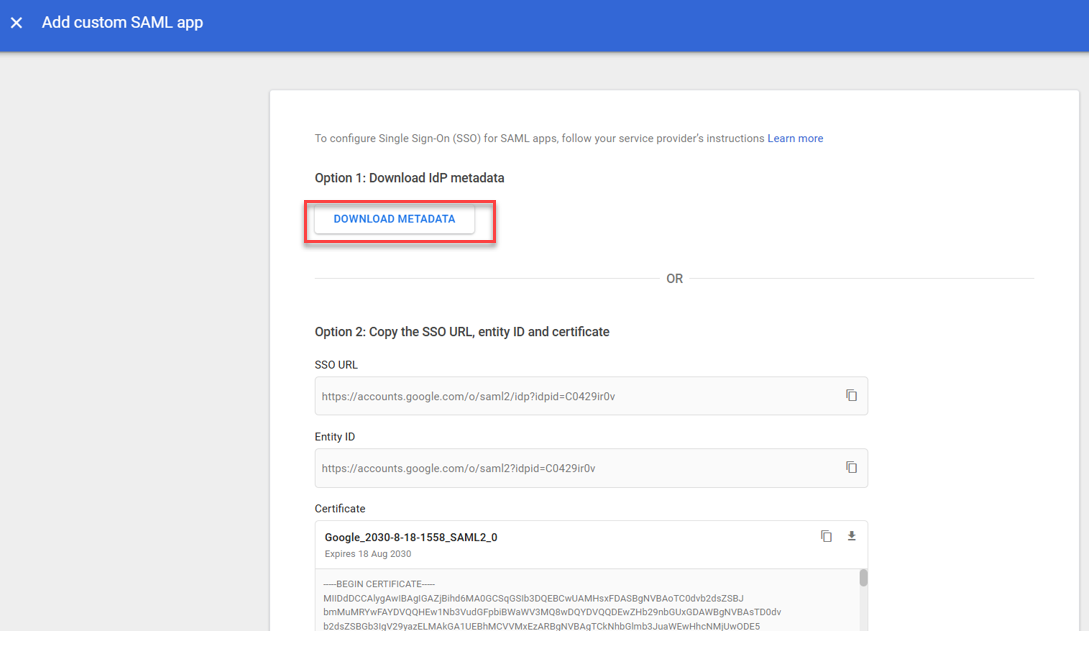
- Click the DOWNLOAD METADATA button to download the IdP configuration and click CONTINUE.
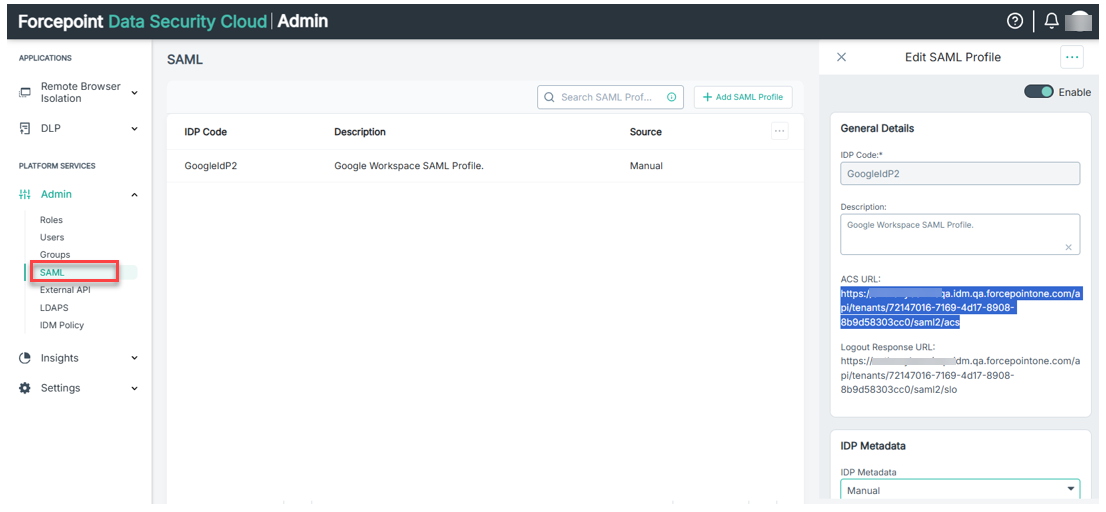
- Copy the ACS URL from the SAML Profile, within the Forcepoint Data Security Cloud.
- Go back to the Google Workspace Admin, custom app setup and paste the copied ACS URL.
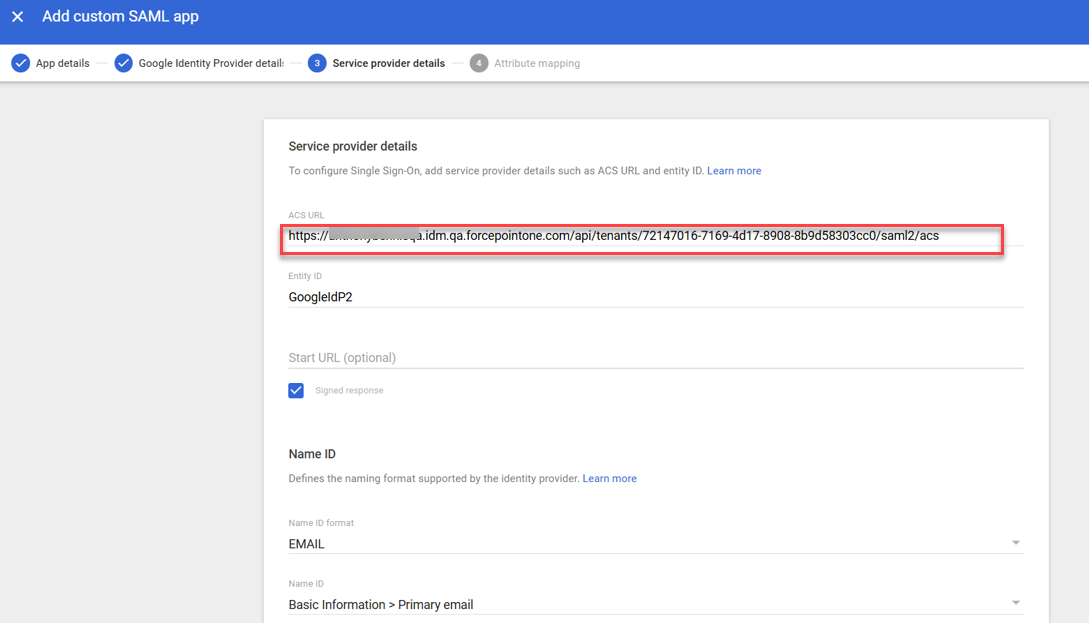
- Enter the Entity ID.Note: The Entity ID must match the IDP Code from your Forcepoint SAML ID.
- Select Signed Response (Not mandatory but good practice).
- Choose EMAIL for the Name ID format.
- Choose for Name ID and click CONTINUE.
- Add Attribute mappings as below and click FINISH.
Attributes
Google directory attributes App attributes Primary email http://schemas.xmlsoap.org/ws/2005/05/identity/claims/emailaddress First name firstName Last name lastName Group membership (optional)
Google Groups App attribute [Group name] http://schemas.xmlsoap.org/claims/Group 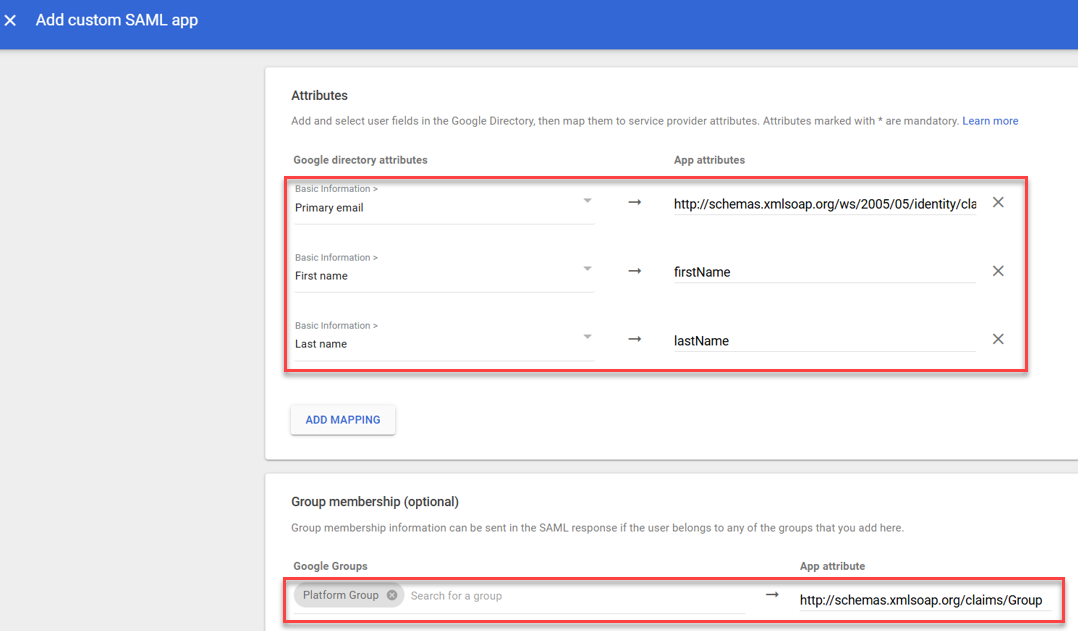
- Forcepoint custom app is now created as below.
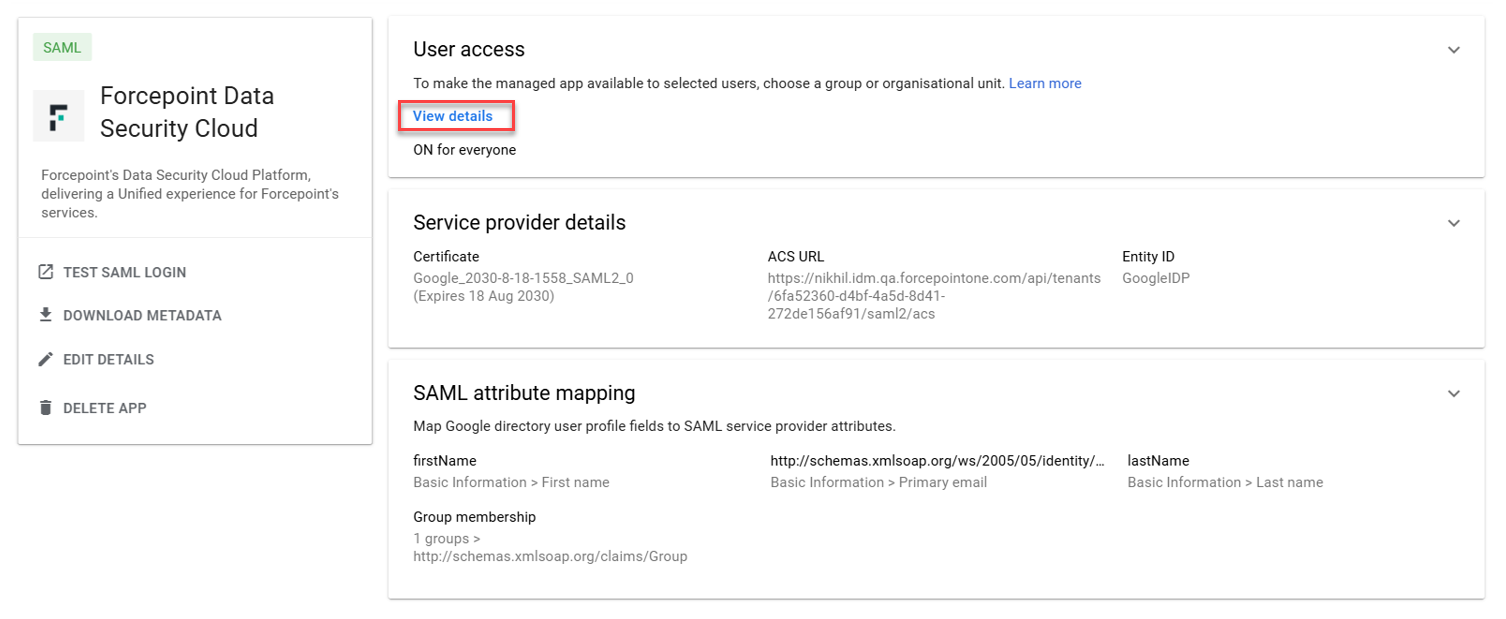
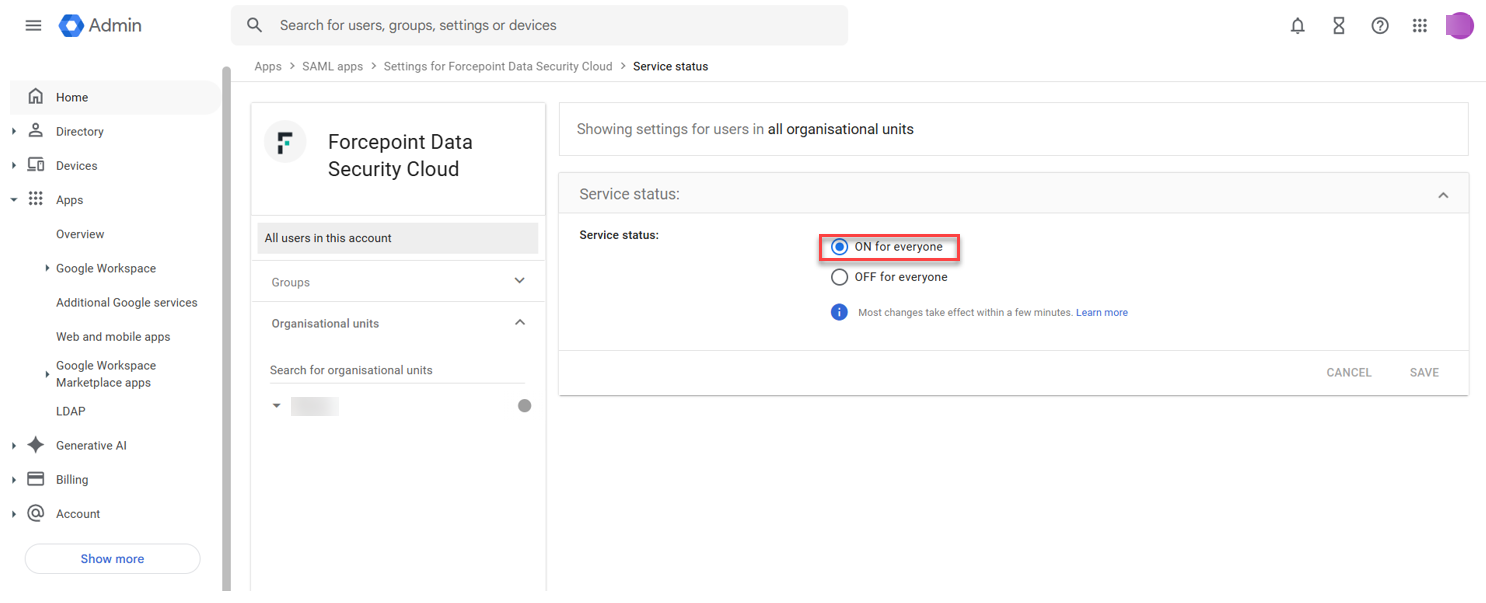
- Select View details to edit and ensure user access is ON for everyone.
- Navigate to and select .
- Now go to Forcepoint Data Security Cloud SAML profile and choose IDP Metadata File for the IDP Metadata field.
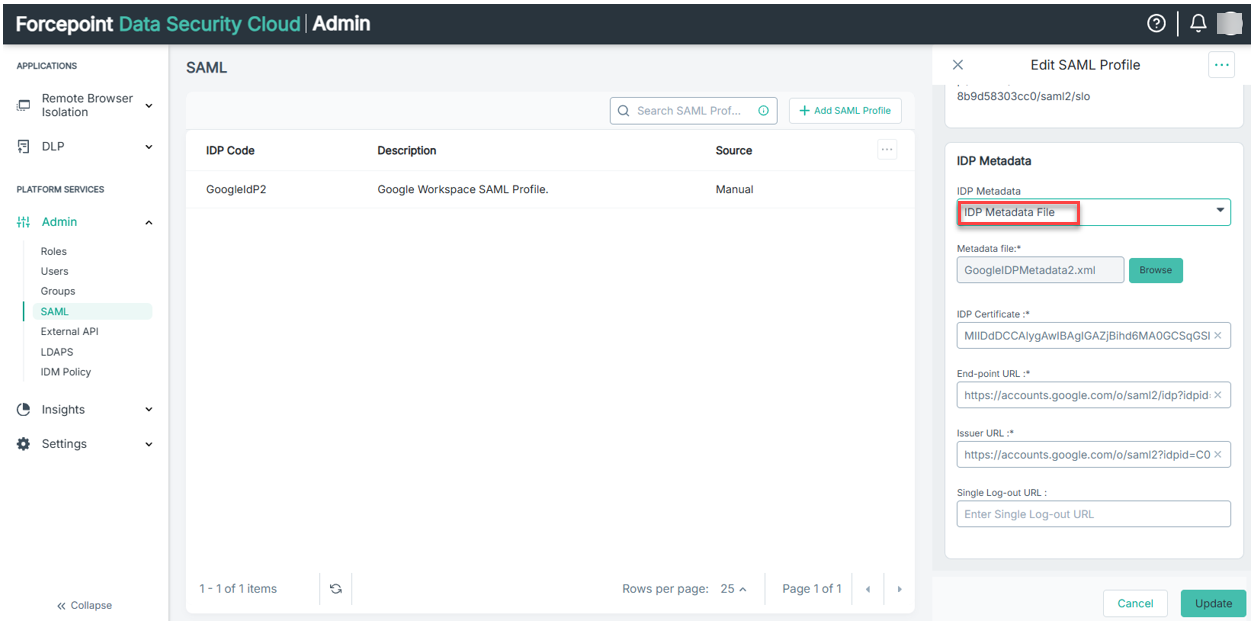
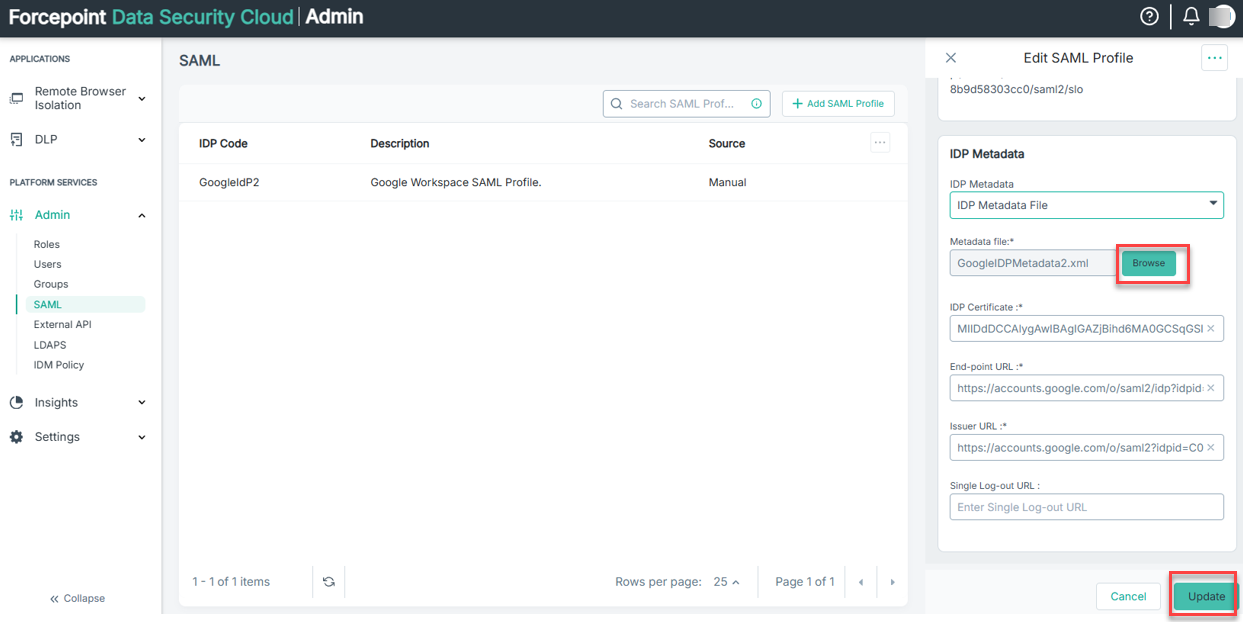
- Select Browse to upload the Metadata file you downloaded earlier [See 2(c)]. The SAML configuration will automatically be completed with the
uploaded metadata and click Update.
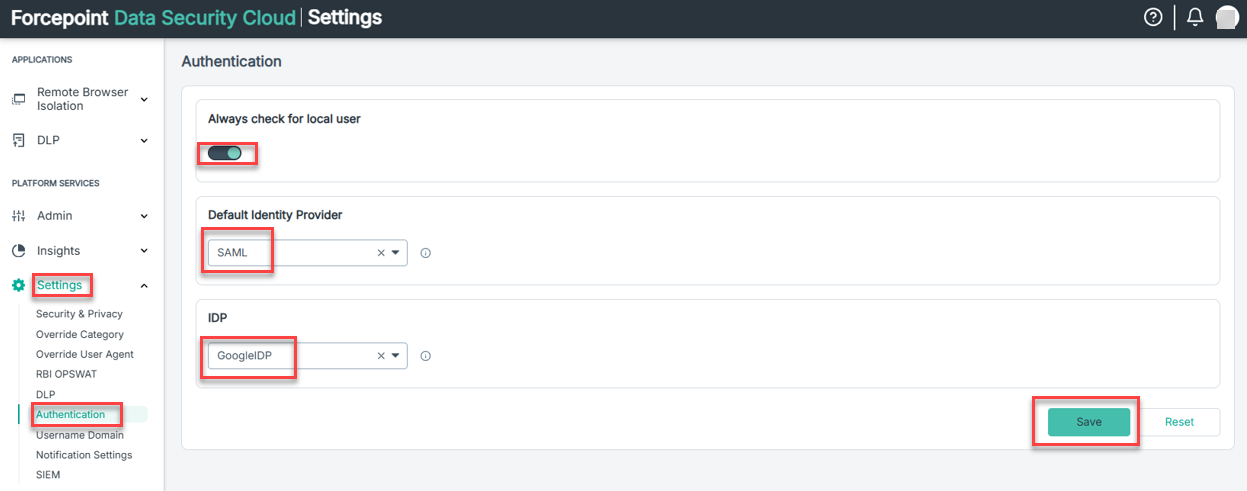
- Now configure Forcepoint Data Security Cloud to use SAML for Authentication.
- Navigate to .
- Enable Always check for local user.
- Select SAML as Default Identity Provider.
- Select the Entity ID of the SAML profile you have created.
- Click Save.
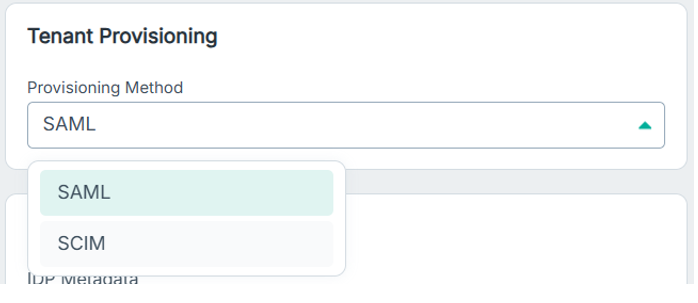
User Provisioning
For each SAML profile, be sure to set the Tenant provisioning to SCIM or SAML, depending on your set up to avoid duplicate users being created on Authentication.
This setting is available under the SAML Profile properties.