Creating Roles with Scope
Follow the below steps to create Roles with Scope.
Steps
-
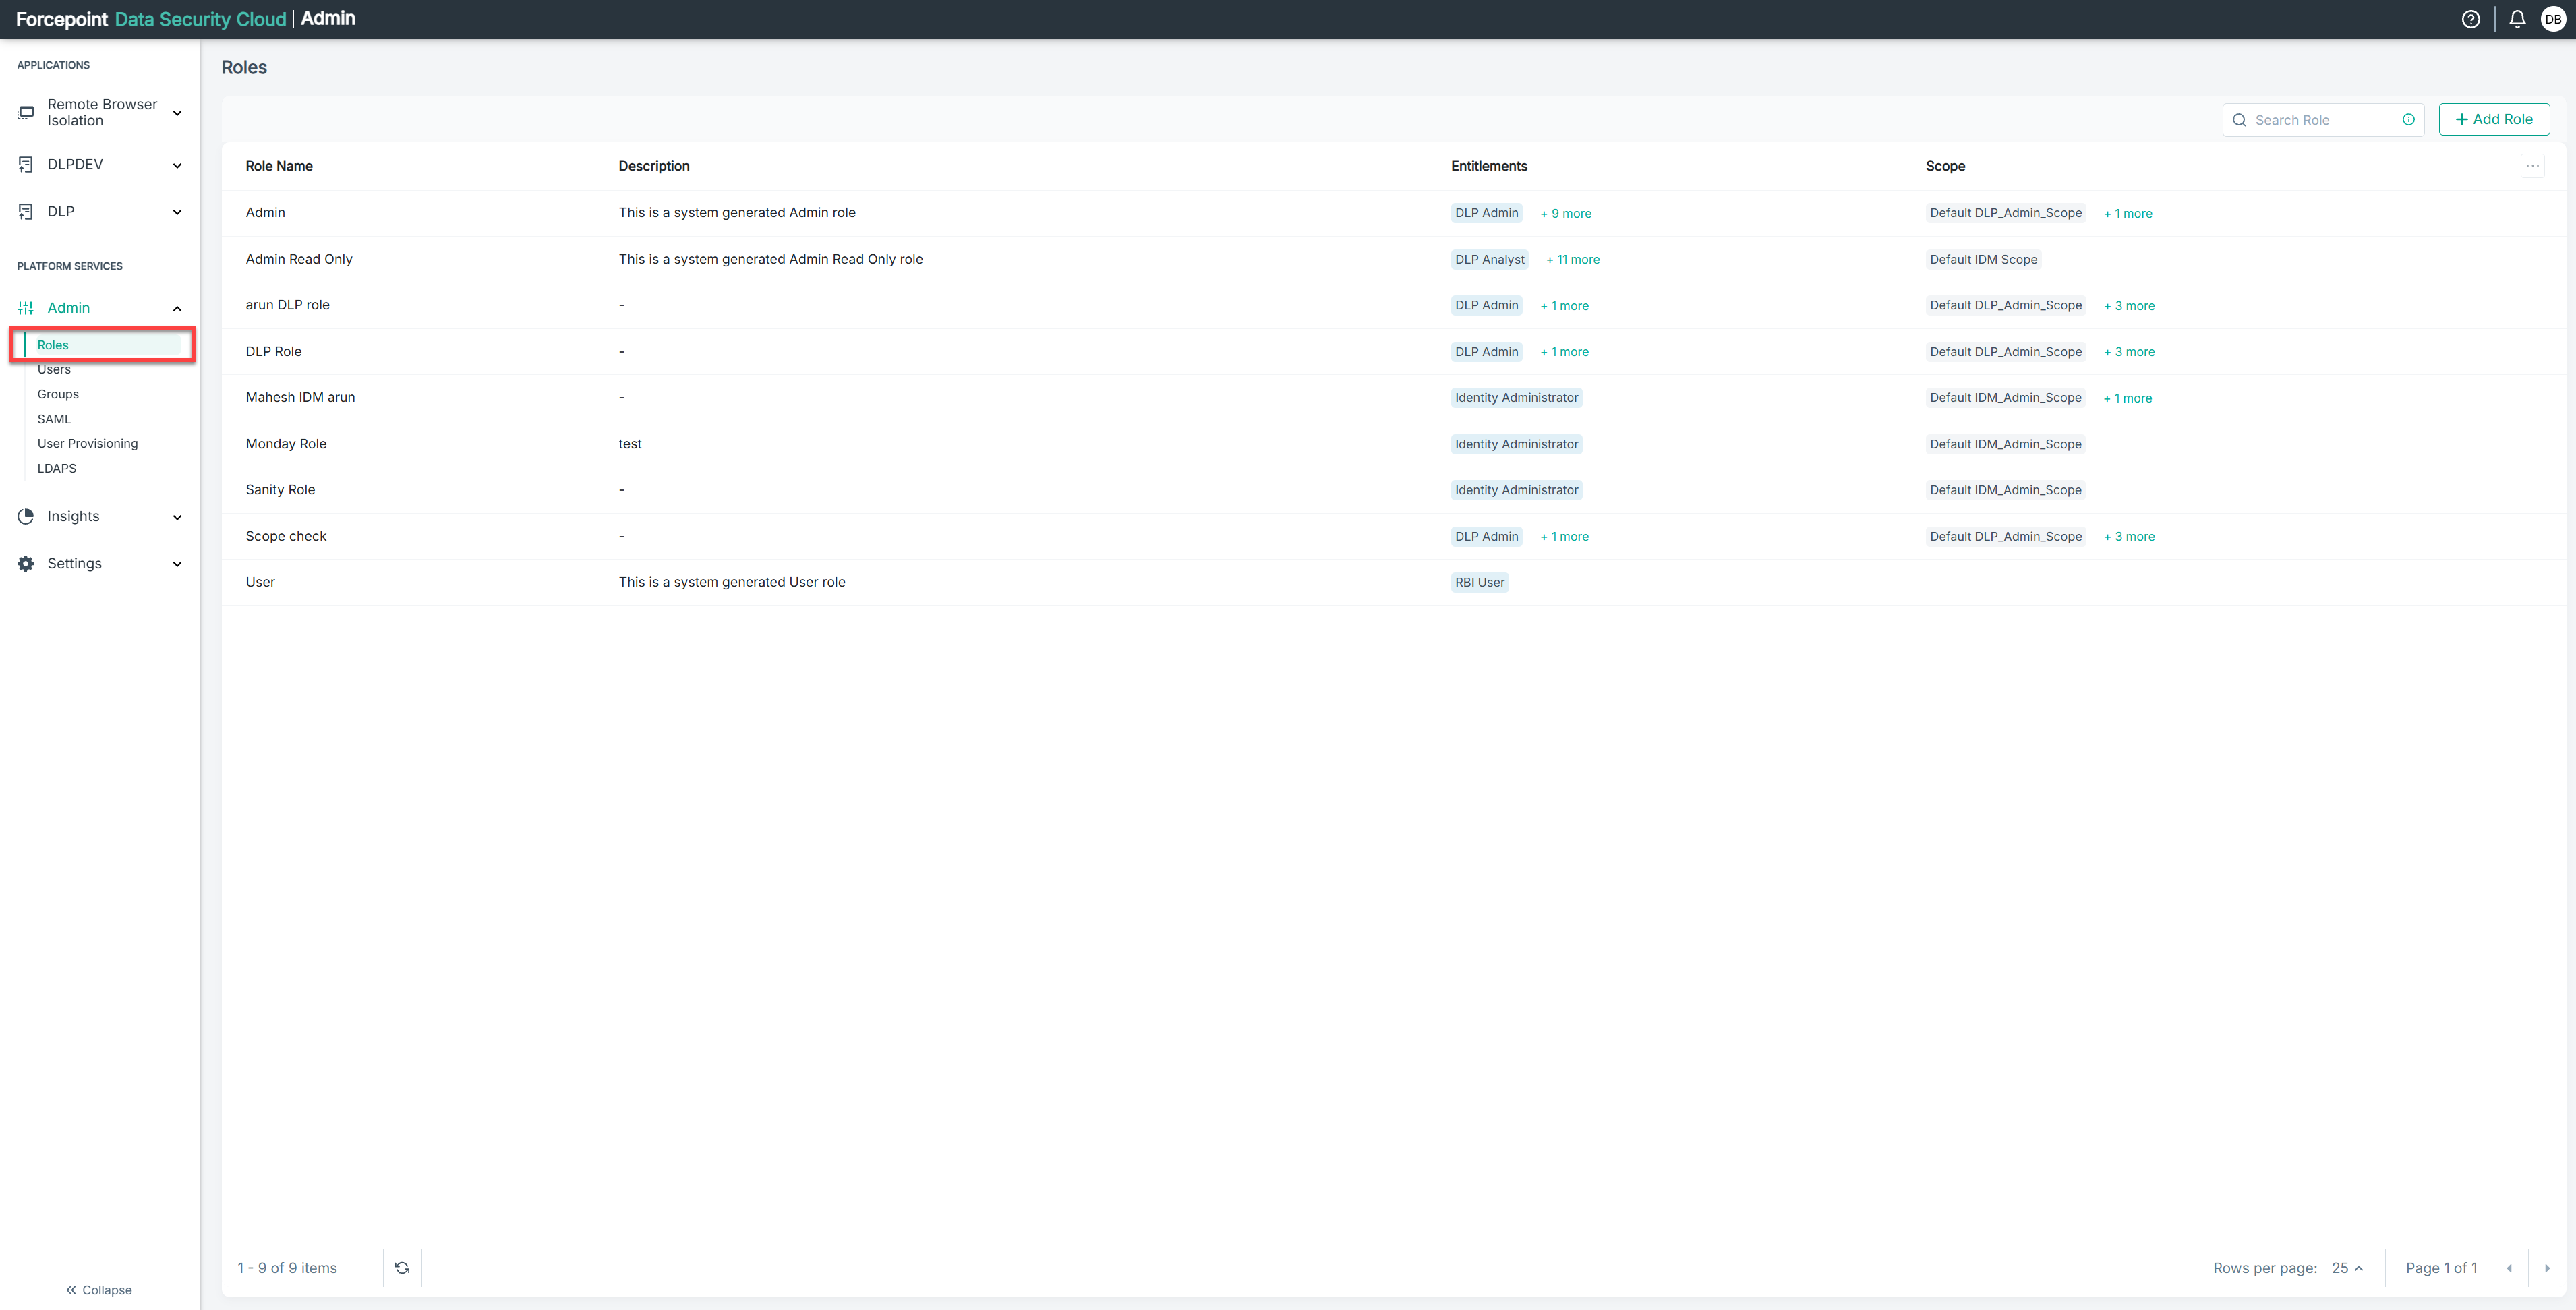
Click on Admin, and then select Roles.
-
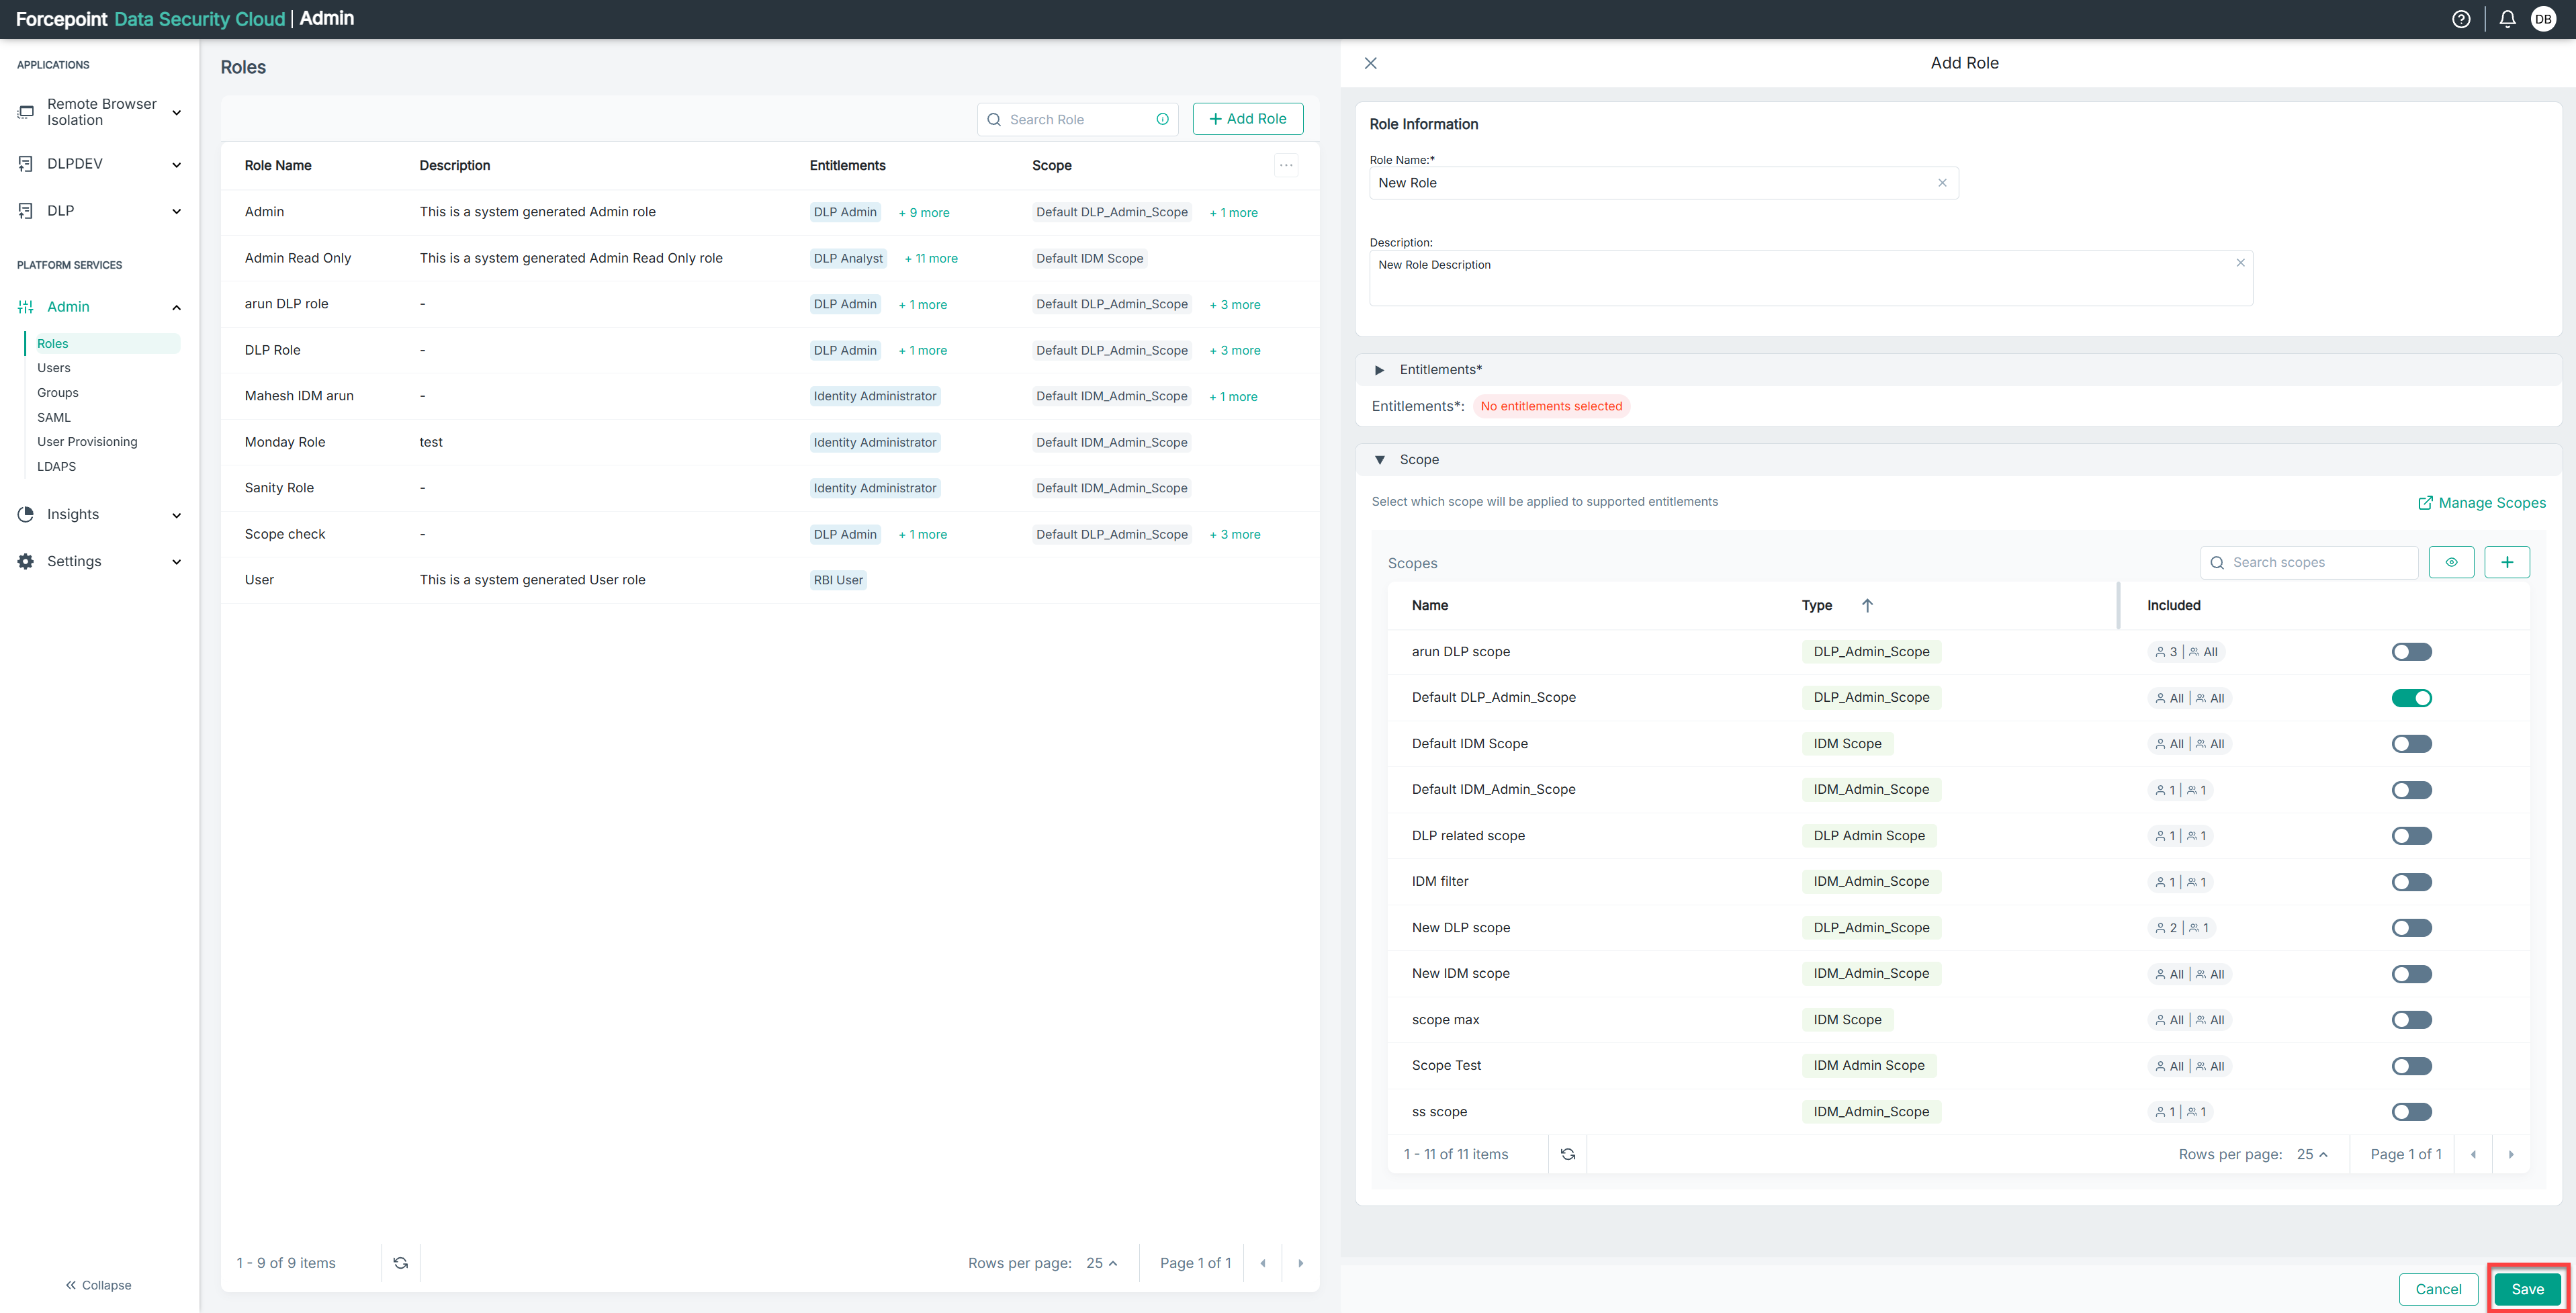
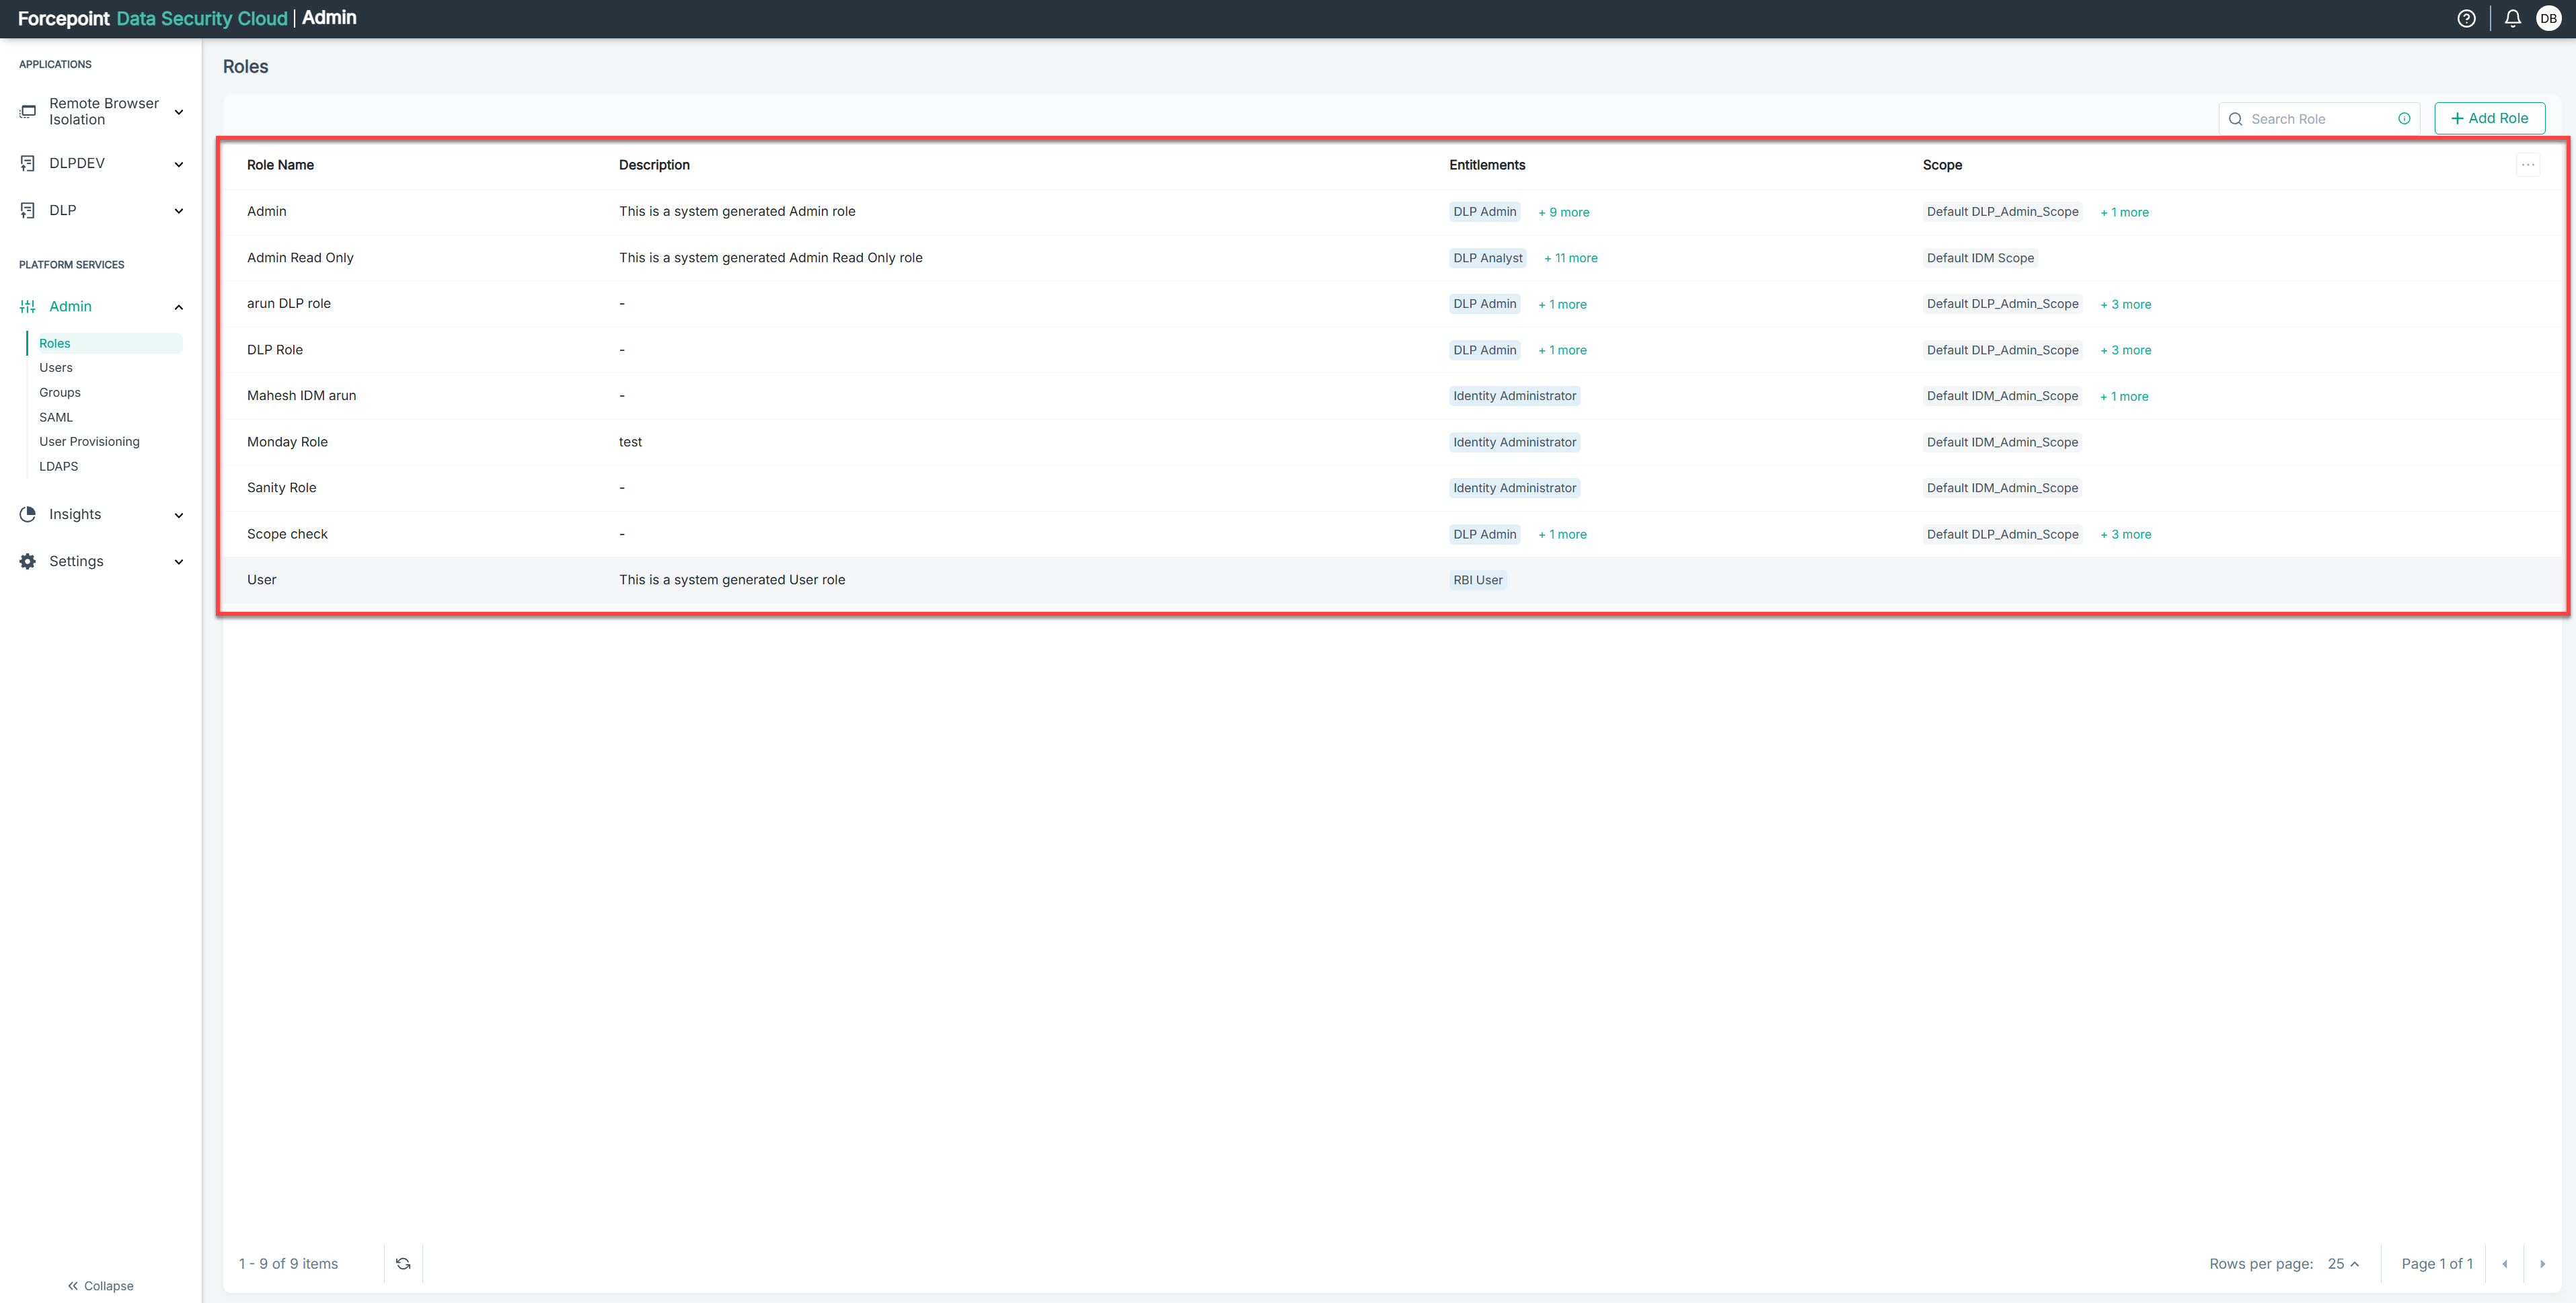
In the Roles section, you will see existing roles with their name, description, entitlements, and scope.
-
In the Scope section you will see all the existing scopes with their name, type, and included details.
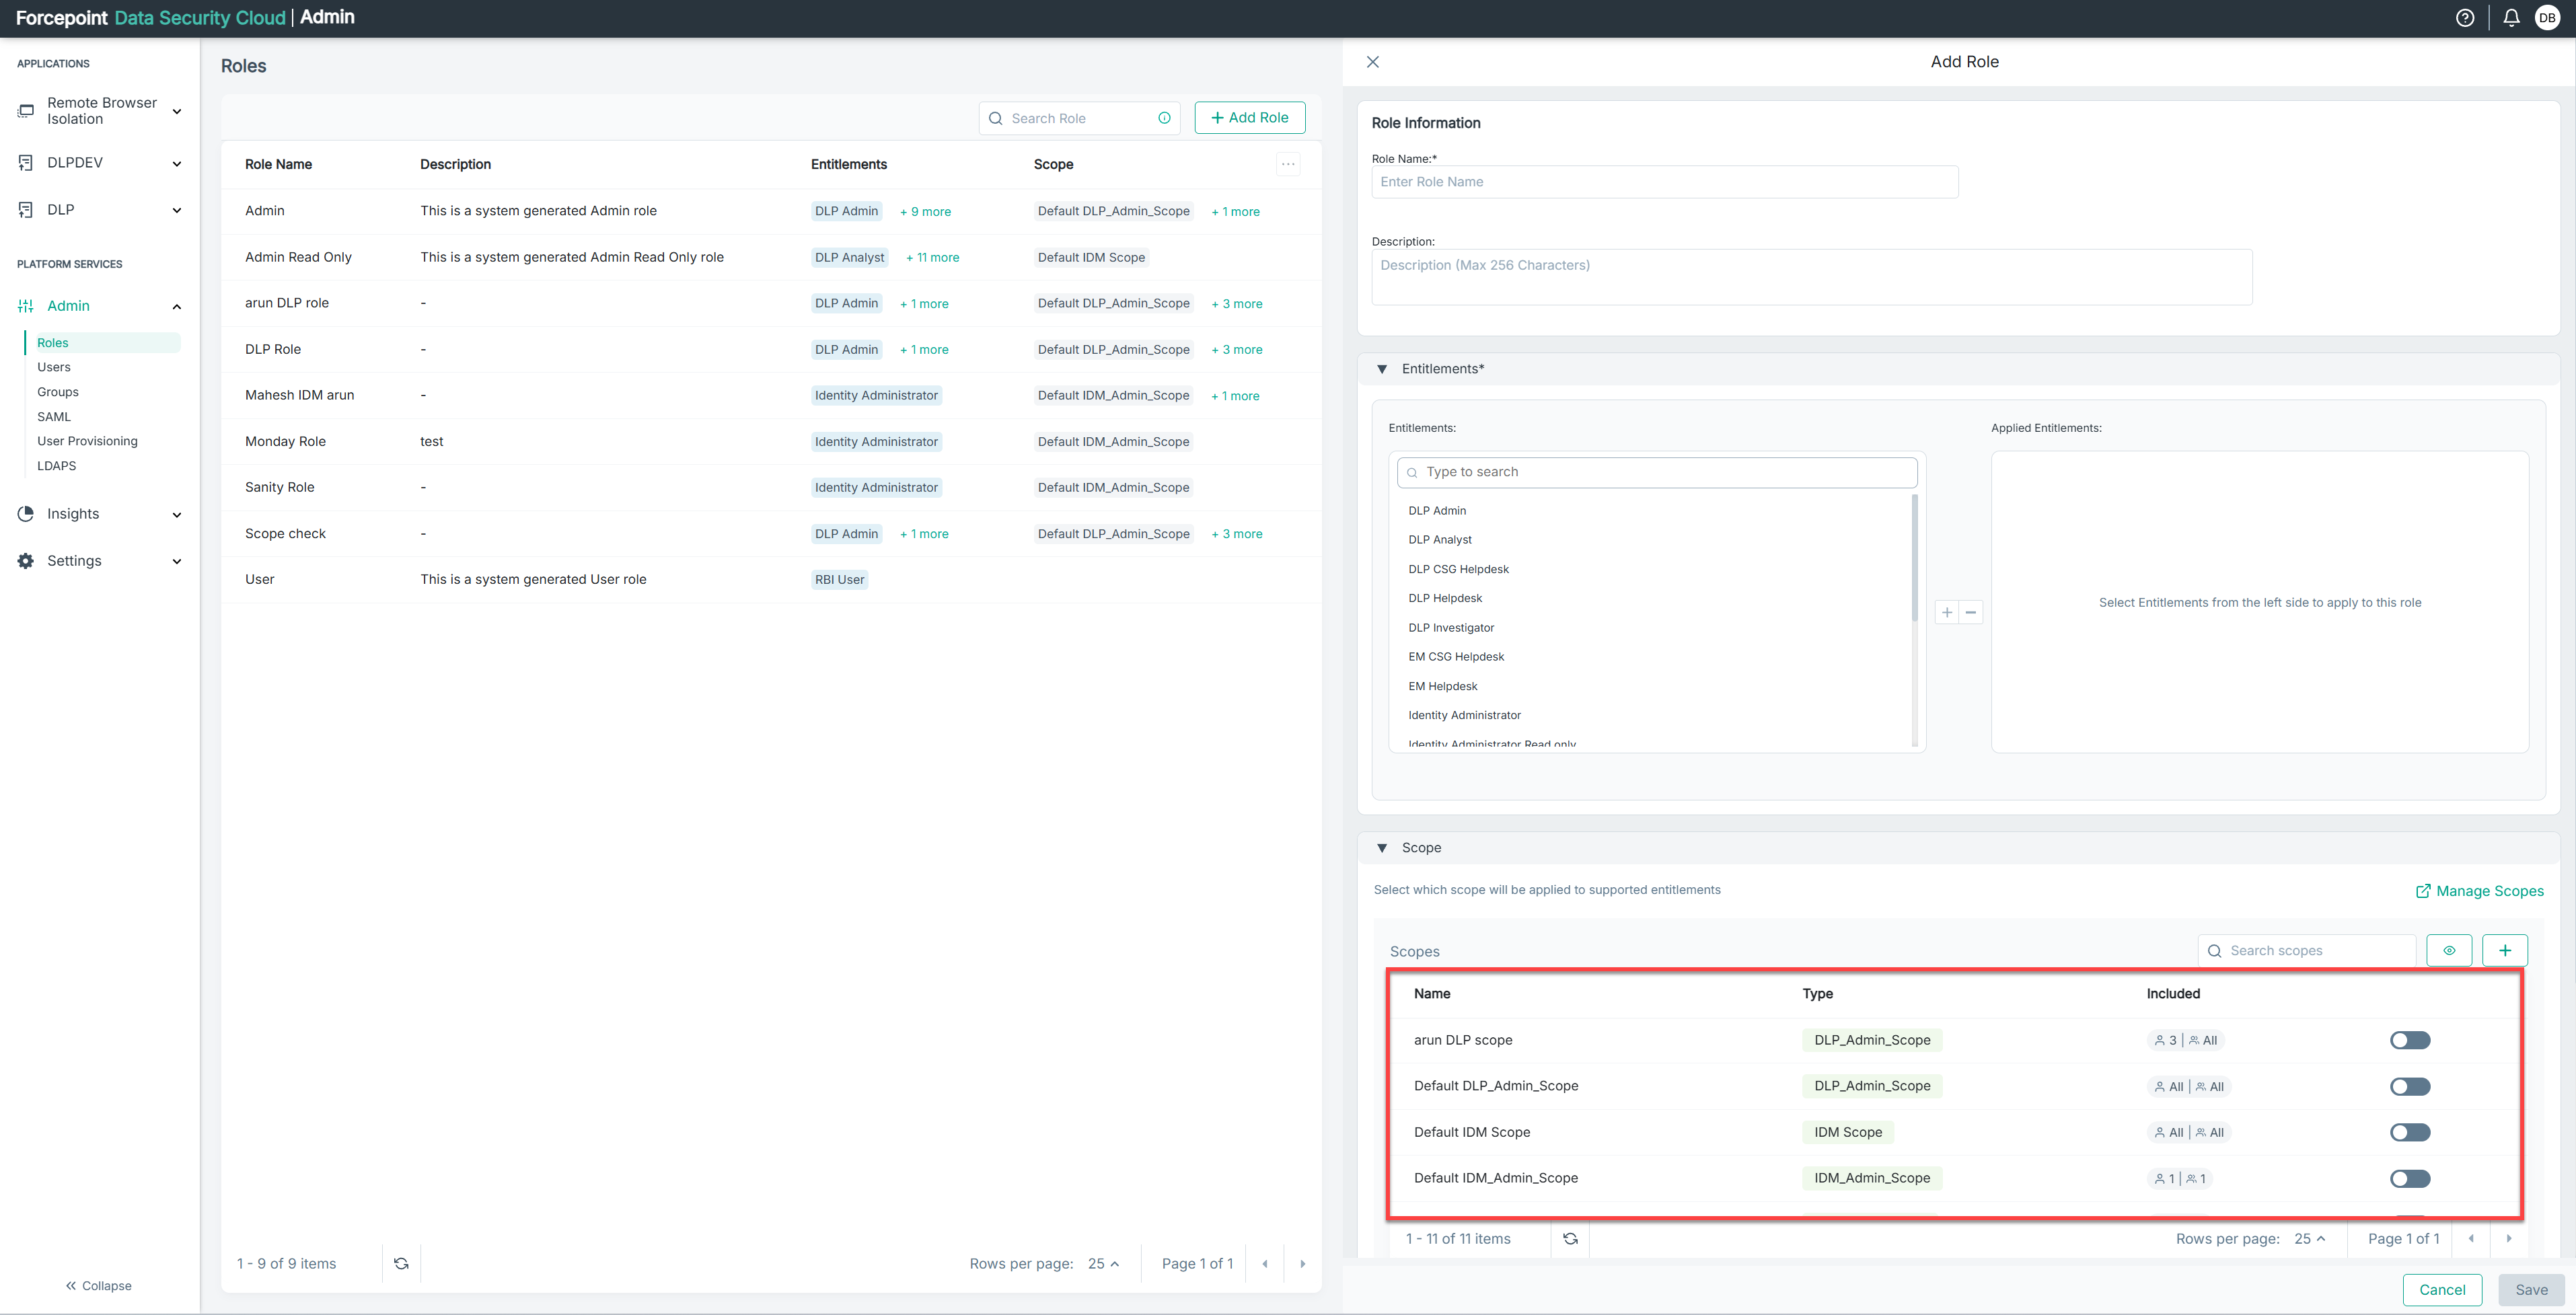
The included section shows you Number of Users | Number of User Groups that are included within this scope.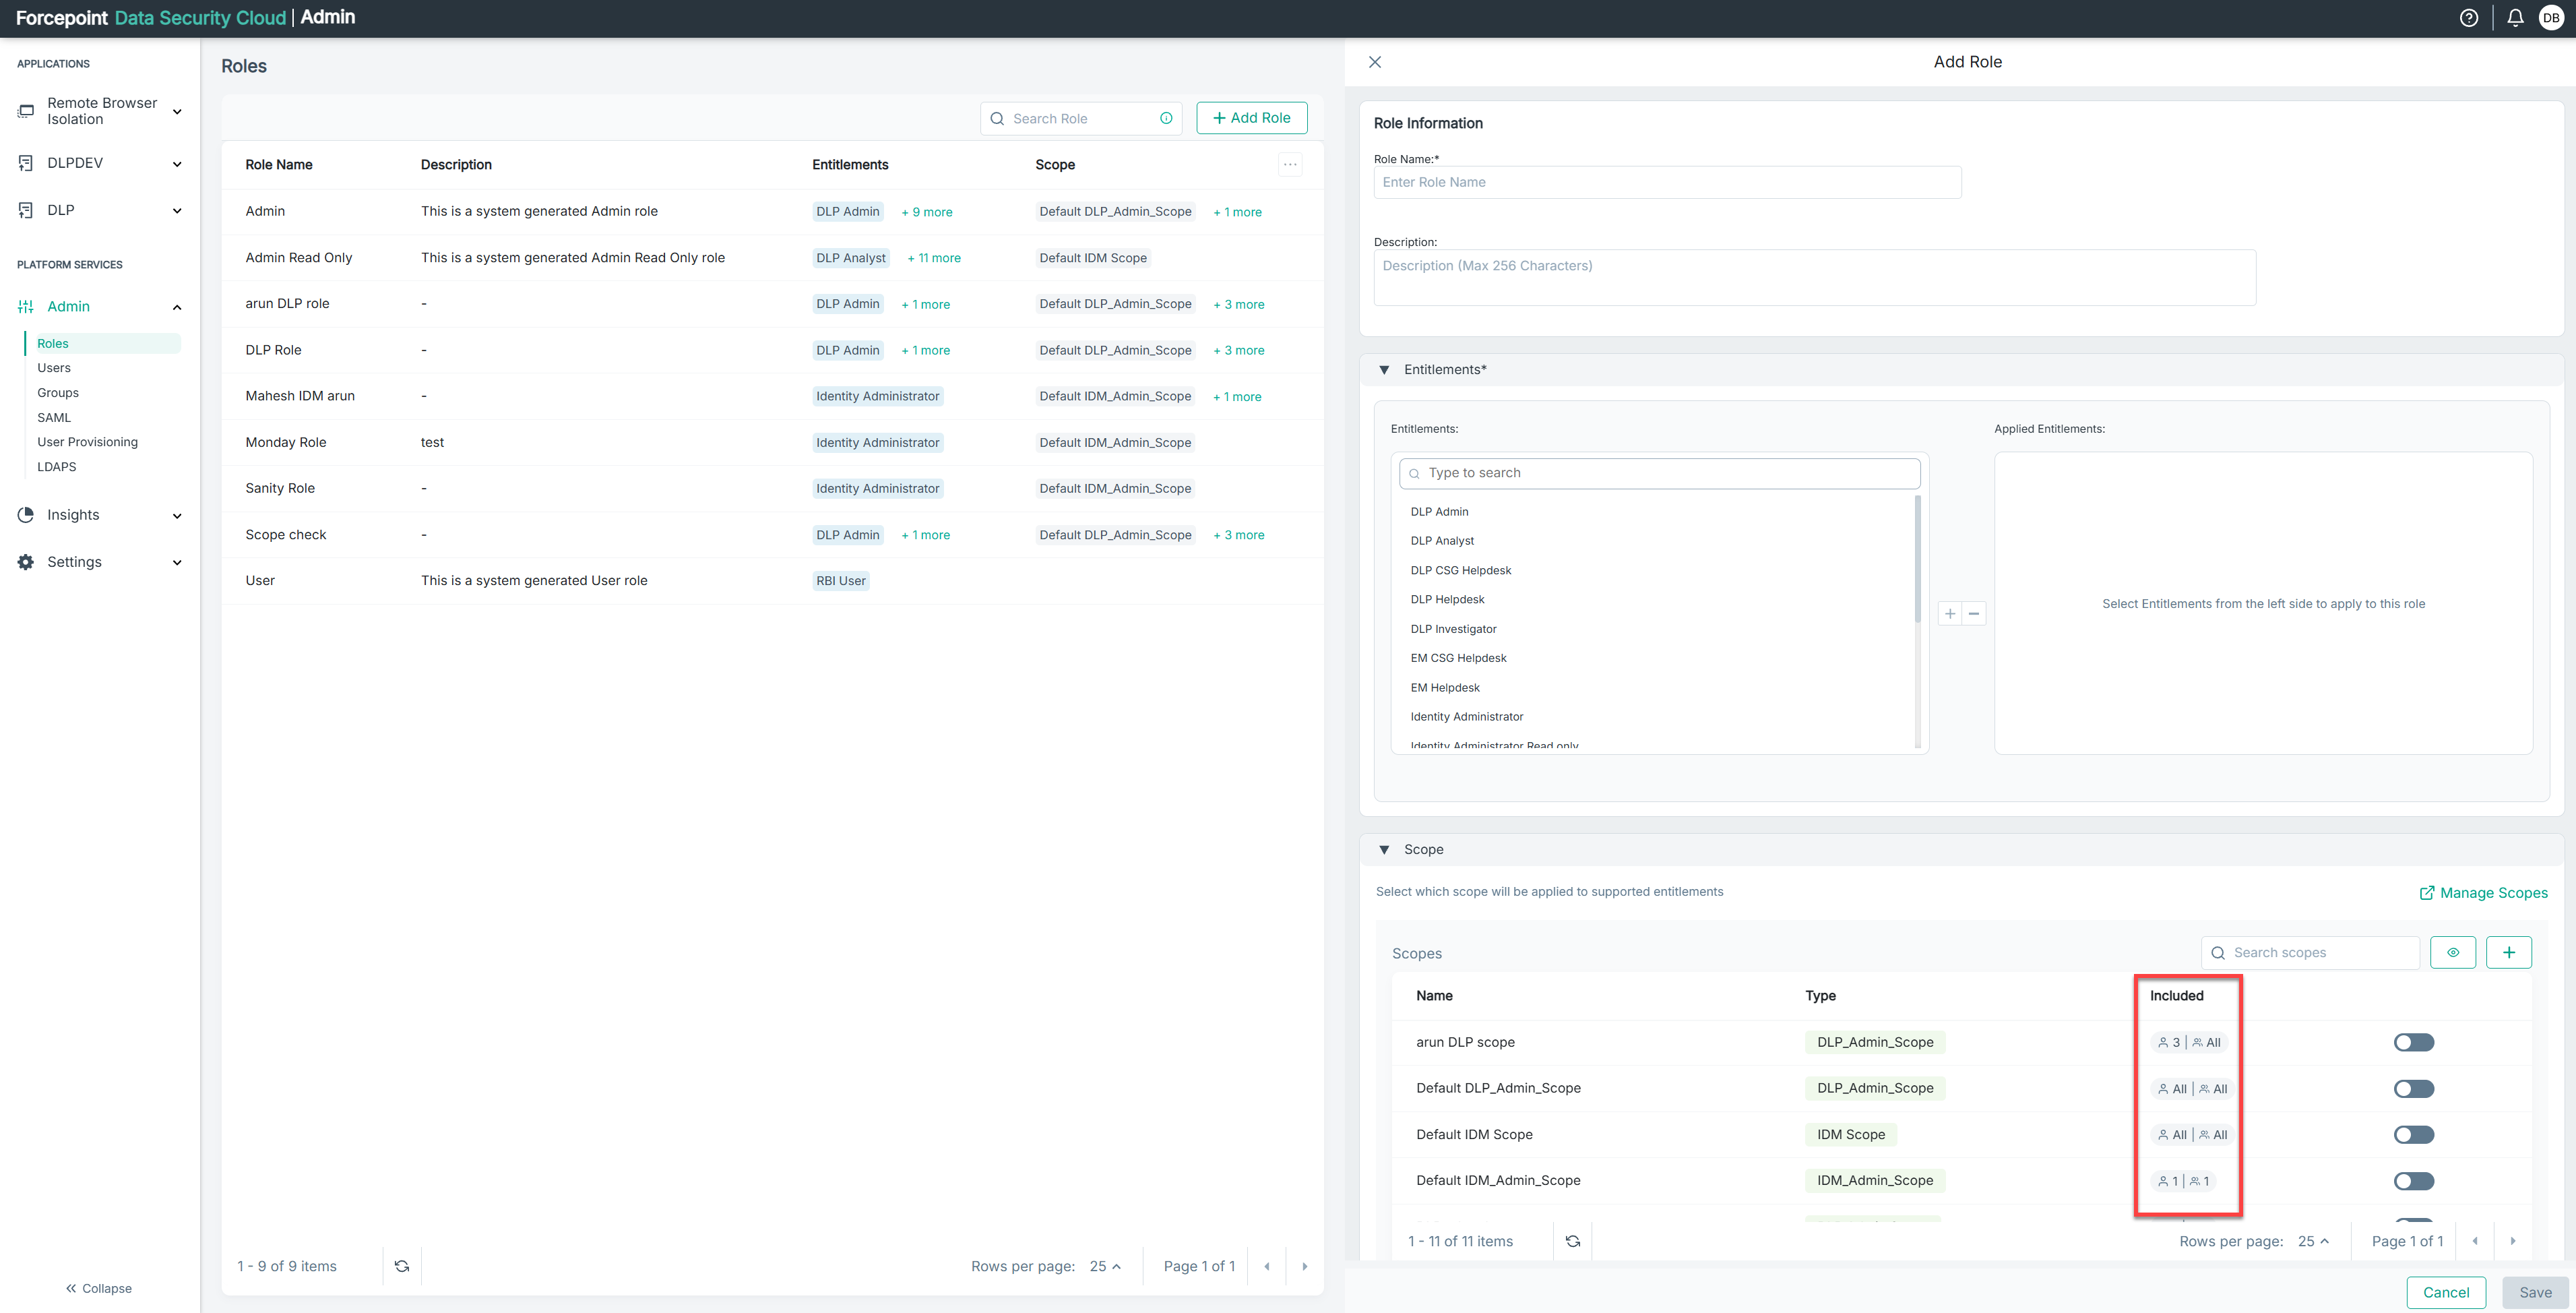
-
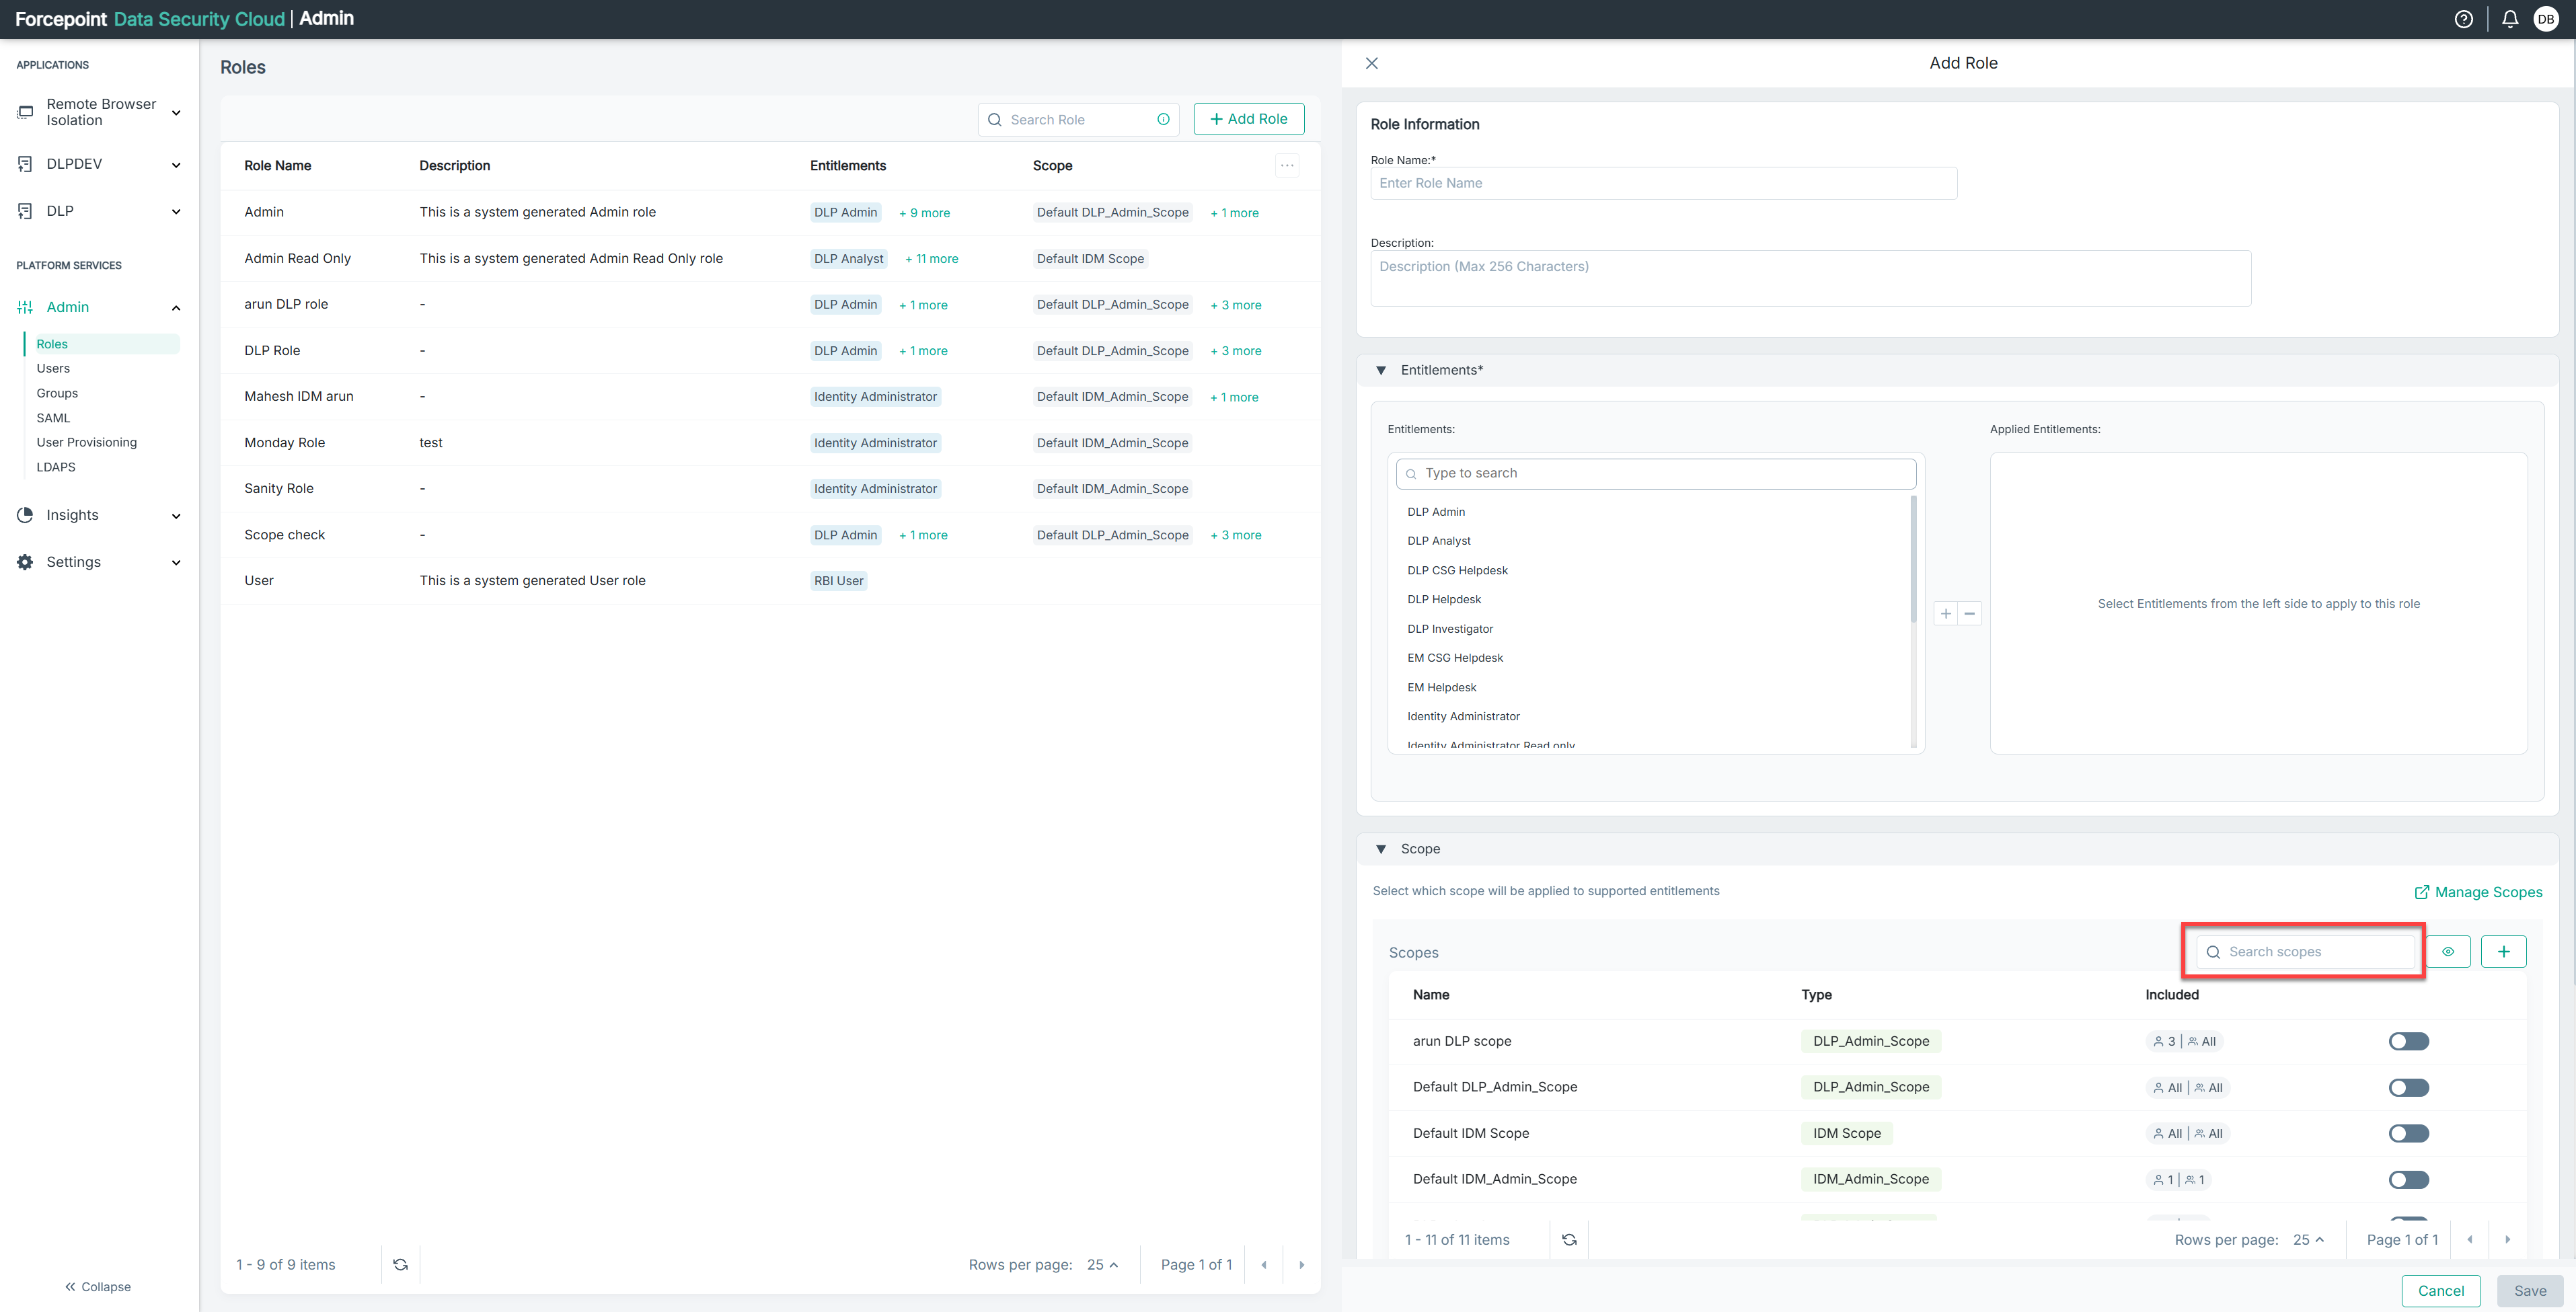
You can Use the Search Box to find any existing scopes.
Note: The Eye icon below the Manage Scopes button enables you to show or hide the existing scopes.
-
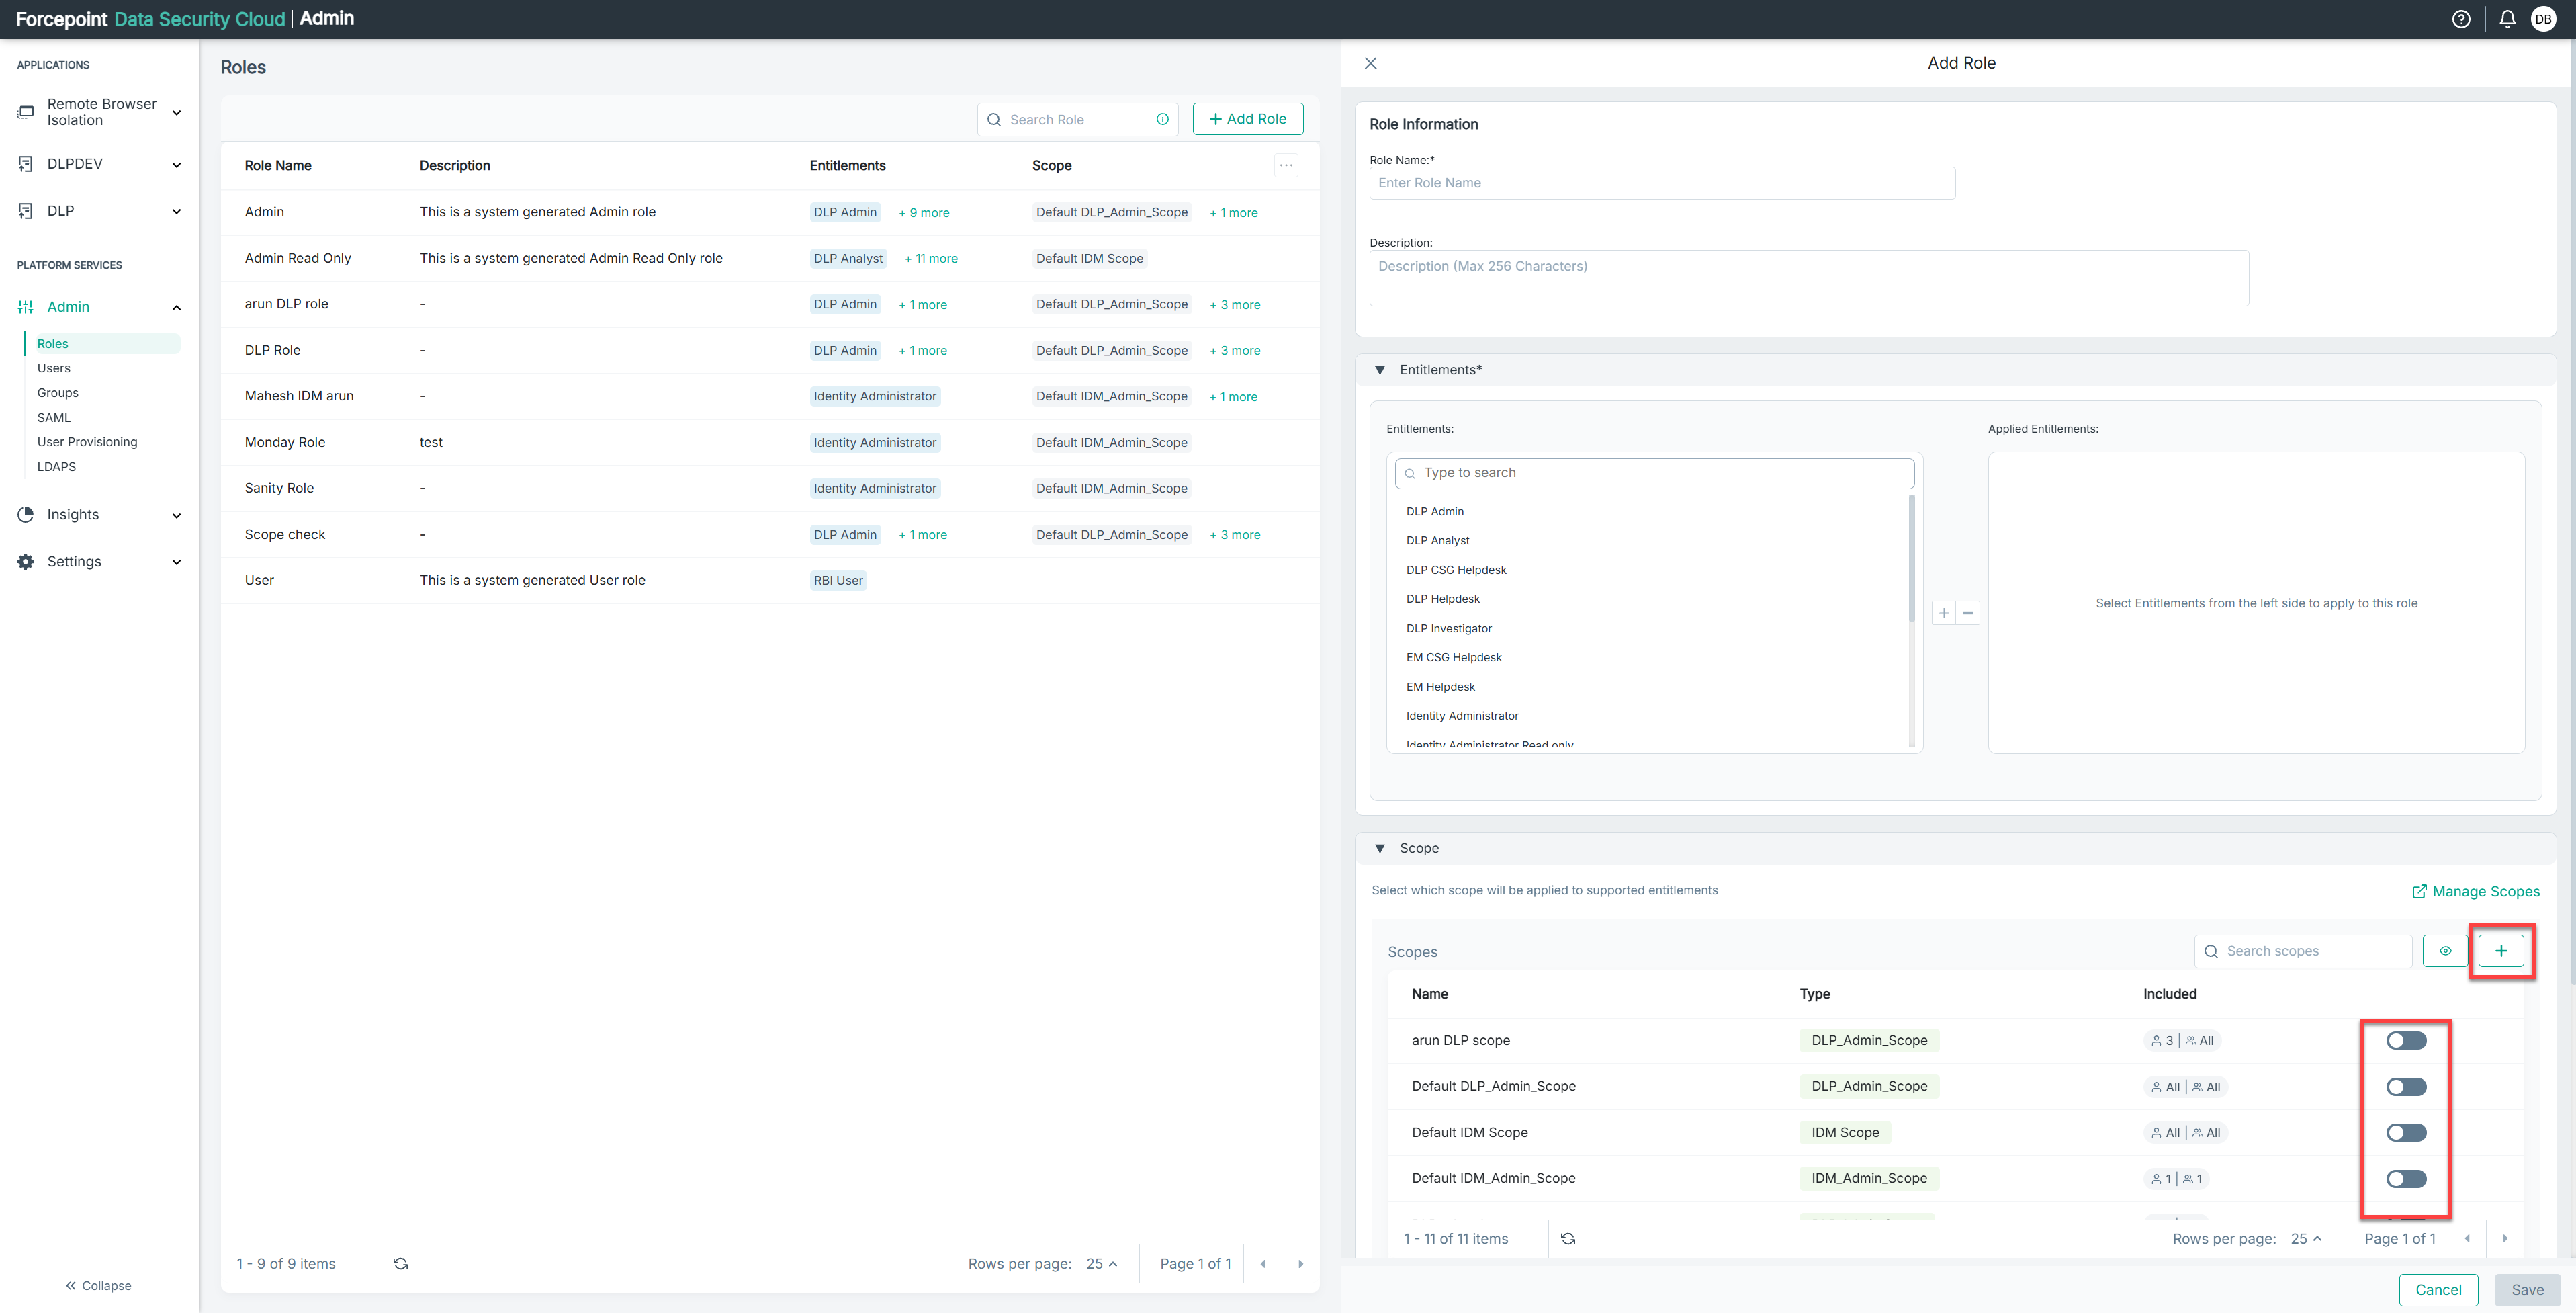
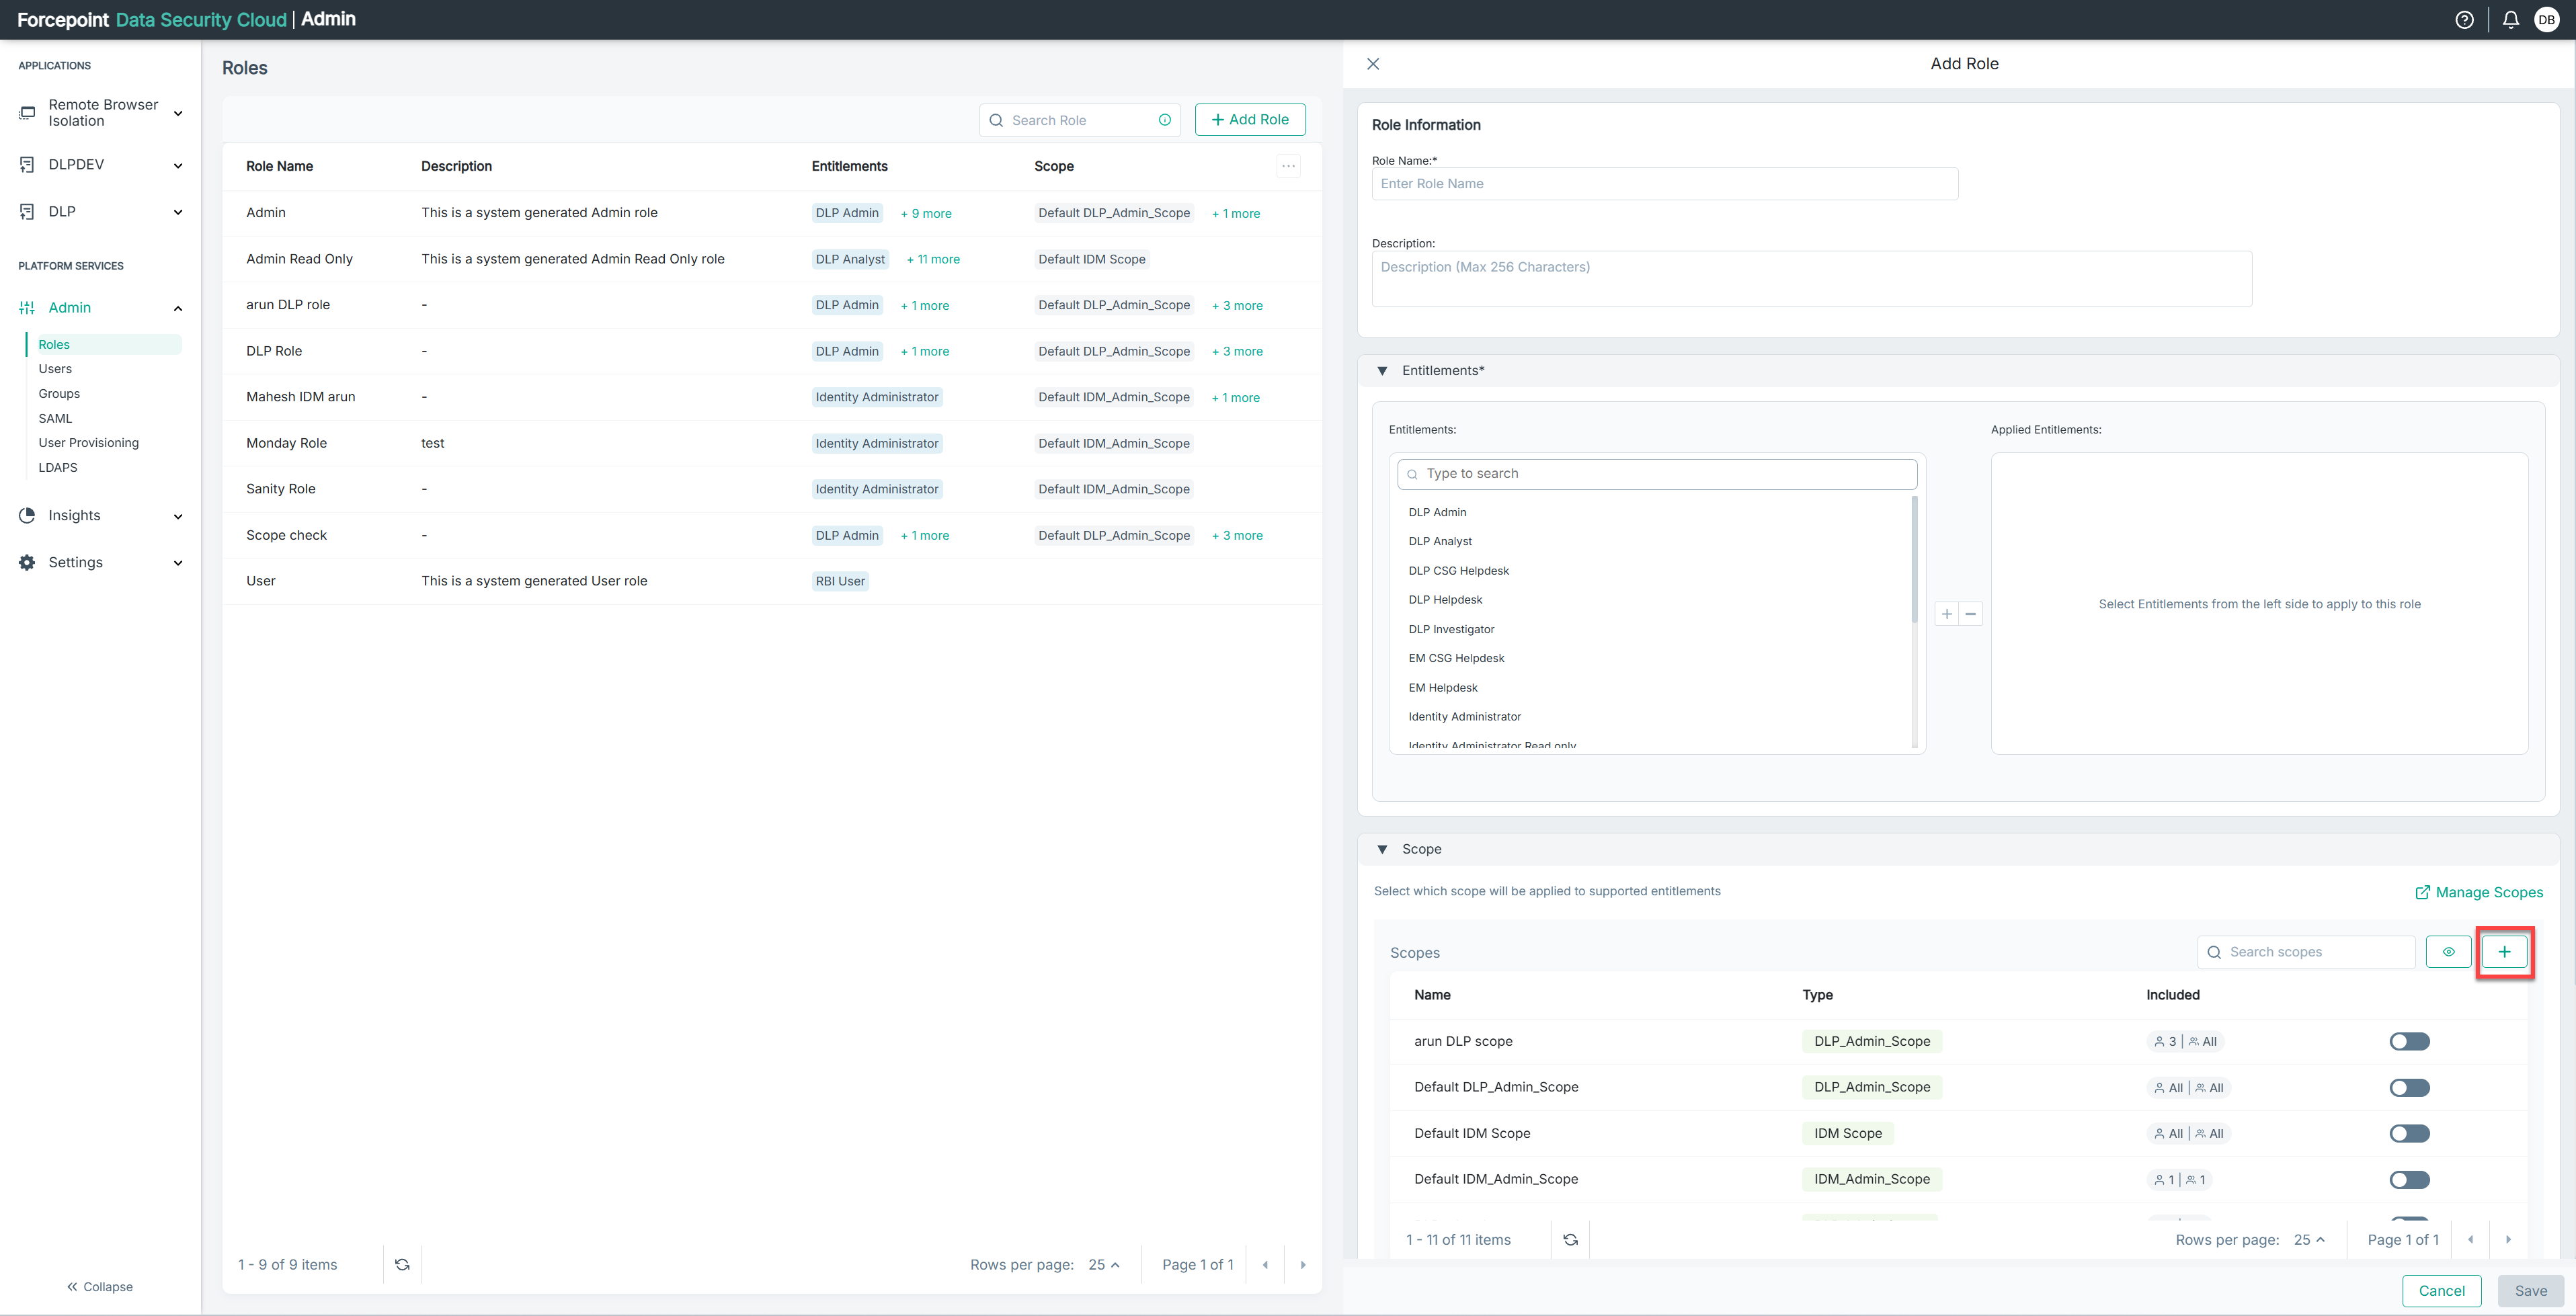
You can either Toggle on any existing scope(s) or click the Plus button below Manage Scopes to create a new one.
-
If you need to create a new scope, click the plus sign.
-
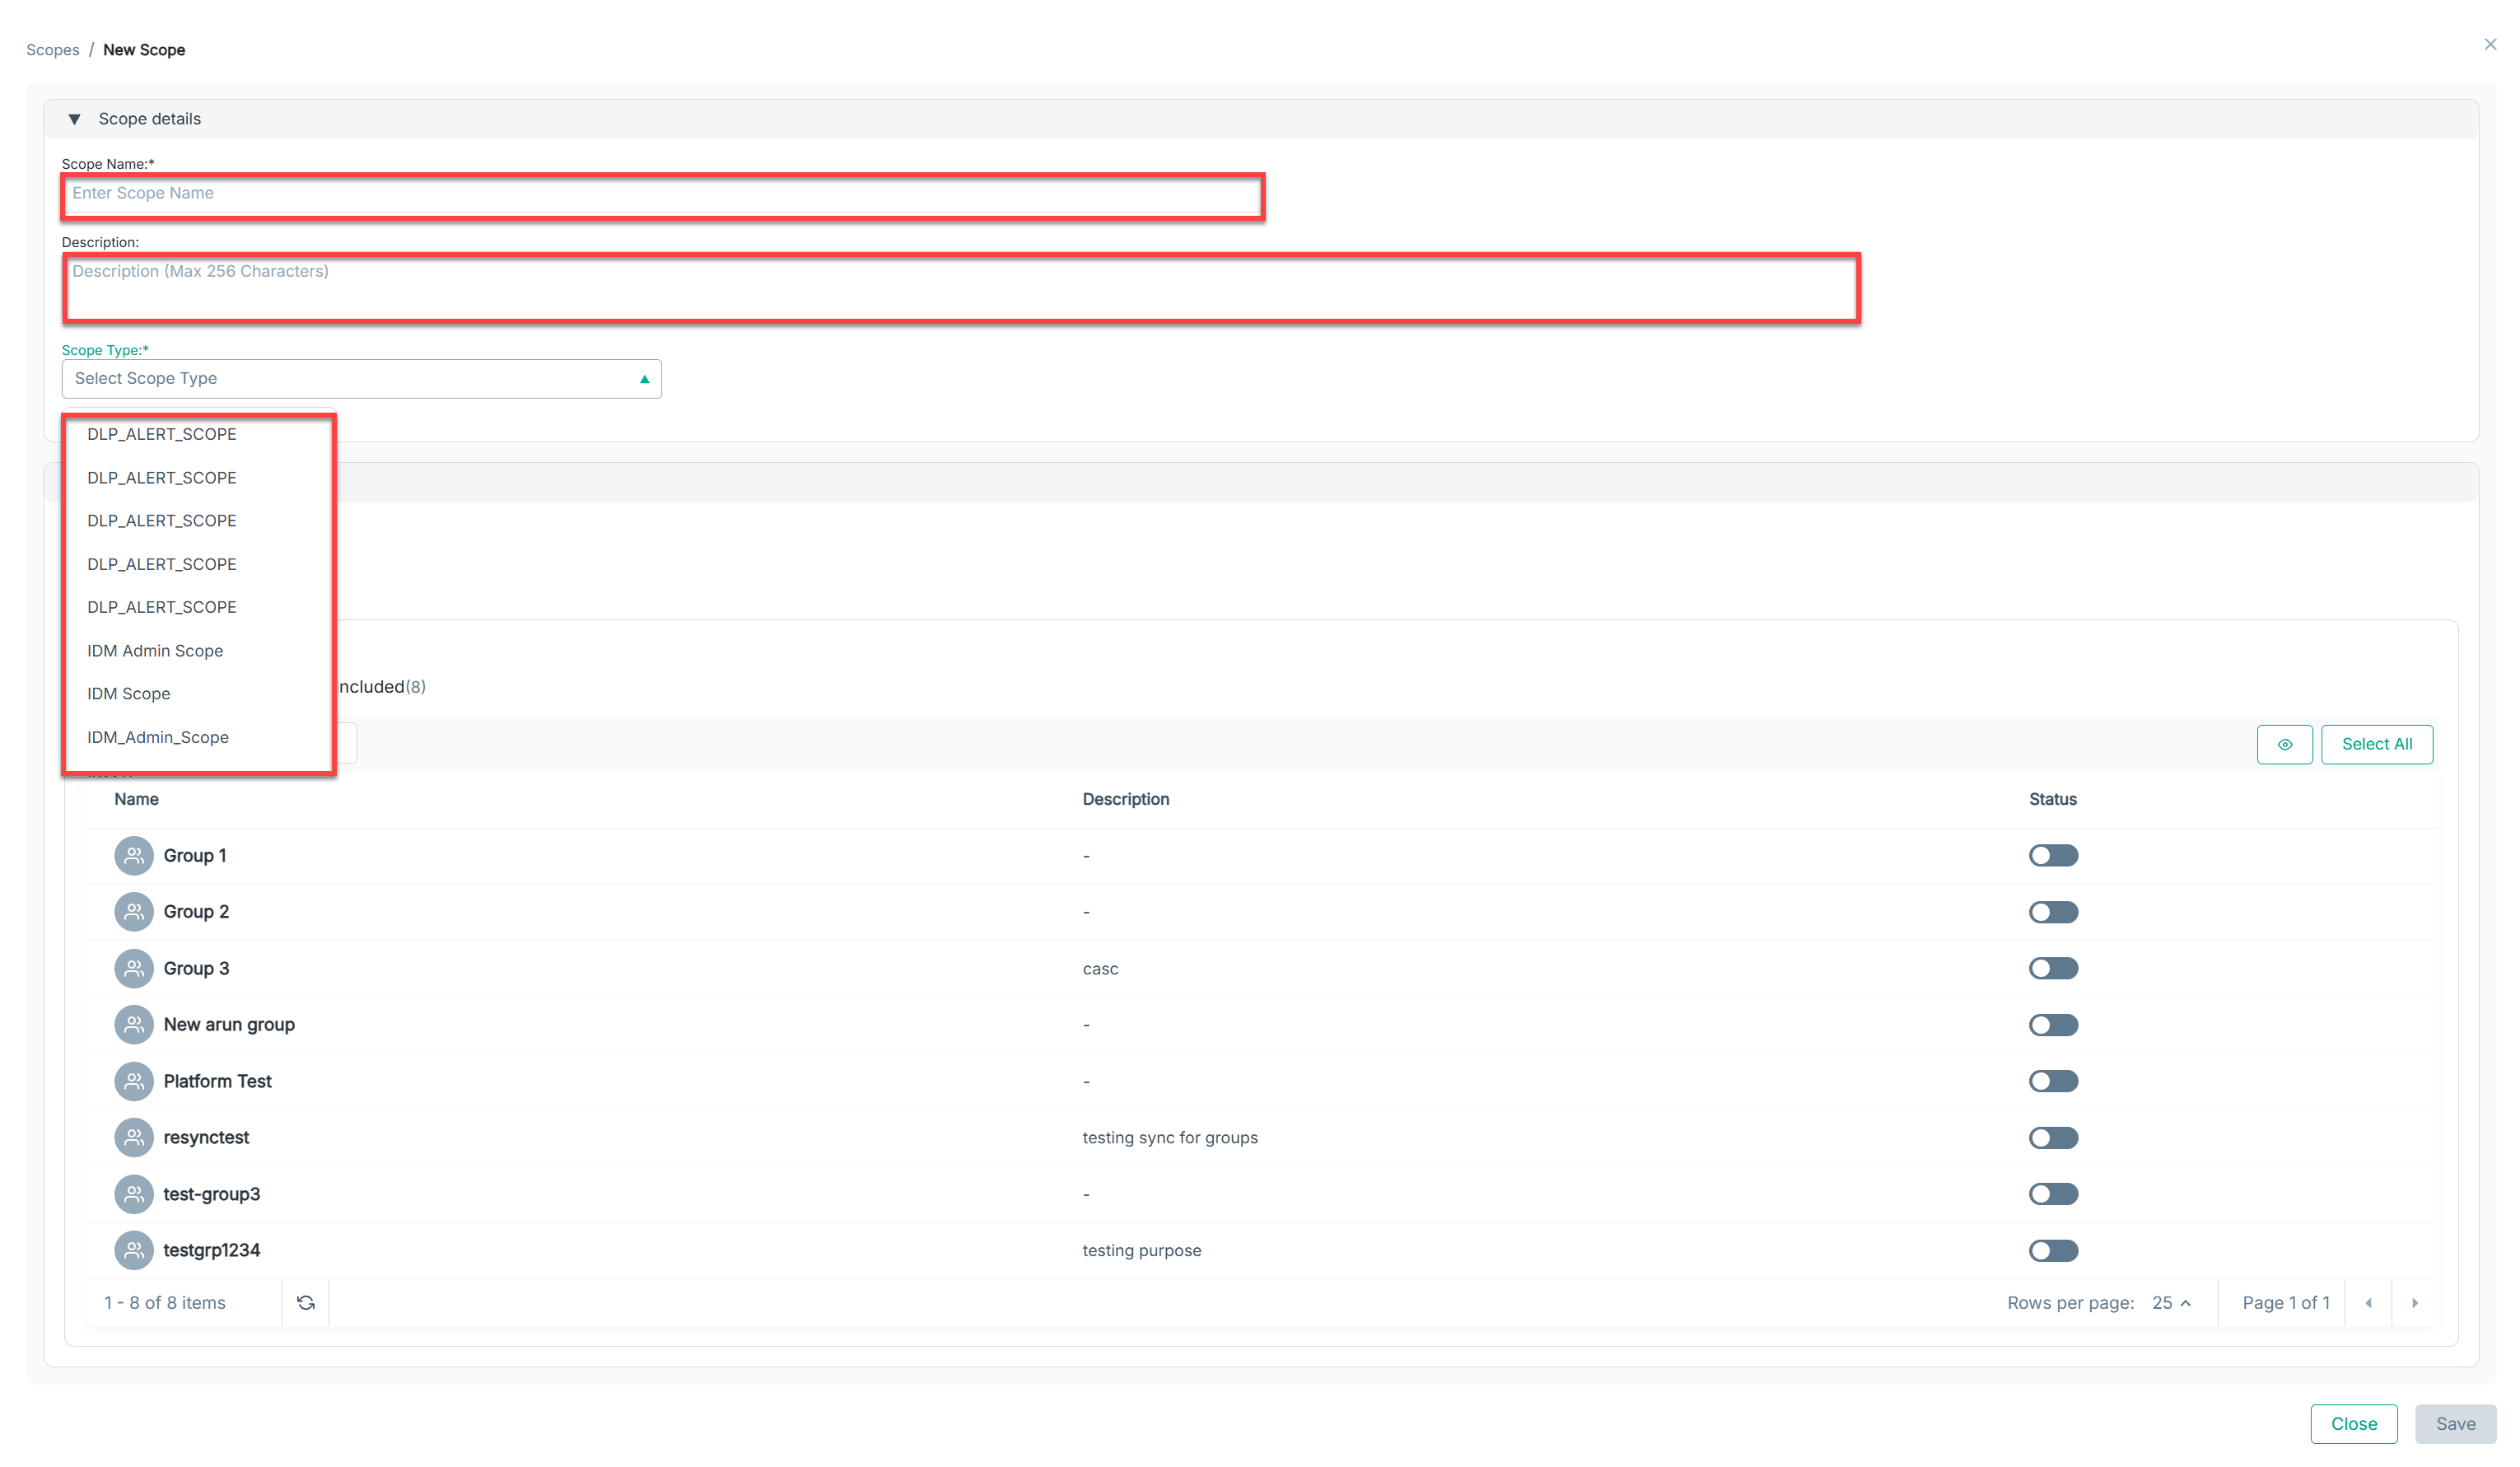
In the Scope Details section, enter Scope Name, Description, and select the Scope Type from the dropdown.
Note: You cannot modify the Scope Name and Scope Type once you save the scope defined.
-
In the Resources section, you will see User Groups by default. Also, you will see the available user groups.
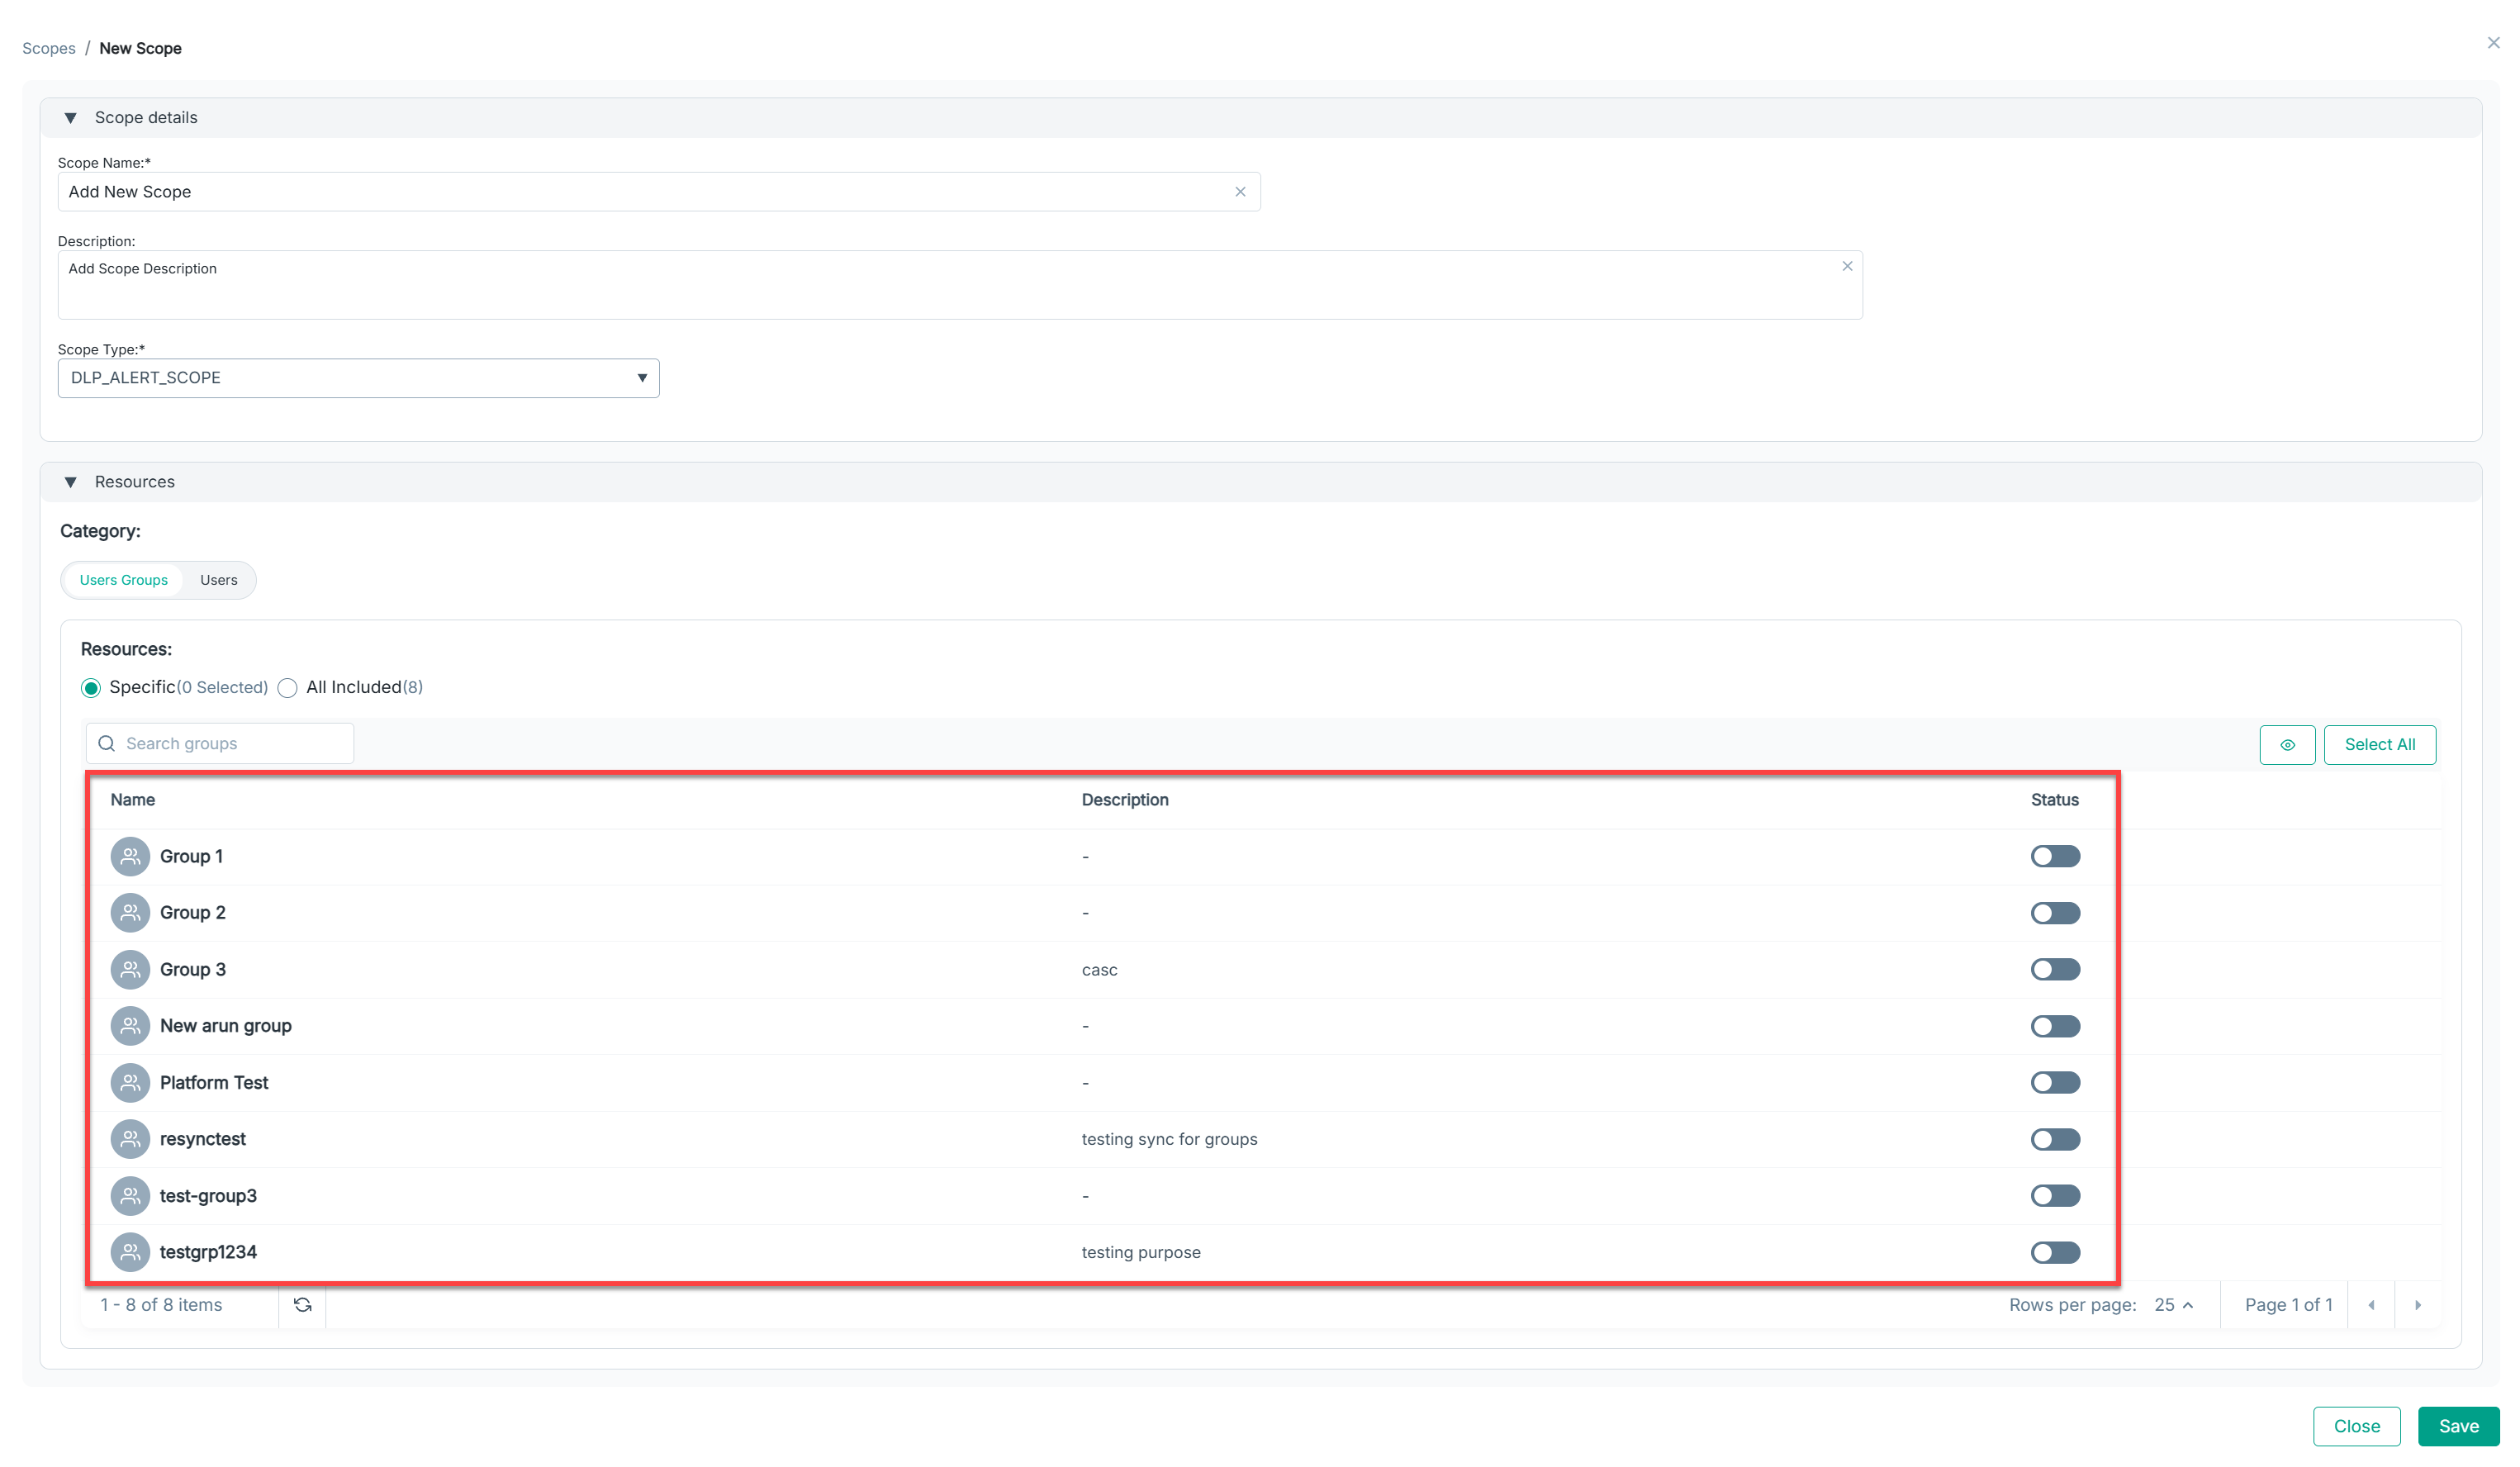
Note: The Eye icon near the Select All button enables you to show or hide the existing User Groups/Users. -
You can either Toggle on specific groups or select “All Included” in the Users Groups Category.
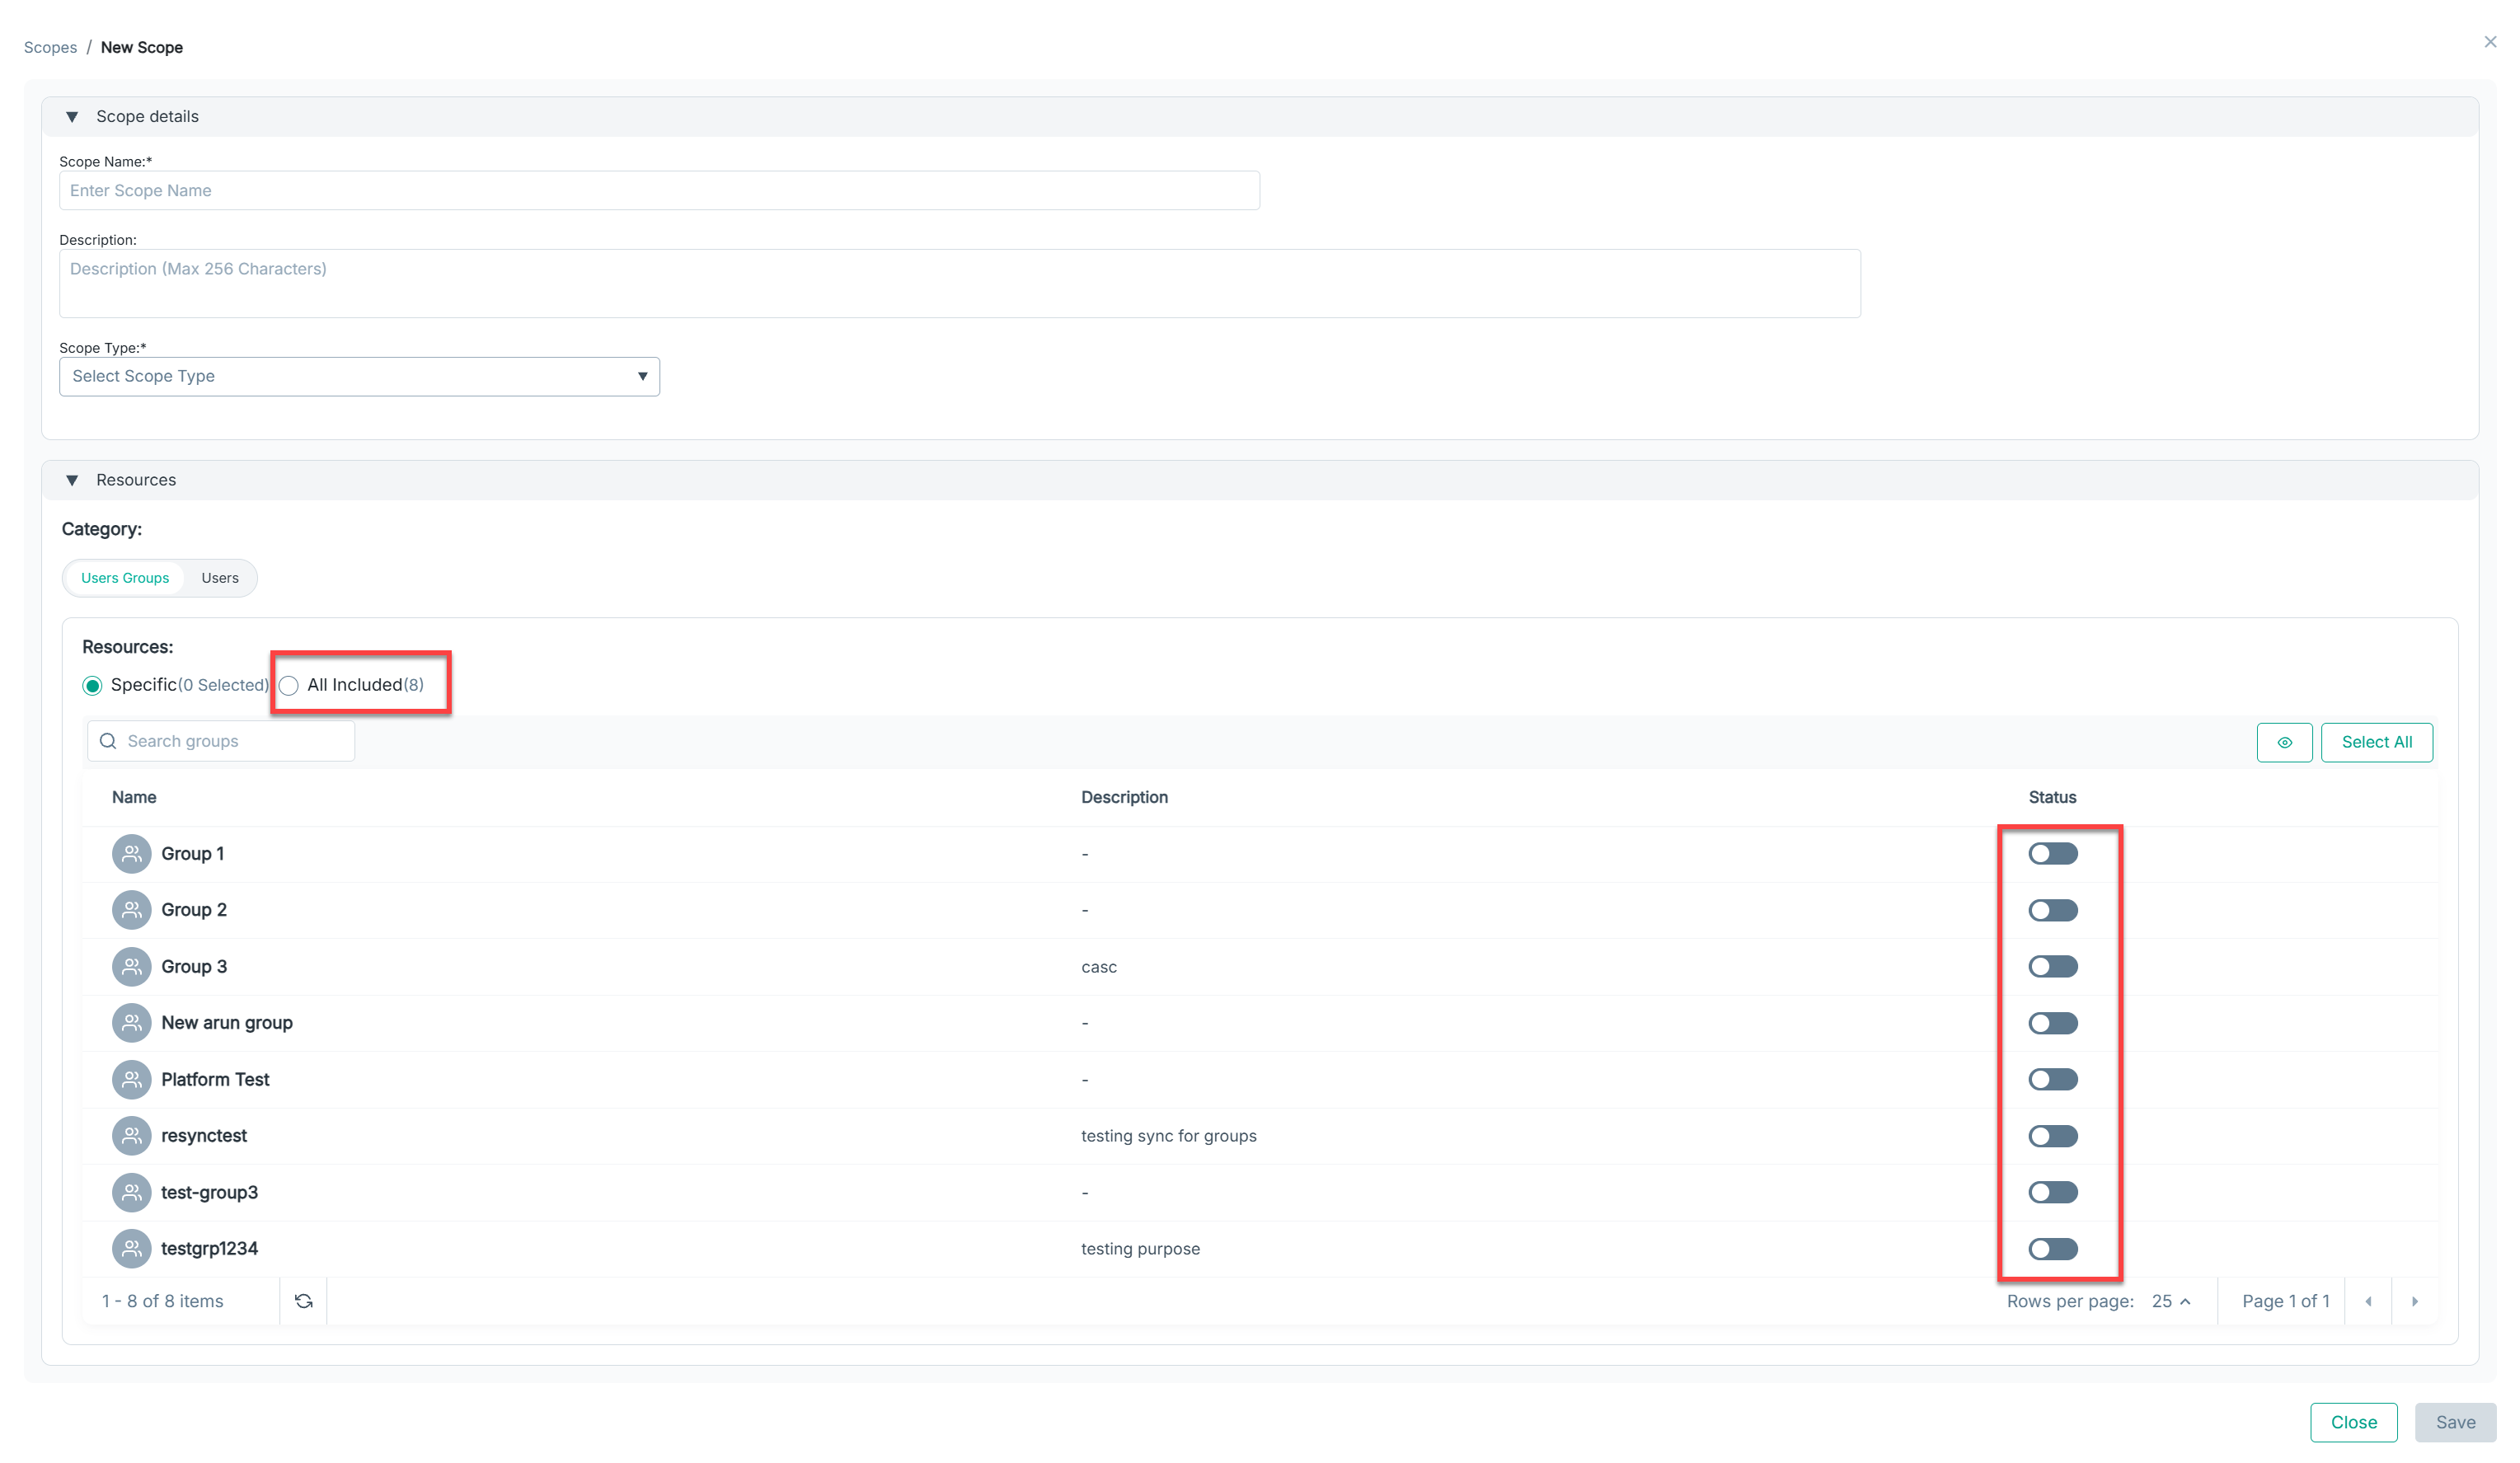
Note: You can use Select All button to Toggle on all the available User Groups.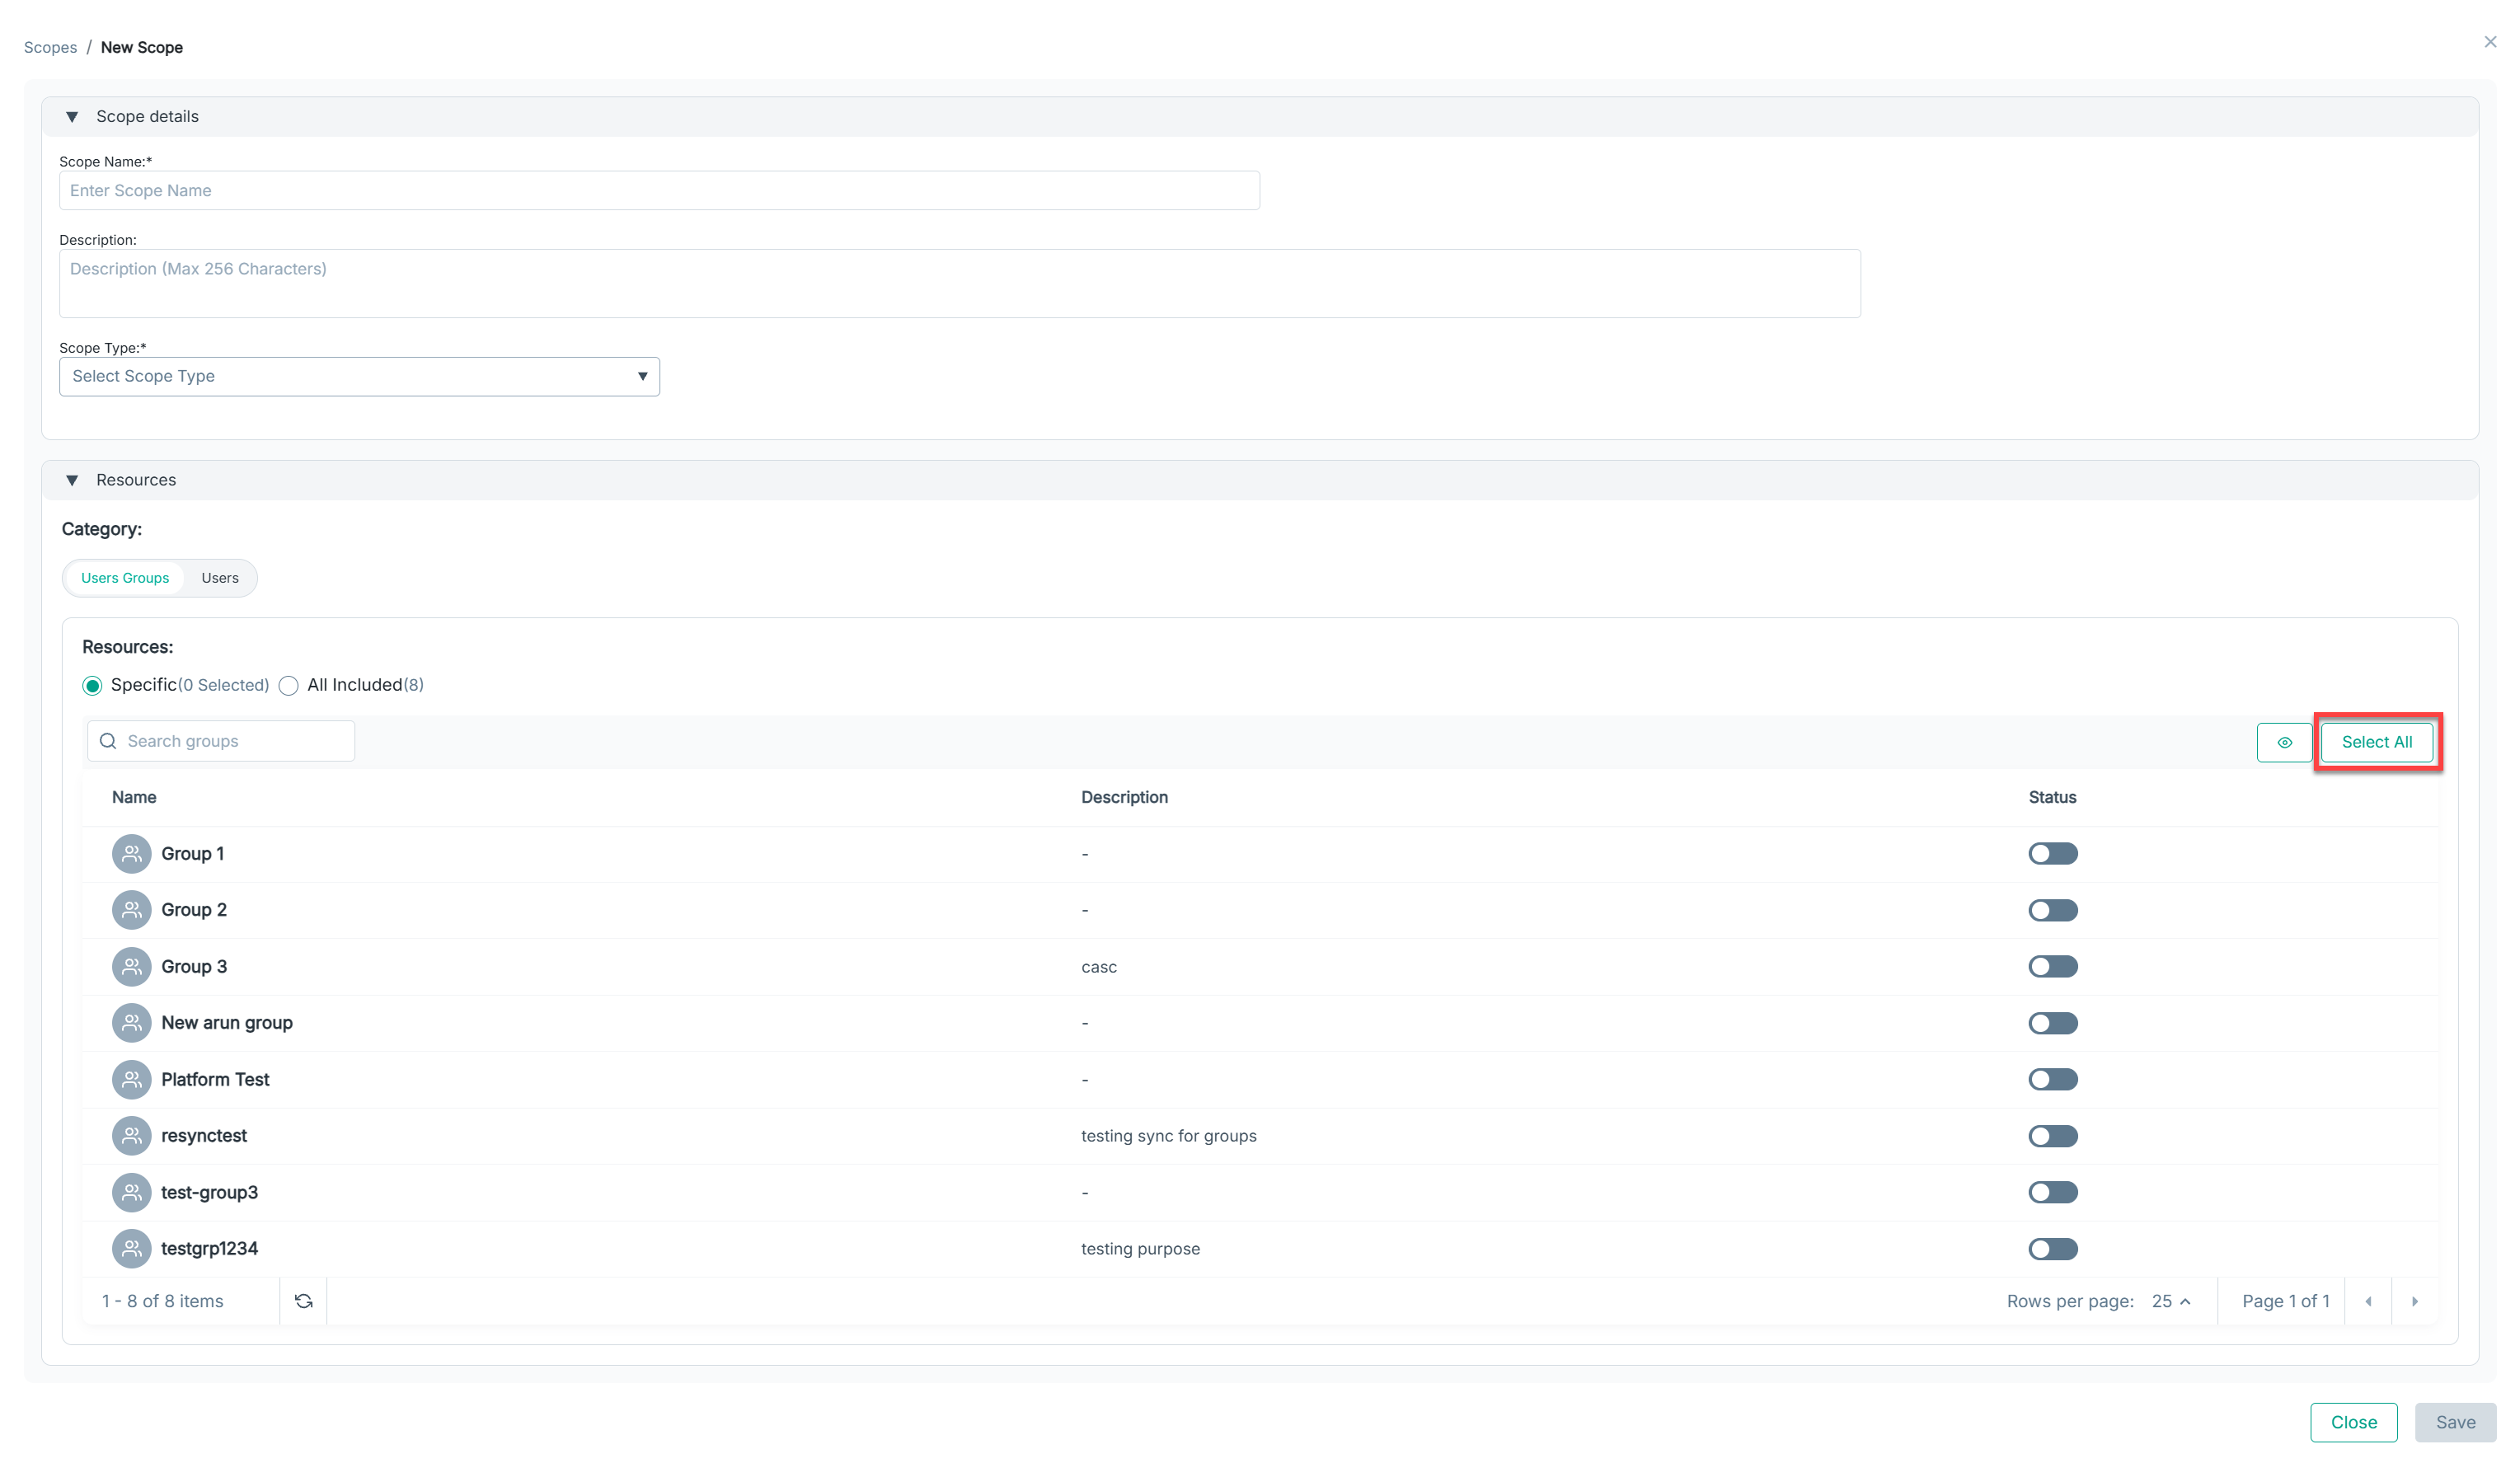
-
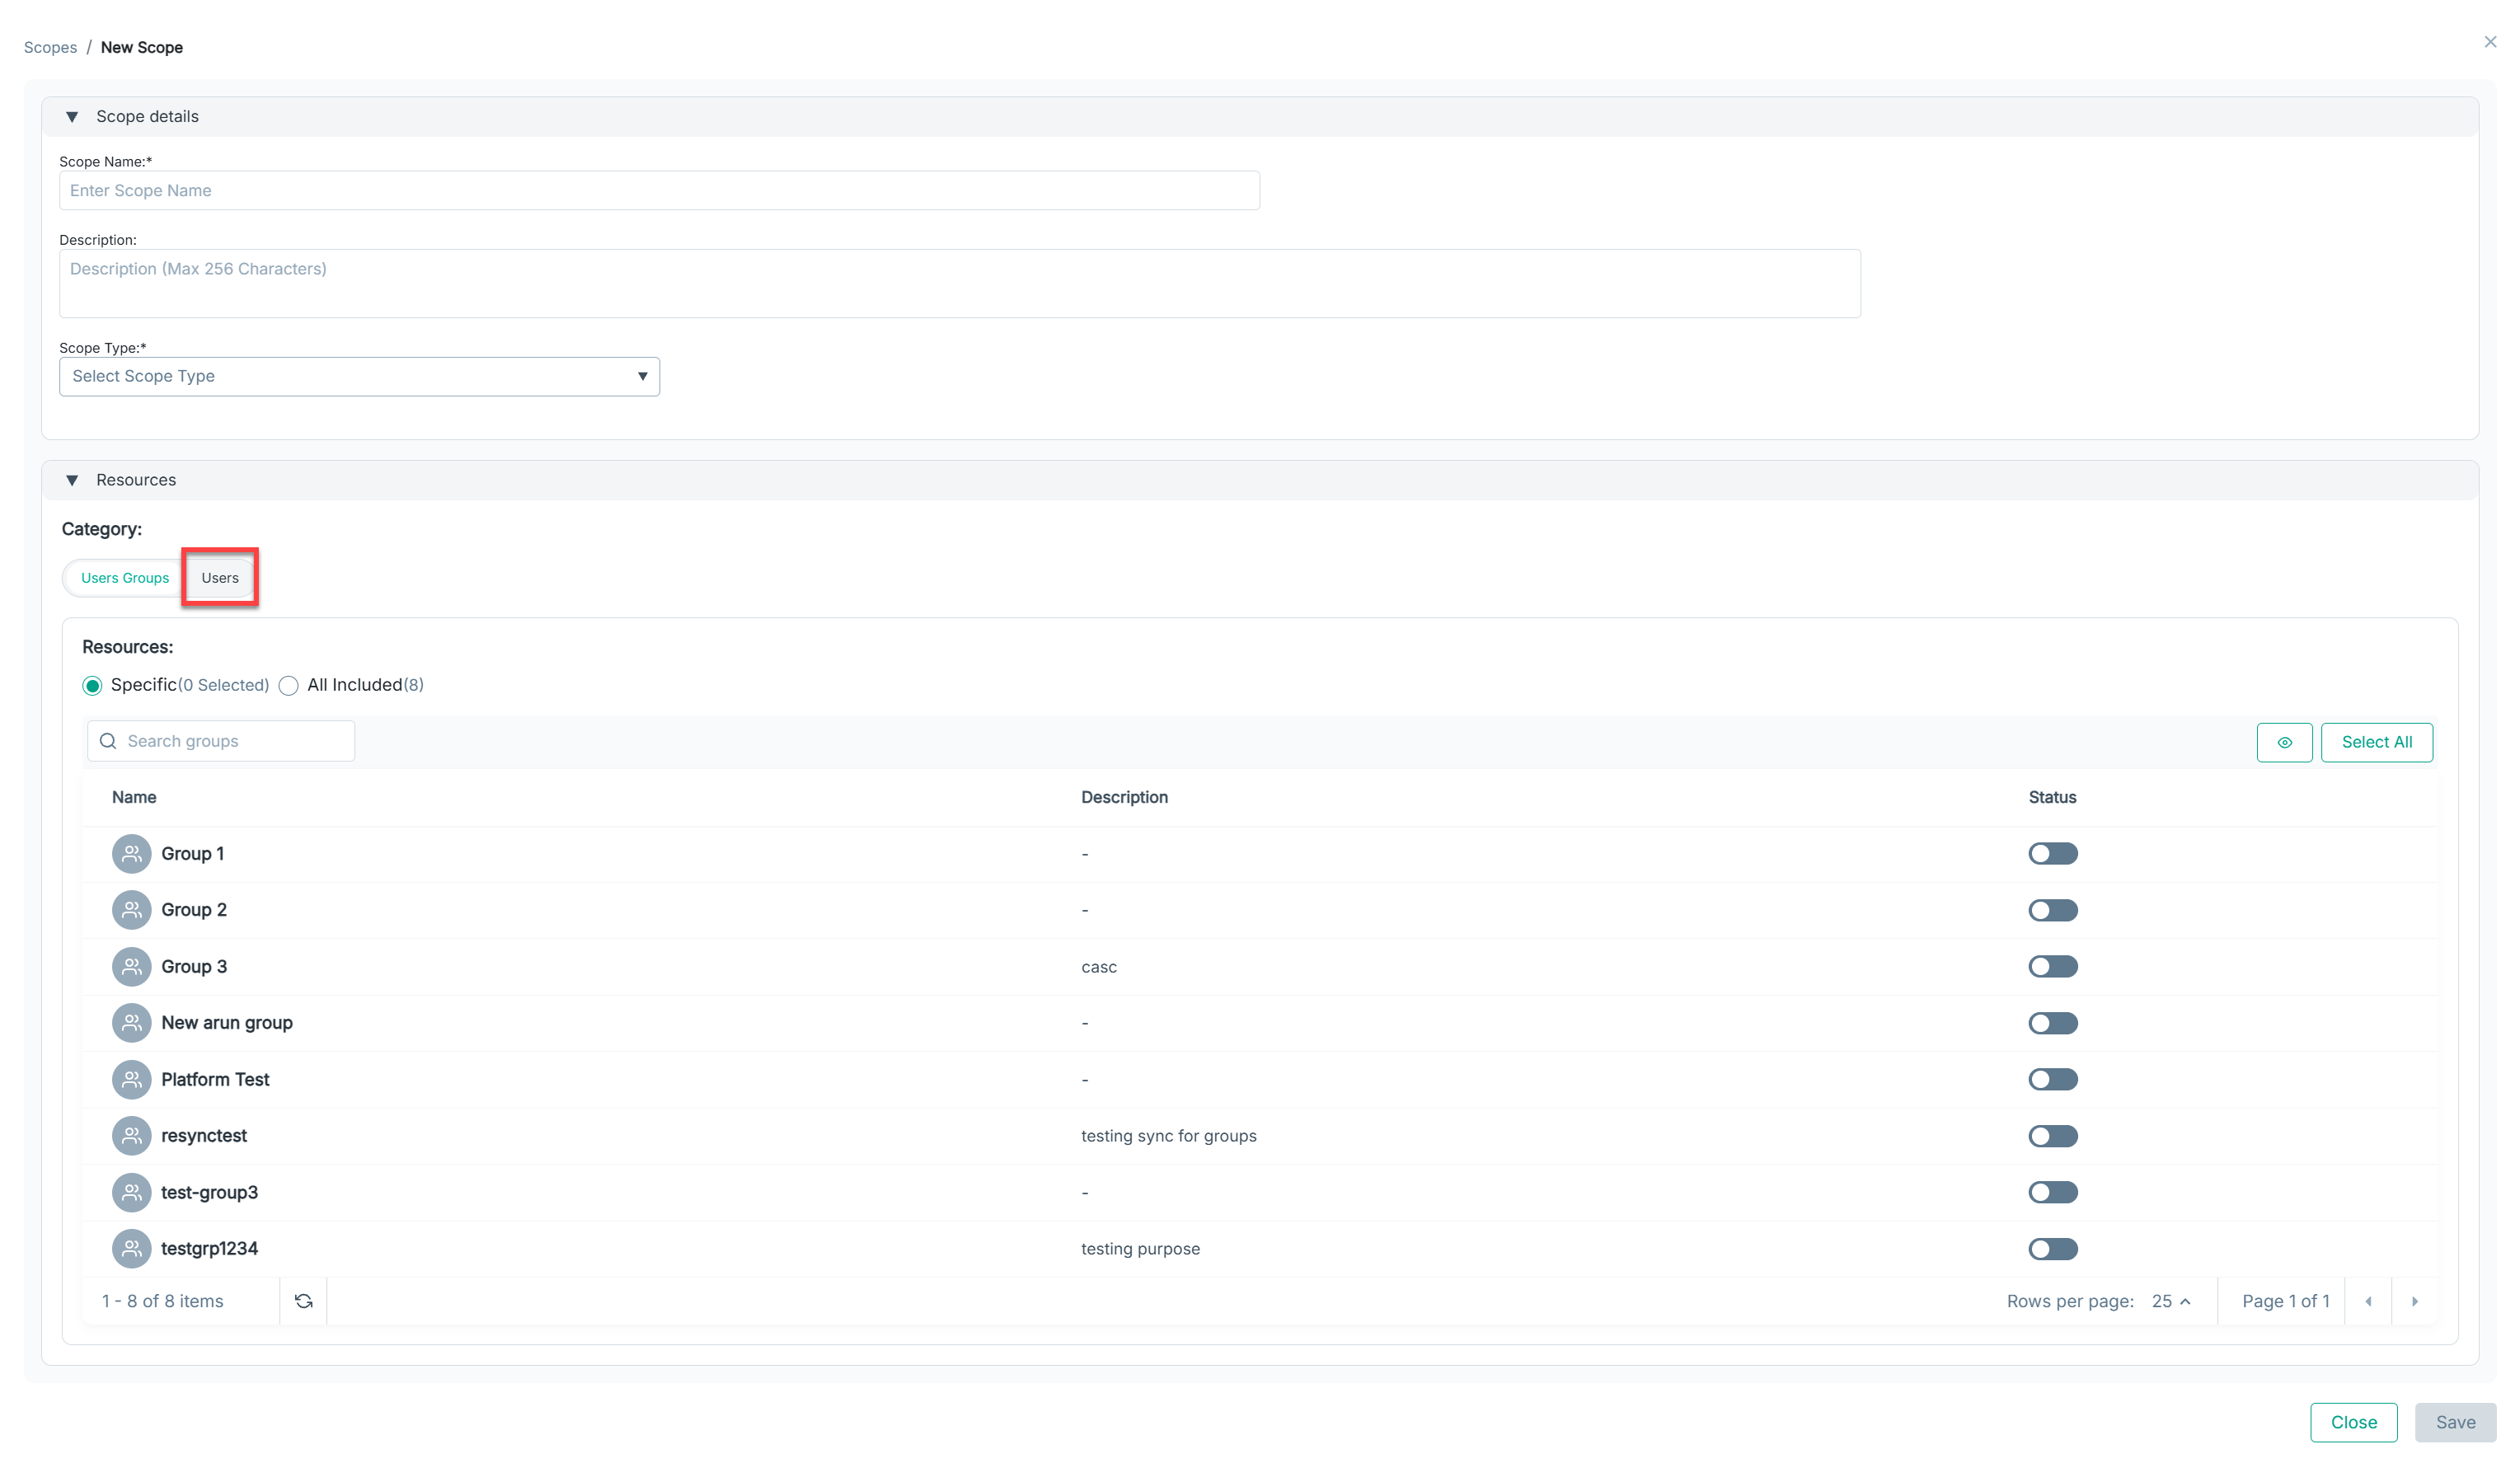
Click on Users which is next to the User Groups.
-
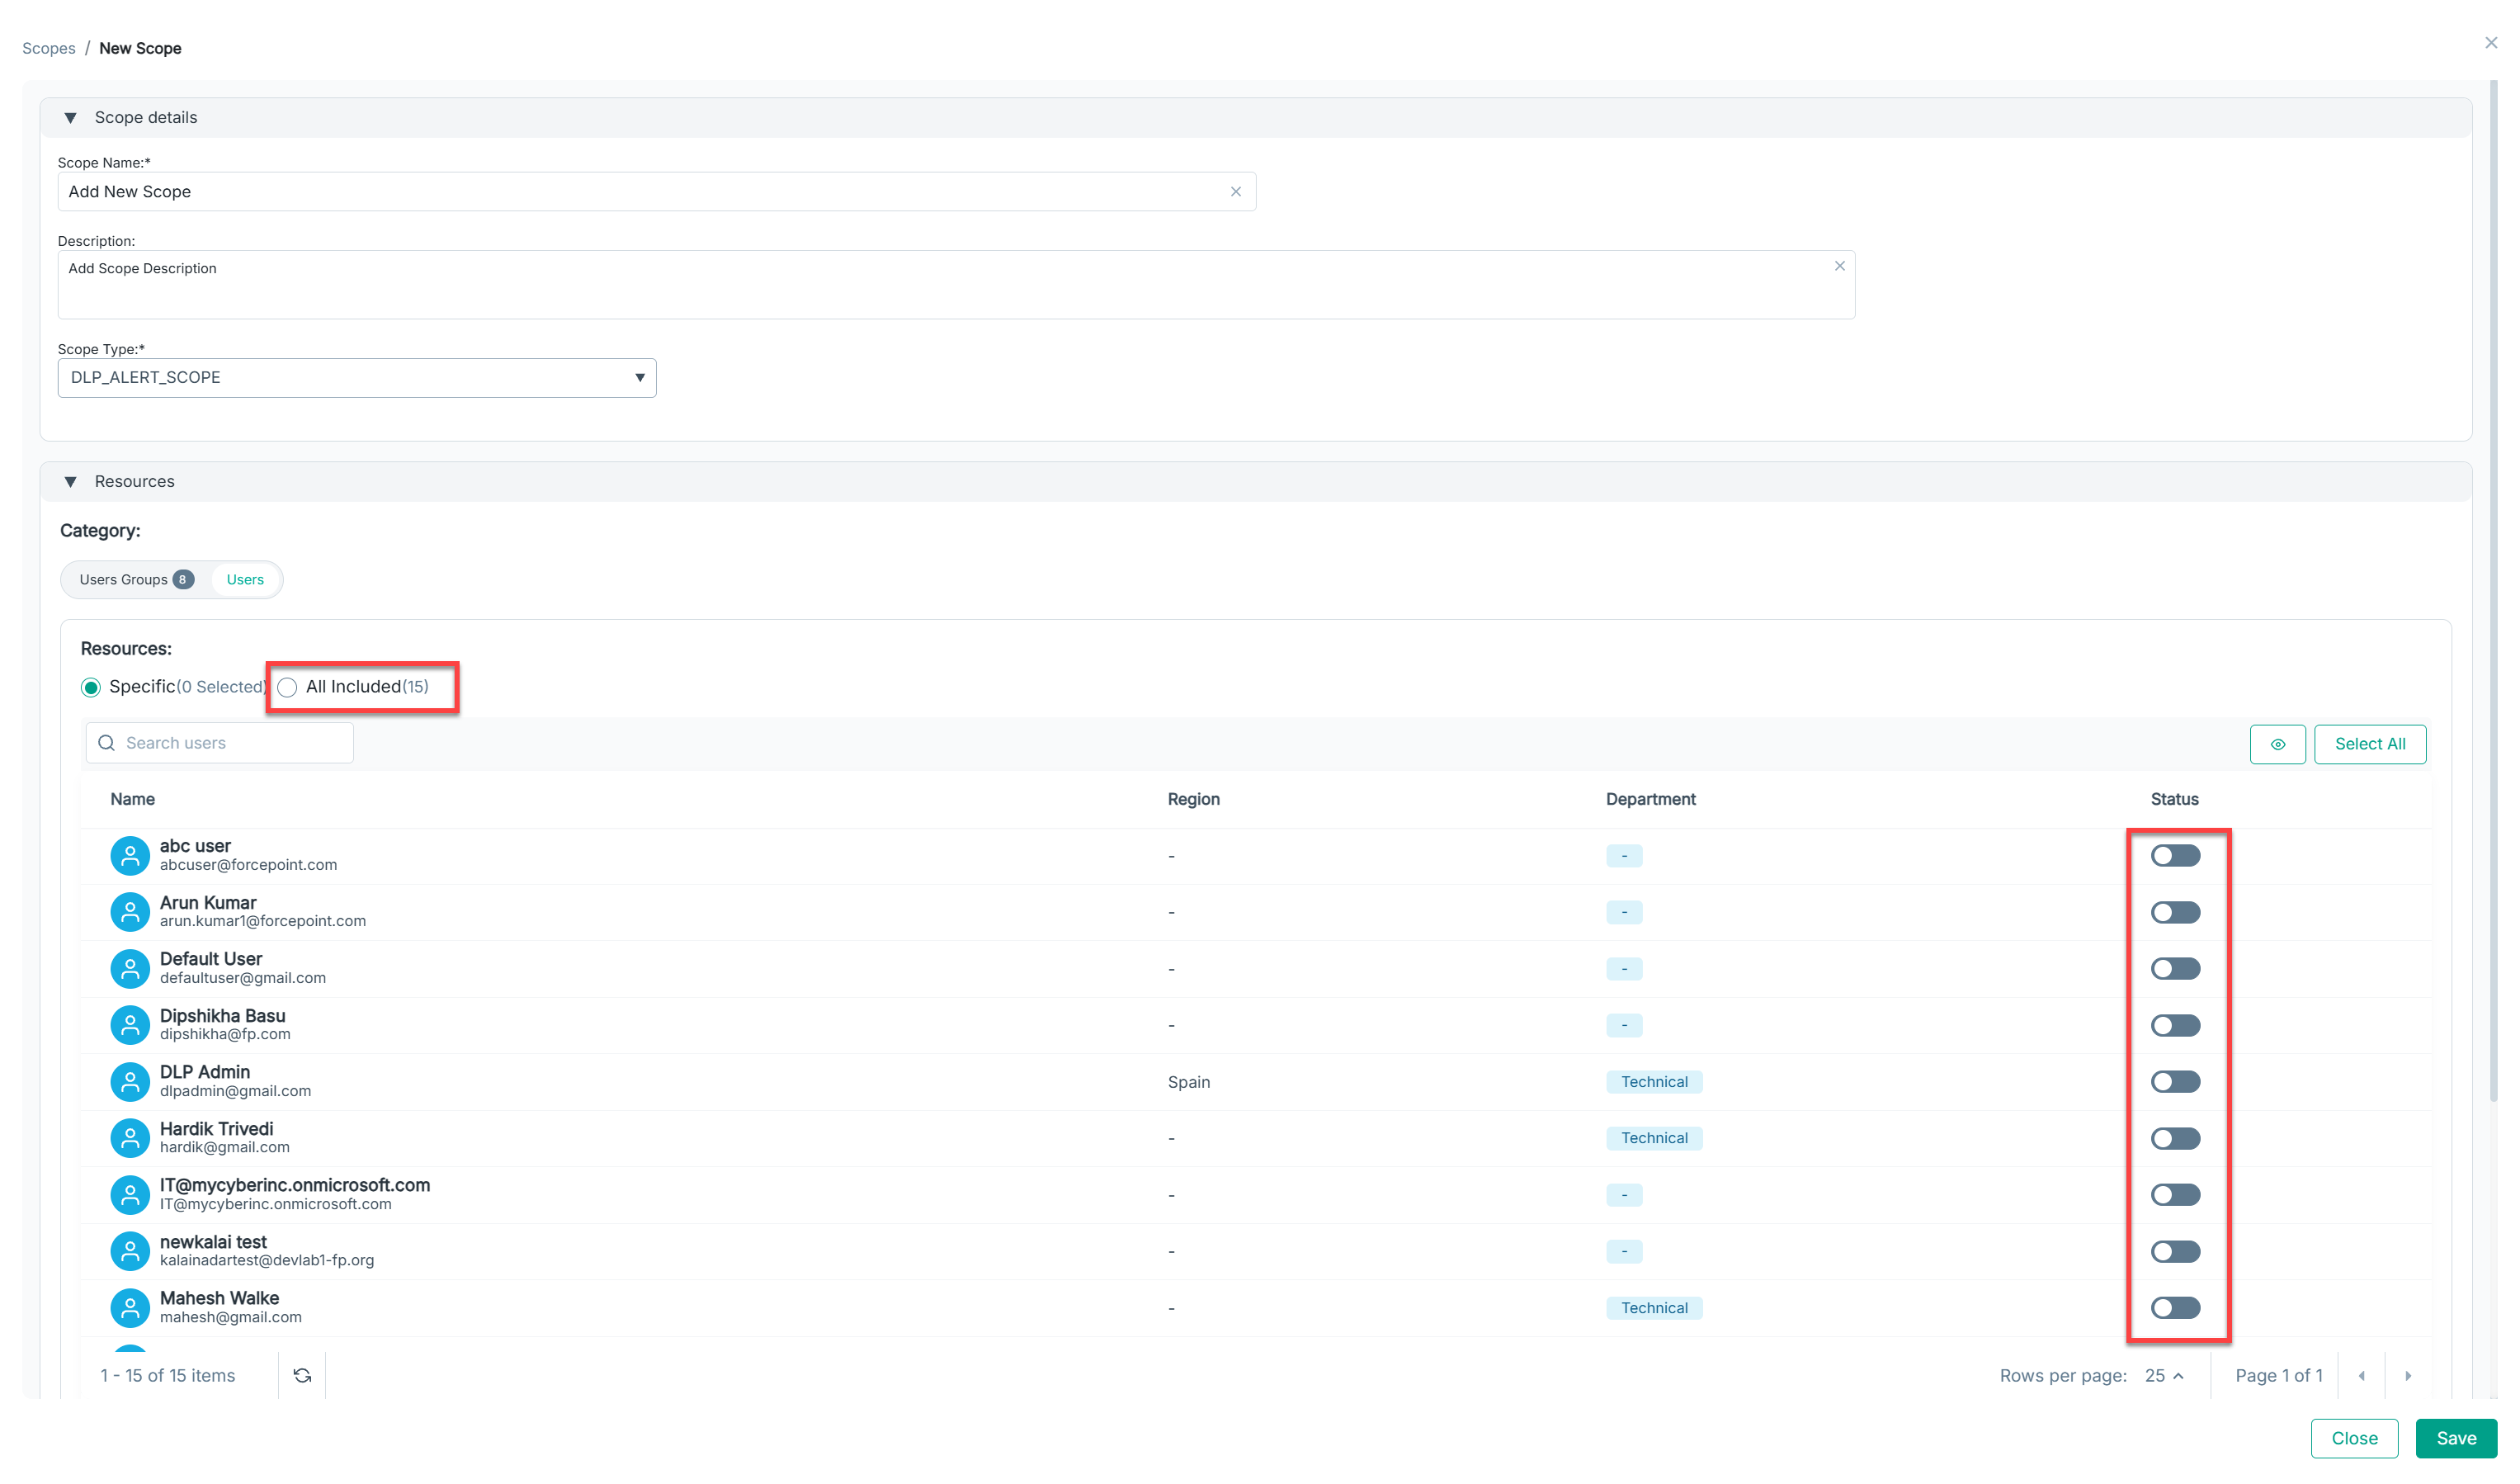
You can either Toggle on specific users or select “All Included” in the Users Category.
-
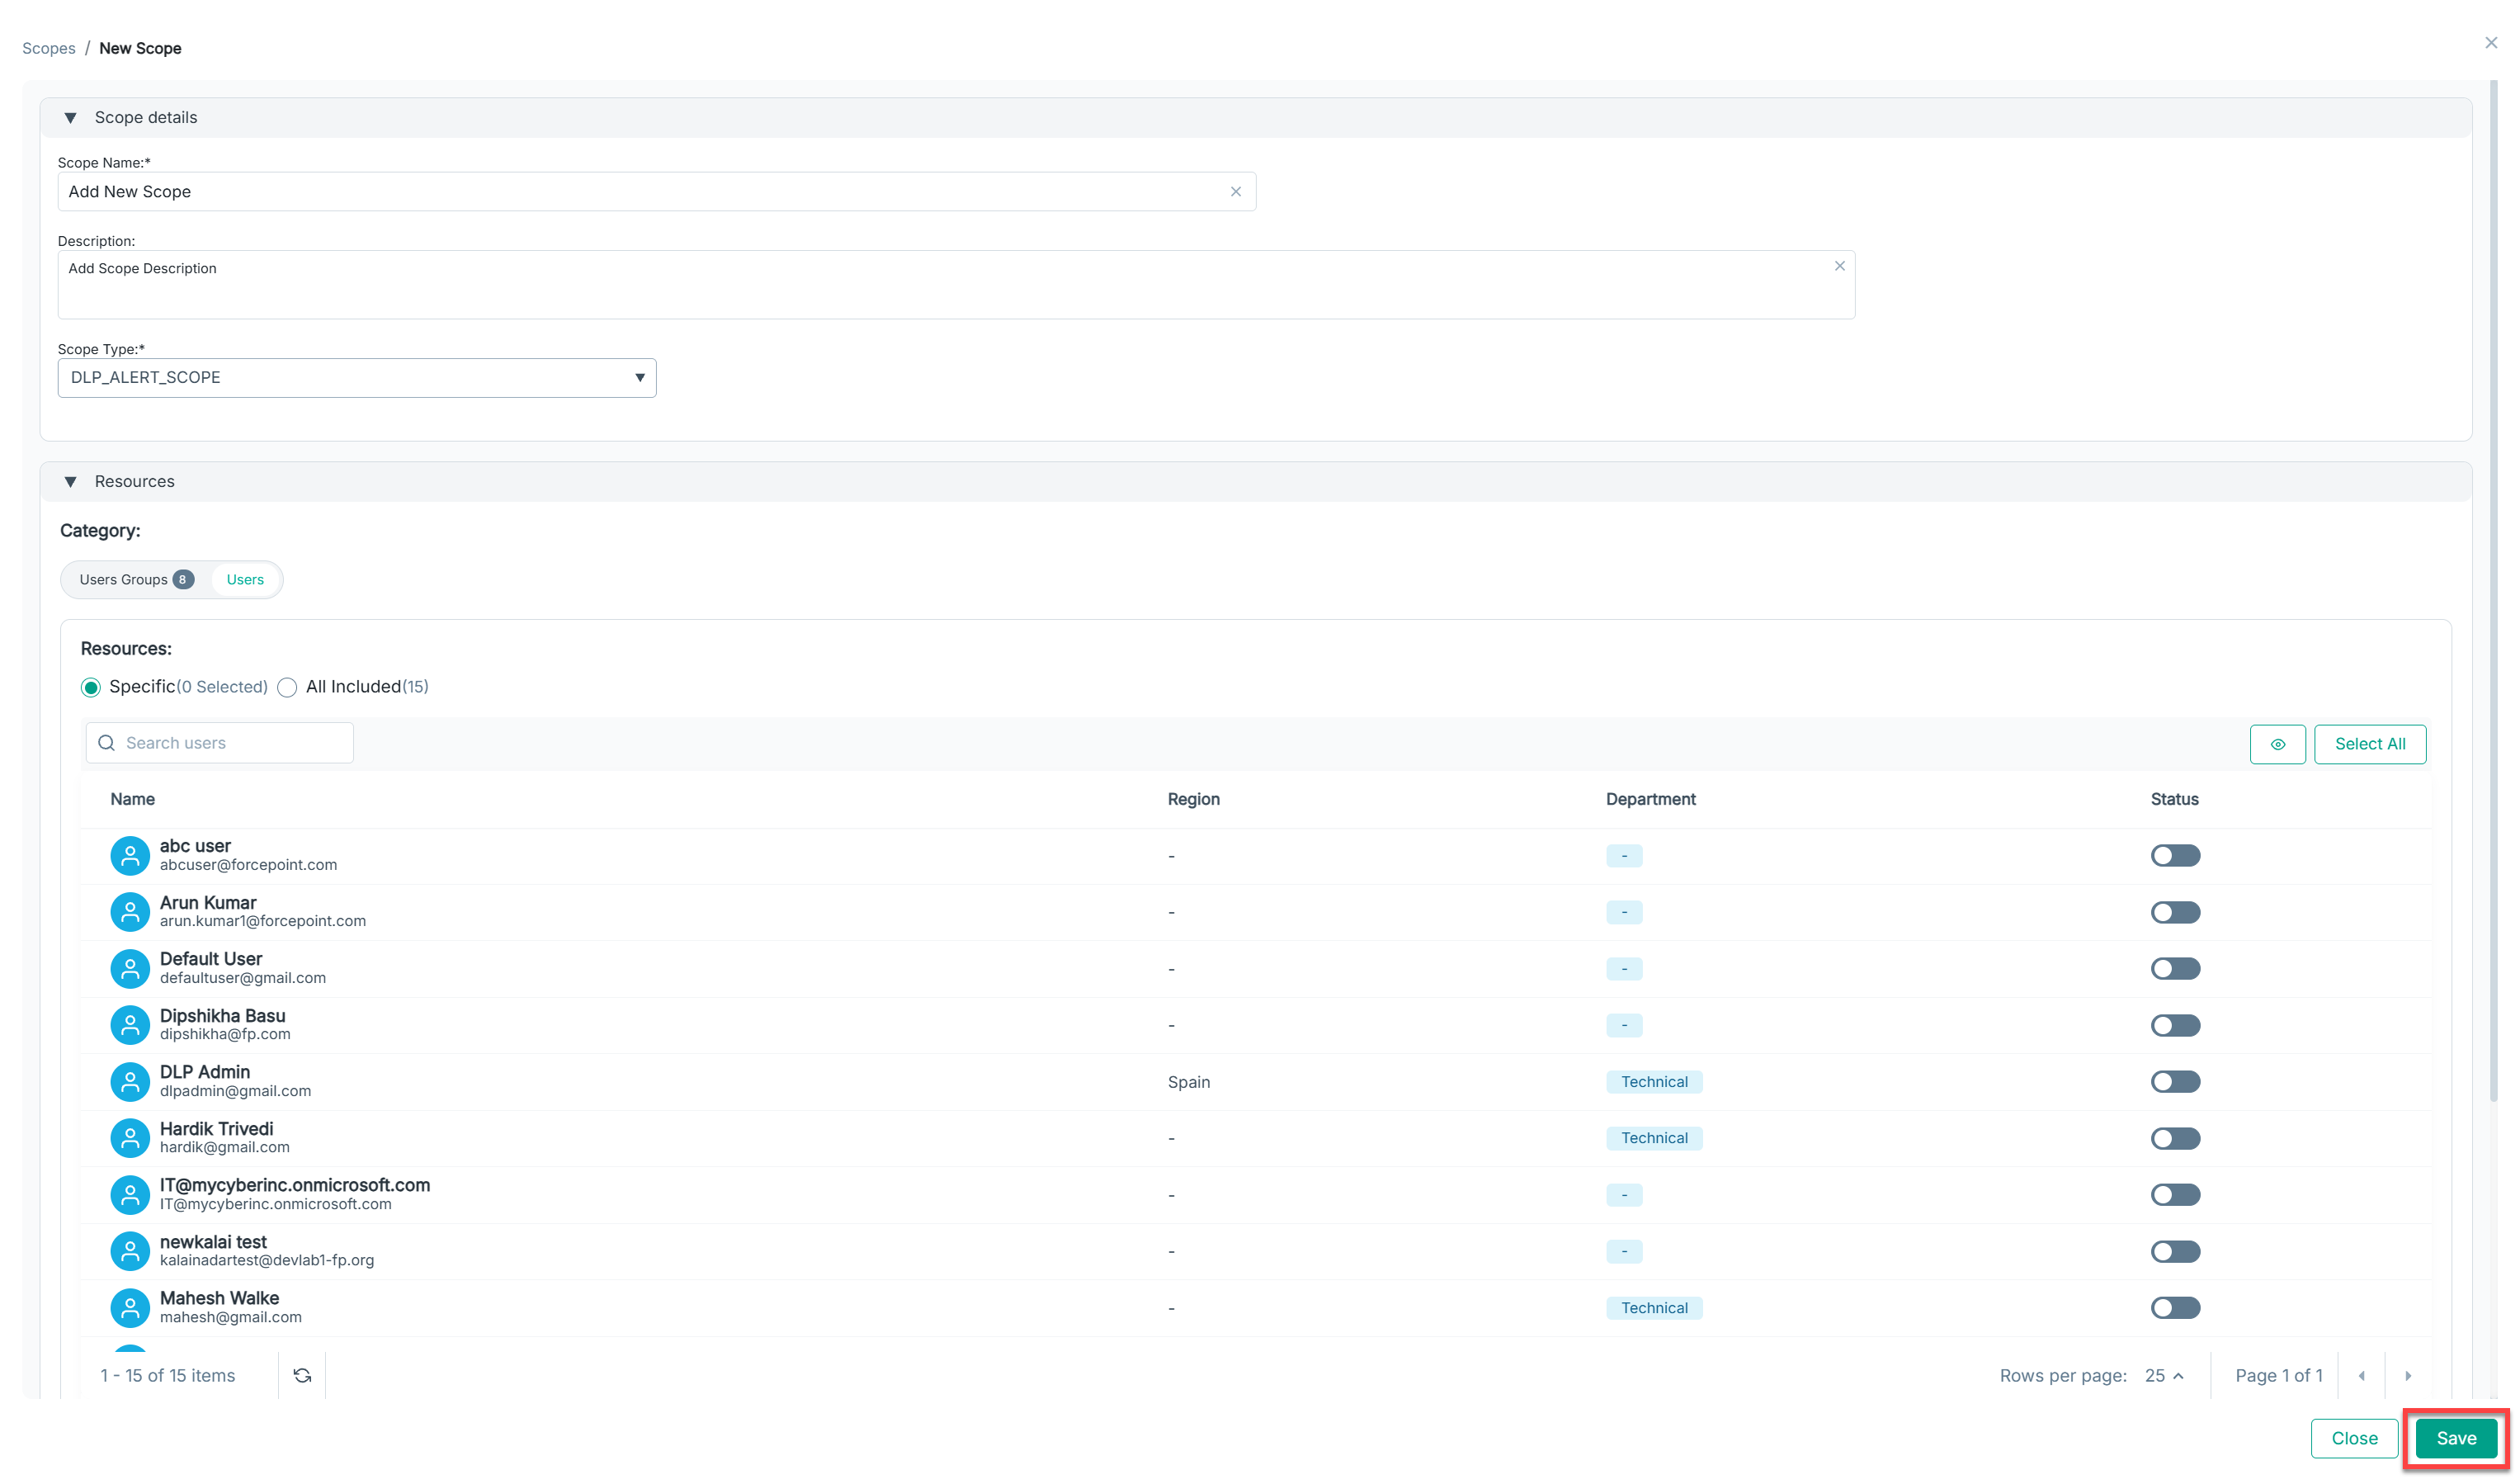
Save the scope. It now appears in the scope list.
-
Back in Add Role, Toggle on the newly created scope if desired.
Note: You can also use the Seach Box to find your newly added scope. -
Save the role. That role now has the scope included.