You can edit the information for an existing SAML profile through the SAML Identity Providers page.
Steps
-
Sign in to Forcepoint Data Security Cloud.
-
From the application waffle, select Admin.
-
From the left Navigation Pane, click the SAML
 icon.
icon.
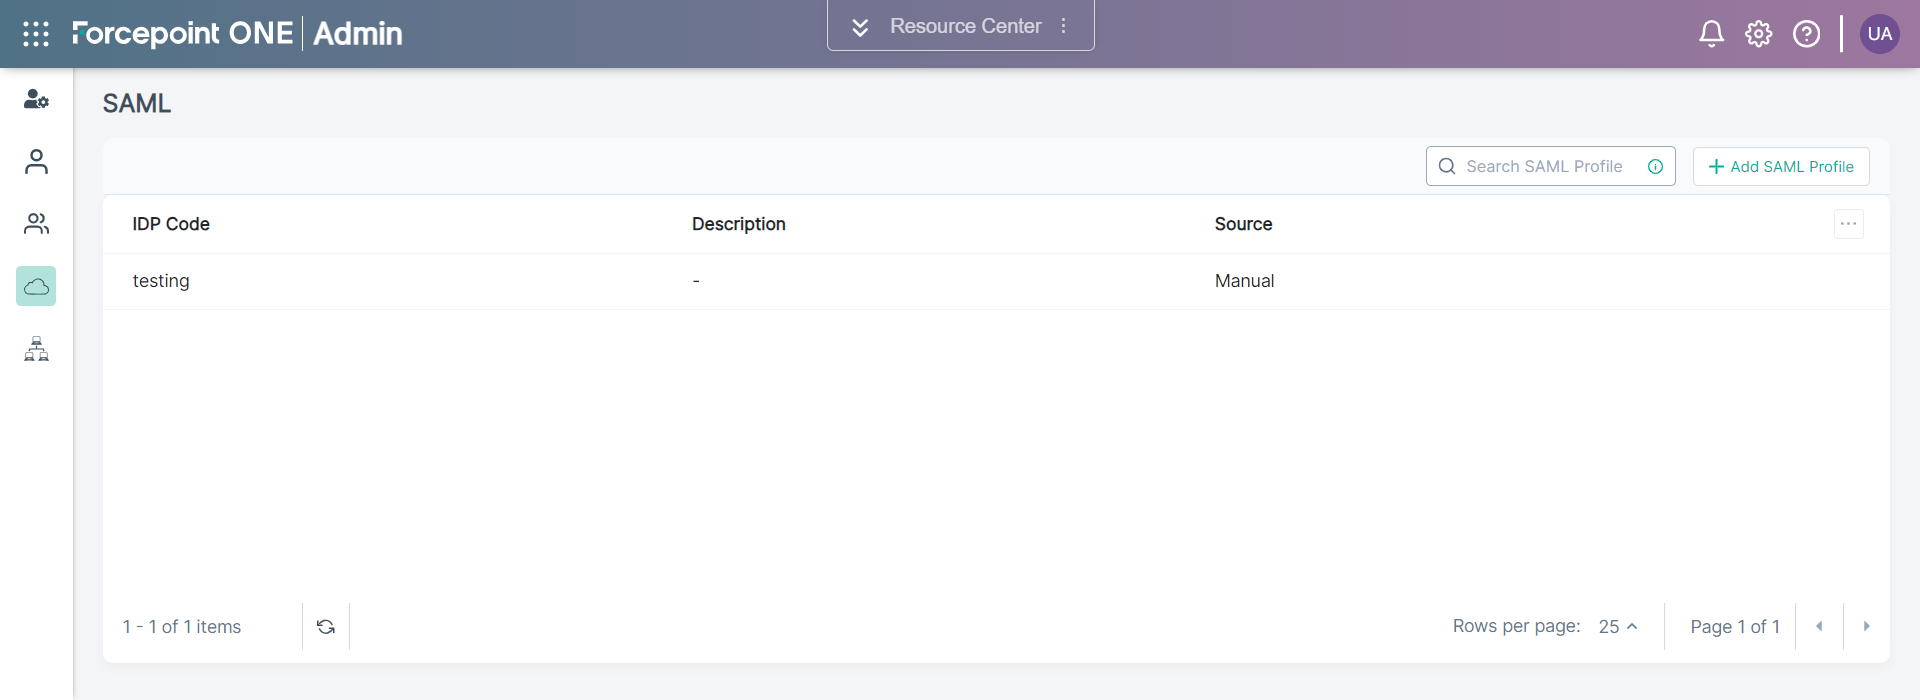
The following page opens displaying existing SAML Profiles.
-
Select the specific SAML profile from the list which you want to edit. This opens the editor.
-
Edit the SAML profile as needed.
-
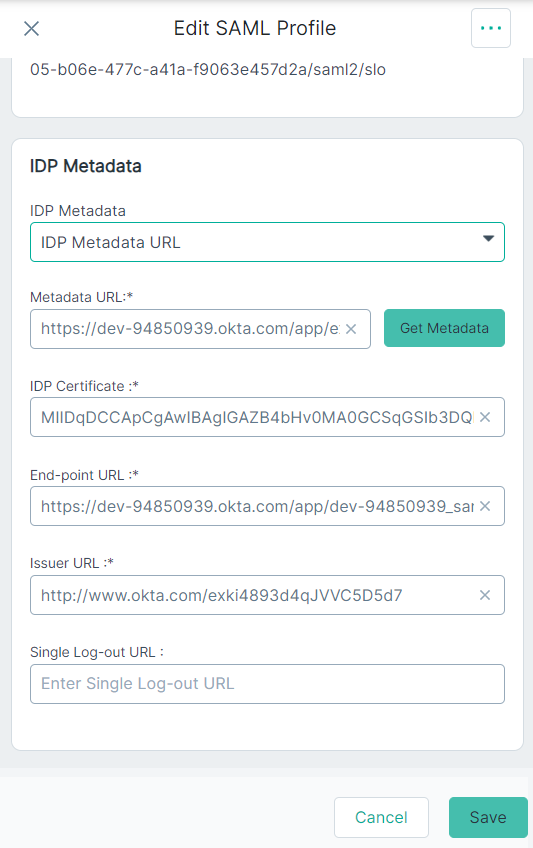
On the IdP Metadata section, select one of the following option from the IdP Metadata drop-down to define how Forcepoint Data Security Cloud gets the SAML identity provider metadata.
- Manual (default) - Select the Manual option to manually enter all the required metadata information.
- IDP Metadata URL - Select the IDP Metadata URL option to pull IdP metadata information from an URL.
- IDP Metadata File - Select the IDP Metadata File option to pull IdP metadata information from an XML file.
-
If you have selected Manual from the IdP Metadata drop-down, then the following fields are displayed:
- IdP Certificate: The SAML identity provider certificate.
- End-point URL: The SAML identity provider endpoint URL to which the SAML authentication request is sent.
- Issuer URL: A unique identity provider identifier where the security assertion originated.
- Single Log-out URL: The SAML URL for logging out of the identity provider.
-
If you have selected IDP Metadata URL from the IdP Metadata drop-down, then the following fields are displayed:
- Metadata URL: The SAML metadata URL from the identity provider. After you provide the URL, click Get Metadata to auto-populate
the other fields.
- IdP Certificate: The SAML identity provider certificate.
- End-point URL: The SAML identity provider endpoint URL to which the SAML authentication request is sent.
- Issuer URL: A unique identity provider identifier where the security assertion originated.
- Single Log-out URL: The SAML URL for logging out of the identity provider.
-
If you have selected IDP Metadata File from the IdP Metadata drop-down, then the following fields are displayed:
- IdP Metadata File: The SAML metadata file from the identity provider. After you provide the metadata file, the other fields auto-populate.
- IdP Certificate: The SAML identity provider certificate.
- End-point URL: The SAML identity provider endpoint URL to which the SAML authentication request is sent.
- Issuer URL: A unique identity provider identifier where the security assertion originated.
- Single Log-out URL: The SAML URL for logging out of the identity provider.
-
To save the changes made, click Update.
-
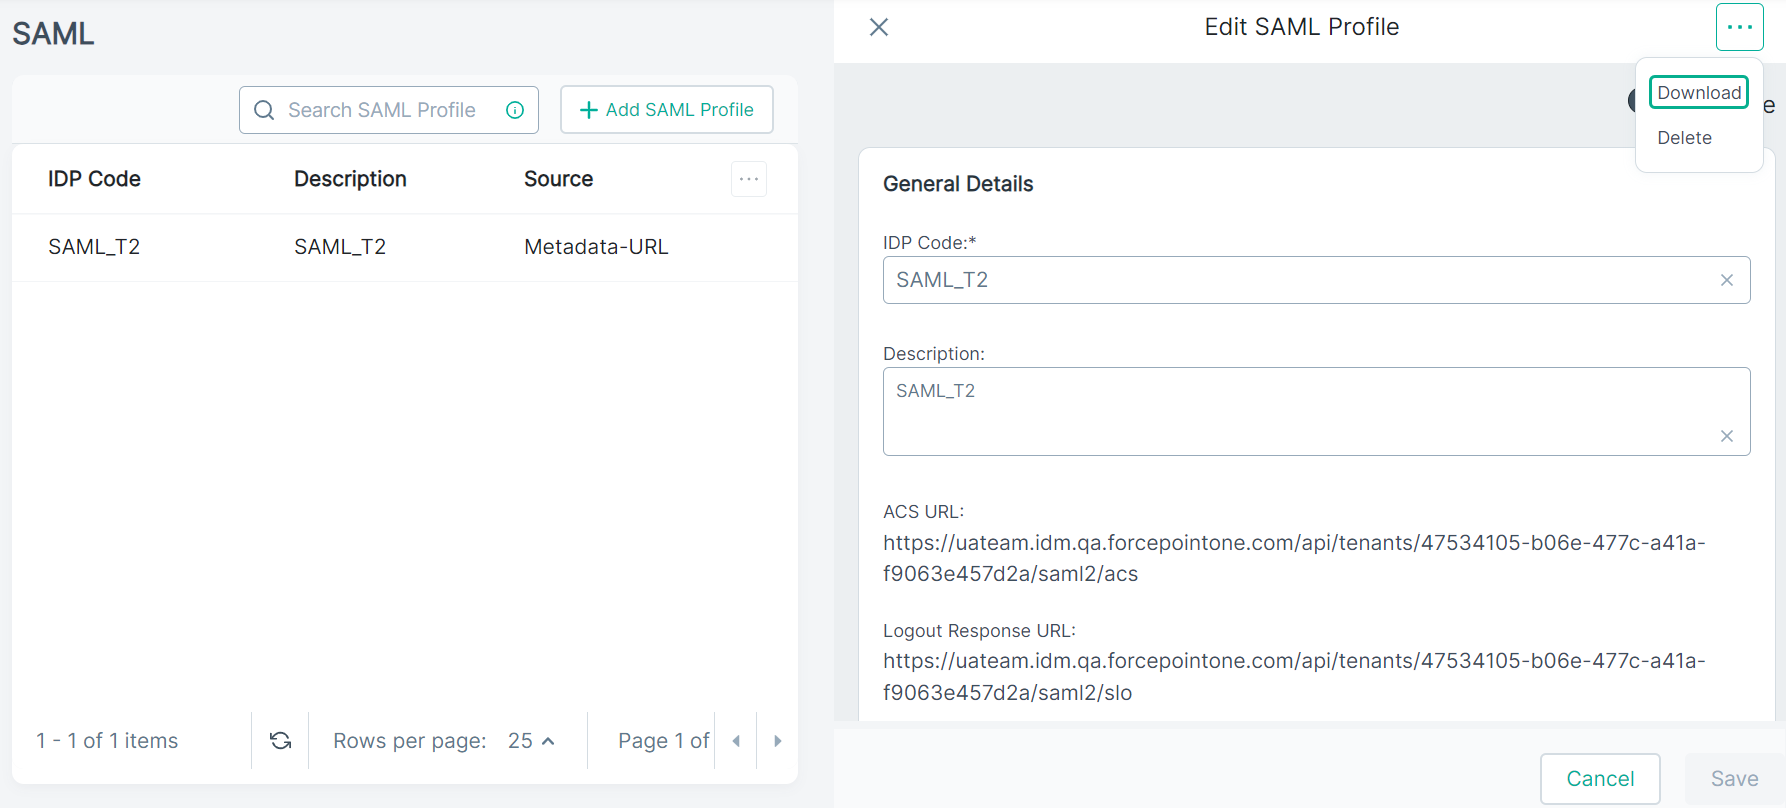
To download and use the SPMetadata.xml file to configure the identity provider, follow the steps below:
-
Click the SAML Profile to view the SAML profile details.
-
Place your mouse pointer on the
 icon and then click
Download.
icon and then click
Download.
A metadata file gets downloaded. Use the same metadata file while configuring identity provider.