Creating role and assigning permissions
If you have chosen to create your own account/role that will have only the necessary read permissions for the API authorization, you will first need to use an admin account with elevated permissions to create the role and assign it the proper permissions.
- OAuth_Admin role: This role will give the account permission to create applications under OAuth that is needed to connect Forcepoint Data Security Cloud | SSE to ServiceNow. This role is not necessary if your primary admin account will be creating the OAuth application for you.
- sys_dictionary: Need read access to this table which defines data dictionary, data modeling, and entity relationship information in multiple tables.
- sys_dictionary.*:Need read access to this table also to ensure you are covering all tables.
- sys_db_object: Need read access to this database object which contains a record for each table in the database.
- sys_db_object.*:Also need to add read access to ensure you are including all tables.
- sys_attachment: Need read access to this database object to read file attachments.
- sys_attachment.*: Also need to add read access to ensure you are reading all included tables user has access to.
- sys_glide_object: (This permission might only appear in the Quebec and later releases). Needed to collect information about data types including names, base
types, etc.
Additional table permissions might need to be specified and included if the user does not have default read access to them (ex: incident).
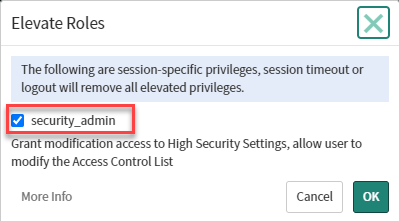
Elevated permissions are needed to create or edit ACL controls. You can elevate permissions by selecting your profile in the upper right and selecting Elevate roles and then check the box for security_admin and saving.

Steps
-
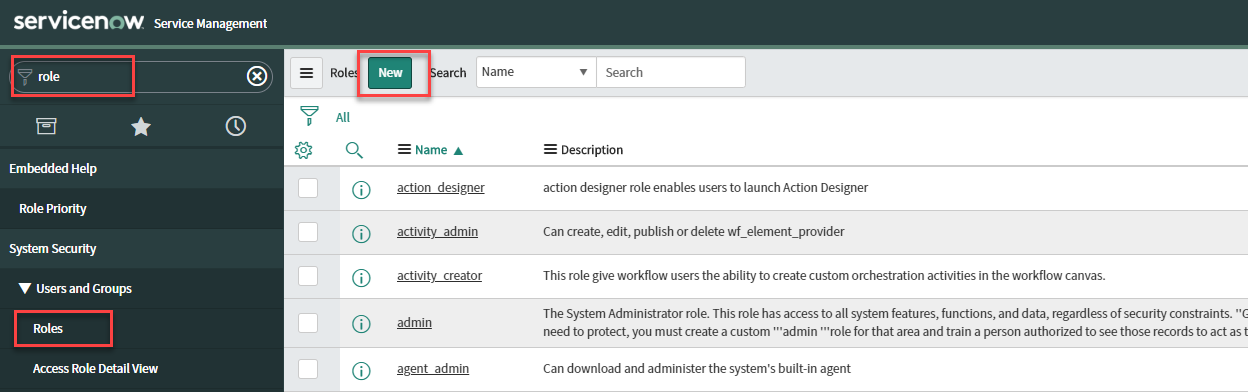
In the ServiceNow admin portal, search for role and select Roles under the Users and Groups section in the
left column. Click New to create a new role.
-
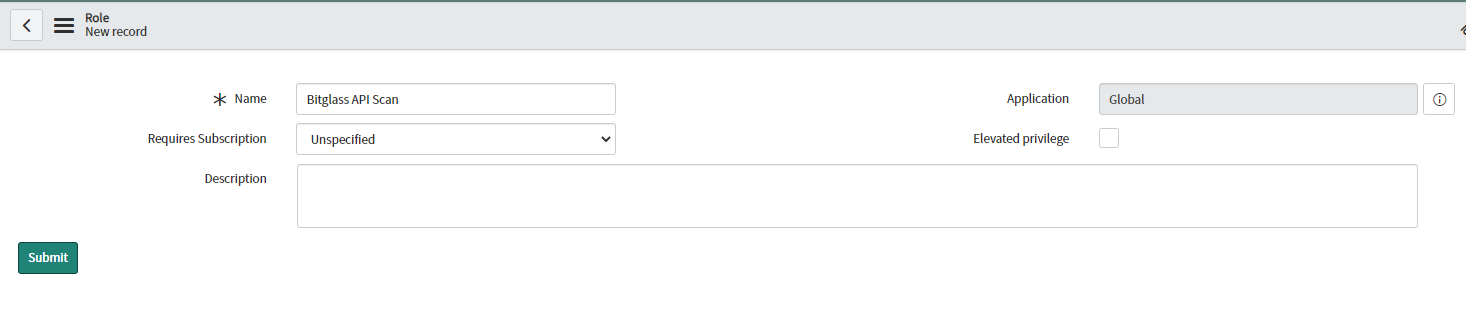
Provide a recognizable name for your new role and click Submit.
-
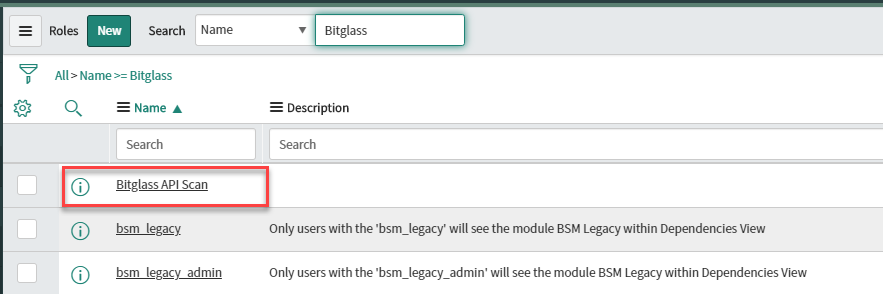
If you are not adding the OAuth role, skip to step 5. Otherwise, after clicking Submit, you will be taken back to the Roles table
page. Search for your new role and select it to edit. In that roles settings page select Edit under the Contain Roles tab.
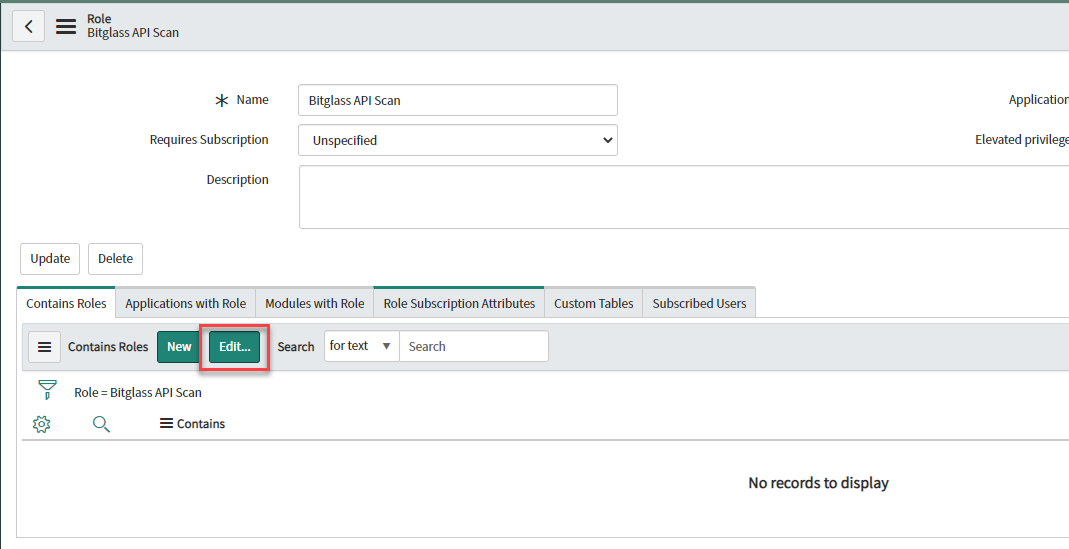
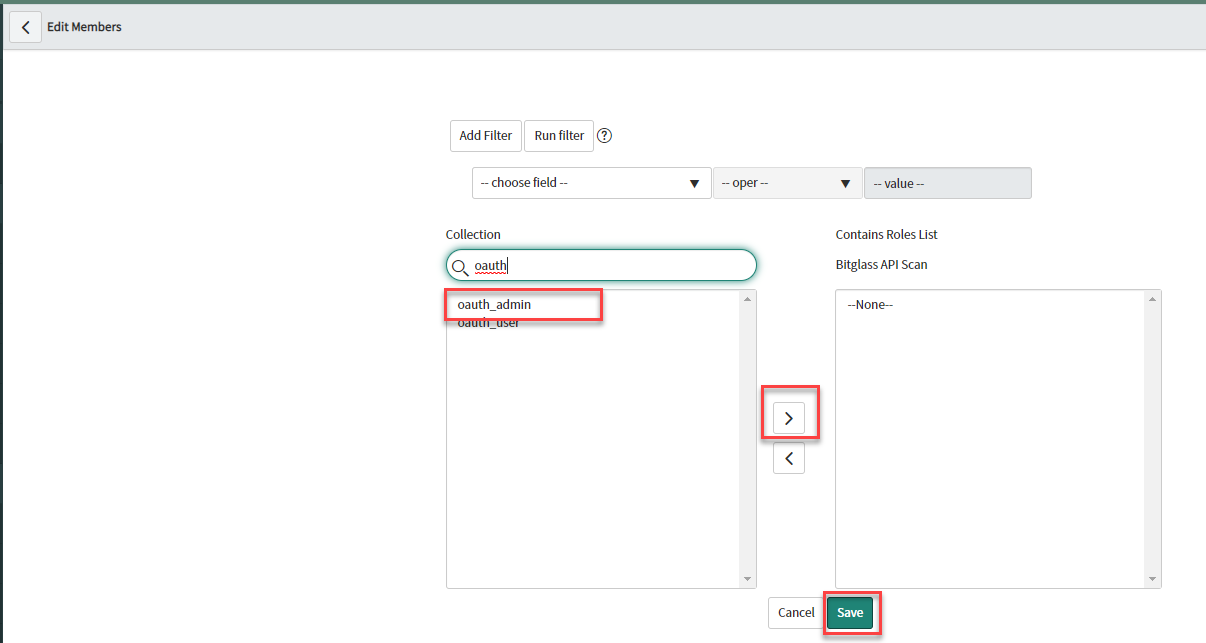
-
In the new window, search for oauth and add the oauth_admin role by selecting it and clicking the arrow to move it to the right box
and then Save when you are done.
-
Now search for acl in the left bar and select Access Control (ACL) under the System Security section in the
left column.
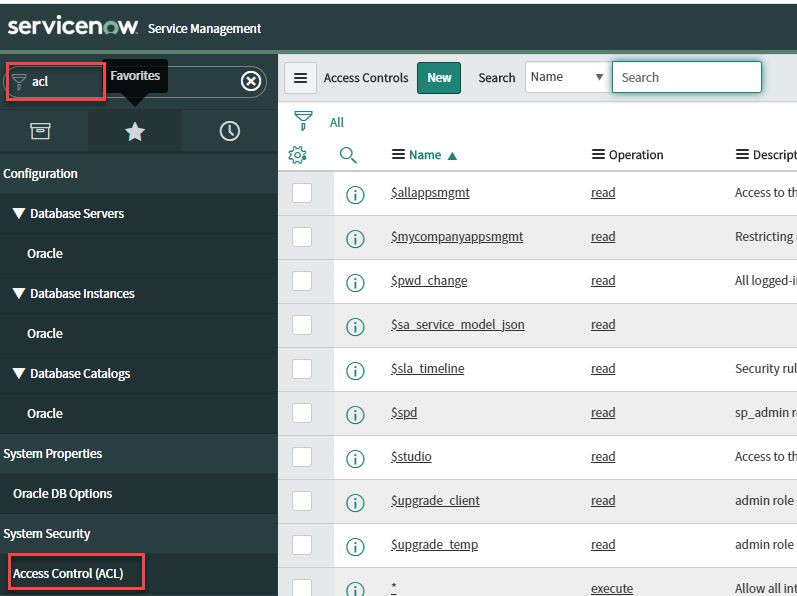
-
There are two approaches for this next step. You can either search for the already existing permissions for the 3 listed above or you can create new ones and then assign your role
to it. For these instructions we will be searching for the existing permissions.
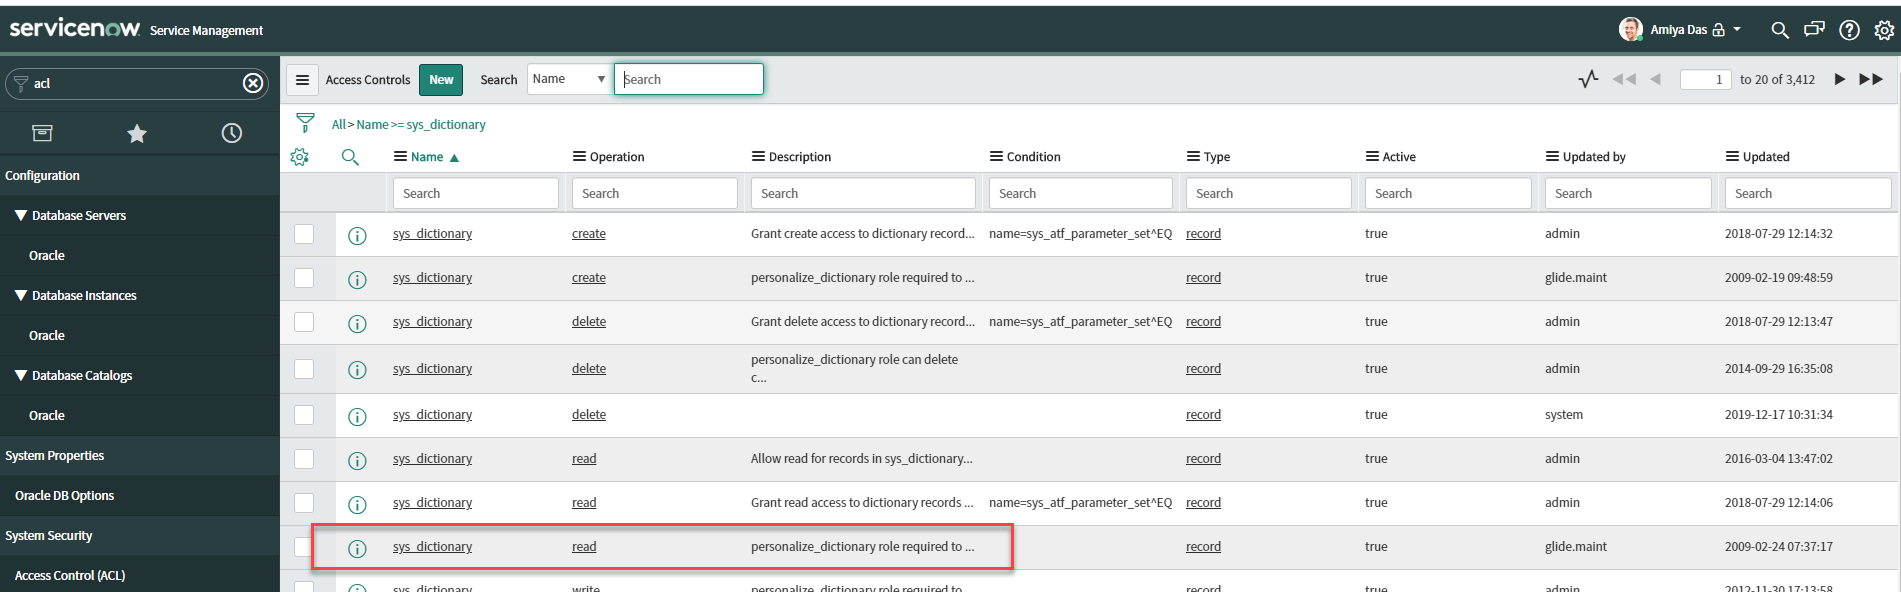
-
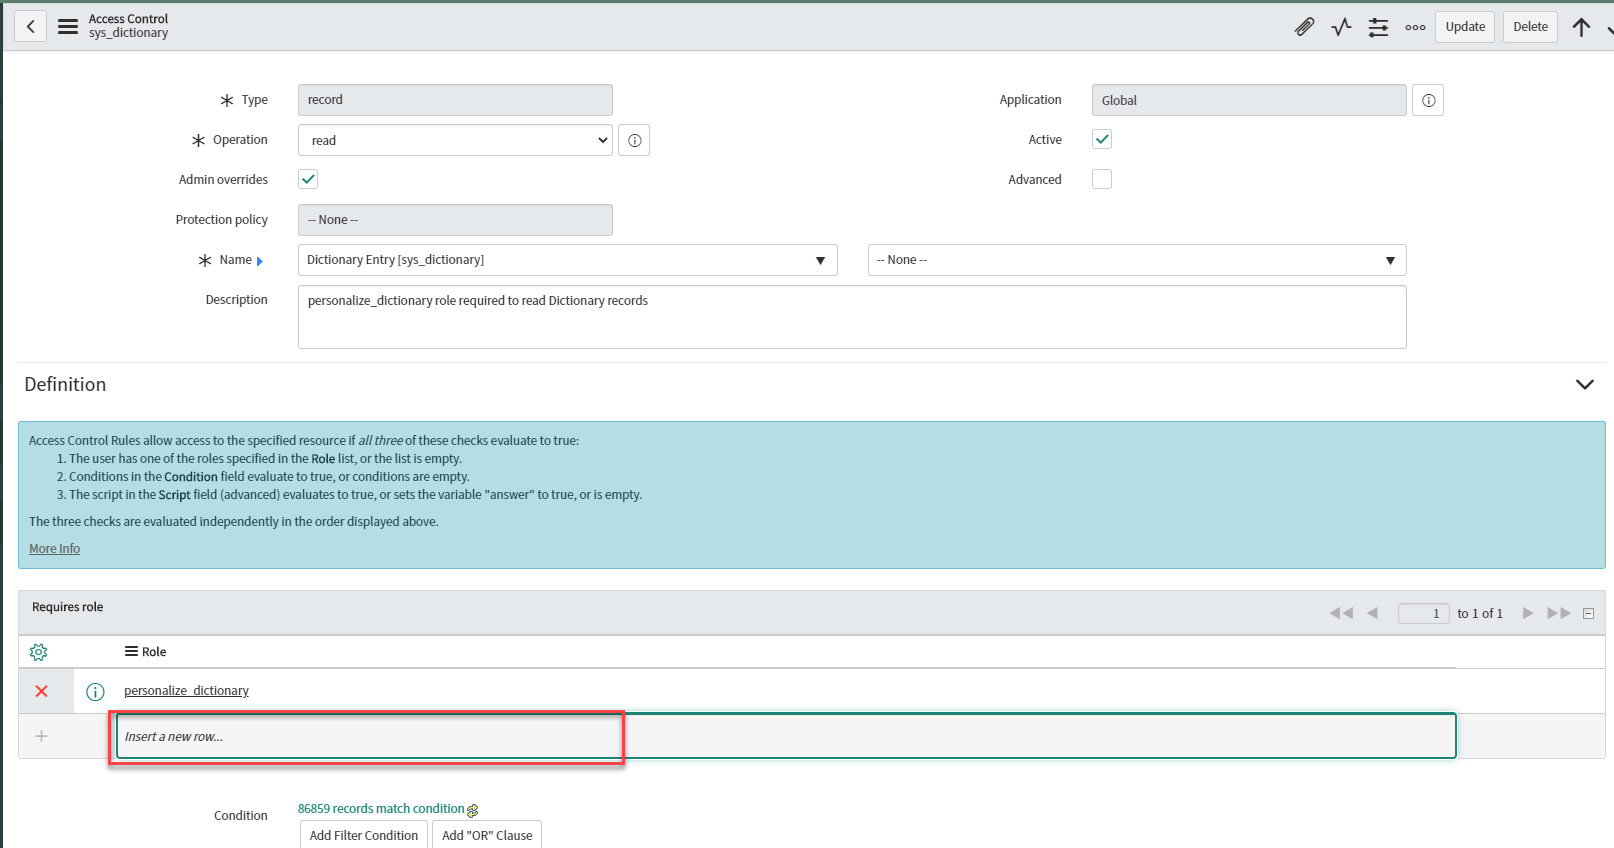
Search by Name for sys_dictionary, you will see a few options. We only need one of the ones that has read permissions. Click
into that permission and then double click Insert a new row under the Requires role section and then search for your role you
created above. Click the green checkmark and then click update to update the permission.

-
Follow the same directions above for sys_dictionary.*, sys_db_object, and sys_db_object.*,
sys_attachment, sys_attachment.*, and sys_glide_object (sys_glide_object might not appear in
releases prior to Quebec) to add your role to each of those read permissions.
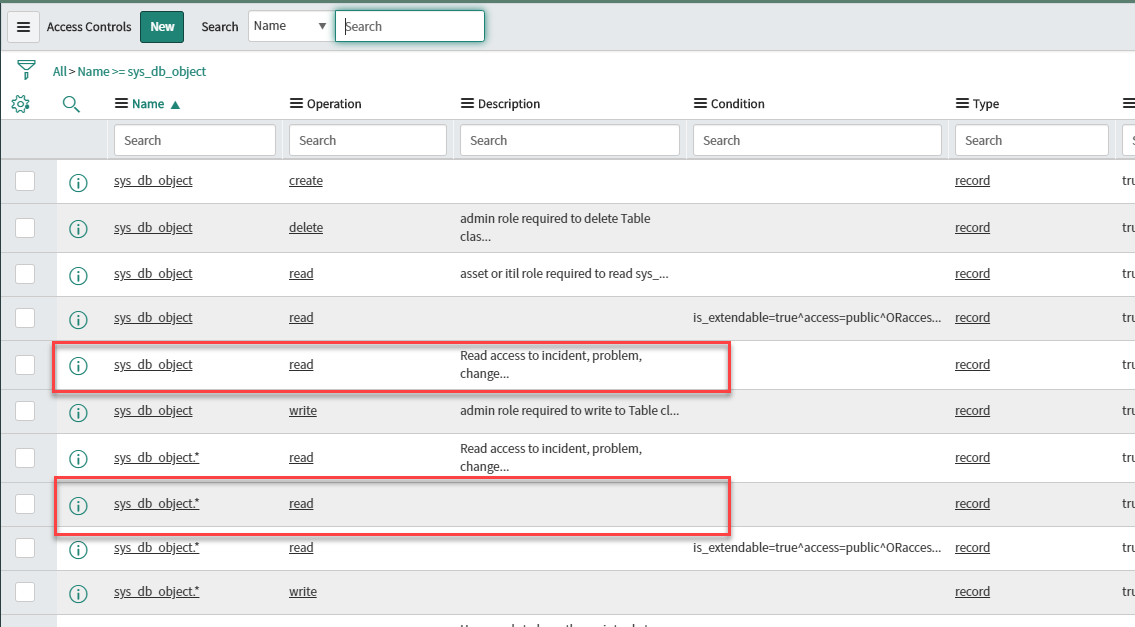
Note:You might see multiple permissions all named the same when searching for the controls. Make sure you add it to one with no additional conditions. These additional permissions are either restricted a bit for certain roles built into ServiceNow or were created by other admins for specific uses.
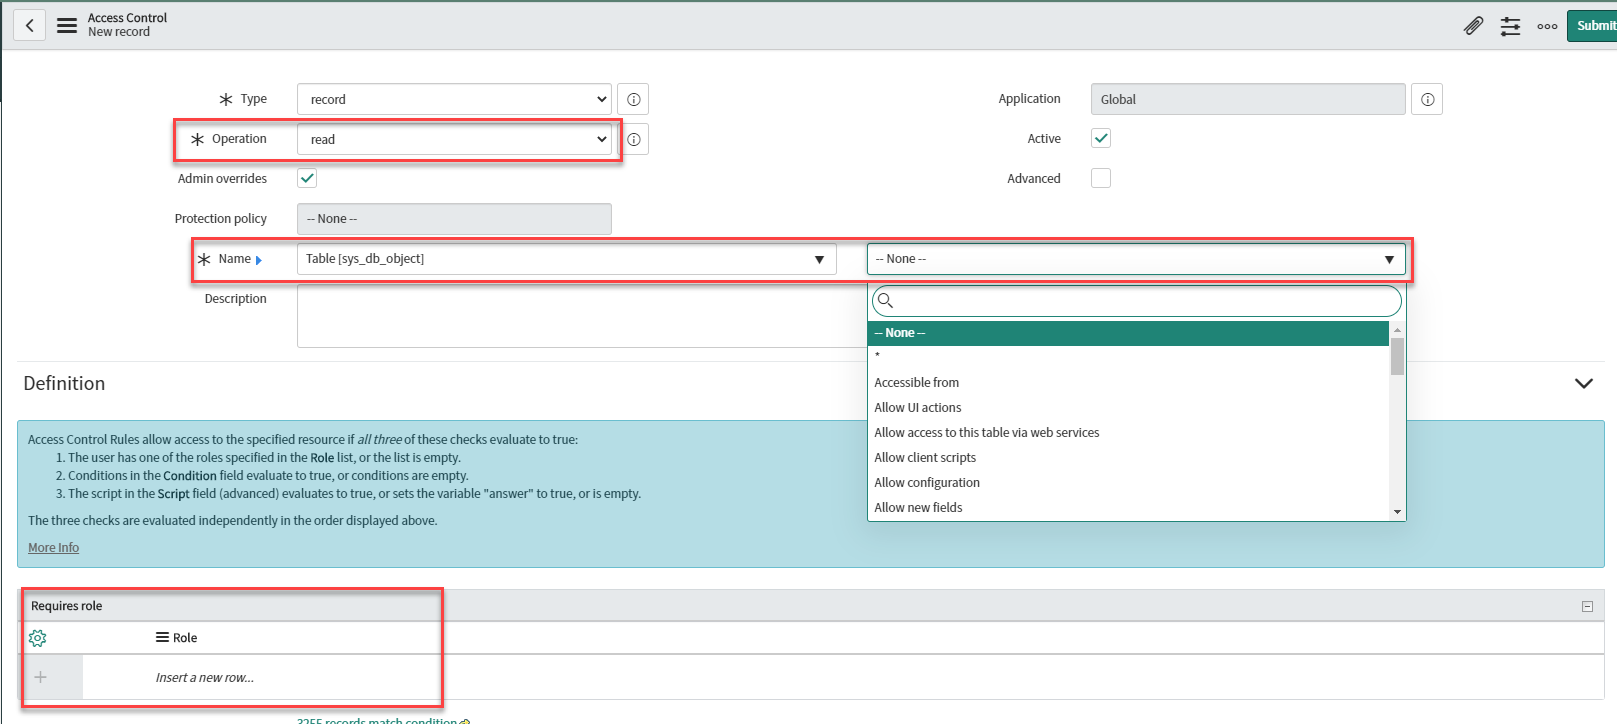
Conversely, you can create your own ACL control for each of sys_dictionary, sys_dictionary.*, sys_db_object, and sys_db_object* by clicking New, setting operation to Read, selecting the control from the Name drop-down, providing a description for you to identify it from the other controls, and then adding your created role to it. Unfortunately you cannot combine all 3 into a single control, so you will need to create each one separately.
-
Search by Name for sys_dictionary, you will see a few options. We only need one of the ones that has read permissions. Click
into that permission and then double click Insert a new row under the Requires role section and then search for your role you
created above. Click the green checkmark and then click update to update the permission.