Configuring Salesforce connected app - Lightning view
Steps
-
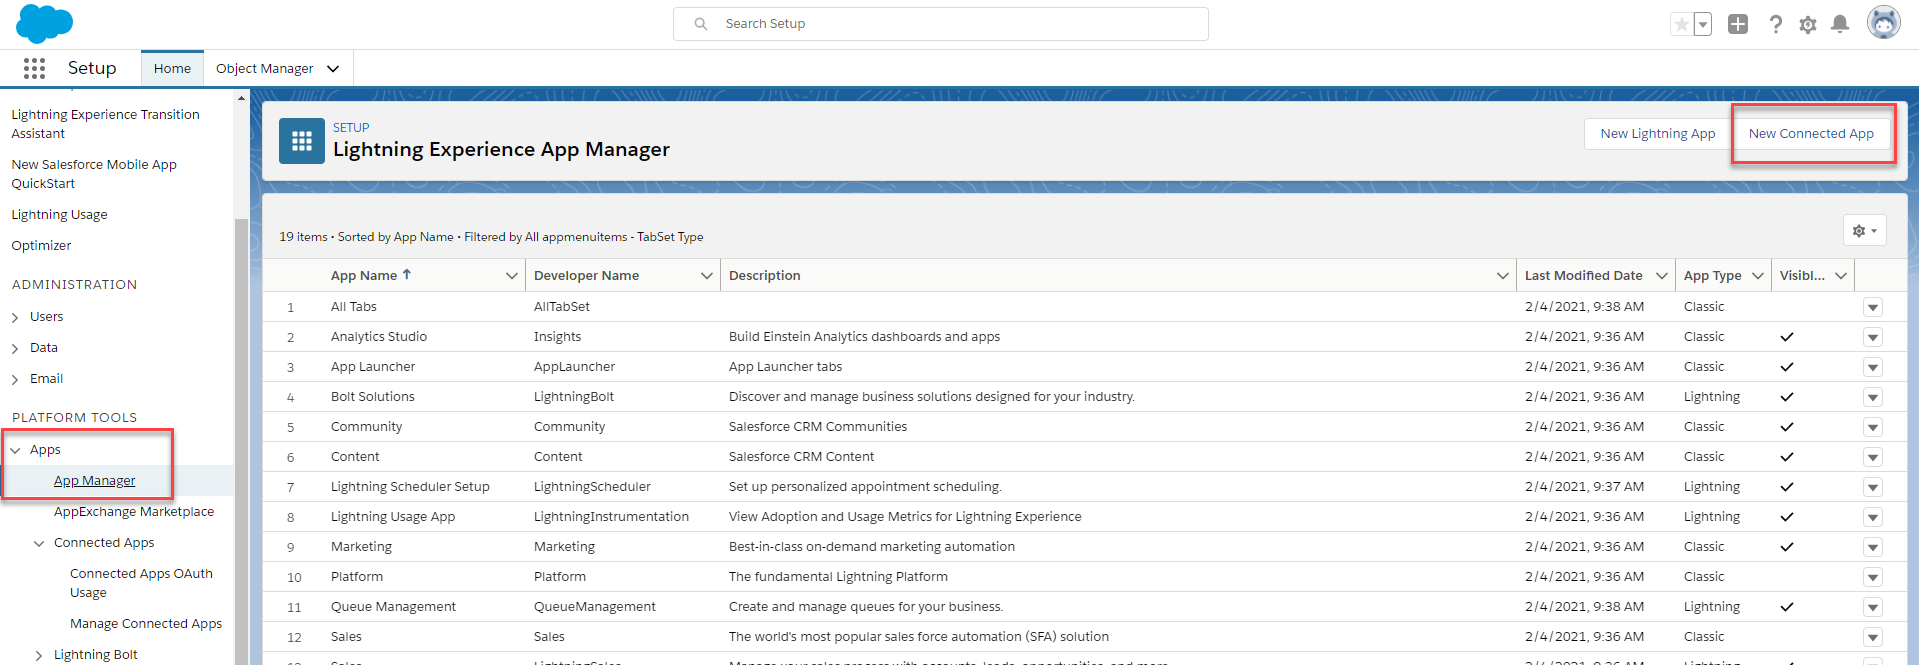
On the top right, click the cog wheel and select Setup.

-
On the Setup page, navigate to page on the left navigation pane and clickNew Connected App.
-
Configure the following required fields and any optional fields as desired (for example, Logo Image) and click Save.
-
Selected OAuth Scopes:
- Manage user data via APIs (api)
- Perform requests at any time (refresh_token, offline_access)
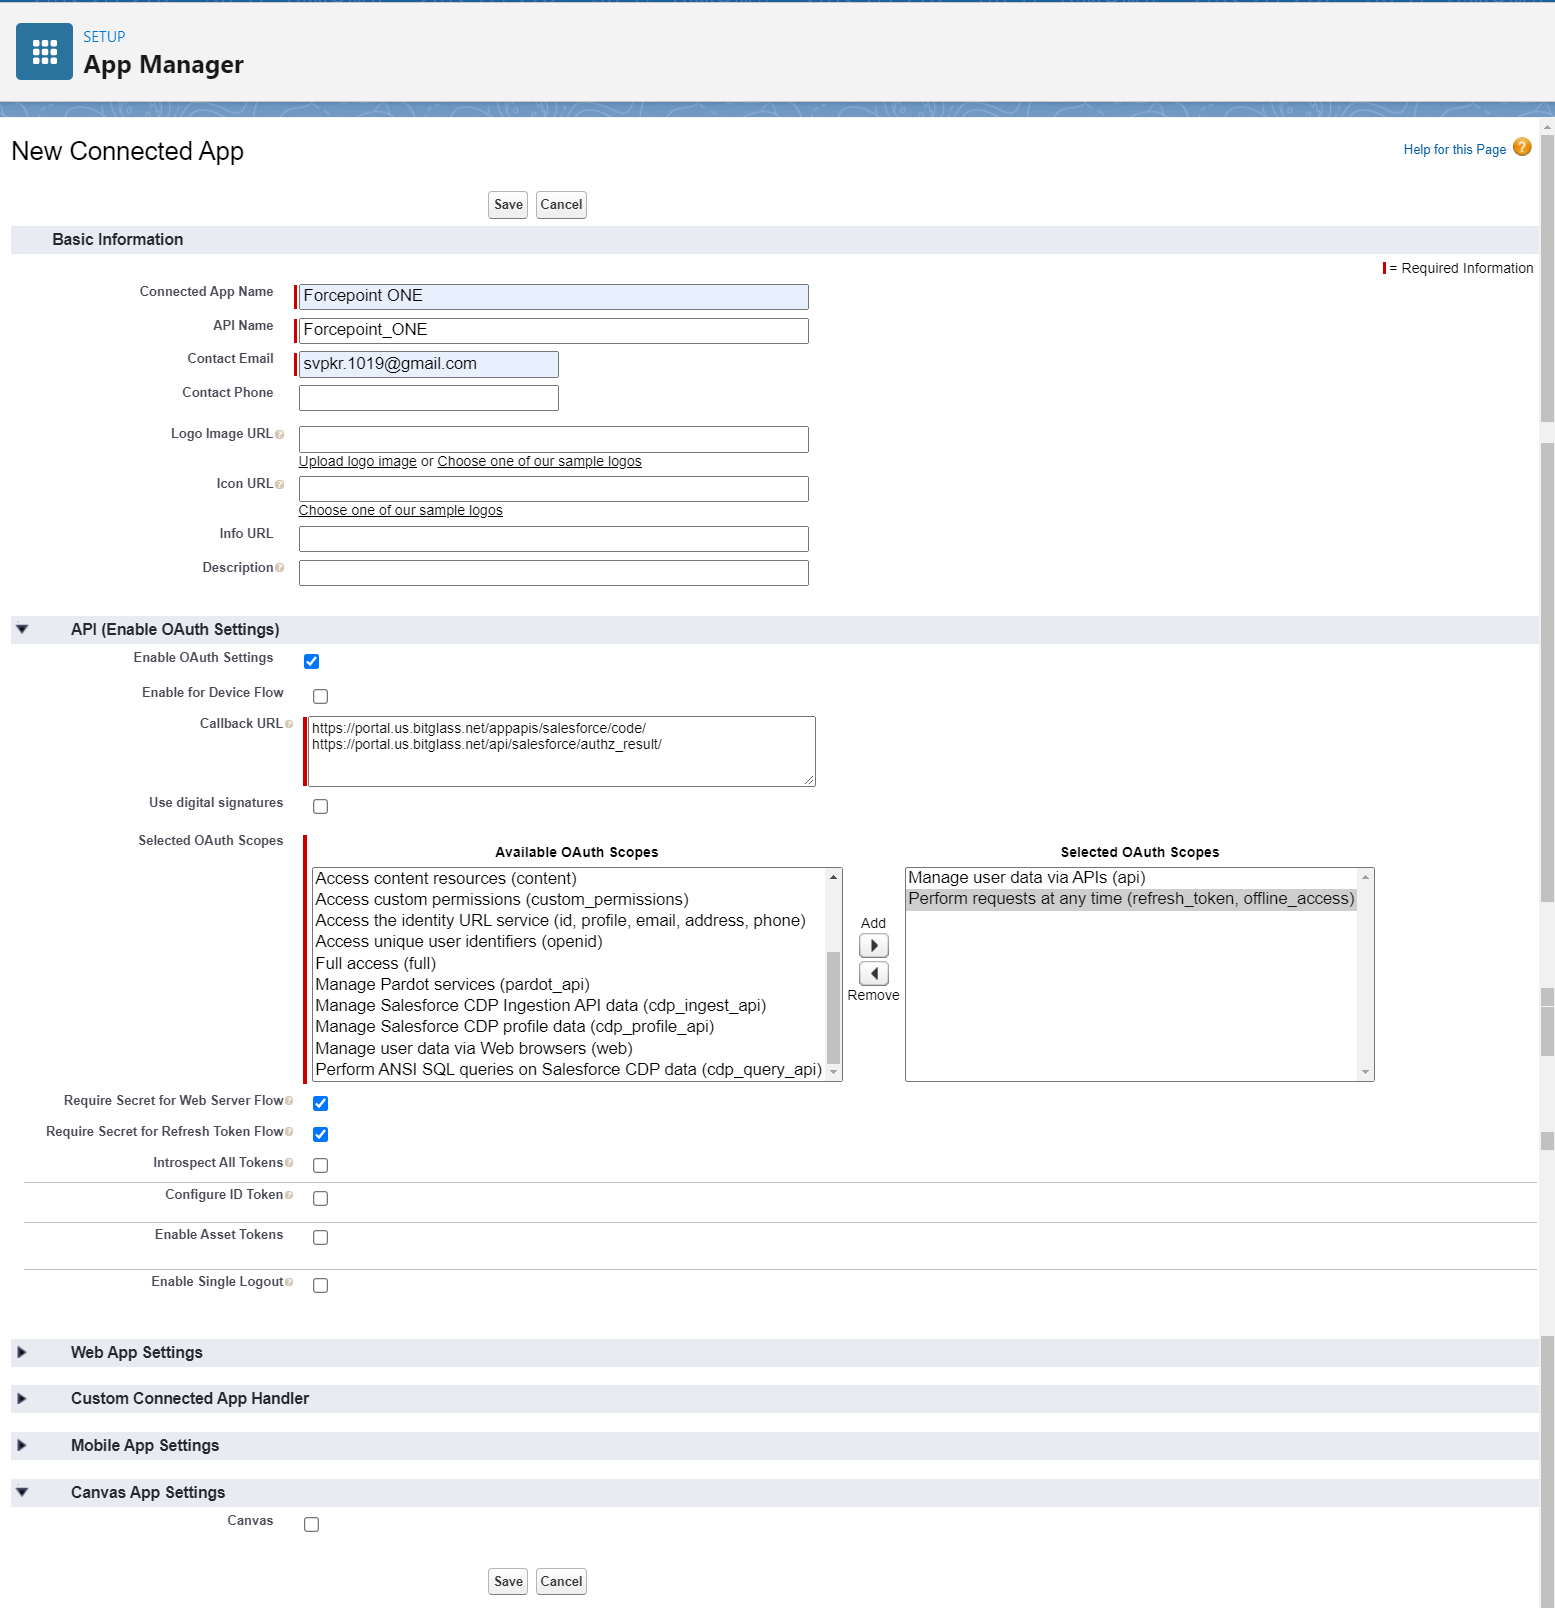
As an alternative, the Full Access (full) OAuth scope can be used. However, this may introduce additional security gaps and may not be acceptable depending on a client's risk tolerance.
For a full list of Salesforce OAuth Scopes and their descriptions, see Salesforce OAuth Tokens and Scopes.
-
Selected OAuth Scopes:
-
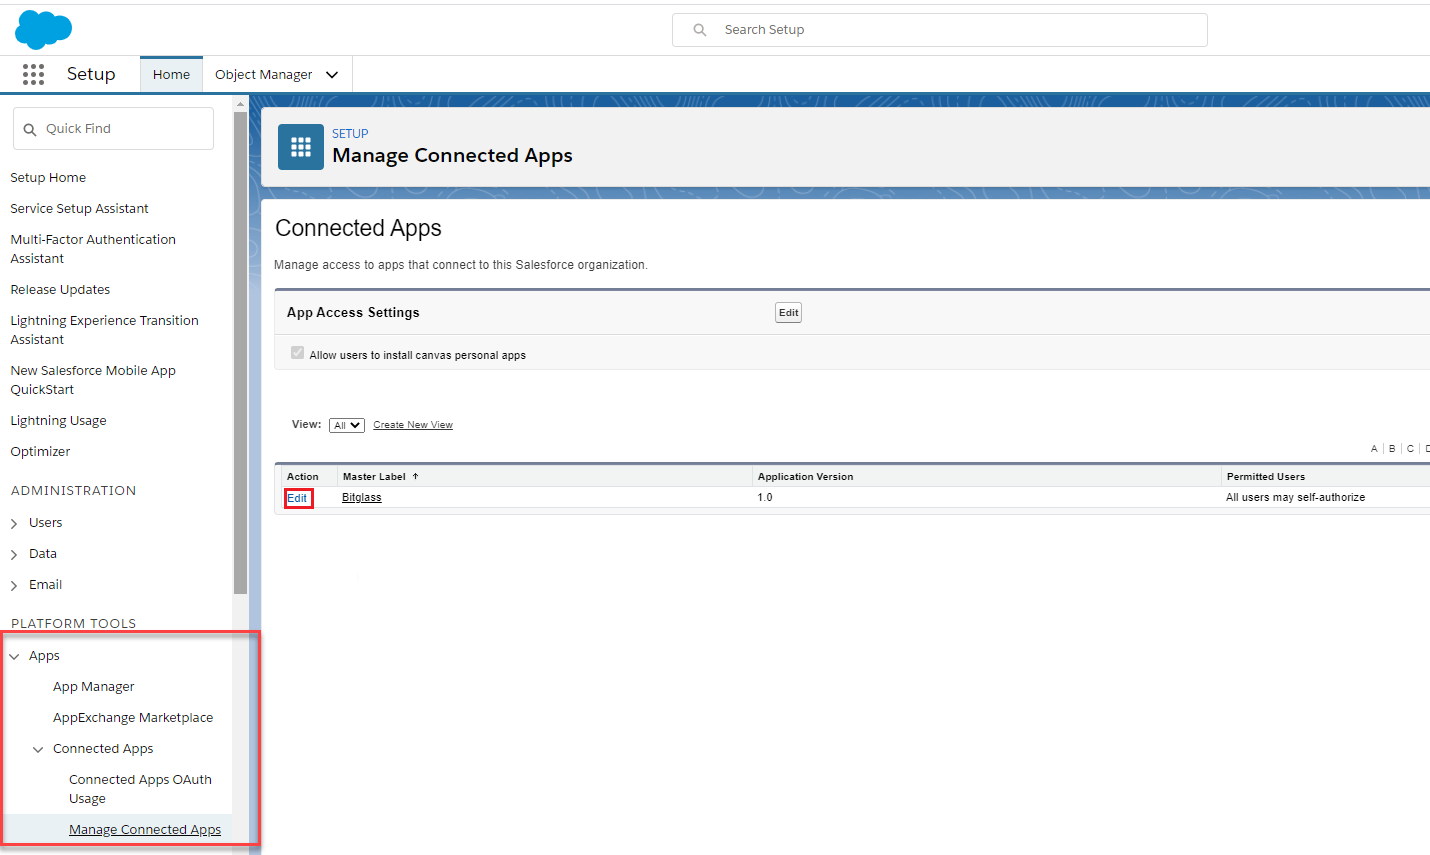
Click on the newly created Forcepoint Data Security Cloud | SSE app in the
Connected Apps table. Keep this page open for the next section as you will need the consumer key and secret for authorizing the API in Forcepoint Data Security Cloud | SSE.

-
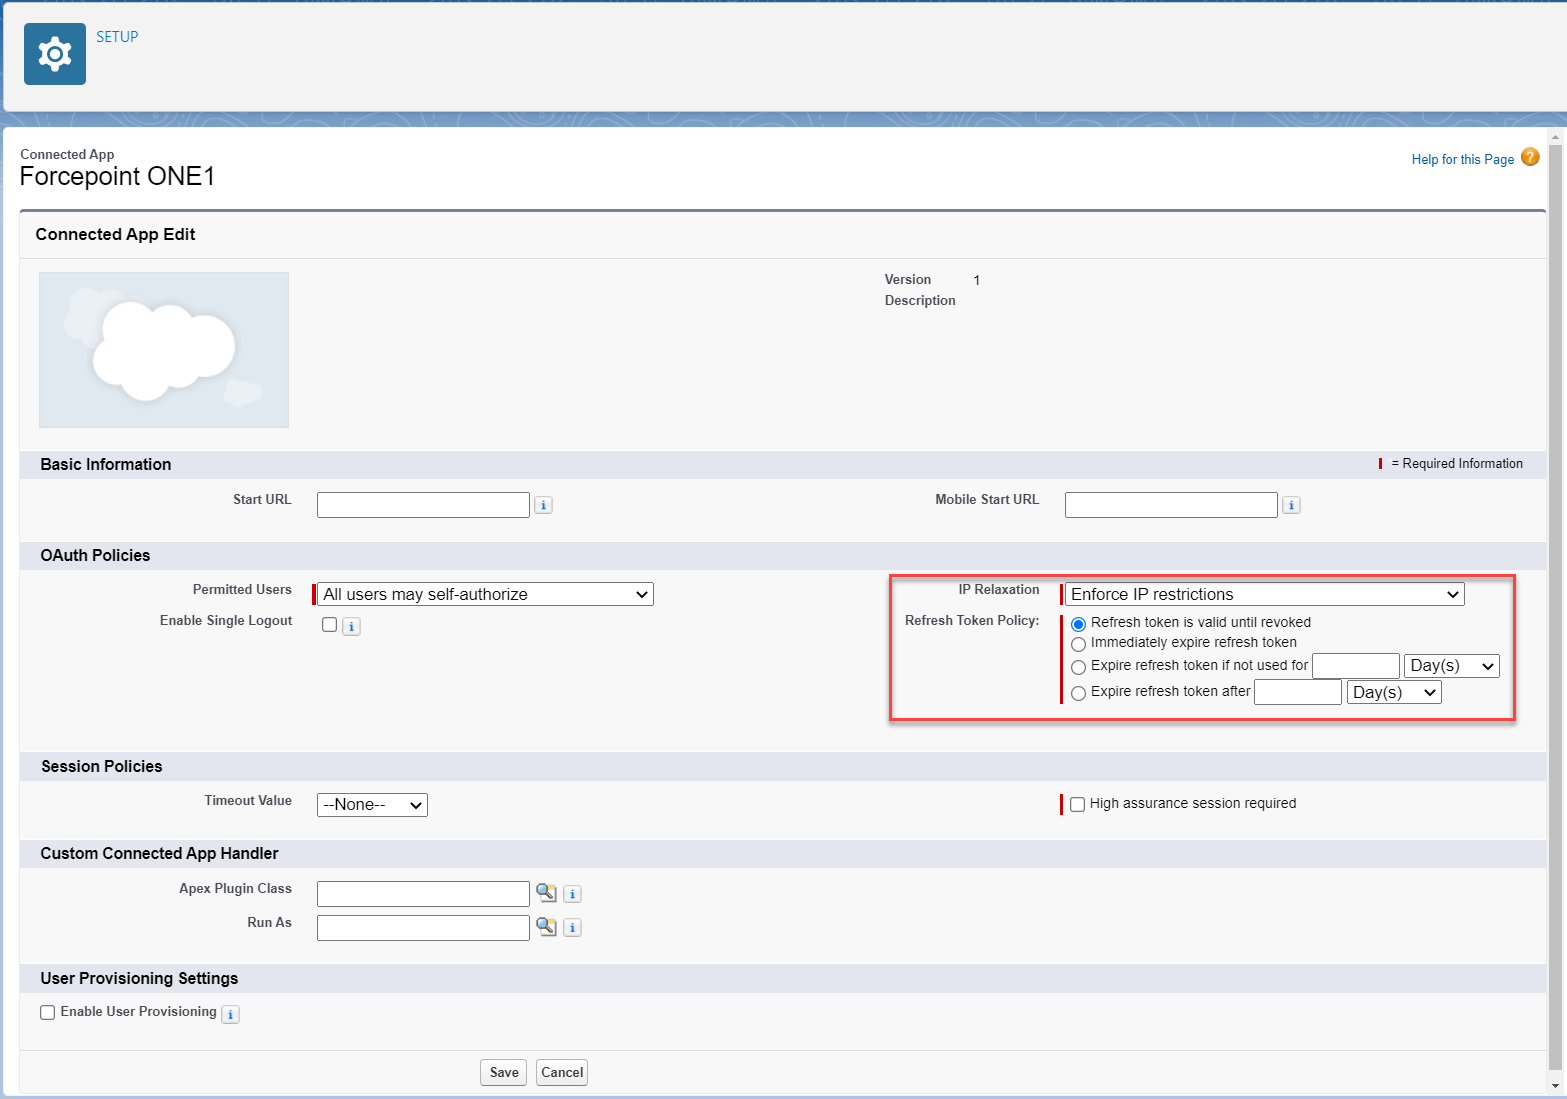
Advanced (OAuth Token Timeouts)
OAuth token timeouts and refresh settings can also be adjusted by editing the Connected App.
- Click the Edit button while viewing a connected app on the page.
- Adjust timeouts and refresh token policies as desired and click Save.
- Click the Edit button while viewing a connected app on the page.