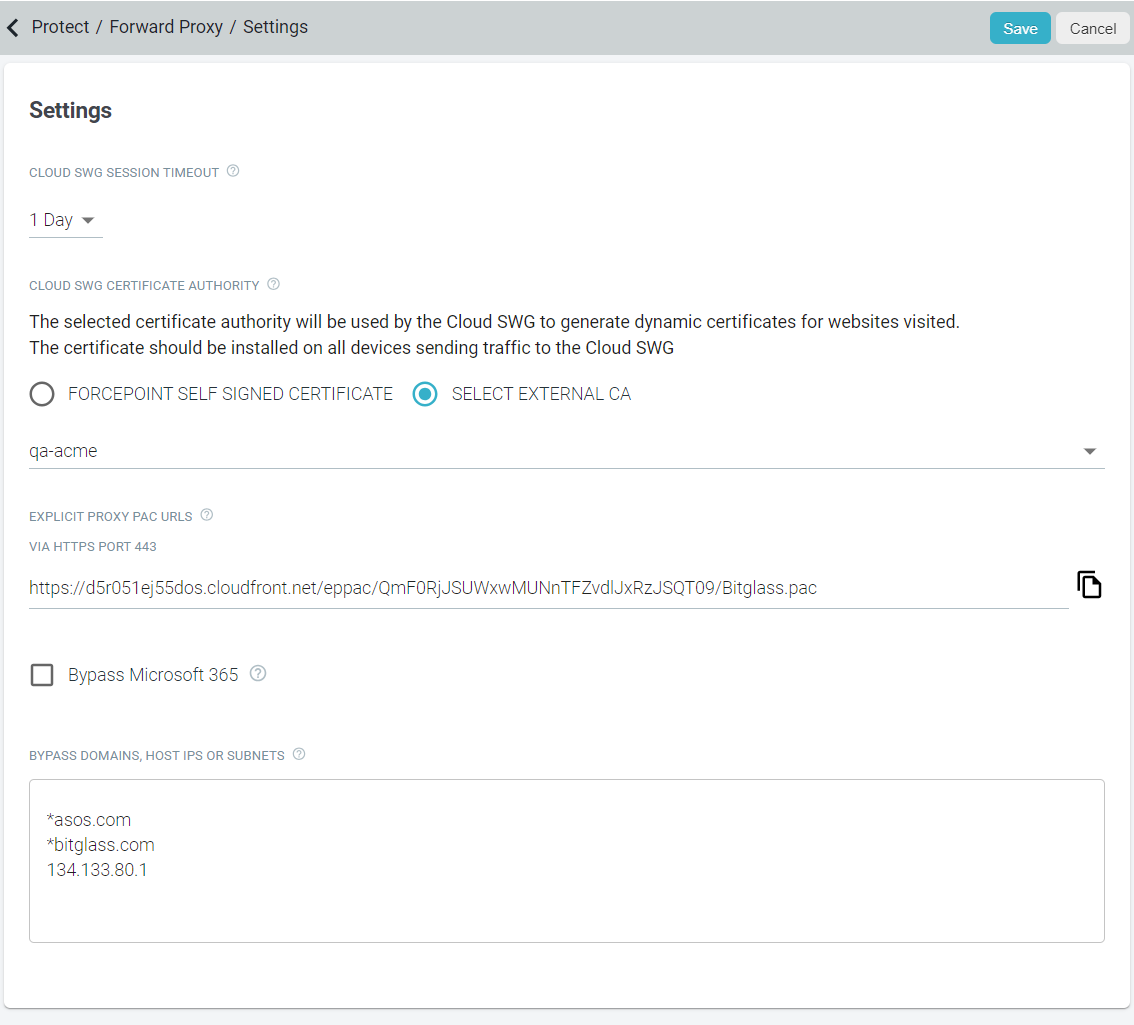
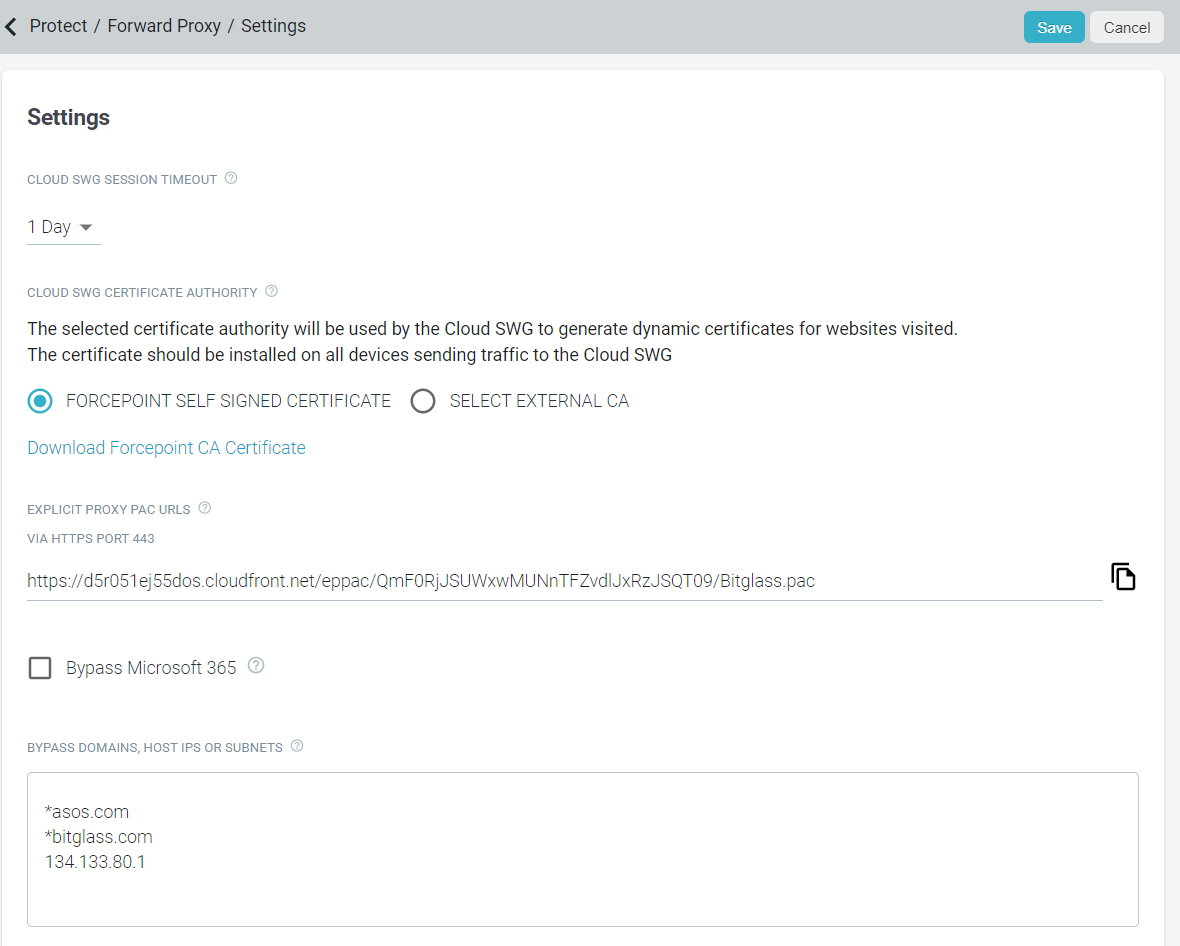
Setting the Cloud SWG certificate authority
You can select either Forcepoint Self Signed Certificate or an external CA, previously uploaded to , so that Cloud SWG can use those CA to generate dynamic certificates for websites visited.
Steps
- Navigate to .
-
On the Settings page, you can either select Forcepoint Self Signed Certificate or an external CA.
- To use Forcepoint Self Signed Certificate, select the Forcepoint Self Signed Certificate option and download the certificate.
 Note: The Forcepoint Self Signed Certificate is same as the certificate available under page. So, you need to push only one certificate via MDM for macOS.
 - To use the configured external CA, select the Select External CA option and then select the CA from the drop-down list.
Only certificates whose Type is CA are available in the drop-down list.
- To use Forcepoint Self Signed Certificate, select the Forcepoint Self Signed Certificate option and download the certificate.
- To save the changes, click Save.
Next steps
- To know how to install and trust the CA on Windows devices, refer to Installing Root Certificate.
- To know how to trust the CA on Big Sur or latest macOS devices, refer to Manually Trusting Certs on macOS.