Once you have met the above requirements, you can proceed to convert your domain to federated from inside the Windows Azure AD PowerShell. You will need to refer to the information
found on the Single Sign-On Setup page.
Before you begin
Each SSO configuration instance supports only one domain. If you have multiple domains, create a separate instance for each one.
Note: Perform this action only when your domain is not
federated with Forcepoint Data Security Cloud | SSE. If your domain is already federated, no further action is needed.
Steps
-
Navigate to .
-
Select Microsoft 365 and then click the Microsoft 365 instance.
-
On the Office 365 Instance dialog, select the SAML SSO option button as the Cutoff Method.
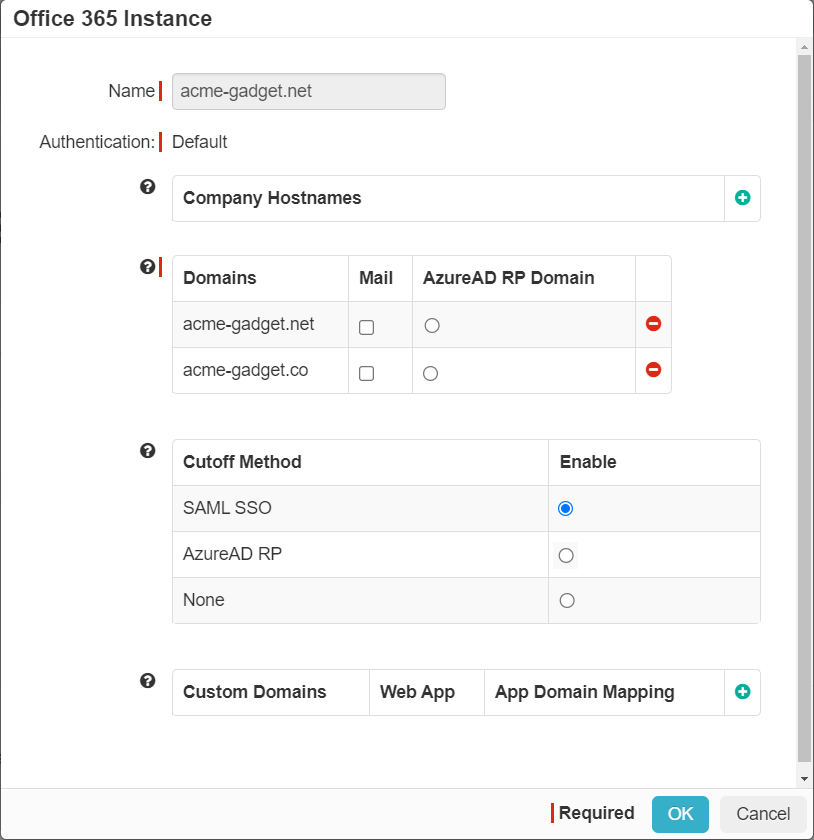
By default, the
Cutoff Method is set to
None.
Note: The Microsoft 365 tile will be hidden from the User Portal when the Cutoff
Method is set to None in the Office 365 Instance dialog.
-
Click OK to save the Office 365 instance.
The application setup page displays the Setup Web SSO link when SAML SSO is selected as the Cutoff
Method.
-
Click Save to save the Microsoft 365 setup page.
-
Click the Setup Web SSO link to view the details of the Single Sign-On Setup page.
-
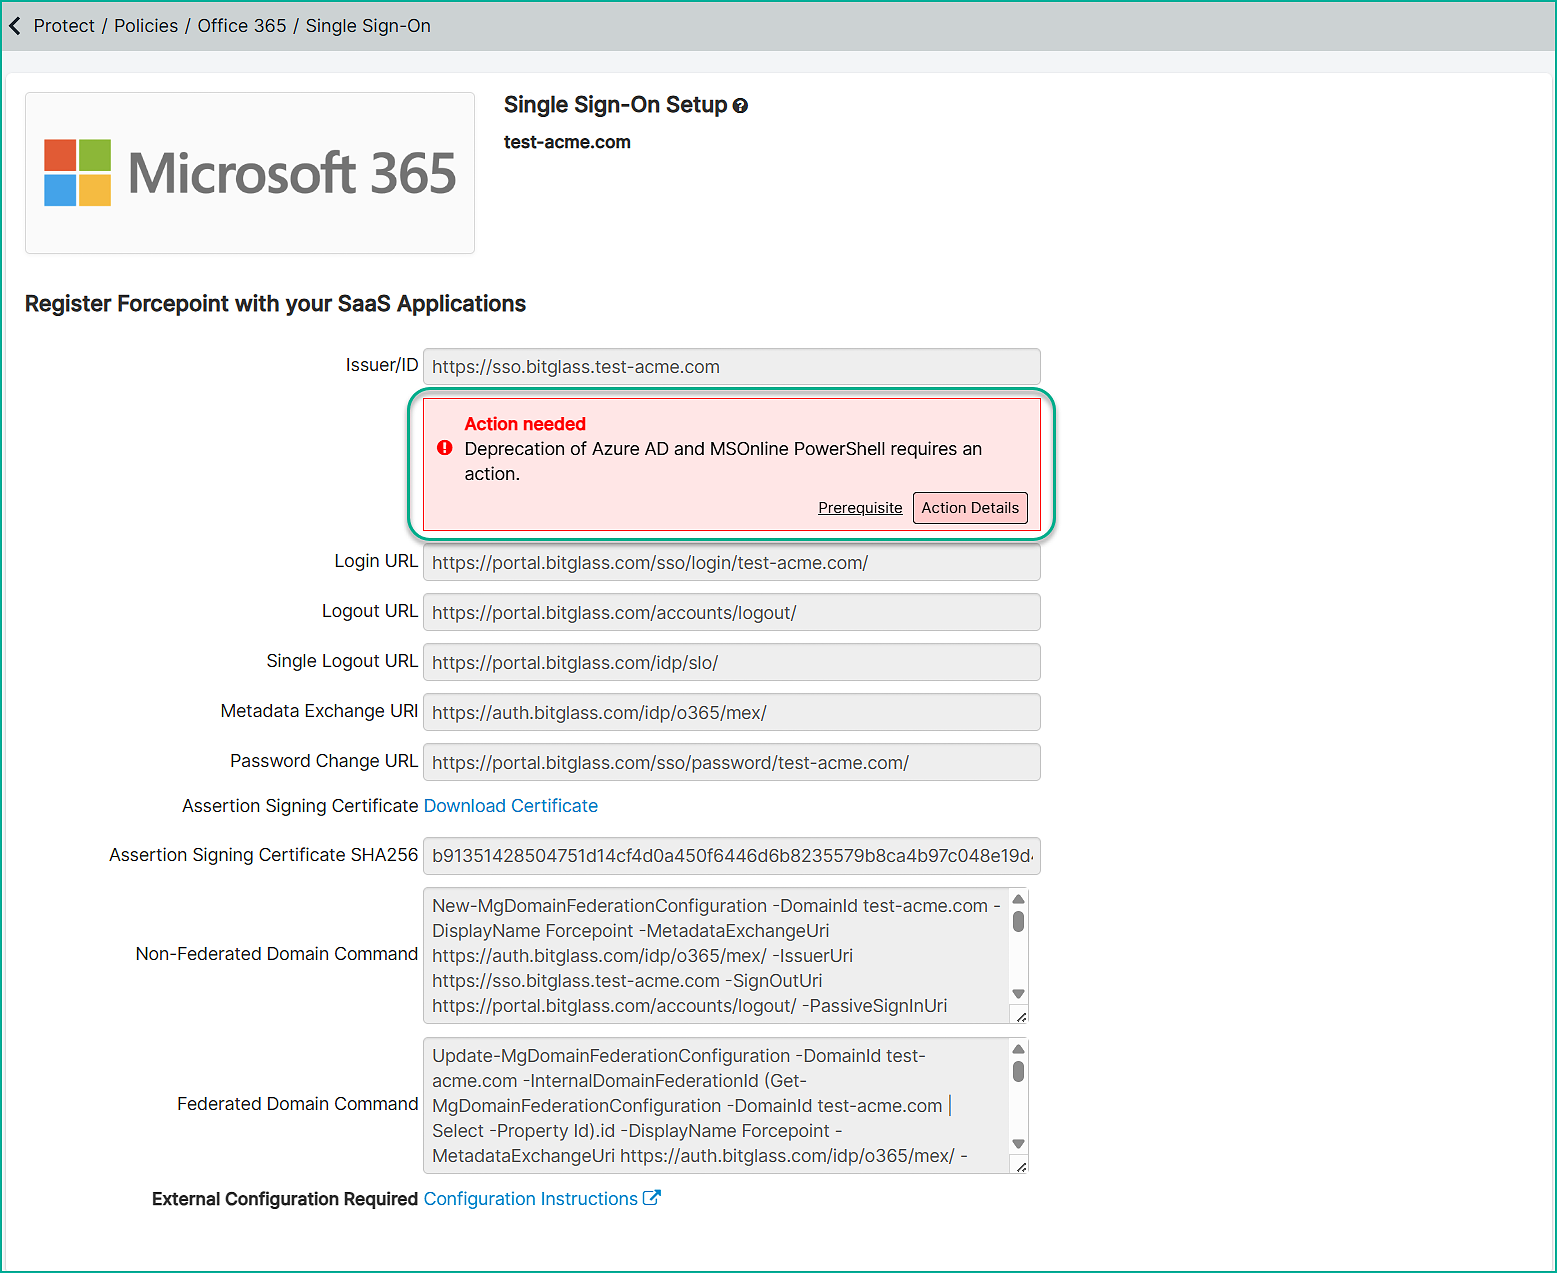
Click on Prerequisites from the Action needed column and review the details provided on the page.
-
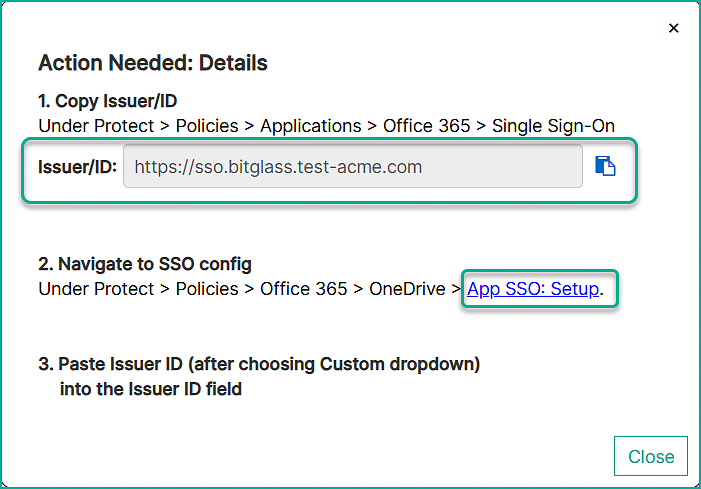
Click on Action Details in the Action needed column to open the page.
-
Copy the Issuer/ID from step 1 and then click on APP SSO: Setup from step 2 to open the SSO Config page.
-
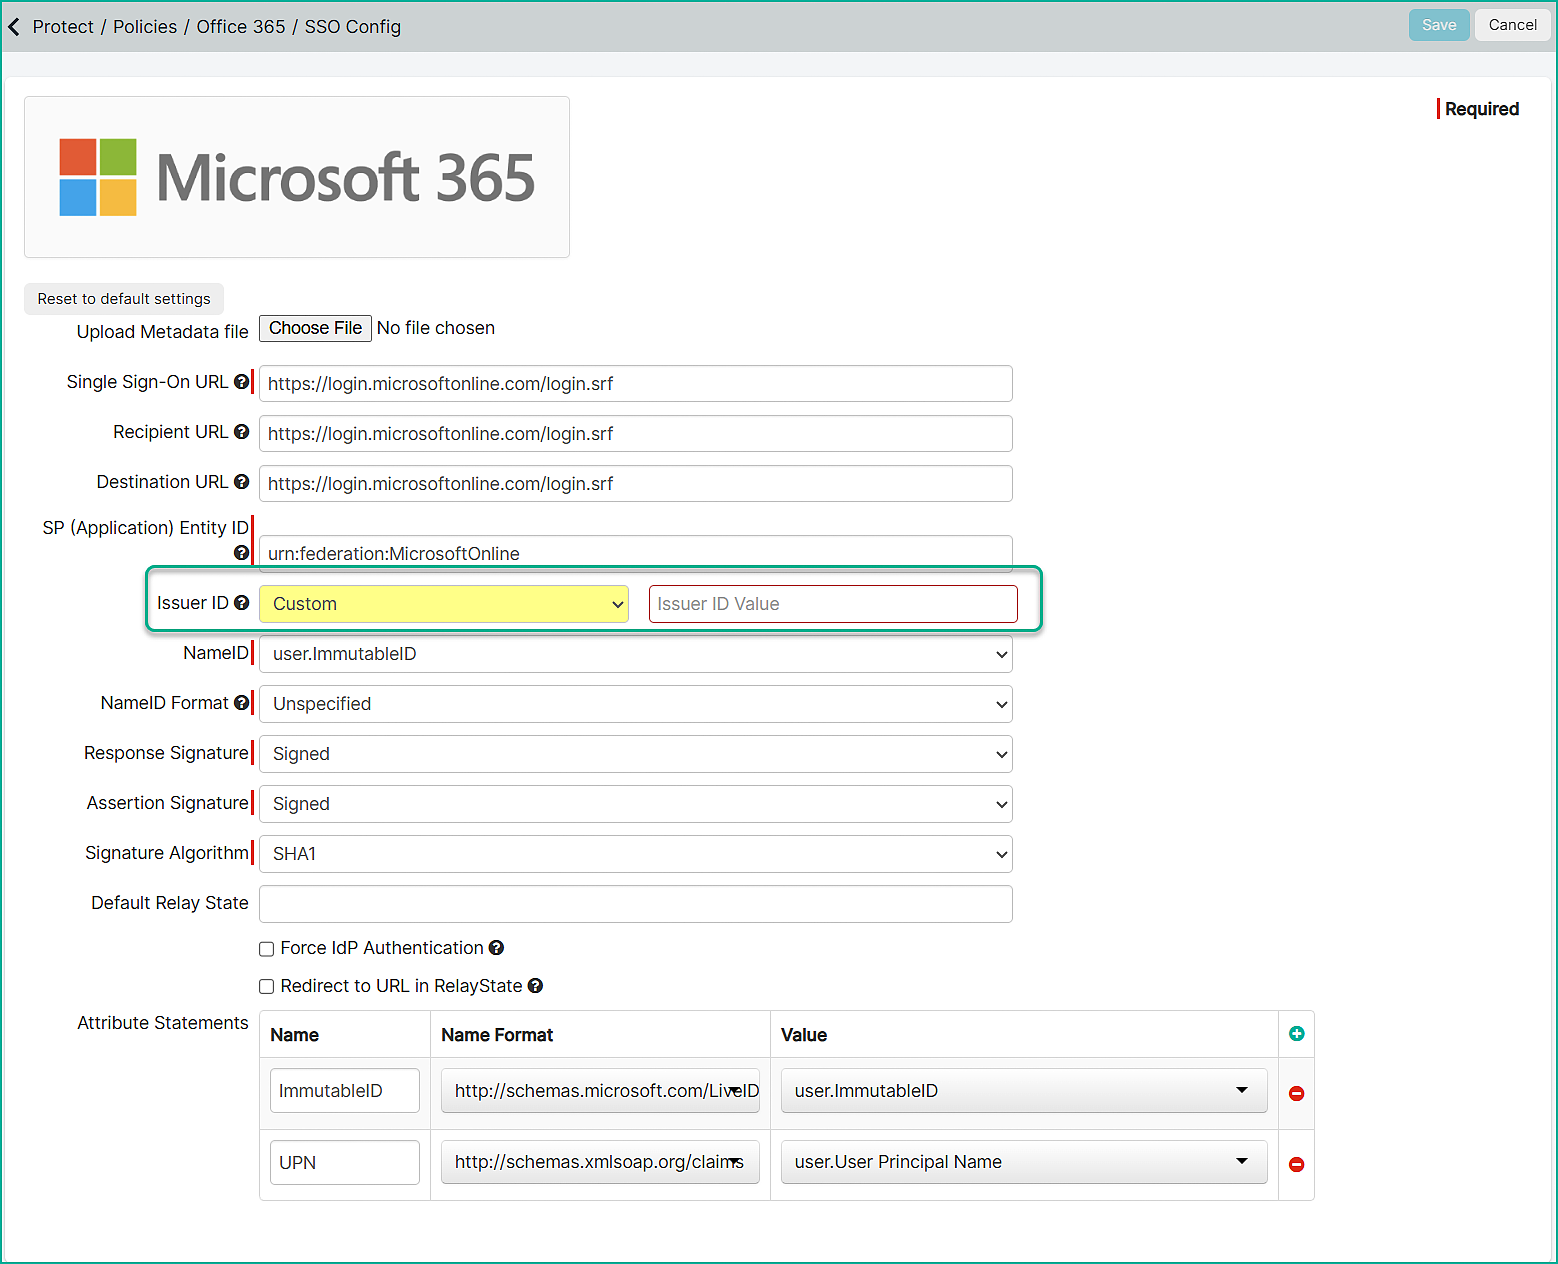
From the Issuer ID drop-down, select Custom. In the Issuer ID Value field, paste the value copied in the
previous step and click Save from the top-right corner.
-
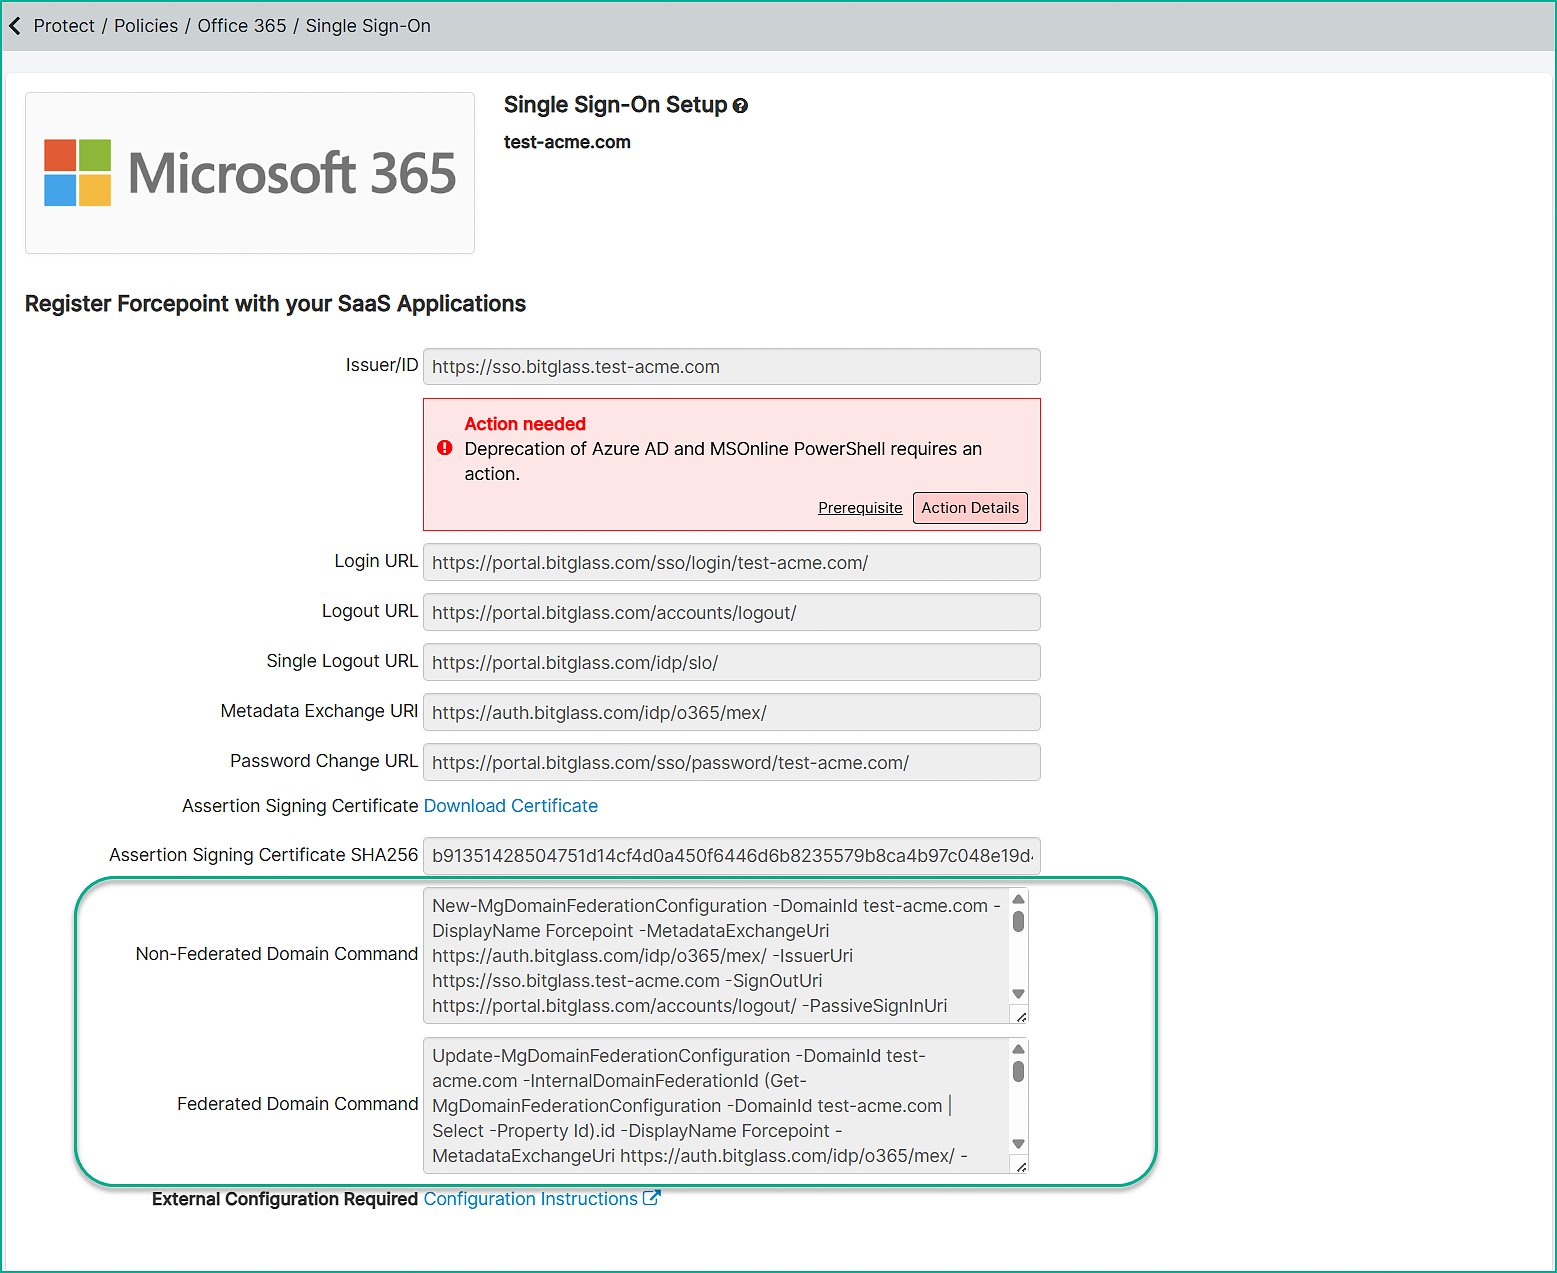
To check the federation status using Microsoft Graph PowerShell, run the following commands:
Install-Module Microsoft.Graph -Scope CurrentUser
Connect-MgGraph -Scopes "Domain.Read.All"
Get-MgDomain -DomainName yourdomain.com
Note: Replace yourdomain.com with the domain for which you are checking the status.
If the Authentication Type is set to Federated and configured to point to Forcepoint, then you are all set.
-
Navigate back to the Single Sign On page and do the step as follows:
-
If your domain is not already federated, copy the Non-Federated Domain Command and paste it into PowerShell.
-
If your domain is already federated, copy the Federated Domain Command and paste it into PowerShell.
Note: In some scenarios, users should be logged out of both Forcepoint Data Security Cloud | SSE and an external IdP when clicking the logout link in the
application. To accomplish this, use https://portal.bitglass.com/accounts/logout/ as the Logout URL instead of the default of https://portal.bitglass.com/portal/
-
Once you have successfully federated and configured Forcepoint Data Security Cloud | SSE as the SAML IdP:
-
Navigate back to the page and scroll down to the Microsoft 365 application.
-
Set up a policy line for Direct App Access and have an admin or a user log in directly once to validate the SAML SSO setup.
-
Set up an additional policy to direct users through Secure App Access (reverse proxy).
-
Adjust your policies to start sending users through the Forcepoint Data Security Cloud | SSE proxy and test to ensure it is working.