The outbound mail flow rule will identify and take action on the external outbound emails based on added conditions.
Steps
-
After the mail flow connectors setup in Microsoft Exchange admin center page, navigate to . The Rules screen appears.
-
Click . The New transport rule screen appears.
-
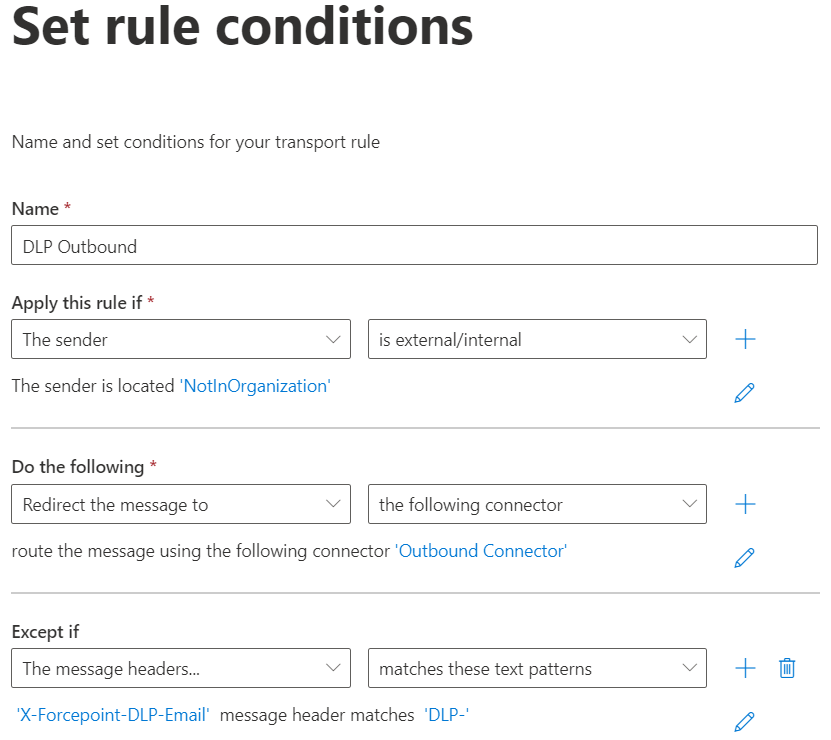
On the Set rule conditions page,
-
Enter a unique name for the rule in the Name field, and then select the conditions, exceptions, and actions for the rule:
-
In Apply this rule if* field:
- Select The recipient from the first drop-down list.
- Select is external/internal from the second drop-down list.
- The select recipient location window appears.
- Select appropriate option (Example: Select Outside the organization to apply this rule on the emails to external recipient).
- Click Save.
-
In Do the following* field:
- Select Redirect the message to from the first drop-down list.
- Select the following connector from the second drop-down list.
- The select connector window appears.
- Select the outbound connector that you created.
- Click Save.
-
In Except if field:
- Select The message headers… from the first drop-down list.
- Select matches any of these text patterns from the second drop-down list.
- Click Enter text. The specify header name window appears.
- Enter message header X-Forcepoint-DLP-Email and then click Save.
- Click Enter words. The specify words or phrases window appears.
- Enter header text DLP- and then click Save.
-
When you complete setting the Set rule conditions page, click Next.
-
On the Set rule settings page, configure the following settings:
-
Select Enforced as Rule mode.
-
Select High in Severity.
-
If necessary, update Activate this rule on and Deactivate this rule on with appropriate date and time.
-
Tick Stop processing more rules.
-
If necessary, tick Defer the message if rule processing doesn't complete.
-
Select Header in Match sender address in message field.
-
Add an optional comment to the rule in Comments field.
-
When you complete setting the Set rule settings page, click Next.
-
On the Review and finish page, verify the settings and click Finish.
-
The Transport rule created successfully message appears. Then, click Done.
The outbound mail flow rule is created.
Note: After creation of the mail flow rule, it might take 30 minutes or more for the new rule to be applied to emails.
For more information on setting up Mail Flow Rules in Microsoft Office 365, refer to the Microsoft Learn
page.