ADFS: Configuring Forcepoint Data Security Cloud as a SAML SP
You can configure Active Directory Federation Services (ADFS) to support Forcepoint Data Security Cloud as a SAML Service Provider.
Before you begin
It is also helpful to have a web browser window opened and logged into Forcepoint Data Security Cloud since some steps will require information you can copy over from Forcepoint Data Security Cloud. You will also need to configure the IdP object towards the end of the setup in Forcepoint Data Security Cloud once you have completed the setup in your AD FS server.
Steps
-
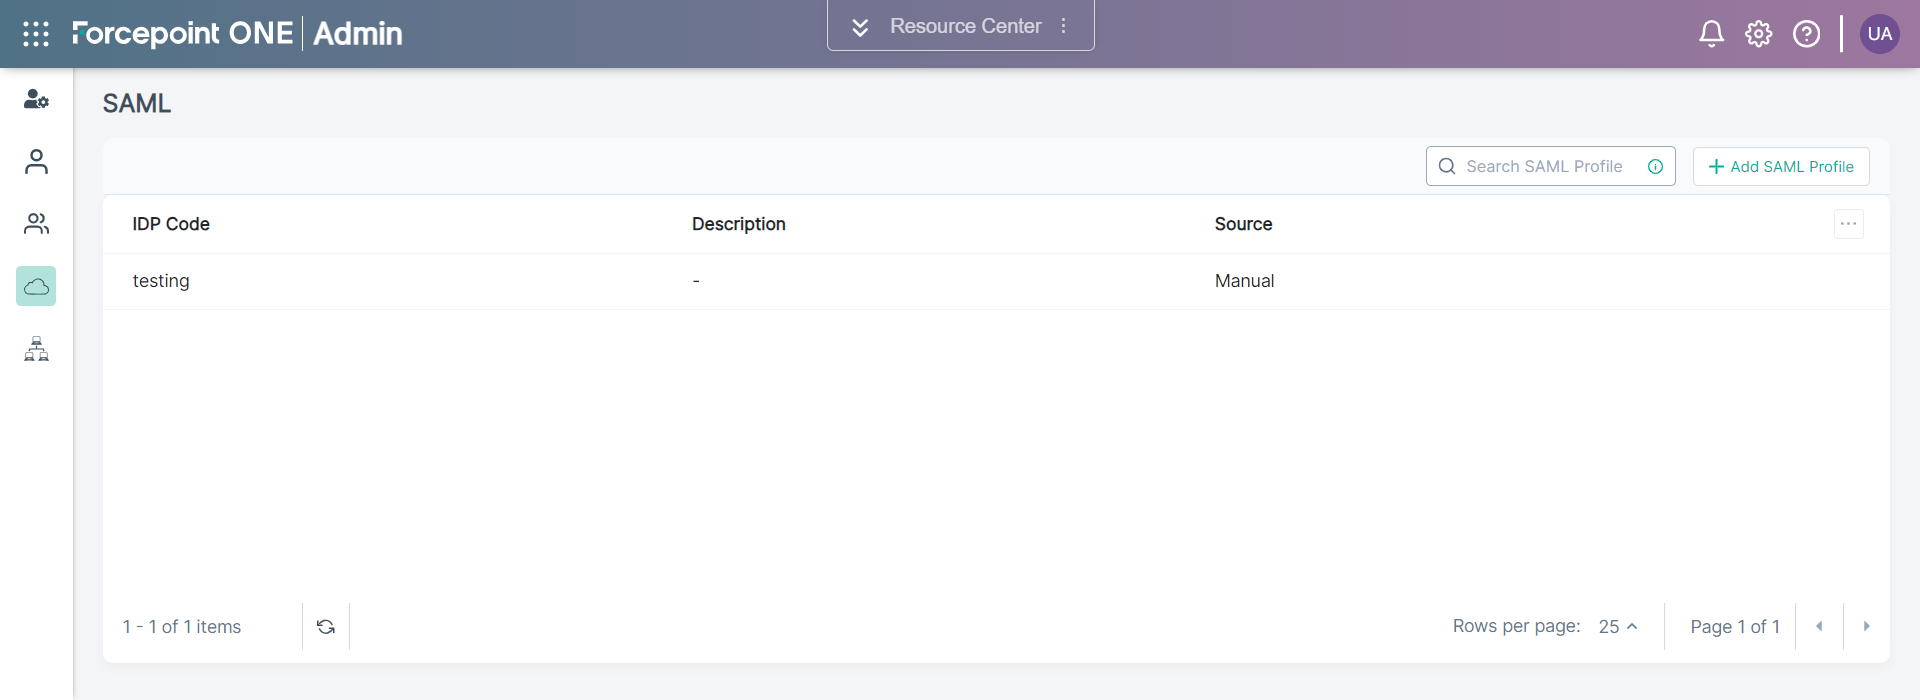
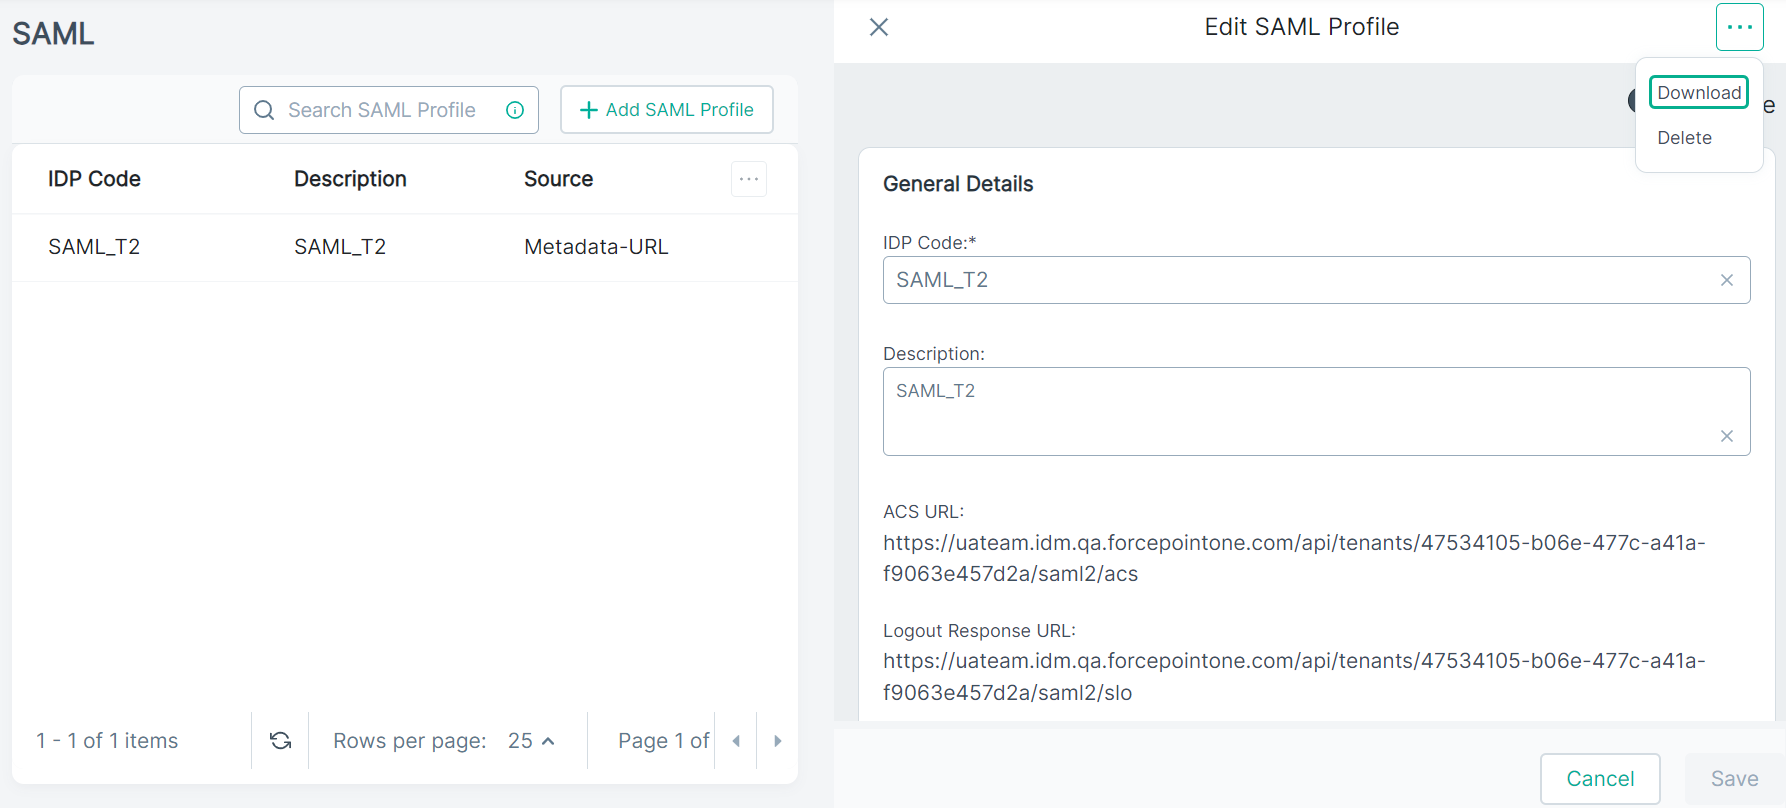
From the left Navigation Pane, click the SAML
 icon.
icon.
The following page opens displaying existing SAML Profiles.
-
To add a new SAML Profile, click +Add SAML Profile.
The Add SAML Profile opens on the right pane.
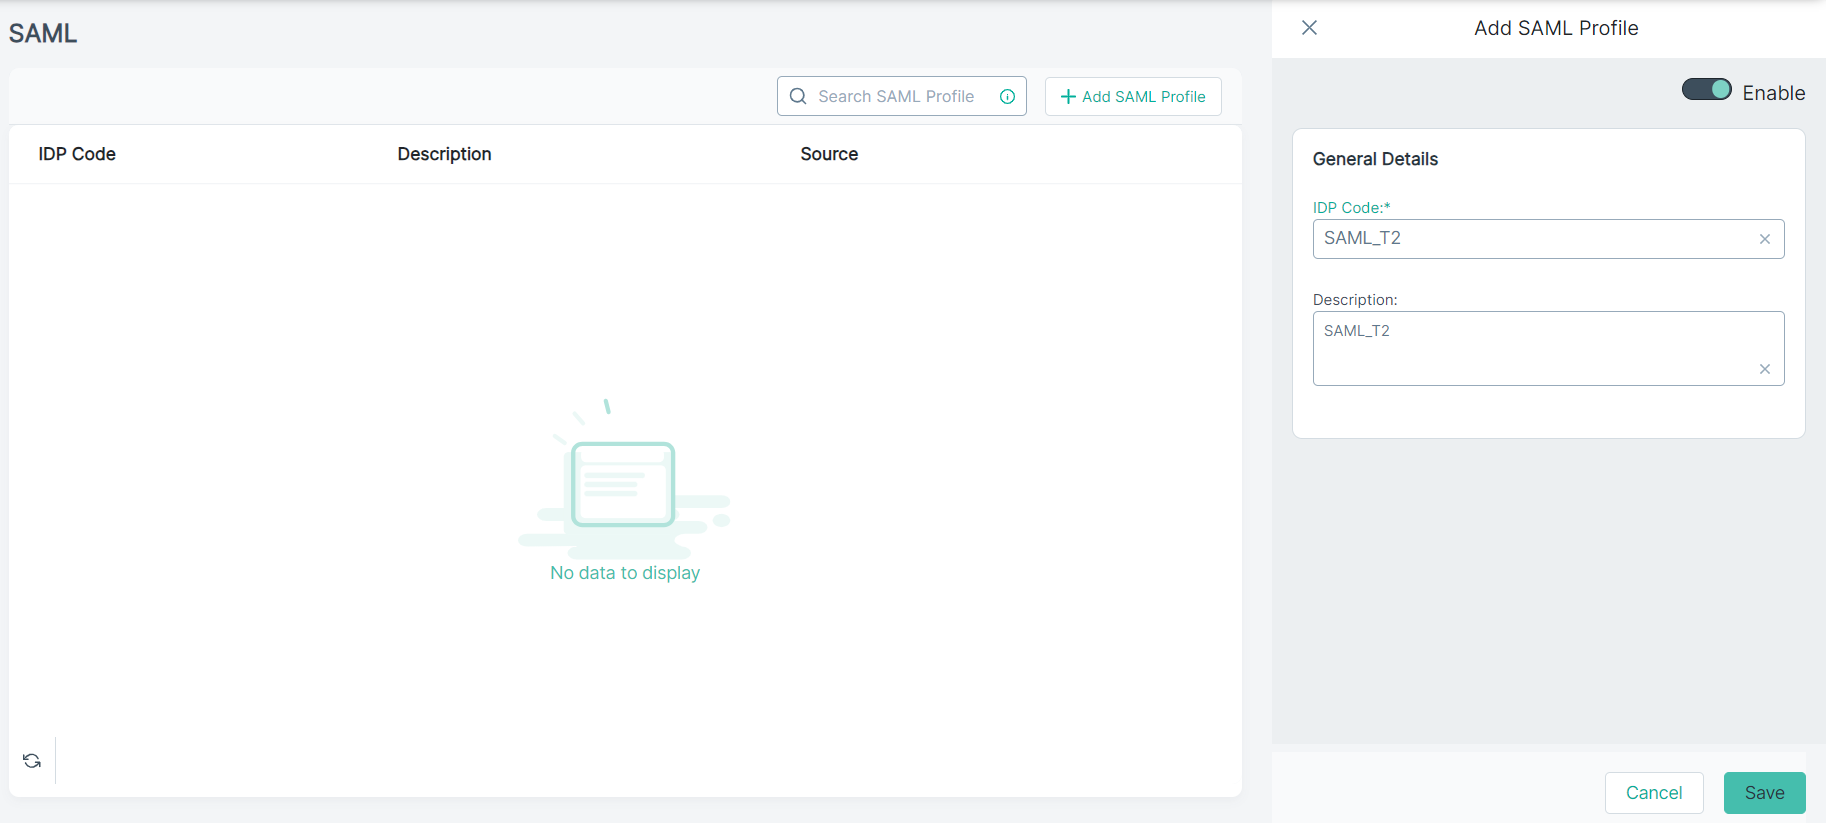
-
Under the General Details section:
-
To save the SAML Profile, click Save.
The SAML profile gets created.
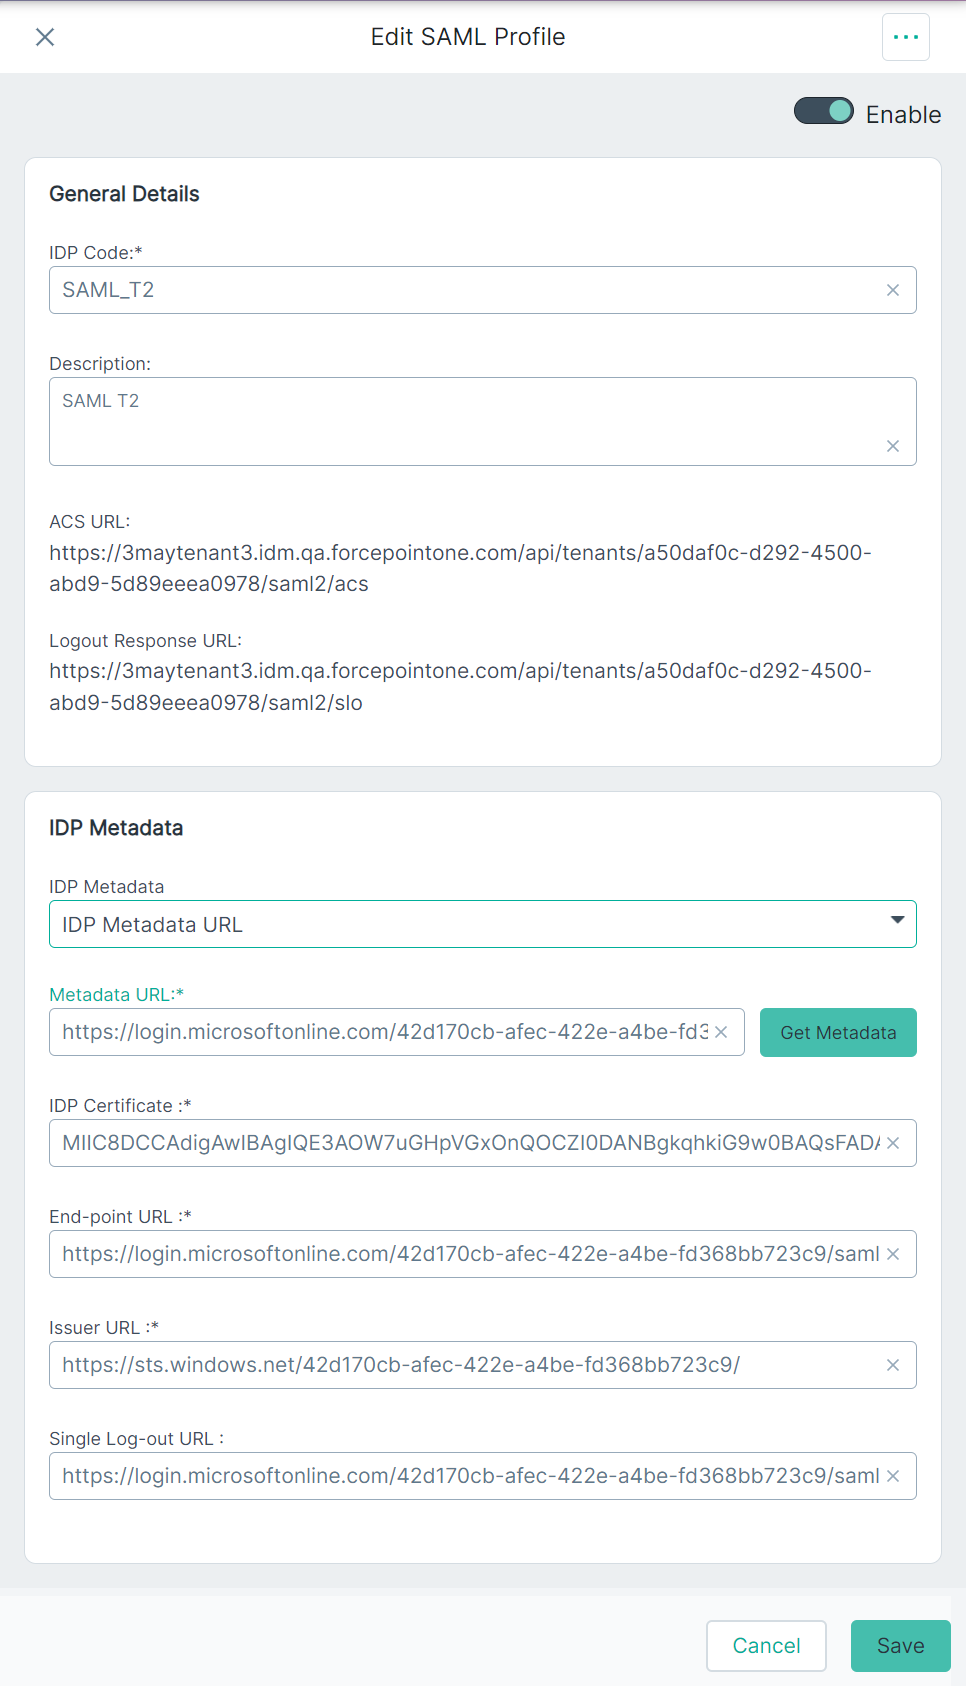
The Add SAML Profile pane also displays ACS URL, and Logout Response URL read-only fields under the General Details section along with an additional section, IDP Metadata.
- ACS URL - The URL location where the SAML assertion is sent with an HTTP POST.
- Logout Response URL - The URL location on the service provider where the identity provider sends its sign out response.
-
To save the SAML Profile, click Save.
-
Place your mouse pointer on the
 icon and then click Download.
A metadata file gets downloaded. Use the same metadata file while configuring identity provider.
-
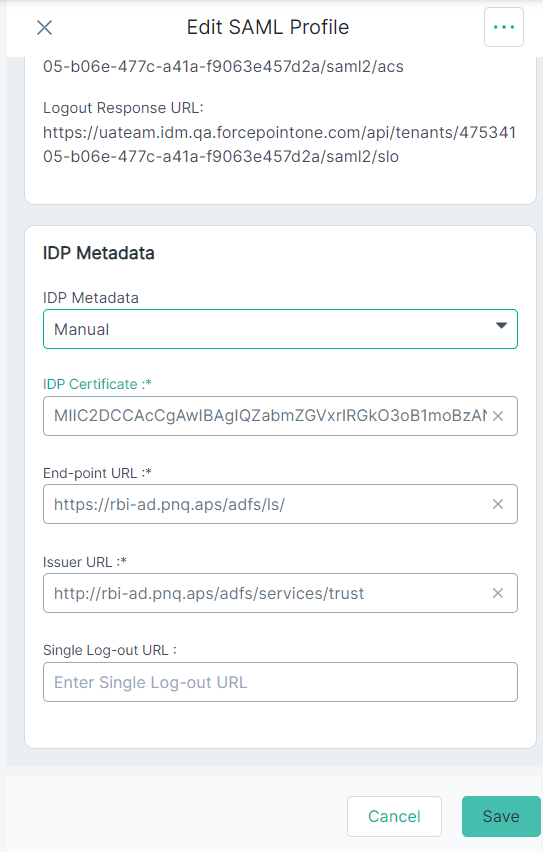
From the IdP Metadata section, select the Manual option from the IdP Metadata drop-down to enter metadata and
certificate details manually.
-
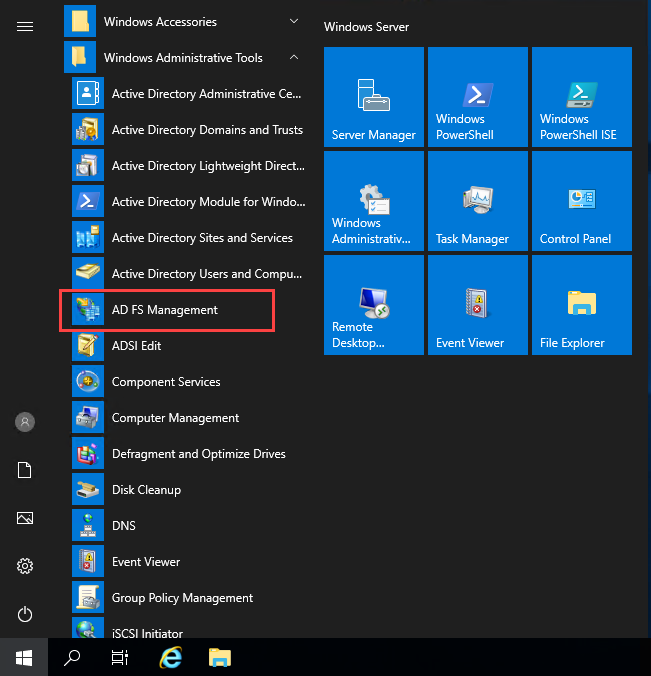
Login to your server and start AD FS Management.
-
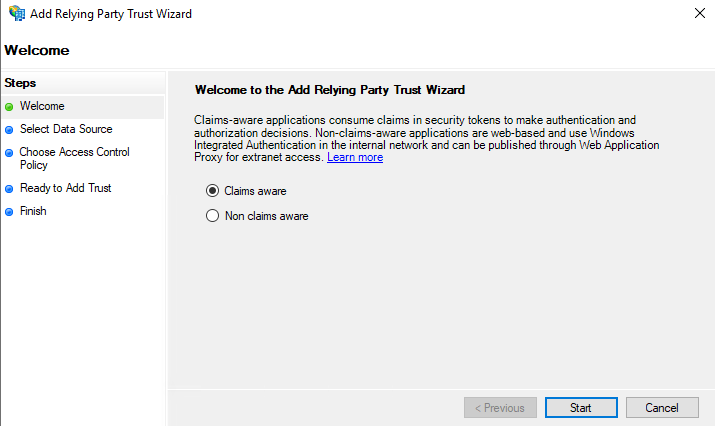
From the Actions pane, click Add Relying Party Trust… to start a configuration wizard.
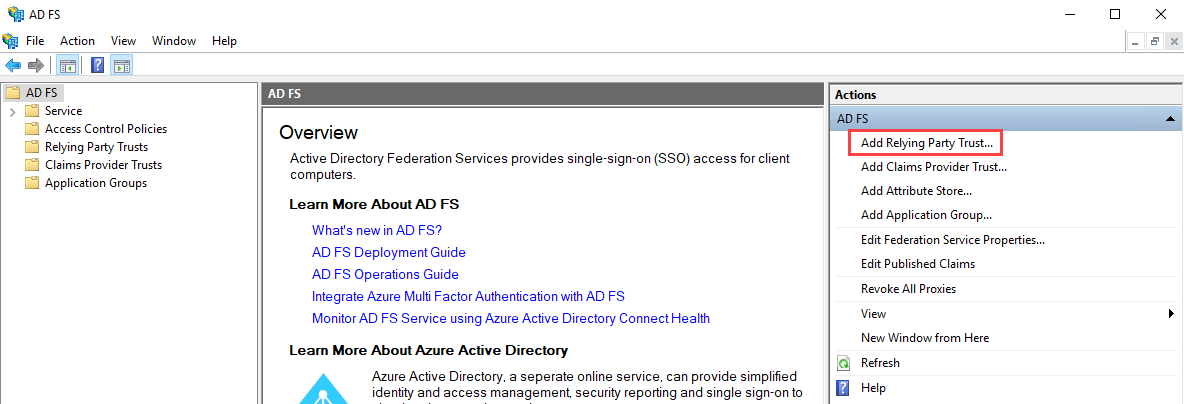
The Add Relying Party Trust Wizard opens.
-
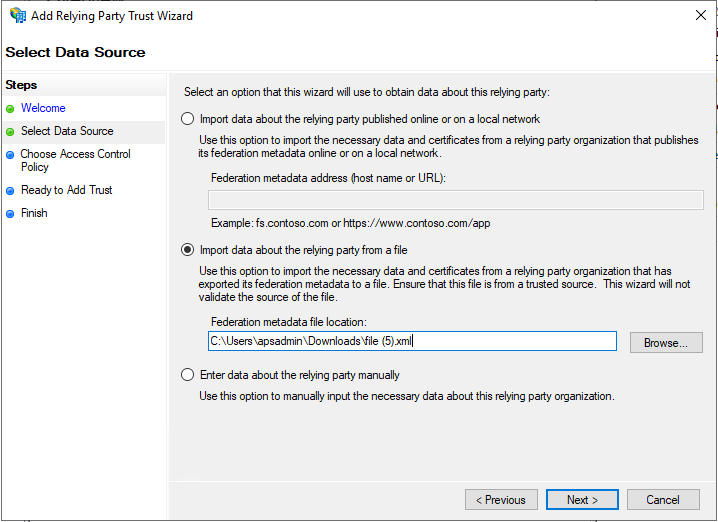
On the Select Data Source tab:
-
Click Browse to select the metadata file that you downloaded in step 6.
-
Click Browse to select the metadata file that you downloaded in step 6.
-
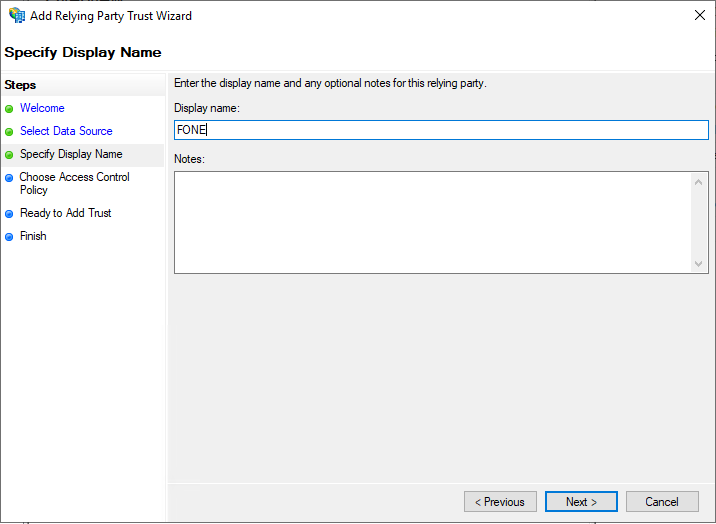
On the Specify Display Name tab, enter a Display name and click Next.
-
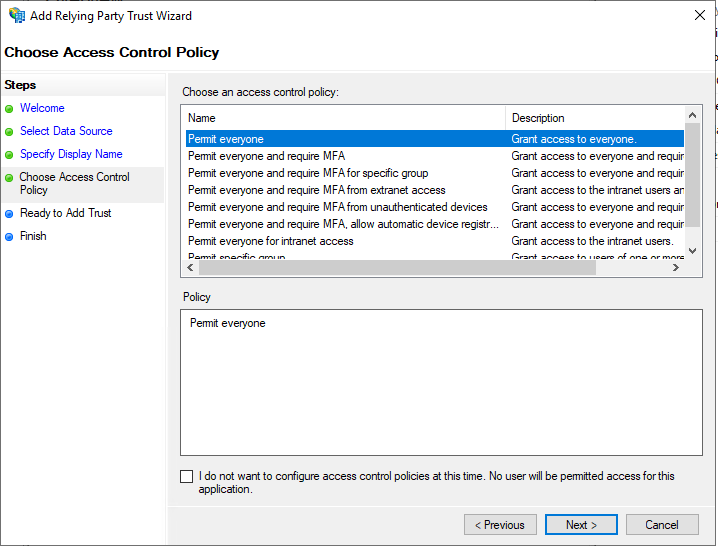
On the Choose Access Control Policy tab, make sure that the Permit everyone option is selected and click
Next.
-
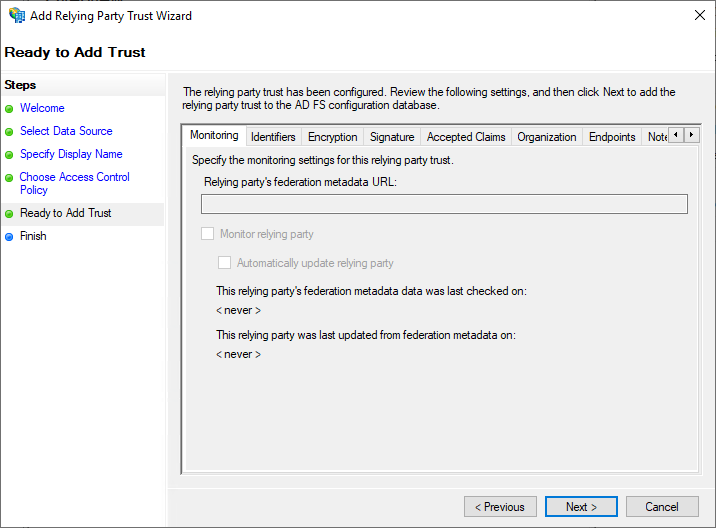
On the Ready to Add Trust tab, review the settings on each sub-tab and then click Next to complete the wizard.
-
On the Finish tab, ensure that the Configure claims issuance policy for this application checkbox is selected and click
Close.
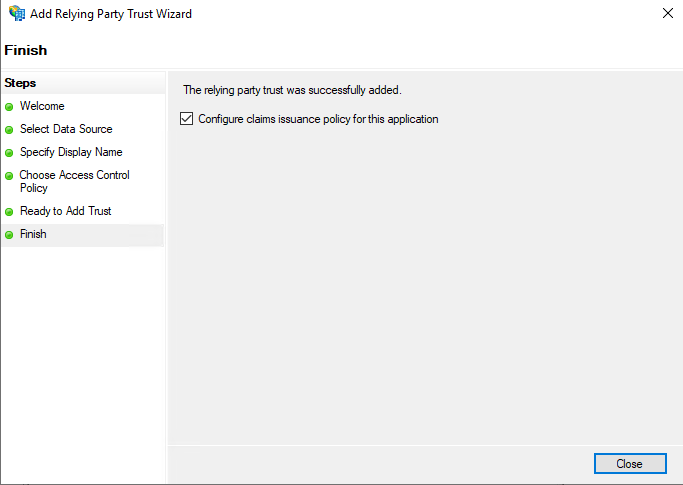
The relying party trust gets created and displayed under the on Console Tree. Also, opens the Edit Claim Issuance Policy dialog.
-
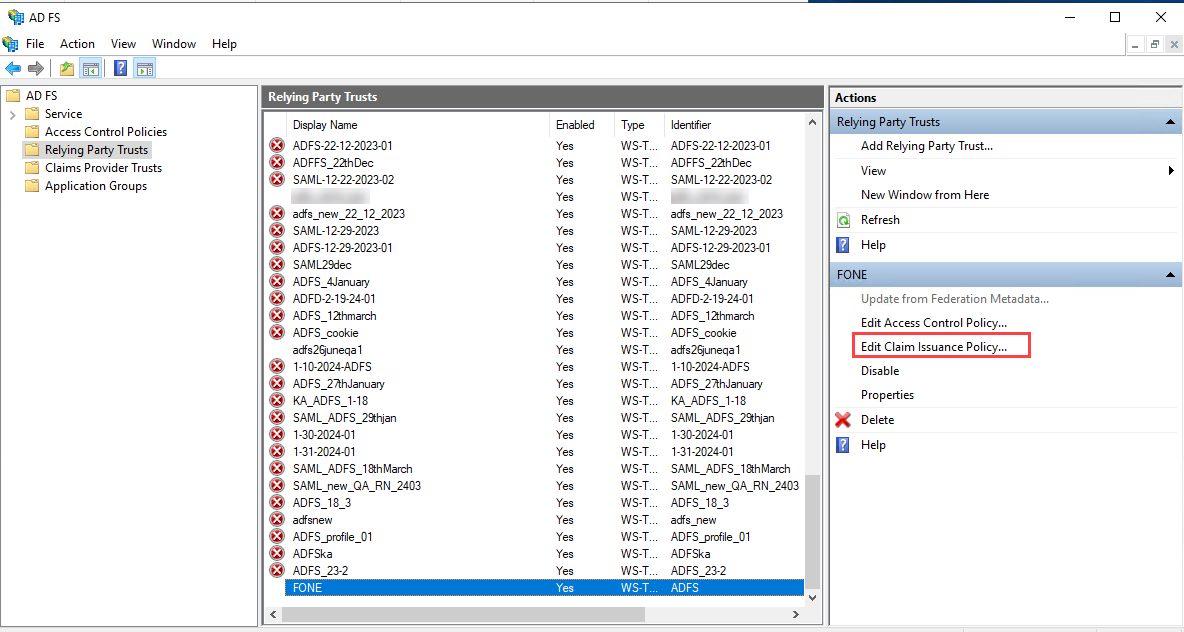
If the Edit Claim Issuance Policy dialog is closed, select the relying party that you have created from the Relying Party Trusts page
and select Edit Claim Issuance Policy from the Actions pane.
-
On the Edit Claim Issuance Policy dialog, click Add Rule ....
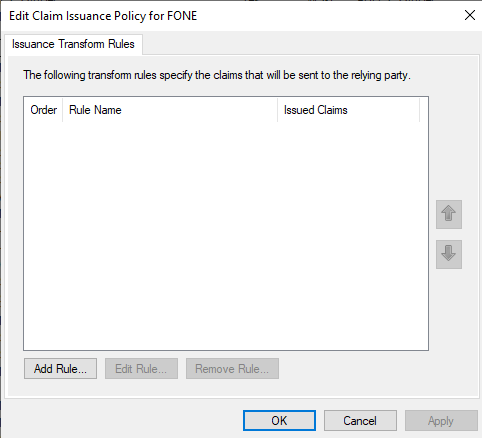
The Add Transform Claim Rule Wizard dialog opens.
-
On the Choose Rule Type tab, verify that the Claim rule template is set to Send LDAP Attributes as Claims and
then click Next.

-
On the Configure Claim Rule tab:
-
Enter Claim rule name.

-
Enter Claim rule name.
-
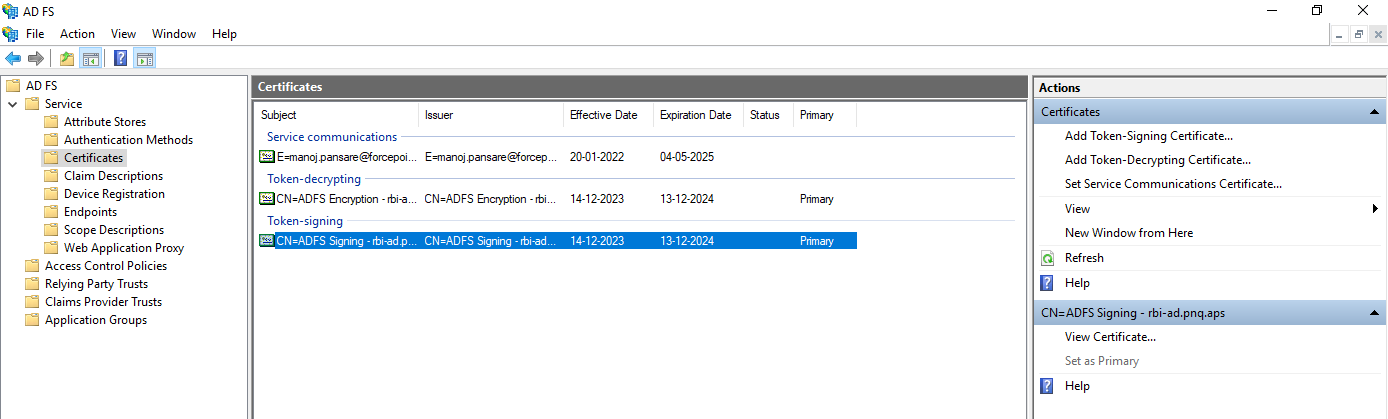
Export the token-signing certificate from ADFS to upload into Forcepoint Data Security Cloud.
-
In ADFS, expand .
-
In ADFS, expand .
-
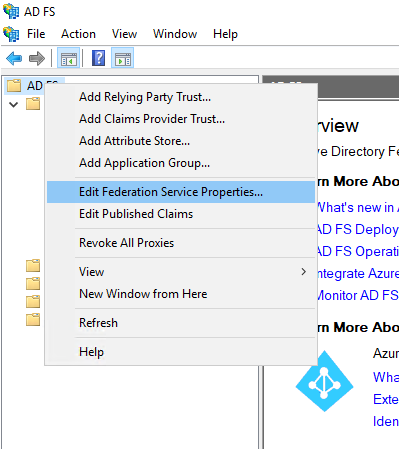
Right-click on AD FS top level folder and then click the Edit Federation Service Properties… menu item.
-
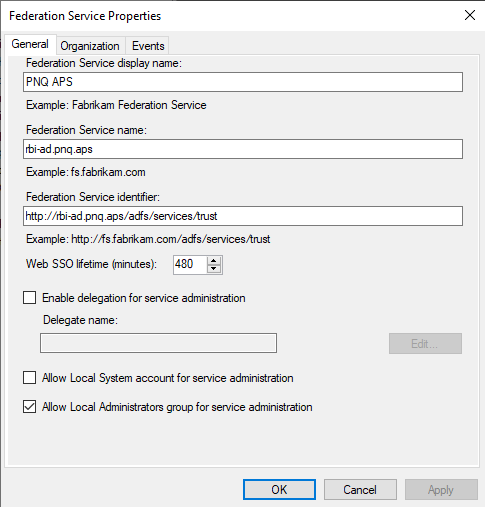
Copy the Federation Service Name and paste it into End-point URL of the SAML setup in Forcepoint Data Security Cloud (Step 7).
-
Copy the Federation Service Name and paste it into End-point URL of the SAML setup in Forcepoint Data Security Cloud (Step 7).
-
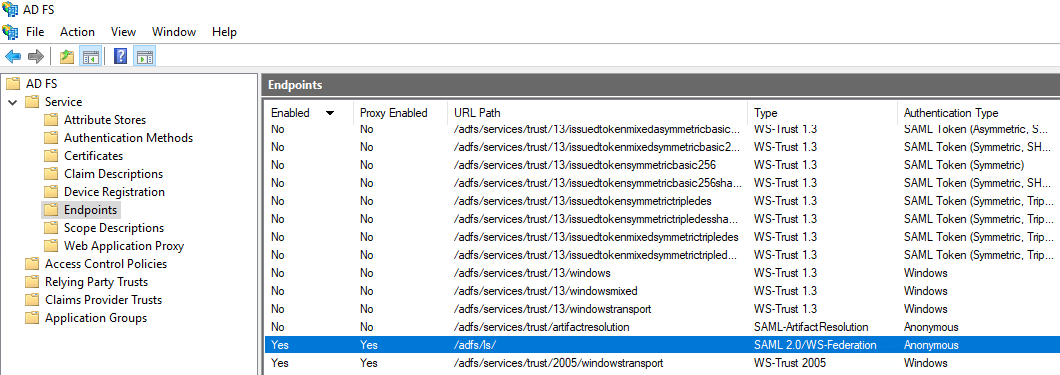
Navigate to and find the URL Path of the SAML 2.0/WS-Federation type under Token Issuance.
Append the End-point URL in Forcepoint Data Security Cloud (Step 7) with URL Path.