Configuring Azure CSPM audit
Steps to configure the Azure CSPM audit.
Steps
-
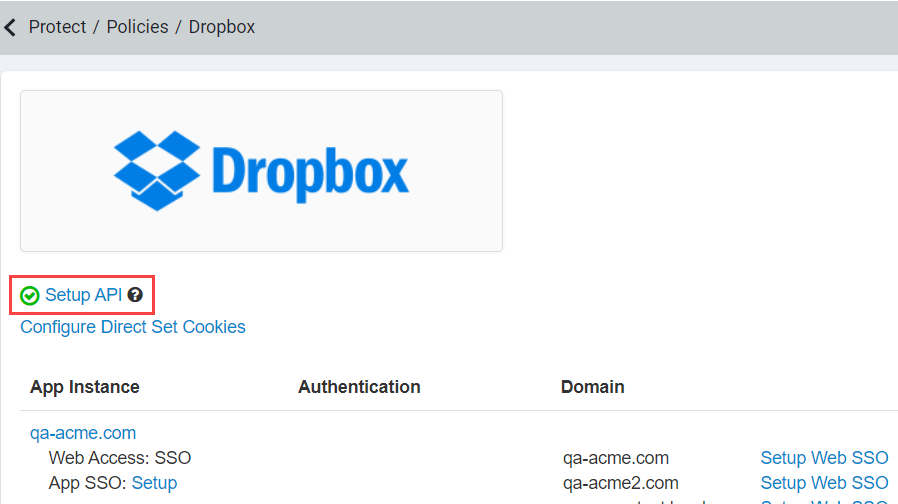
Leave your Azure portal page open as we will need information from here in Step 3 below. Open a new window or tab and login to the Forcepoint Data Security Cloud | SSE admin portal, then navigate to the page and select Microsoft 365 to open the application settings page. Then select Setup API.
-
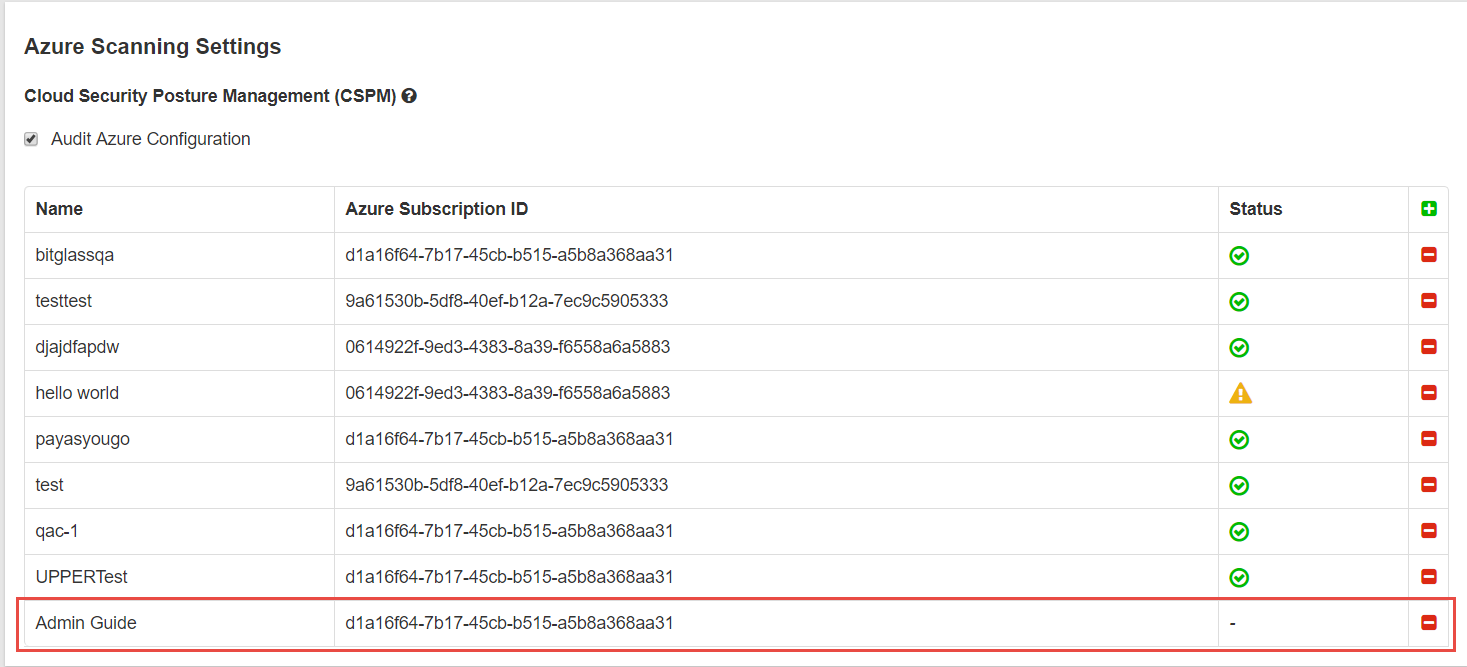
Next select the checkbox for Audit Azure Configuration and then click the green plus icon to add a new instance you want to audit.

-
In the Add Azure Instance dialog enter a name you want to give that particular instance (can be anything you want to use to identify it) and then go back to
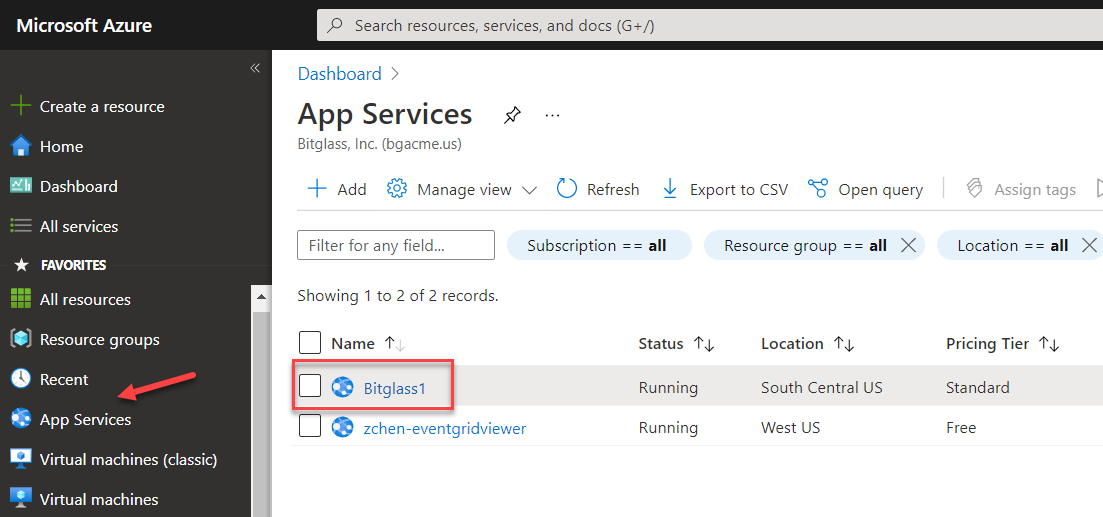
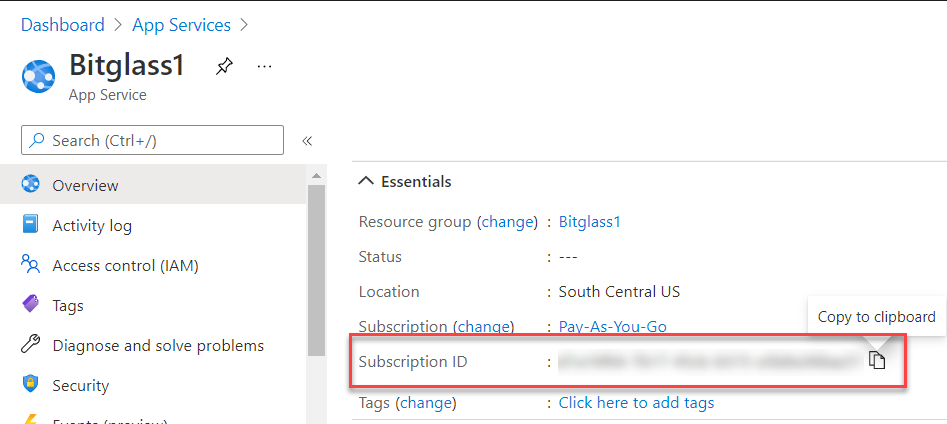
your prior tab/window with the Azure portal open. Click on App Services in the left column and then click on the particular Azure instance you want to audit.
In the new page locate the Azure Subscription ID and copy that and paste that into the Forcepoint Data Security Cloud | SSE
Azure Subscription ID field. Click OK when you are done.

-
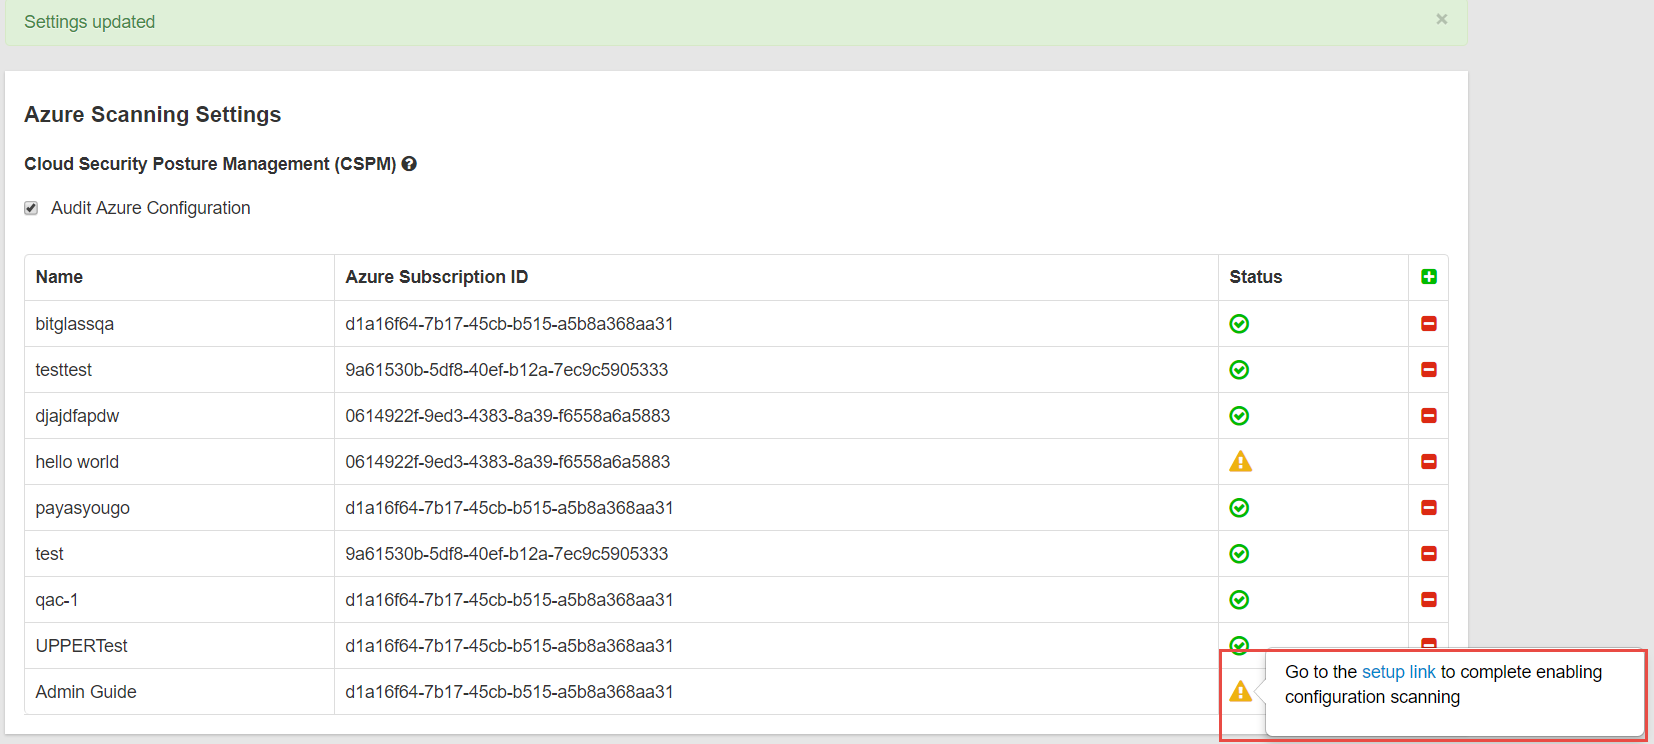
You will see your instance added to the table with a blank status field. Click Save in the top right corner. You will then see the status change to a yellow
exclamation icon. Click on the icon and you will see a link to authorize the API connection (again remember to use an admin or owner account for the Azure instance you are trying
to audit). Once you authorize you will see the icon change to a green checkmark indicating a successful connection.