Admins can create custom new inline notification so that it can used while creating a policy.
Steps
-
Navigate to .
Inline Popup page opens with all the existing inline popup notifications.
-
To create a new inline popup, click the green plus icon.
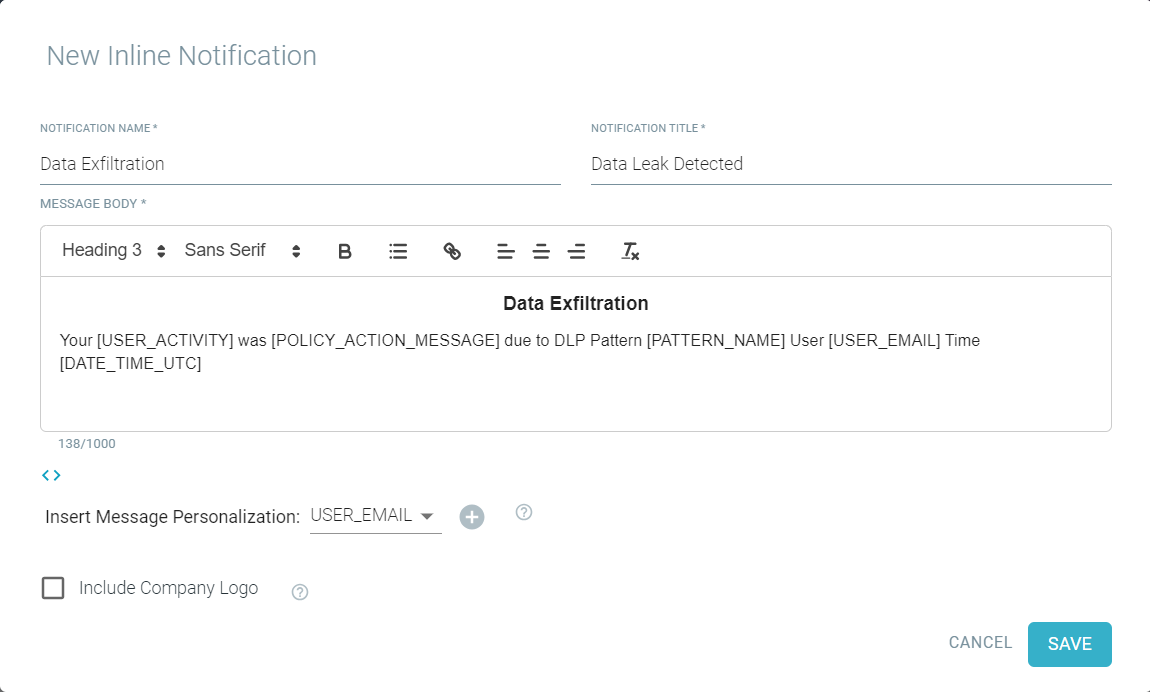
New Inline Notification dialog opens.
-
Enter the Notification Name that helps you in identifying it.
-
Enter the Notification Title that appears at the top of the inline notification.
-
Enter the Message Body of the inline notification message.
You can:
-
Use the rich text editor to format and style the content and to add links and email addresses in the notification.
You can also click  icon to enter notification content using HTML tags. To switch back to rich text editor, click
  icon.
icon.
- Insert various variables to the body of the message.
-
To insert a variable to the body of the message, select the appropriate option from the Insert Message Personalization drop-down list and click add icon
next to it.
Options that you can add to the body of the email are based on variables (Message Personalization) from the policy trigger (for example, application, pattern name, username, IP,
etc).
Note: When using message personalization variables, if the variable you are using is empty, then the message will display a blank field. For example, if you select the
variable IP Address but there is no available IP to display, then the message will show as the title of the variable with no value displayed IP
Address:
-
To include Company Logo in the inline notification, select the Include Company Logo checkbox.
The Company Logo is pulled from the Portal Icon field at page.
-
To create the notification, click Save.
Next steps
Once notification created, you can use it while configuring policies under page.