Configuring schedules
You can choose the frequency, time, and the start and end dates for your schedule.
Steps
- Open the Create Schedule view.
-
To set the Frequency of your schedule, select one of the following:
- Daily
- Weekly
- Monthly
-
If you select Daily from the Frequency drop-down, then a new field, Every, appears. Click the
Every value and then enter number of days between each schedule of the report.

You can enter any value between 1 and 999.
-
If you select Weekly from the Frequency drop-down, then a new field, On these days, appears. Select
the checkbox(es) for the day(s) of the week on which the schedule should occur.

-
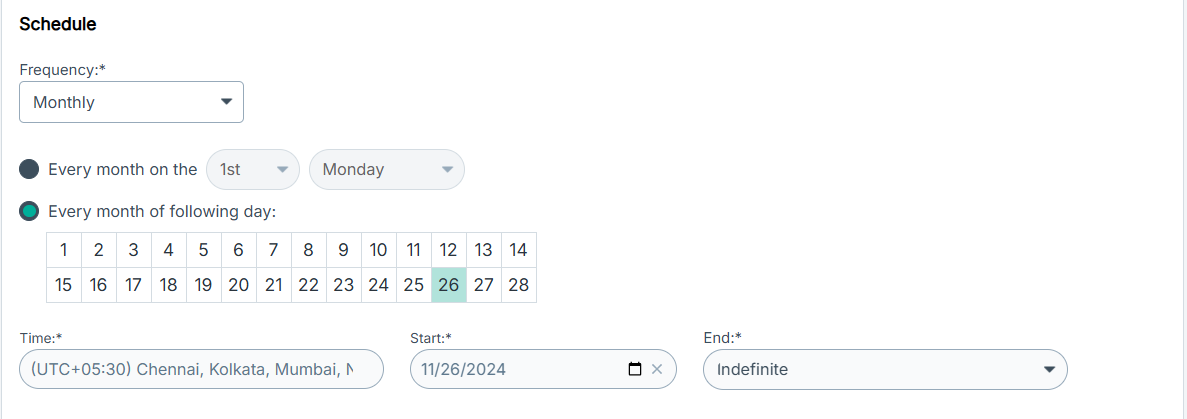
If you select Monthly from the Frequency drop-down, then the following options are displayed:
- To specify on which day of the week the schedule should occur, select the Every month on the option, select on which instance of day, and then select the day of the week.
- To select on which day of the month the schedule should occur, select the Every month of following day option and select the date.

-
To set a time for sending the email, do the following:
-
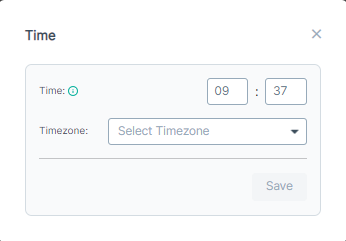
Click the Timezone in Time.
The Time dialog opens.

- In Time, enter time in mm:ss format to schedule the report.
- From the Timezone drop-down, select the desired timezone.
- Click Save.
-
Click the Timezone in Time.
- To select a start date for your schedule, enter a date or select the date from the calendar in Start.
-
To select an end date for your schedule, click End and then select one of the following:
- Indefinite
- After 5 occurrences
- After 10 occurrences
- After 20 occurrences
- After 30 occurrences
- After 60 occurrences
- After 90 occurrences
- Custom
Note: If you select Custom, you must select an end date from the End Date dialog that opens.