(MDM) Installing the agent using Microsoft Intune
You can deploy the Forcepoint agent using Microsoft Intune on endpoints running macOS.
Steps
-
Log in to the cloud portal and download the installation package.
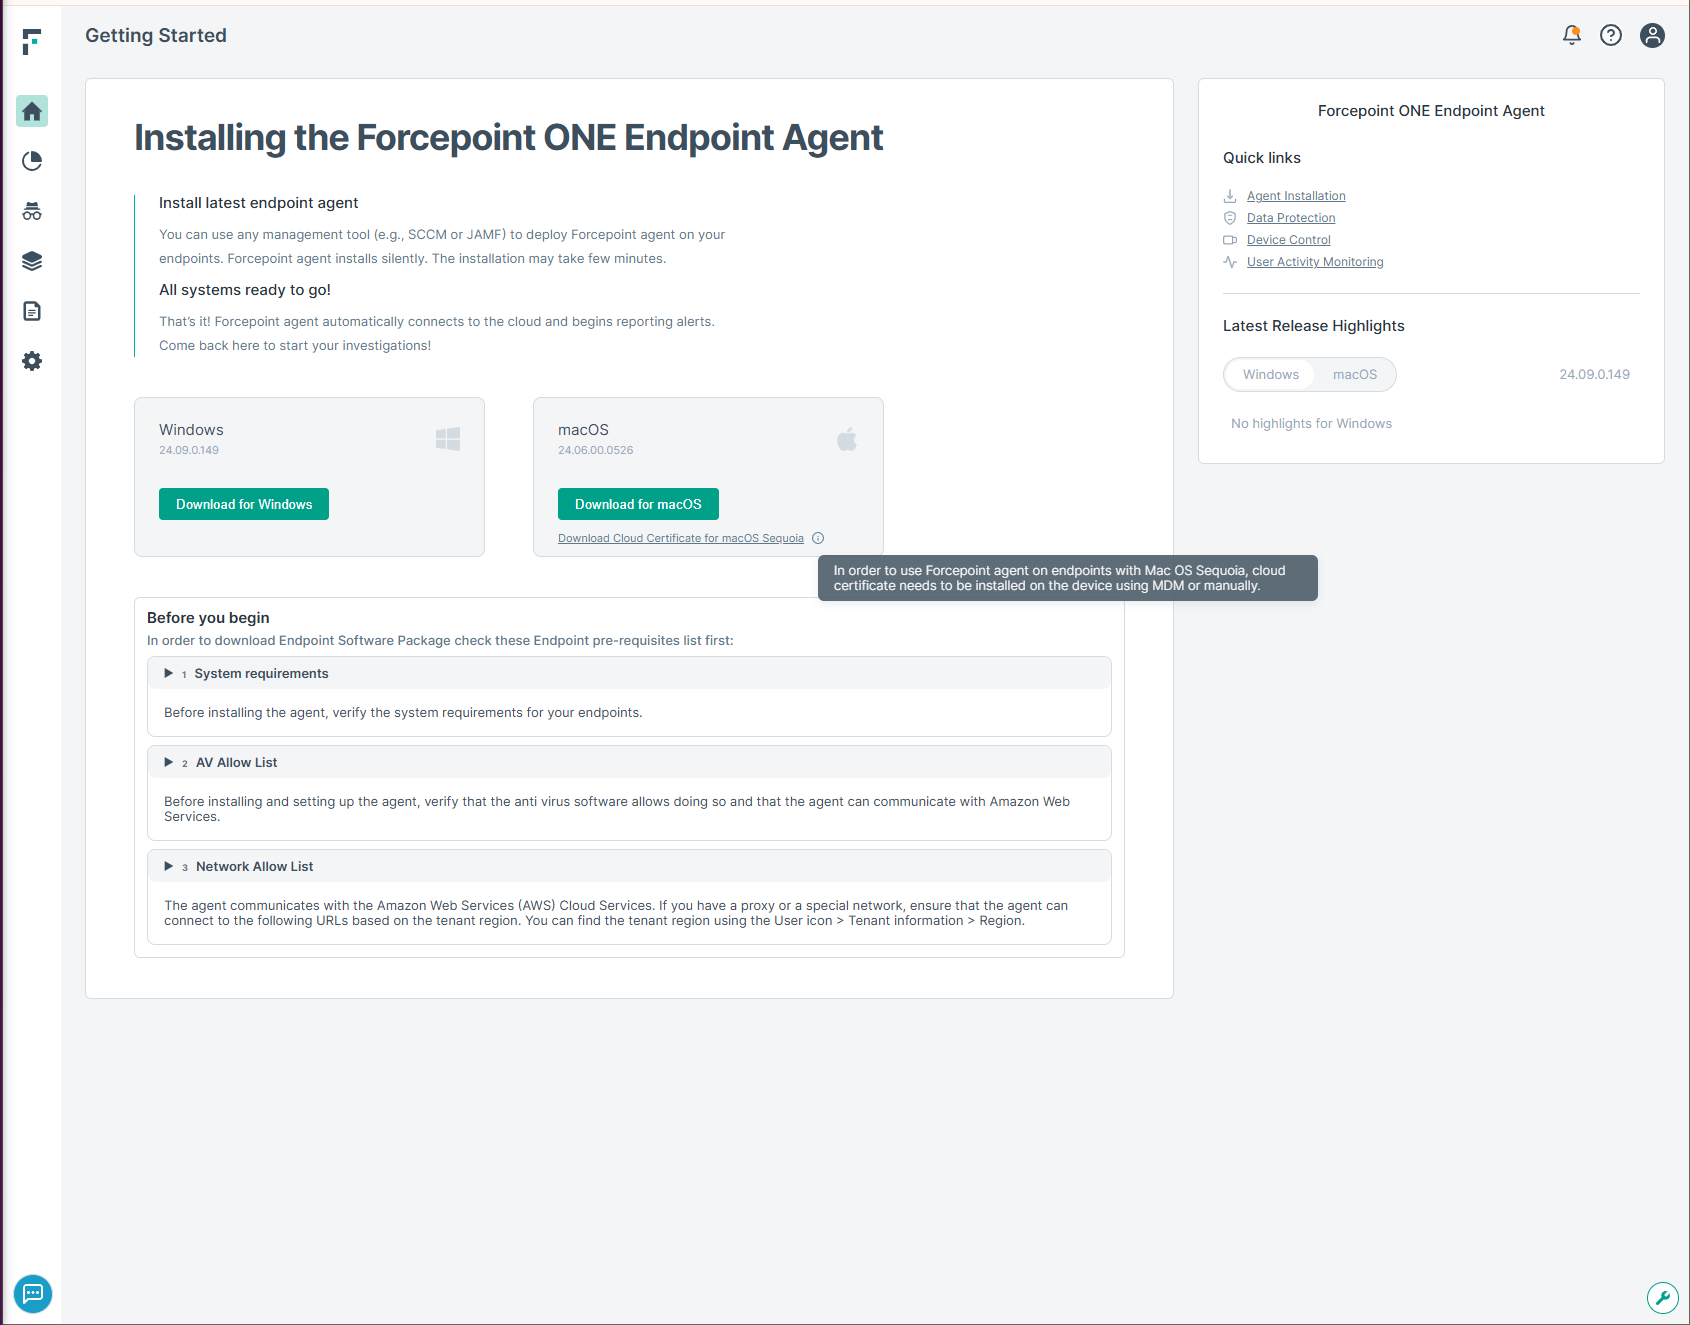 Note: If you are installing the agent on endpoints running macOS Sequoia then you must also download and install the certificate provided in the link on the download page.
 - Open the terminal application and create a folder to place the downloaded package. You can choose a location of your preference.
-
Copy the contents of the provided
FP_Neo_installer_macOS_24.02.00.0410.zipfile and paste them into the new folder you have created. -
Use a packaging tool like Jamf Pro Composer (or any other packaging tool mentioned in this link) to build the package with the following payload structure.
Note: A post install script is not required but may be auto populated anyway. Leave this blank.

-
Ensure the package is signed with your developer ID. How this is done is dependent on your packaging software but you can double-click on the package and click the padlock in the
top right corner. Verify that it is properly signed before proceeding.

-
In Intune, navigate to Apps > macOS > + Add and choose the application type Line-of-business app.

-
Select and upload the file created in Step 3 (for example:
*.pkg). The filename depends on how you have named the file while creating the package.
-
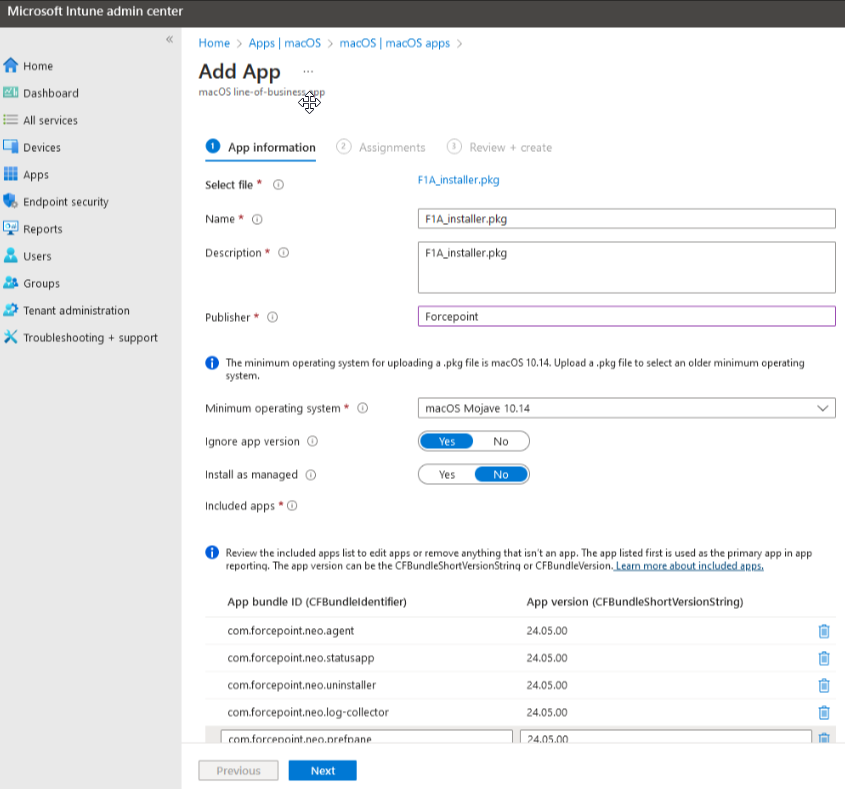
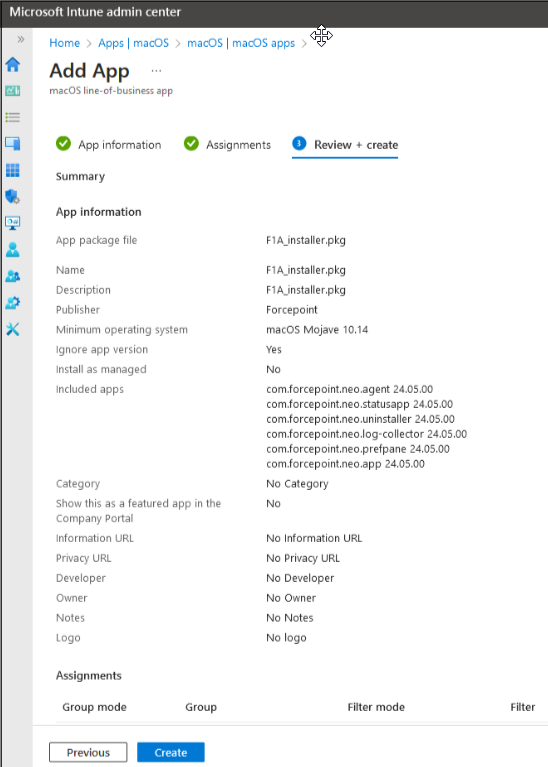
In the next page, set the Publisher to Forcepoint and specify details per your requirements. However, do not edit the predefined
App bundle IDs.
-
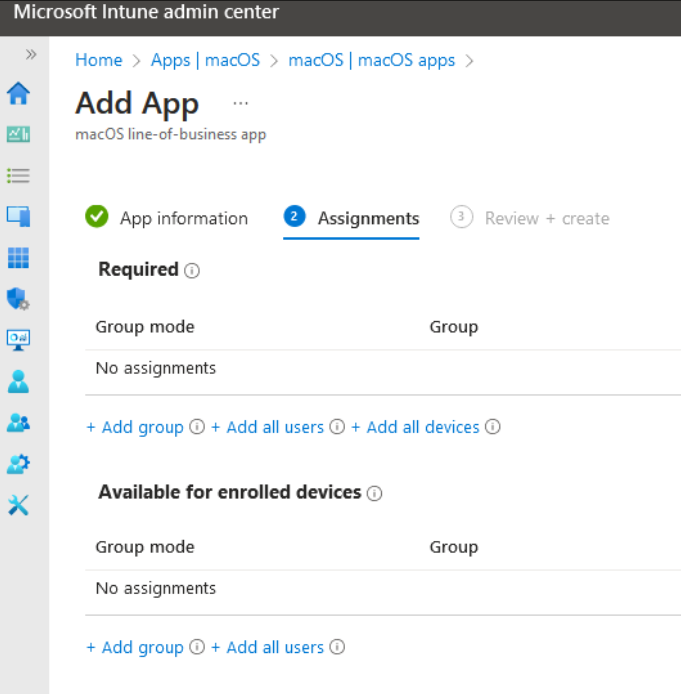
Set the assignments as mentioned in the following screen:
-
Review your settings and click Create.
-
For setting the configuration profiles on macOS go to Devices > macOS > Configuration profiles > + Create then click + New Policy.

-
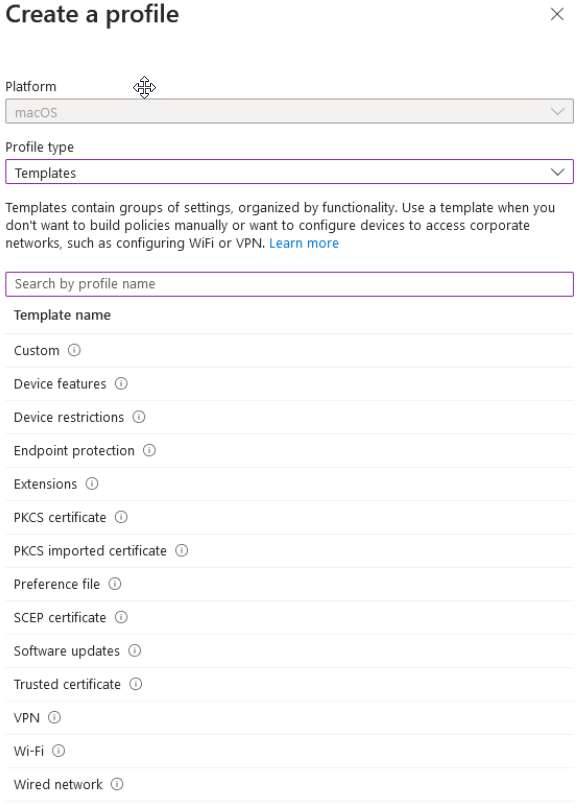
This will next display the Create a profile window. Here you can select the appropriate profile type.
-
Create a trusted certificate which contains and sets the
Forcepoint Cloud CA.ceron the endpoint. Set assignments and other configuration options as needed.
-
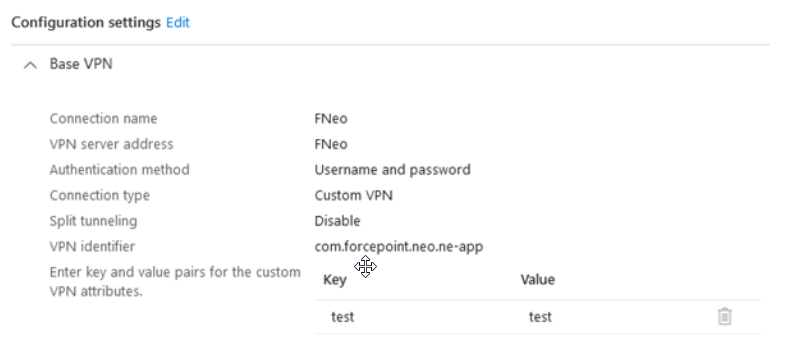
Next create the VPN, details that are mentioned below. Set assignments and other configuration options as needed.
-
Create a trusted certificate which contains and sets the
Forcepoint Neo NC Root CA.cer. Set assignments and other configuration options as needed.
-
Create a trusted certificate which contains and sets the
localhost.cer. Set assignments and other configuration options as needed.
-
Create a Device configuration profile which contains the following settings. Set assignments and other configuration options as needed.
Allowing the com.forcepoint.neo.agent service to edit privacy preferences. 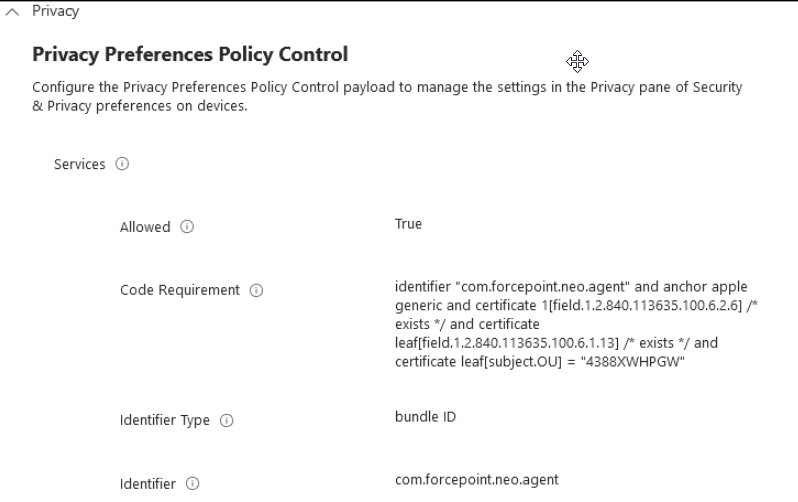
Allowing the com.forcepoint.neo.es service to edit privacy preferences. 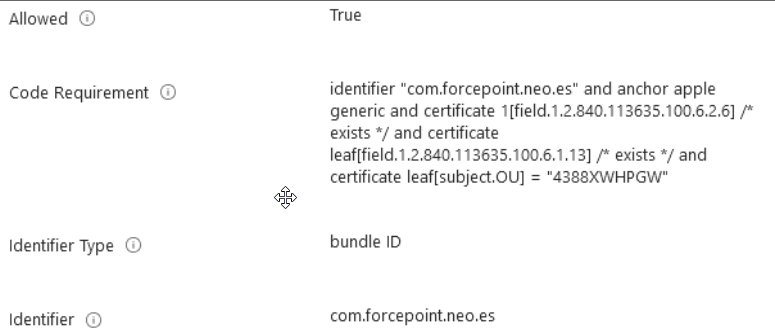
Allowing the com.forcepoint.neo.protectiond service to edit privacy preferences. 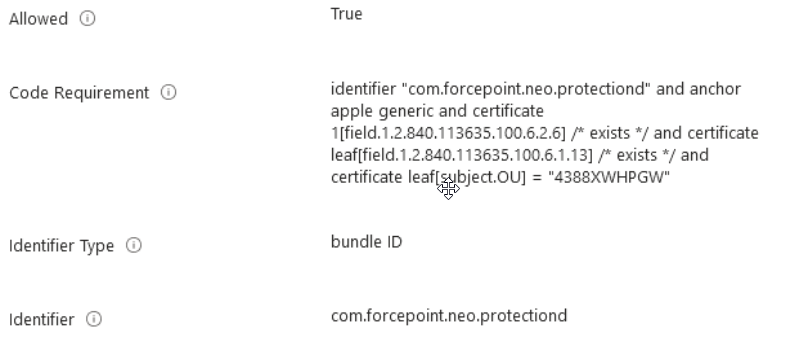
Allowing the com.forcepoint.neo.log-collector service to edit privacy preferences. 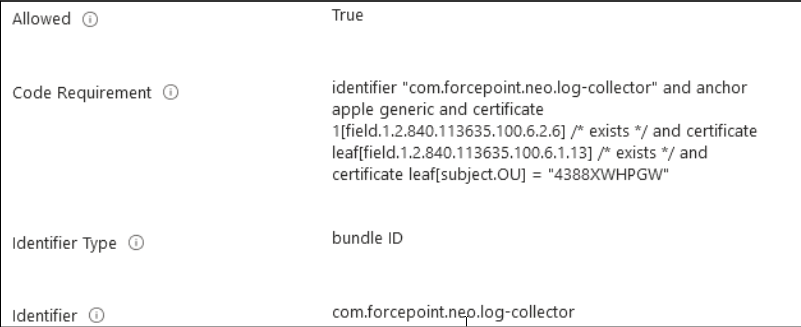
Allowing the com.forcepoint.neo.privilege-helper service to edit privacy preferences. 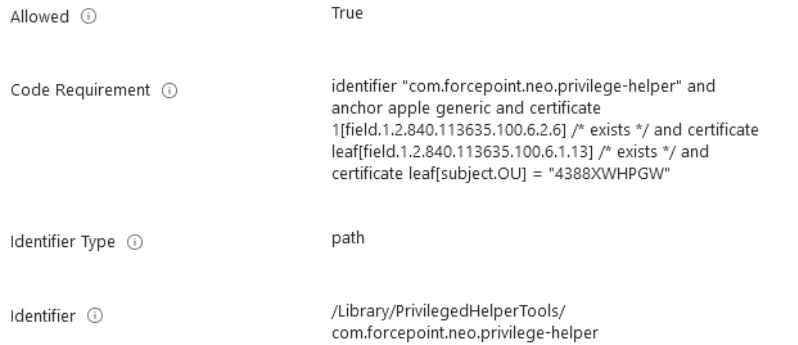
Allowing the fpneoprotectiond service to edit privacy preferences. 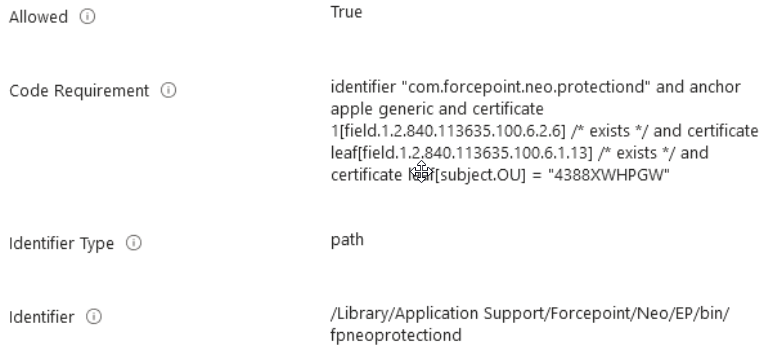
Allowing the EndPointClassifier service to edit privacy preferences. 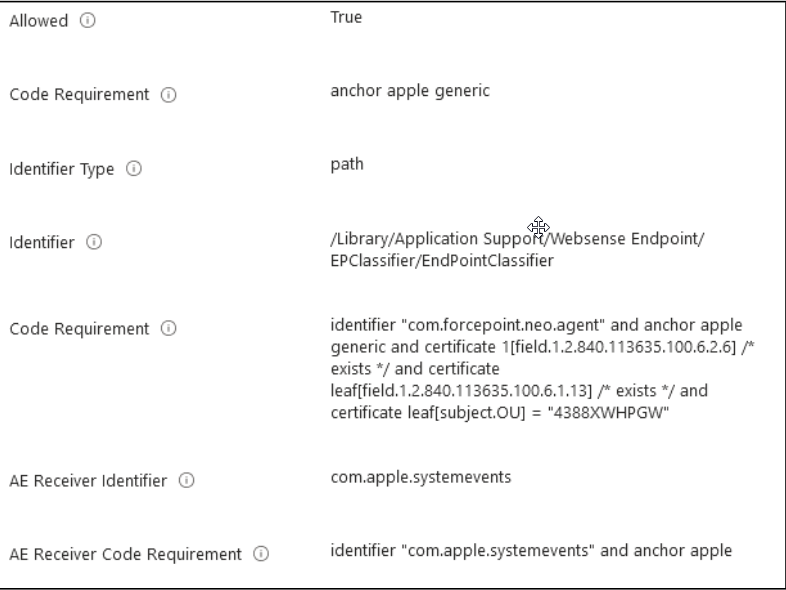
Adding bundle IDs and receiver types for the EndPointClassifier 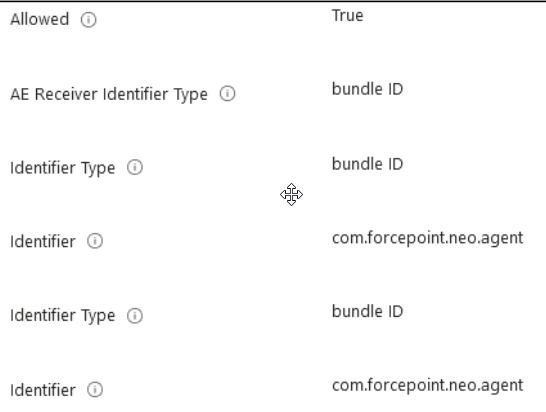
Adding code requirement for EndPointClassifier. 
Allowing the com.forcepoint.neo.es and com.forcepoint.neo.ne system extensions to configure payload settings for enrolled devices. 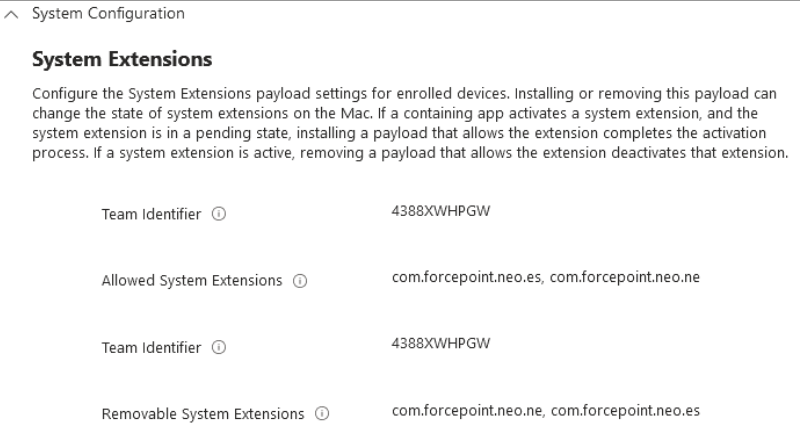
Configuring the web content filter. 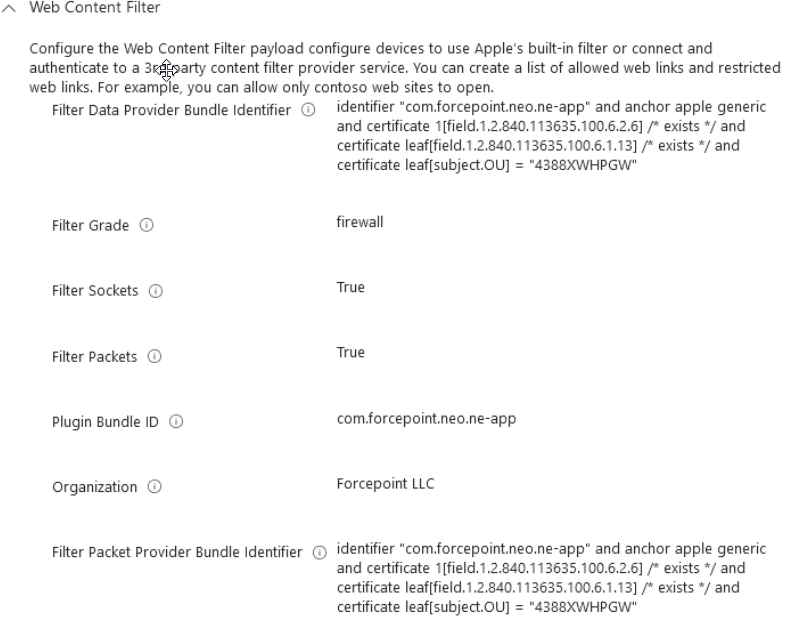
-
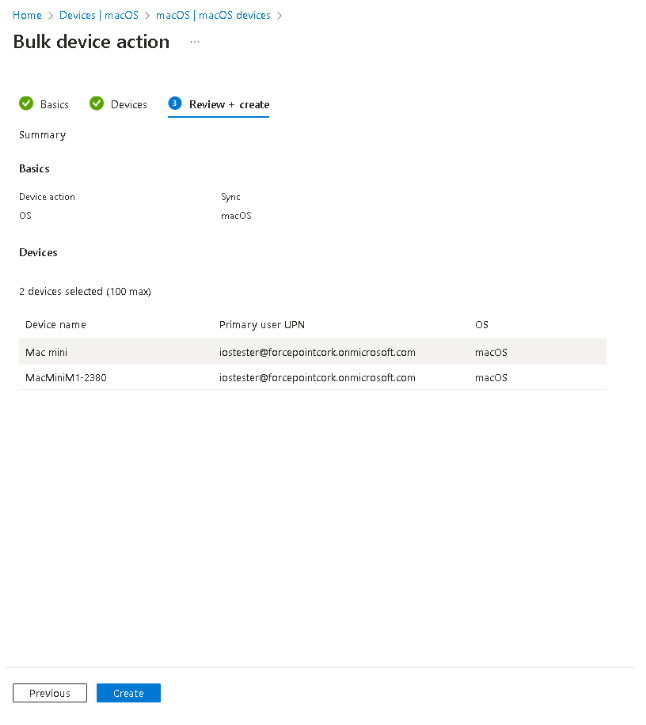
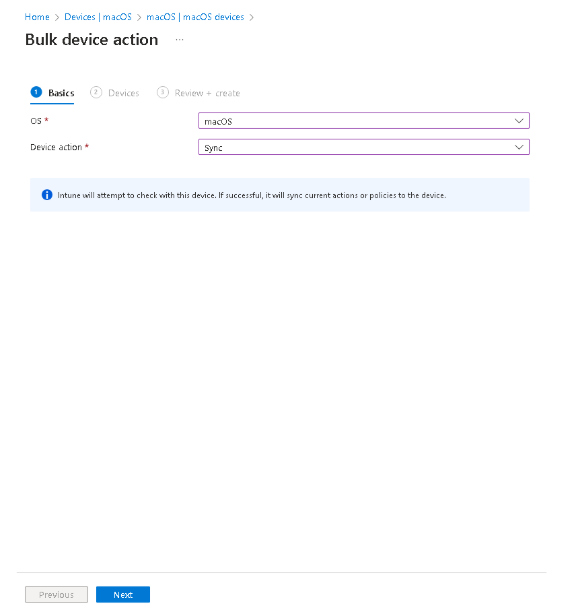
To ensure that the agent deploys on all endpoints in Intune navigate to Devices > macOS > Bulk device actions. Select macOS for the OS entry and Sync for the device action entry. Then click Next.
-
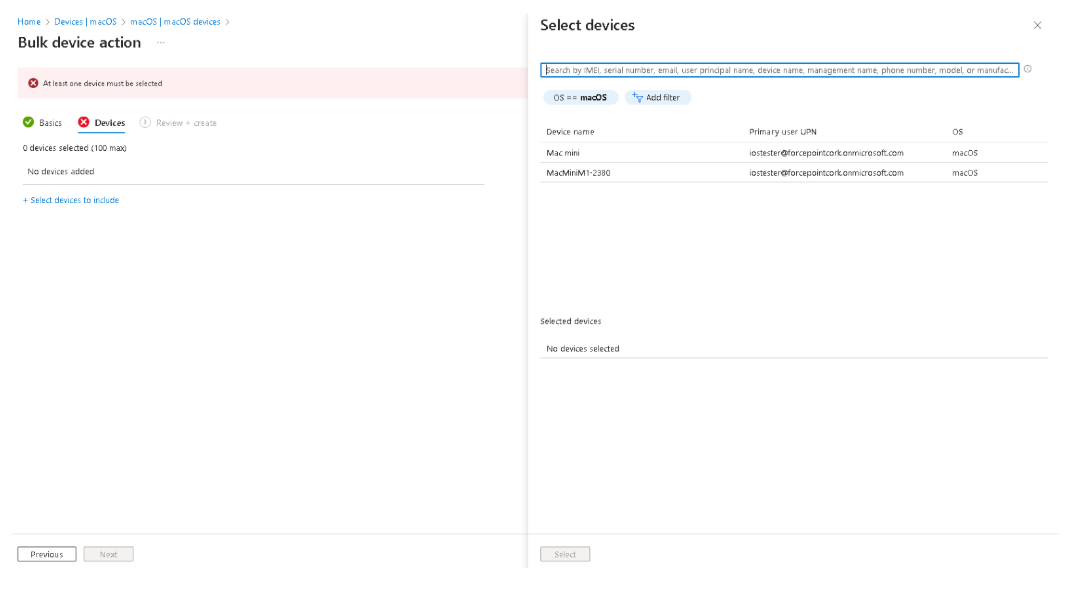
Select which devices you wish to install the agent and then click Next.
-
Once you are happy with your selected devices, click Create. The agent should deploy to all selected devices assuming they are assigned to the app as
highlighted above.
