Installing the Add-in
Your installation will differ depending on whether you are using Office 365 or an Exchange Server.
Office 365
Note: The deployment can take up to 6 hours and needs to be completed prior to endpoint deployment.
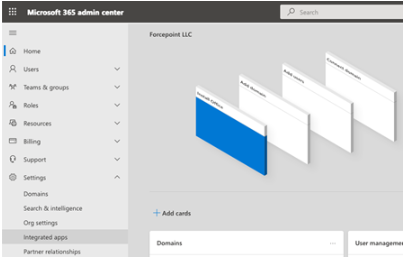
- Open the Microsoft 365 Admin Center.
- Go to Settings. (You may need to click Show All to see all options).
- Select Integrated Apps.
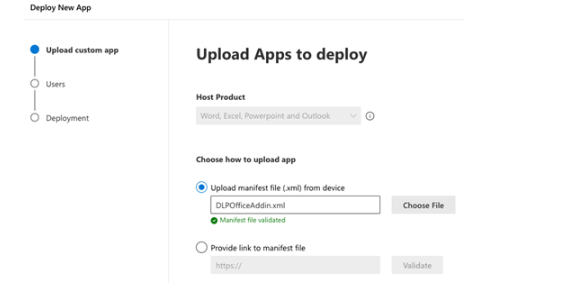
- Select and choose DLPOfficeAddin.xml. Click Next.
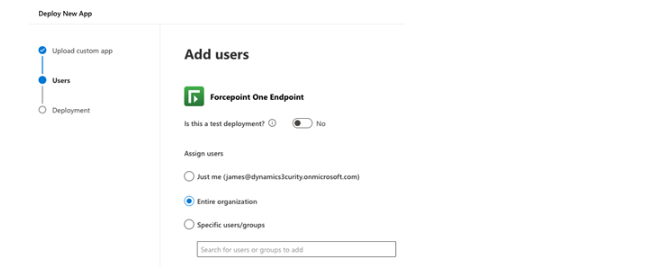
- Select the users (choosing the Entire organization or Specific users/groups) and then click Next.
- Accept the permissions requests and then click Next.
- Review and click Finish deployment.

Exchange Server Setup
- Copy the DLPOfficeAddin.xml file to the Exchange server.
- Open the Exchange Center Administration application.
- Select Organization and go to the Add-ins tab.
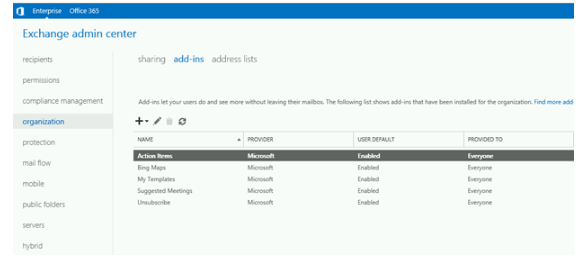
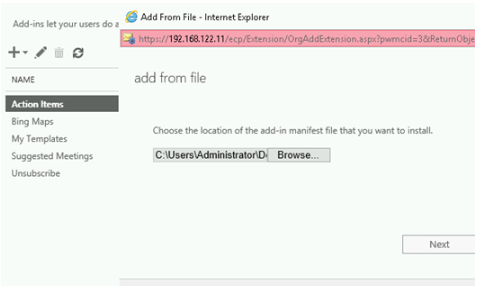
- Click on the + sign to add a new add-in.
- Select Add from file and browse to the location where the DLPOfficeAddin.xml file is located. Click on Next.
- Set the Provided to field to a group that will apply specifically to your macOS endpoints or to everyone.
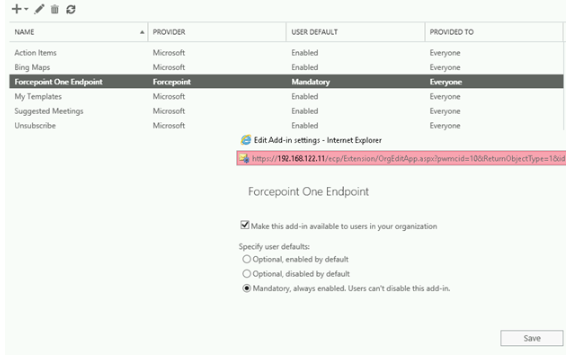
- Be sure to enable the Add-in. (Right click to edit the Add-in and specify the user defaults). Select Mandatory to ensure
users cannot disable this add-in and bypass DLP inspection.
Next Steps
Communication between the Forcepoint agent and the Outlook email client uses HTTPS. Forcepoint recommends creation and use of a specific certificate for use in your environment. See section Creating the Endpoint SSL Identity for details.