Adding SCIM application in Azure
After generating a SCIM access token, you should create the SCIM application in Microsoft Entra ID so that admins can provision/deprovision users directly in Microsoft Entra and have those users automatically created, attributes edited, or disabled within Forcepoint Data Security Cloud.
Before you begin
To learn more about using SCIM with Azure AD, refer to the Microsoft Guide.
Steps
-
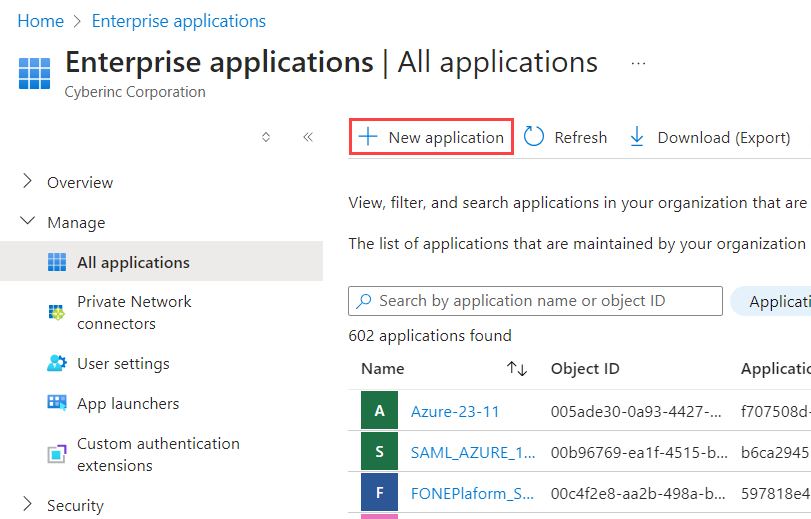
On the Enterprise Applications page, navigate to .
-
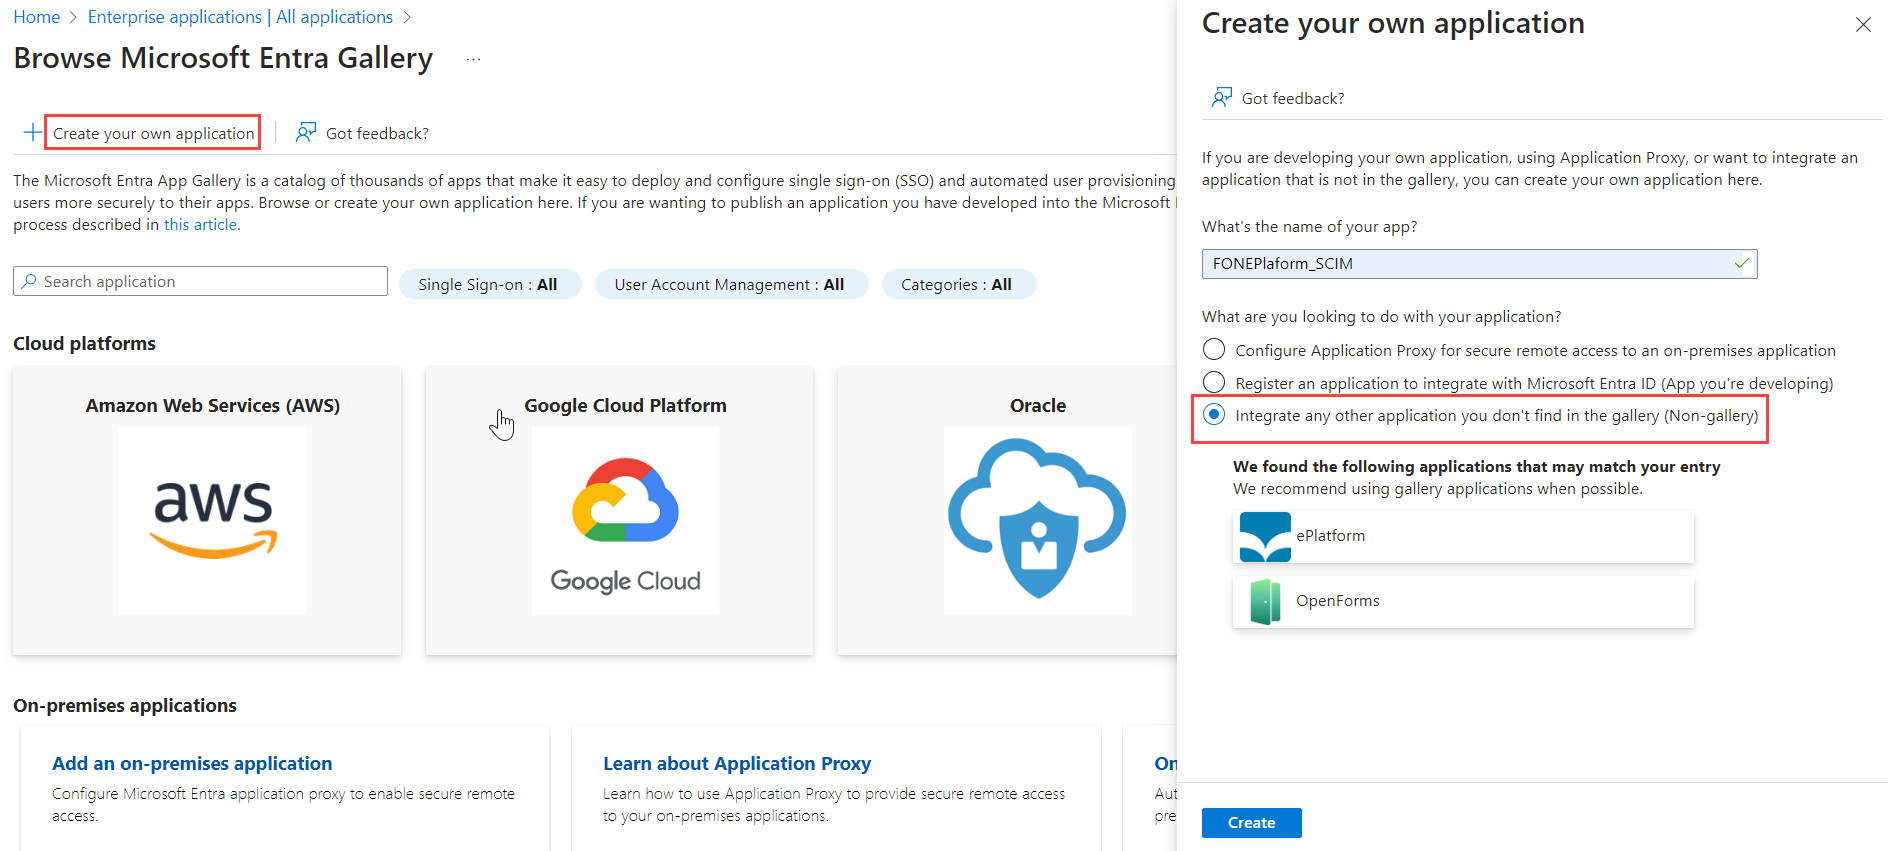
On the Create your own application dialog that appears on the right:
-
Ensure Integrate any other application you don't find in the gallery (Non-gallery) is selected.
-
Ensure Integrate any other application you don't find in the gallery (Non-gallery) is selected.
-
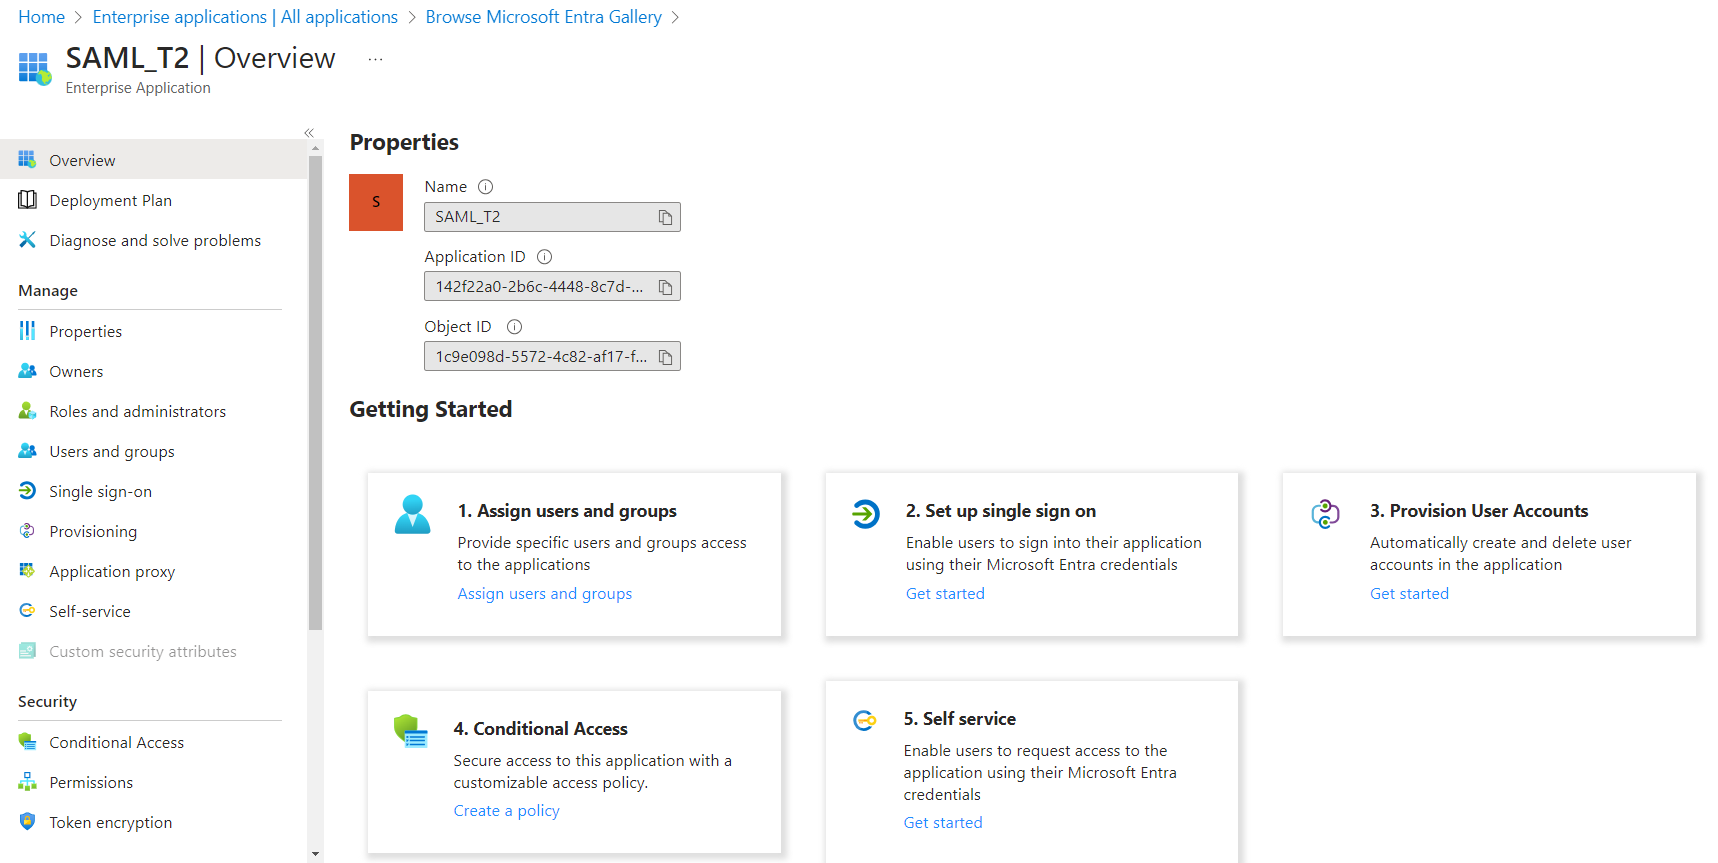
On the resulting page, select Provisioning from the left pane or Get started from the 3. Provision User
Accounts tile and then select Get started to automatically create, update, and delete accounts when users join, leave, and move within your
organization.
-
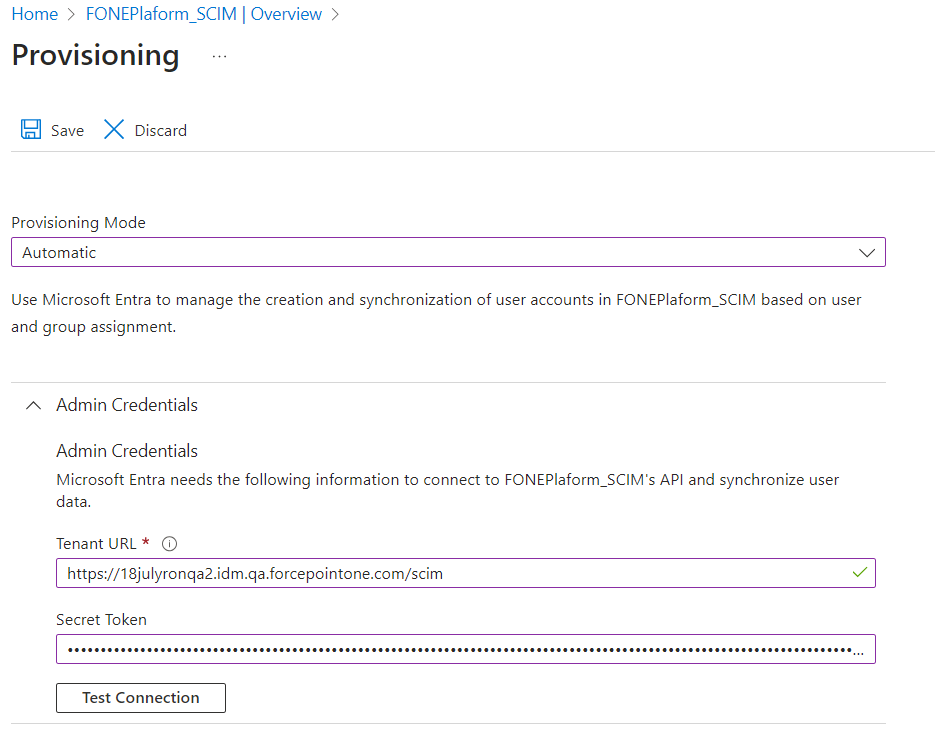
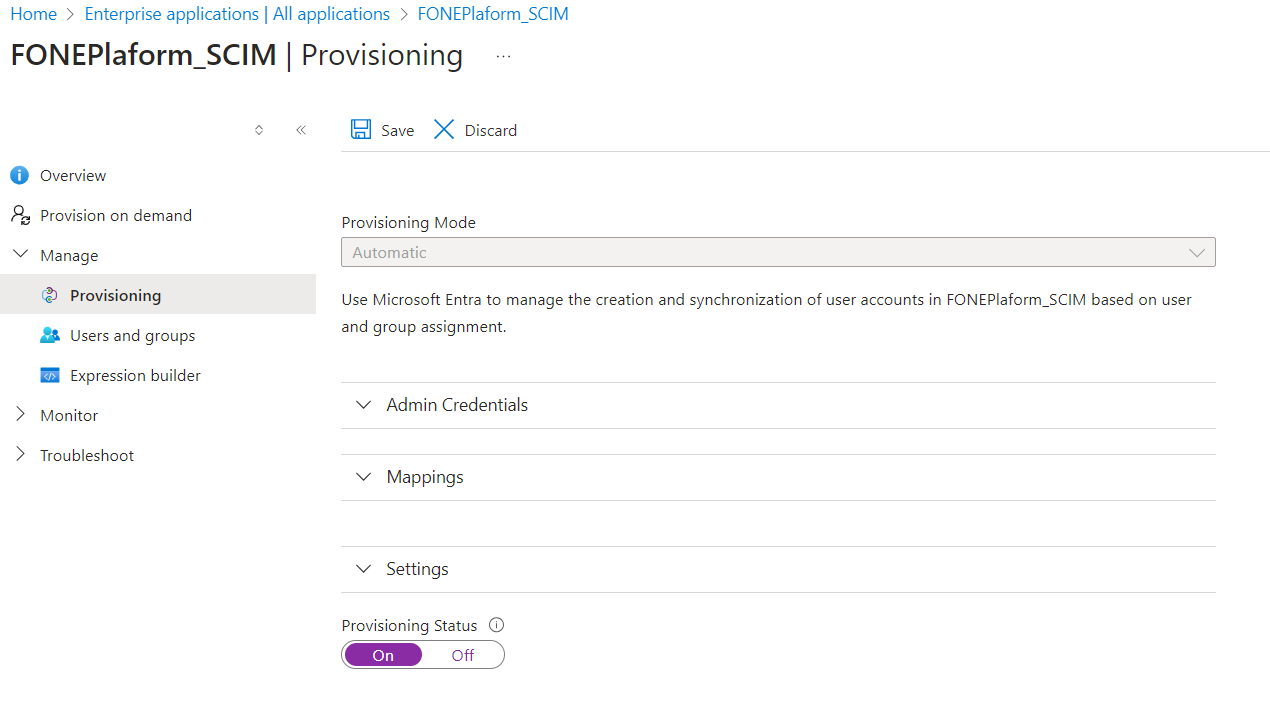
On the Provisioning page, select Automatic from the Provisioning Mode drop-down.
-
To save the details entered, click Save.
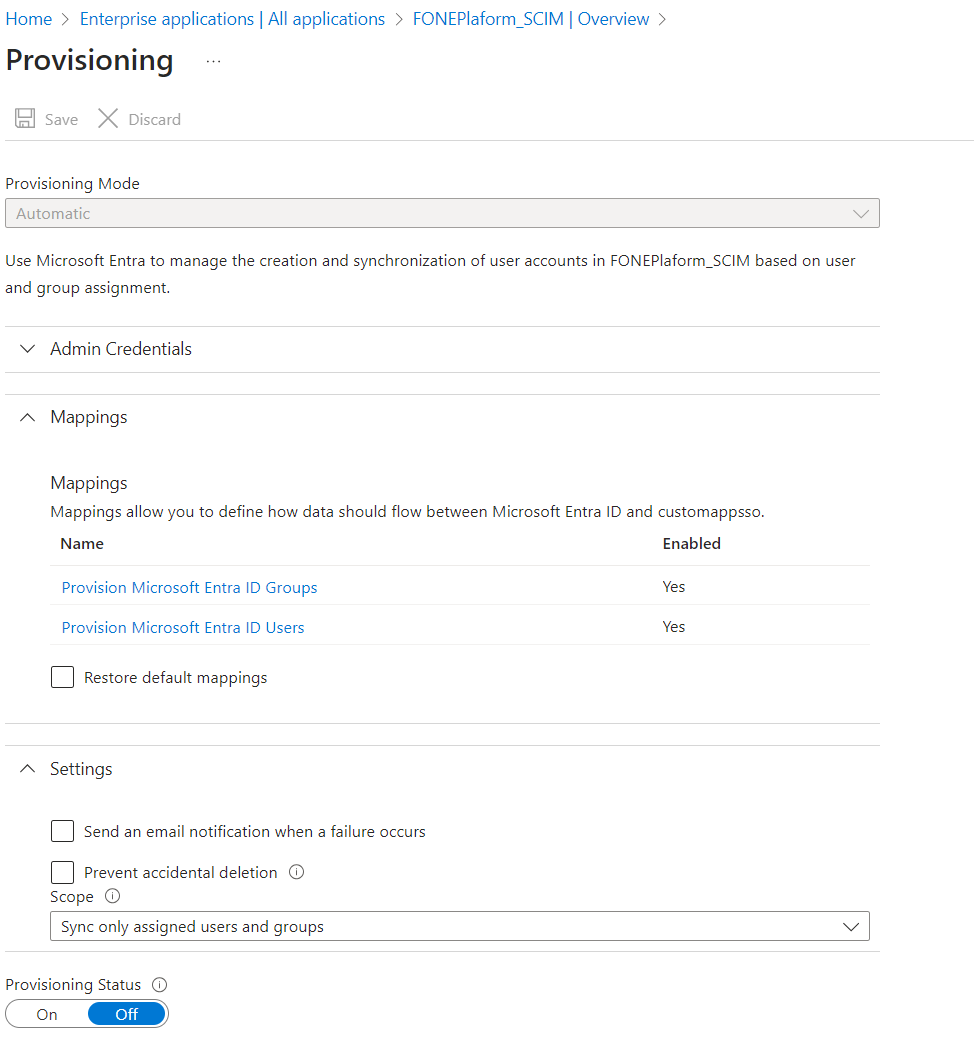
Once you save, you will see options to configure users or groups are going to be provisioned as well as which attributes.
-
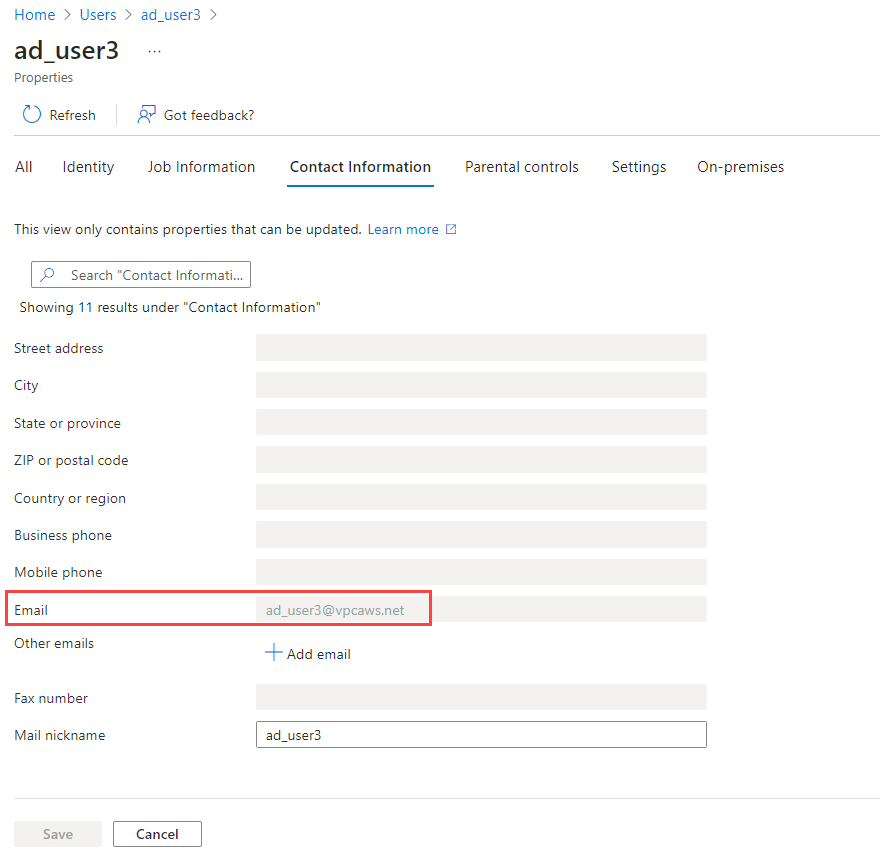
Under the Mappings section, adjust the user attribute properties match the users in your app.
-
Adjust the fields of user attribute mapping to match the following:
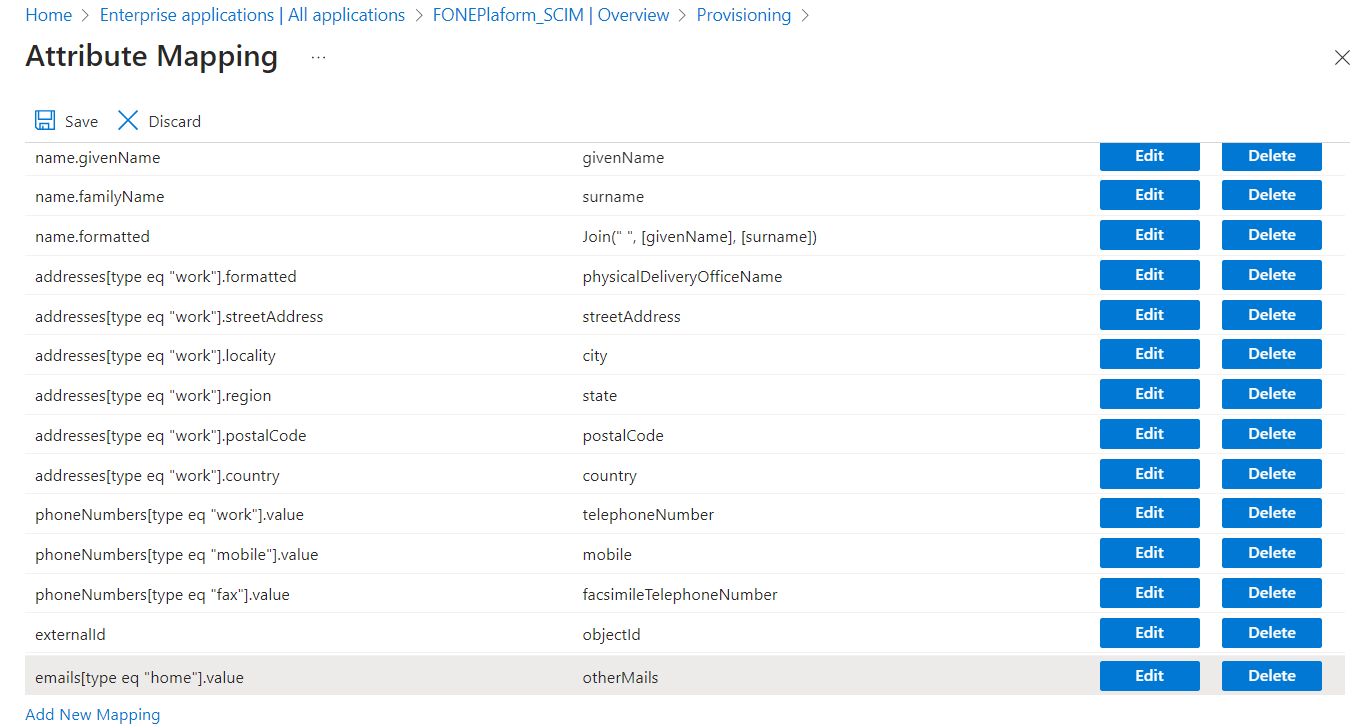
customappsso Attribute Microsoft Entra ID Attribute userName userPrincipalName active Switch([IsSoftDeleted], , "False", "True", "True", "False") displayName displayName title jobTitle emails[type eq "work"].value mail preferredLanguage preferredLanguage name.givenName givenName name.familyName surname name.formatted Join(" ", [givenName], [surname]) addresses[type eq "work"].formatted physicalDeliveryOfficeName addresses[type eq "work"].streetAddress streetAddress addresses[type eq "work"].locality city addresses[type eq "work"].region state addresses[type eq "work"].postalCode postalCode addresses[type eq "work"].country country phoneNumbers[type eq "work"].value telephoneNumber phoneNumbers[type eq "mobile"].value mobile phoneNumbers[type eq "fax"].value facsimileTelephoneNumber externalId objectId emails[type eq "home"].value otherMails name.middleName surname Note: Microsoft Entra allows to map only unique Target Attribute value with each Source attribute. For example, the Target Attribute drop-down will not display the externalid option as externalid is mapped to some other source attribute by default. So, you have to update the existing mapping of externalid.
-
Adjust the fields of user attribute mapping to match the following:
-
Under the Mappings section of the Provisioning page, adjust the groups attribute properties match the groups in your app.
-
Adjust the fields of groups attribute mapping to match the following:
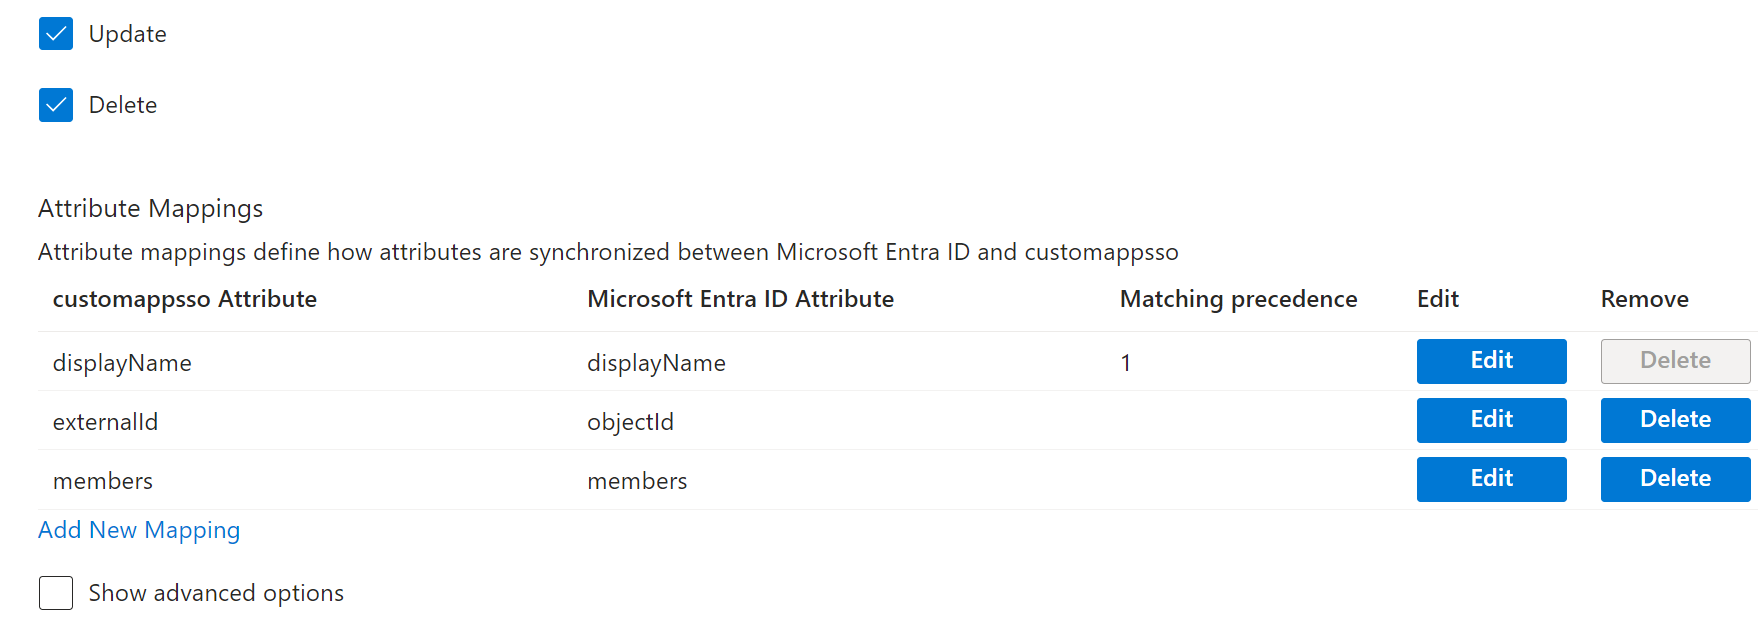
customappsso Attribute Microsoft Entra ID Attribute displayName displayName externalId objectId members members Note: Microsoft Entra allows to map only unique Target Attribute value with each Source attribute. For example, the Target Attribute drop-down will not display the externalid option as externalid is mapped to some other source attribute by default. So, you have to update the existing mapping of externalid.
-
Adjust the fields of groups attribute mapping to match the following:
-
Expand the Settings section of the Provisioning page:
-
To enable an email notification when a failure occurs, select the Send an email notification when a failure occurs checkbox.
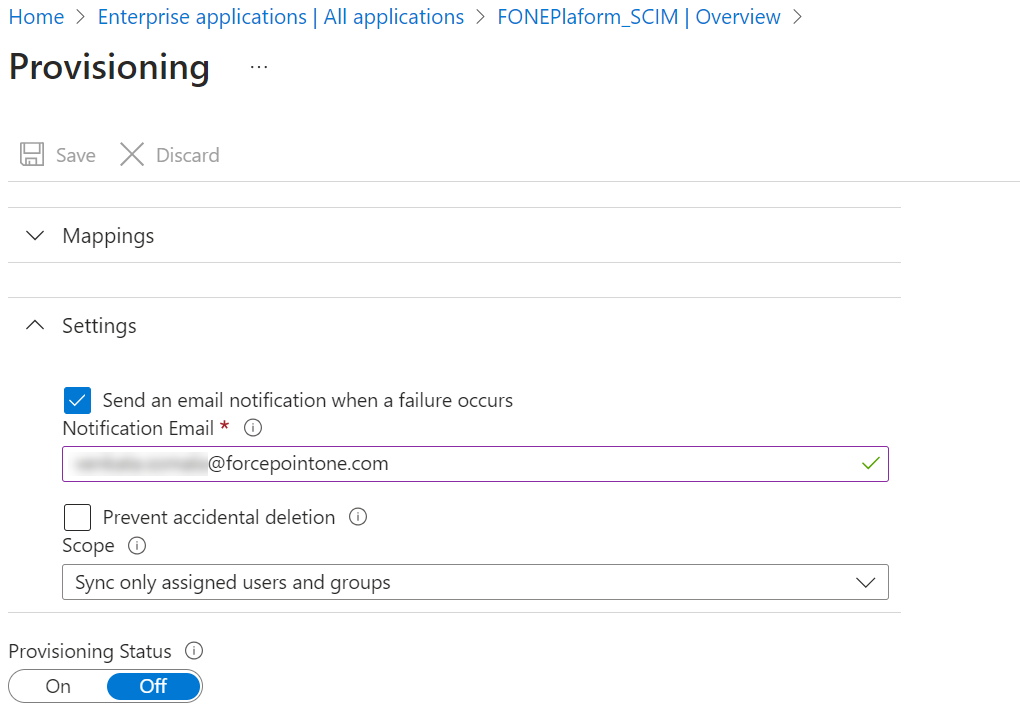
-
To enable an email notification when a failure occurs, select the Send an email notification when a failure occurs checkbox.
-
To only sync over specific users or groups, you will need to add them to the application.
-
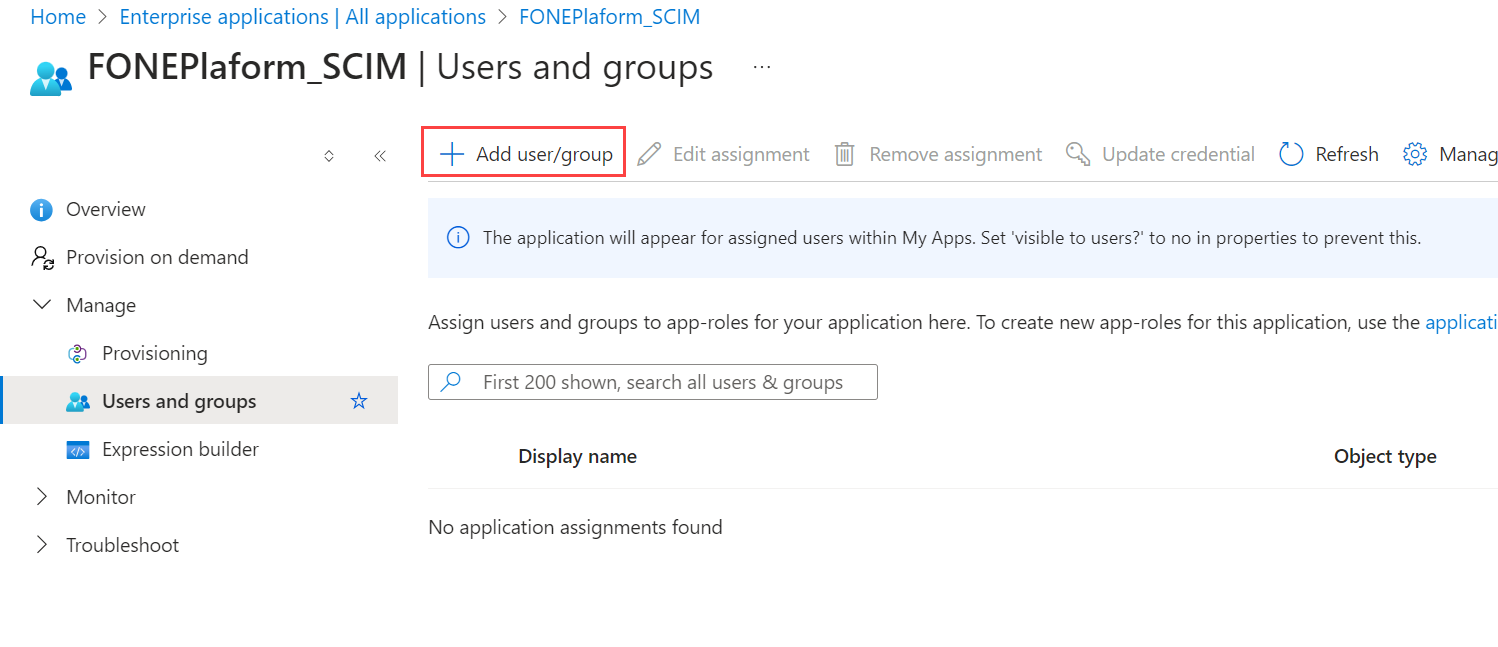
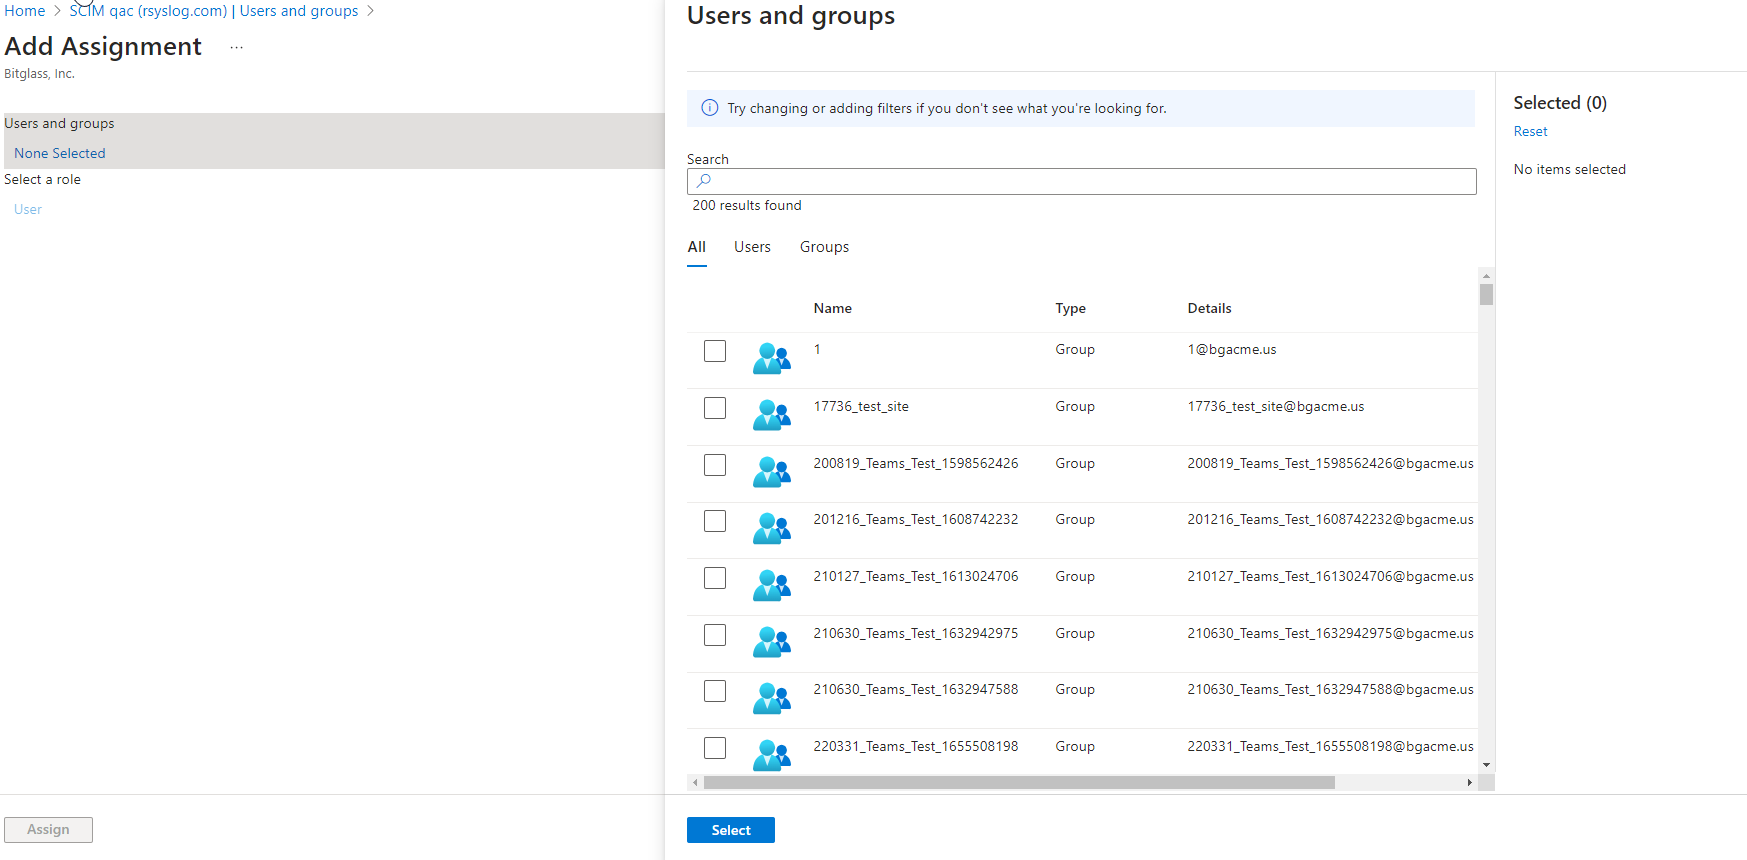
In the left column, select Users and groups and then click Add user/group.
-
Once you have made all of your selections, click Select at the bottom.
-
In the left column, select Users and groups and then click Add user/group.
-
On the Provisioning page, turn the Provisioning Status to On to sync users and groups into Forcepoint Data Security Cloud.
Result
- Users in page
- Groups in page
Next steps
- Now you are set to use Microsoft Entra ID as the IdP to login to Forcepoint Data Security Cloud.
- Now you can enforce users from the specific username domain to get authenticated by the selected Microsoft Entra ID IdP. To configure username domain, refer to Adding a new username domain.