You can automate the log collection using the Syslog-ng relay. This topic covers how to automate log collection using the Syslog-ng relay.
Before you begin
You will need to configure the syslog-ng configuration file (
syslog-ng.conf) before you automate the log collection using Syslog-ng relay.
Steps
-
Add a source statement that accepts logs forwarded by any firewall/proxy.
Example:
source s_relay { syslog(ip(0.0.0.0) port(514) transport("tcp") flags(no-parse); };The port and transport can be adjusted if necessary.
-
Add a destination statement that includes the following:
-
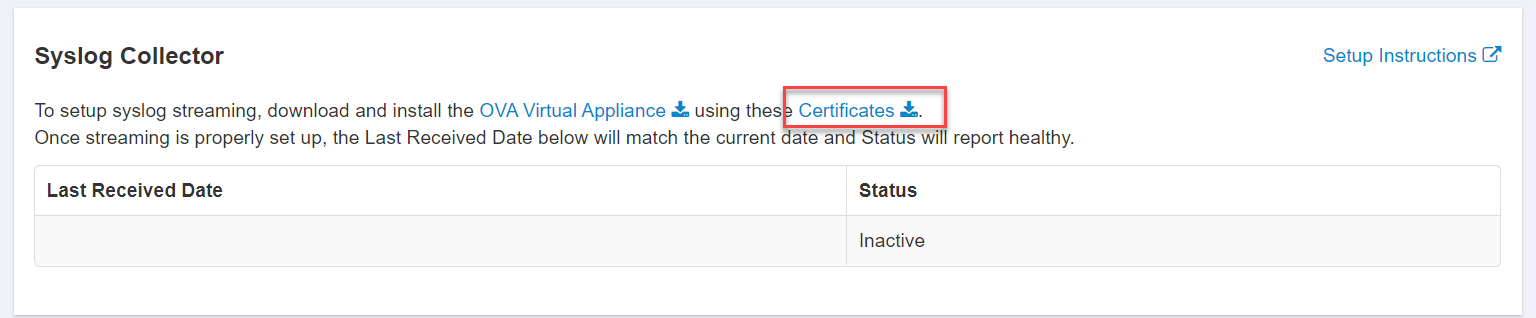
Download the certificate from the Certificate link under the Syslog Collector section on the Discovery
page. Use the included token as a password.
-
Copy the client certificate and private key to the syslog-ng client host as follows (The path locations are examples only).
- Copy the bitglass_collector_client_cert_key.key file to
/opt/bg/deploy/syslog-ng/etc/key.d/bitglass_collector_client_cert_key.key
- Copy the bitglass_collector_clientcert.crt file to /opt/bg/deploy/syslog-ng/etc/cert.d/
-
Setup the CA certificates used by syslog-ng to validate syslog.bitglass.com server as follows:
-
Add a log statement to relays logs from sources to the syslog.bitglass.com server destination to your syslog-ng.conf file.
Sample syslog-ng.conf
file@version: 3.5
@include "scl.conf"
########################
# Global options
########################
options {
chain_hostnames(no);
keep_hostname(yes);
flush_lines(0);
use_dns(no);
use_fqdn(no);
perm(0640);
stats_freq(0);
};
########################
# Sources
########################
source s_relay {
syslog(
ip(0.0.0.0)
port(514)
transport("udp")
flags(no-parse)
);
};
########################
# Destinations
########################
# Network Destination for Bitglass
destination d_collect {
syslog("syslog.bitglass.com"
template("0_ih7nzDU9yuRpESFwgtYNsOUKWlM= ${MSG}\n")
### The above token "0_ih7nzDU9yuRpESFwgtYNsOUKWlM=" should be replaced with the token from your Forcepoint Data Security Cloud | SSE tenant found on the Discovery page ###
port(1999)
transport("tls")
tls(
key-file("/opt/bg/deploy/syslog-ng/etc/key.d/bitglass_collector_client_cert_key.key")
cert-file("/opt/bg/deploy/syslog-ng/etc/cert.d/bitglass_collector_client_cert.crt")
ca-dir("/opt/bg/deploy/syslog-ng/etc/ca.d")
)
);
};
########################
# Log paths
########################
# Relay logs received on port 514 over tcp to Bitglass
log {
source(s_relay);
destination(d_collect);
};
Note: If you are using Cisco ASA, make sure that you enable the Send timestamp in the logstream under .