Configuring downloadable OVA
Forcepoint Data Security Cloud | SSE provides an OVA that you can download to setup syslog streaming for log ingestion. The OVA is a docker container built in VMware and admins must have vCenter in order to install it.
Before you begin
- At least 2 CPU cores
- 8 GB of RAM
- 200 GB of Drive storage space
Forcepoint Data Security Cloud | SSE's OVA connector utilizes UDP for streaming logs. This means you cannot use the OVA option when using a firewall that utilizes TCP. For example, Zscaler's NSS. For TCP based firewalls, Forcepoint Data Security Cloud | SSE recommends you to setup log streaming using Rsyslog.
The steps below will walk you through how to download and configure the OVA for log streaming.
Steps
-
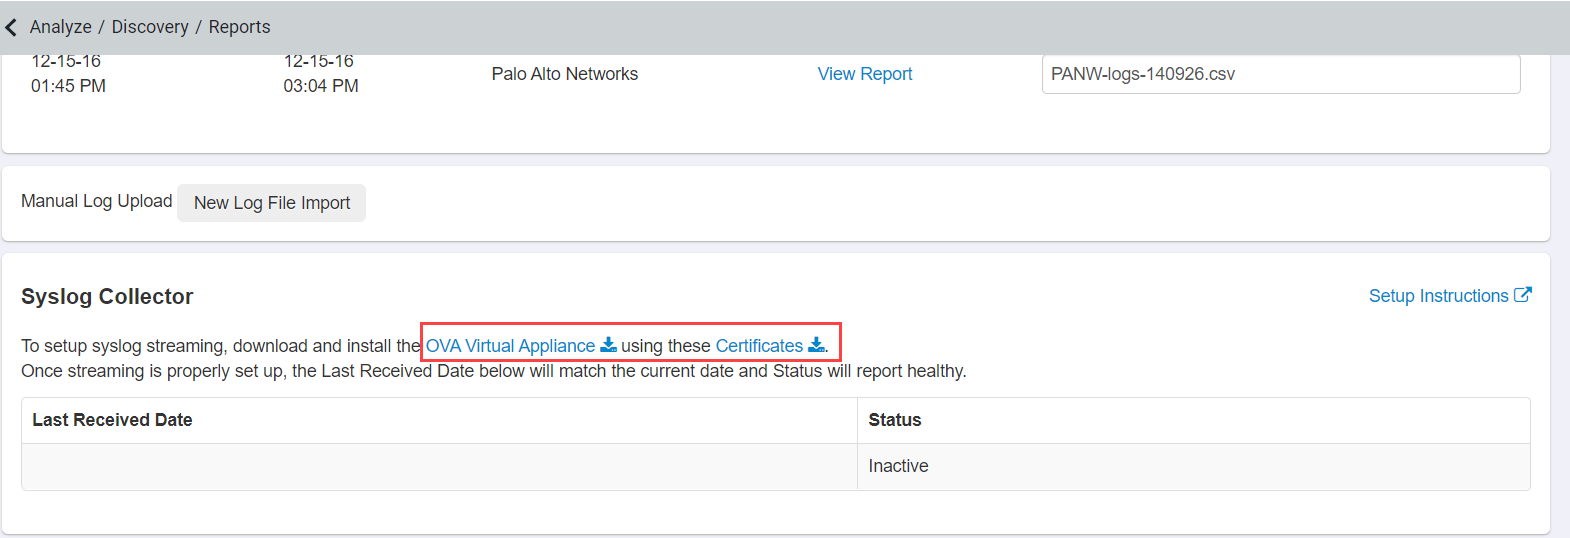
Under the Syslog Collector section, click the OVA Virtual Appliance link and the Certificates link to download
the OVA and certificates needed for configuration.
-
With the OVA downloaded:
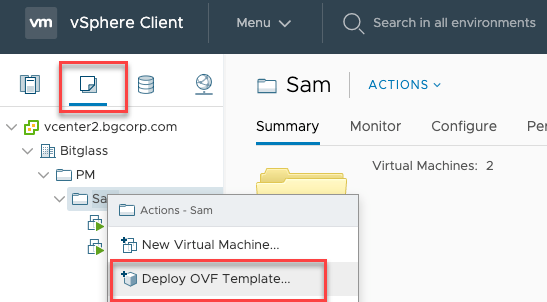
- Open up your vSphere admin console and navigate to VMs and Templates.
- Expand appropriate vCenter.
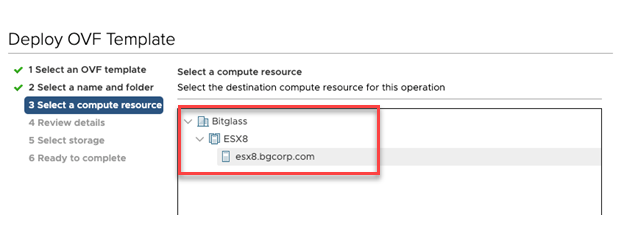
- Select the data center, right click the appropriate VMware ESX host and then select Deploy OVF template.
-
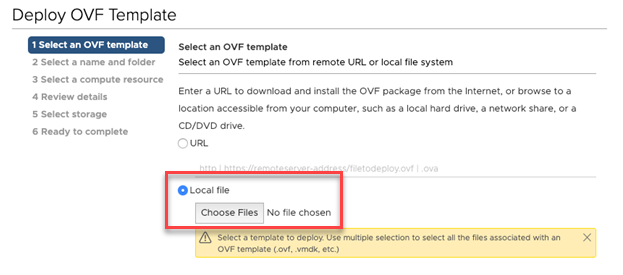
On the Select an OVF template tab, select Local File and then click Choose Files to locate the OVA you just
downloaded. Select all the files under the unzipped folder and click Confirm.
-
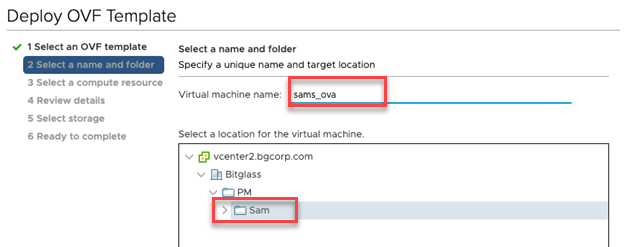
Enter a name for your VM. The wizard will walk you through verification, select the appropriate DataCenter under vCenter for the template location and then select the appropriate
ESX server and DataStore.
-
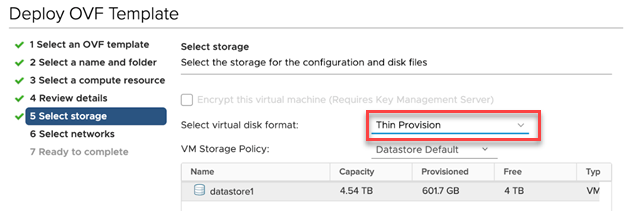
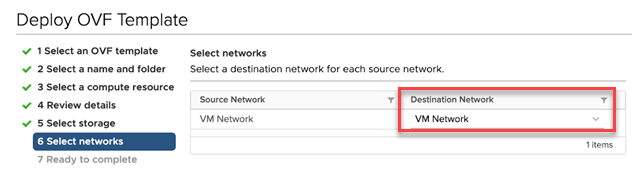
Select Thin Provision for the disk format and then select VM Network as the destination on the next page.
-
With the OVA uploaded successfully, select the VM you created and power it on. If you are not using SSH keys for the VM, you can use the following credentials to login to the OVA
VM:
- User: ubuntu
- PW: onprem123!

-
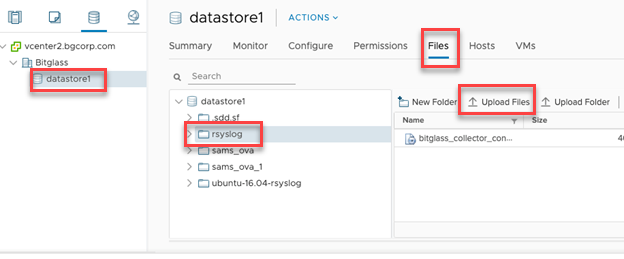
On vCenter, go to Storage and select a datastore. Under the selected datastore, select Files, create a folder and then upload the
certificates ISO you downloaded.
-
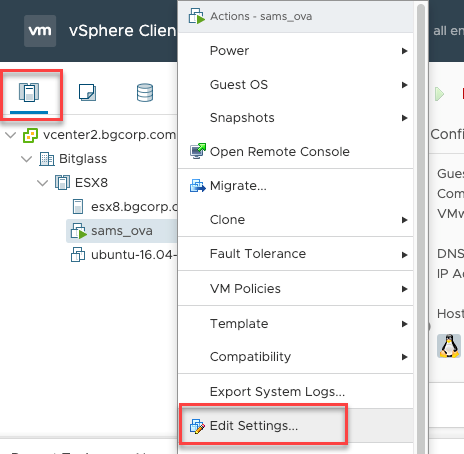
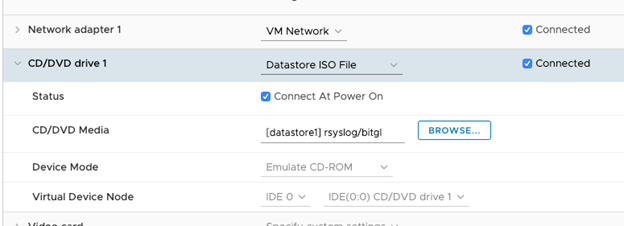
Navigate to Hosts and Cluster, right-click on the VM created and then click Edit Settings. Under CD/DVD drive
1, select Datastore ISO File and select the ISO you just uploaded in step 8. Check the Connect At Power On box and set
the Virtual Device Node to IDE 0 and IDE(0:0) CD/DVD drive 1.
-
At this point, you will need to set the IP of the OVA VM to static and assign the IP, Gateway, and DNS server. Run the following commands to do so and save to the VM:
# sudo nano /etc/network/interfacesYou will see an output like this:# auto eth0 iface eth0 inet dhcp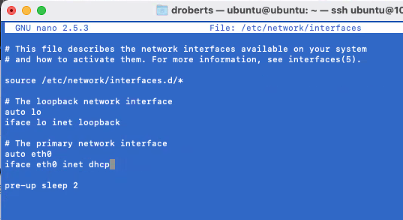 Change it to be a static IP address and then set the information replacing all the values in red with your own Static IP, netmask, gateway, DNS IPs:
# auth eth0
Iface eth0 inet static
address xx.x.x.xxx
netmask 255.255.0.0
gateway xx.x.x.x
dns-nameservers xx.x.x.xx
dns-nameservers x.x.x.x
Push Ctrl-O to save the file, ctrl-X to exit and then reboot the VM to have your changes be applied.- Once the VM is rebooted you should confirm you can ping bitglass.com and that nslookup can resolve bitglass.com.
- You will need to point your firewall syslog server to the VM ip port 514
- You will also need to execute the setup:
sudo ./run_setup.sh
If you have a permission issue, run:
chmod +x “path of”the error that you receive.The setup should complete successfully.