Setting Up Interfaces
Configure the IP address properties for Interface #0 as a dynamic DHCP interface.
Setting Up Interface #0
- Click Interfaces to view the available interfaces that can be edited.
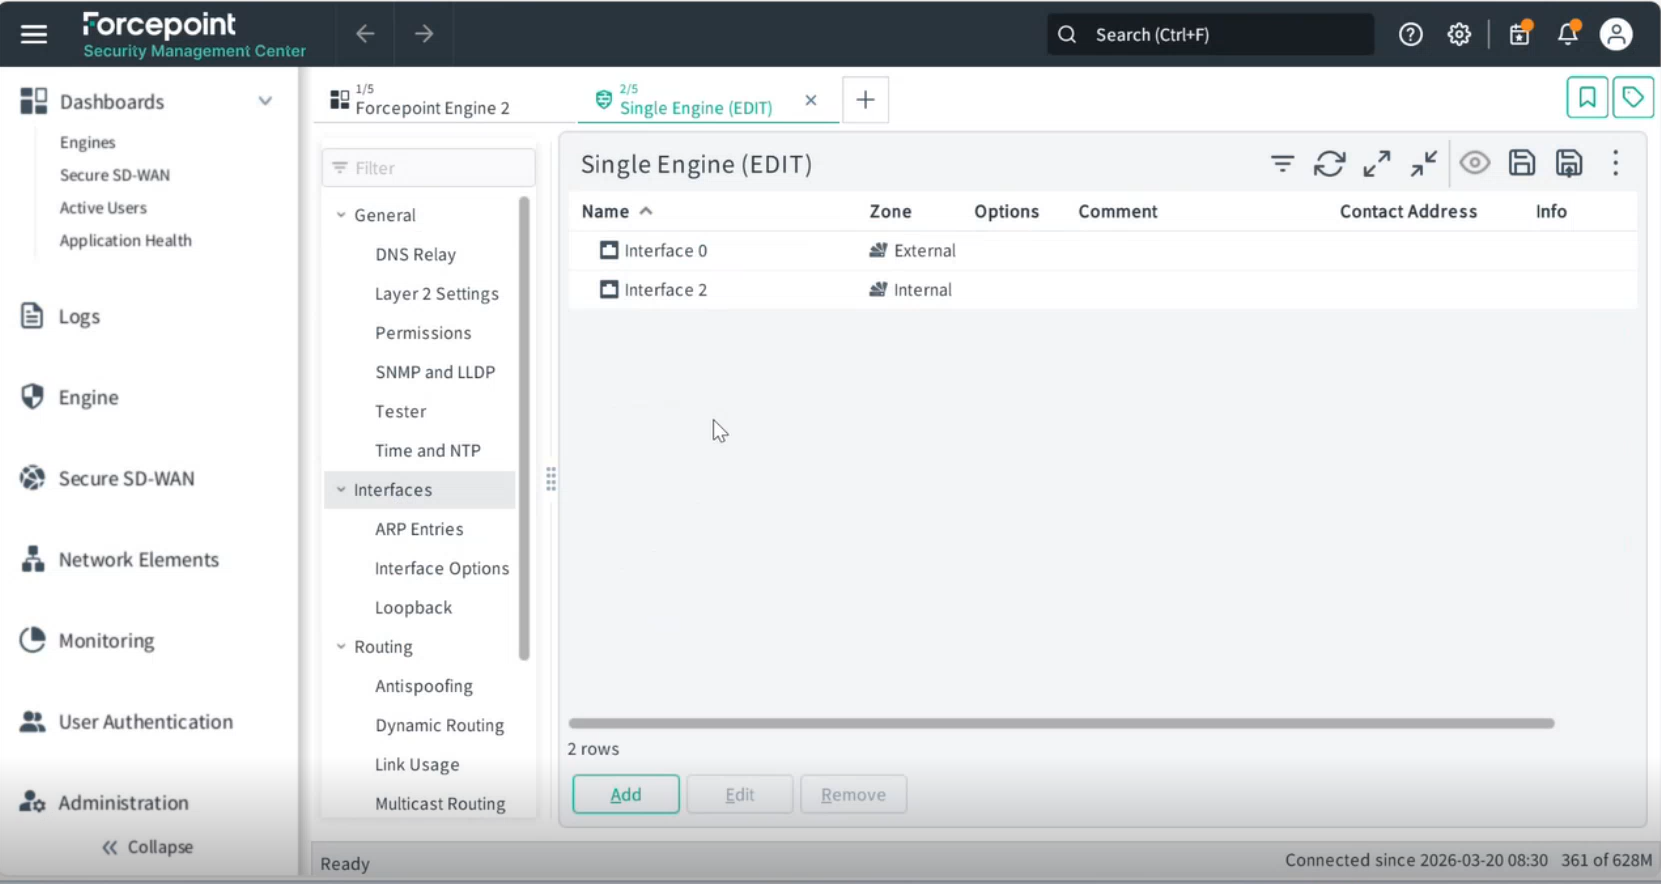
- Right-click Interface 0 and, from the context menu, select .
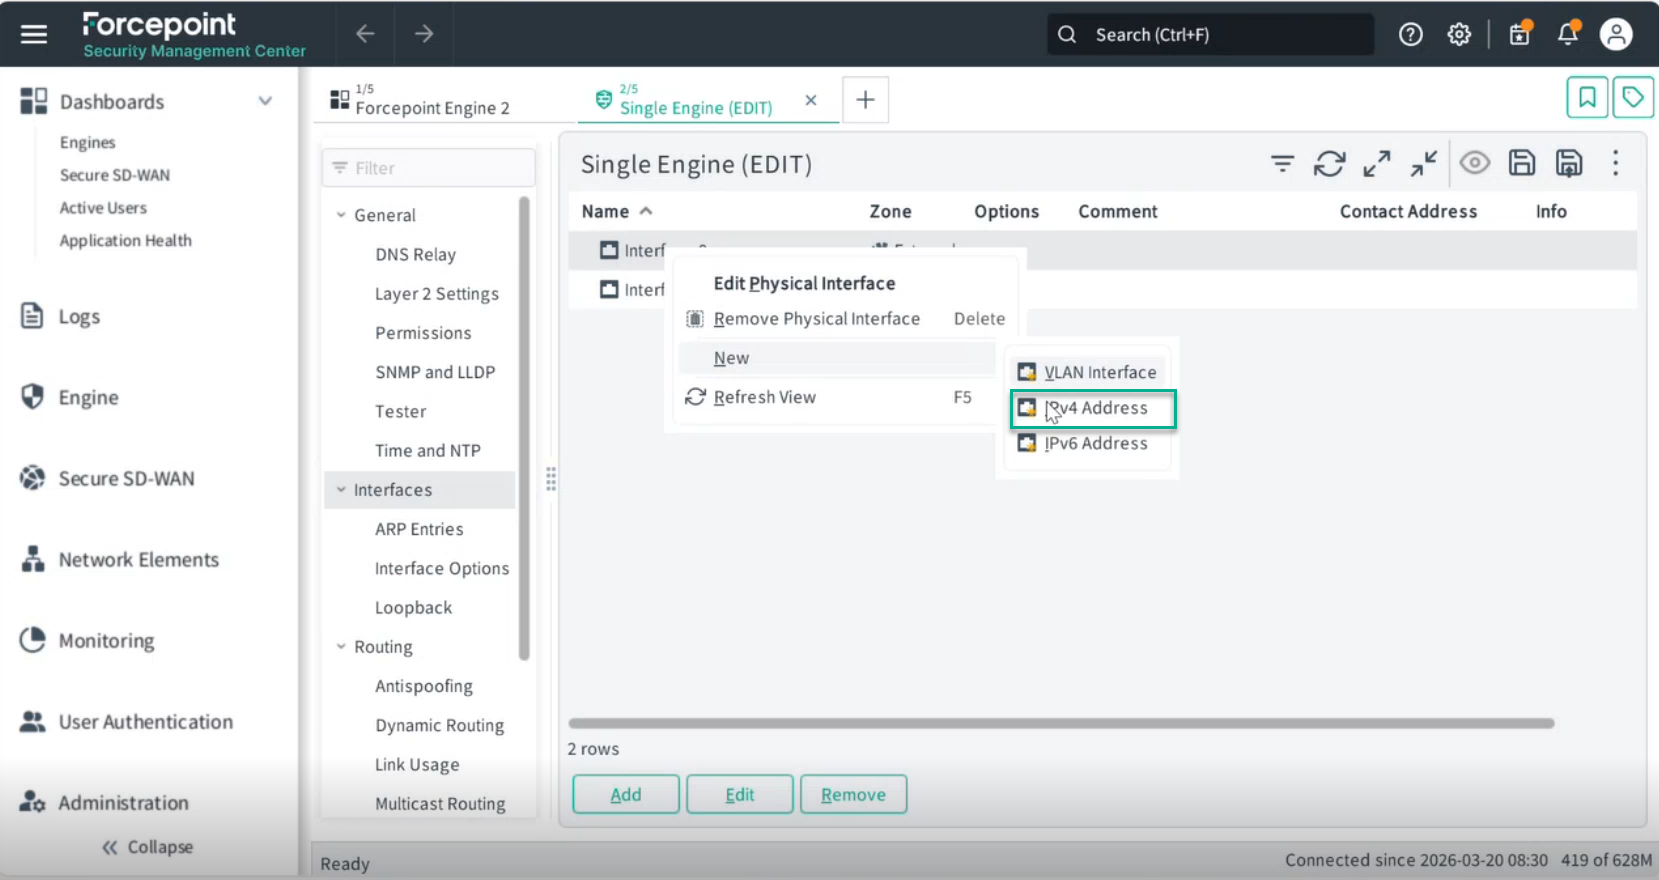
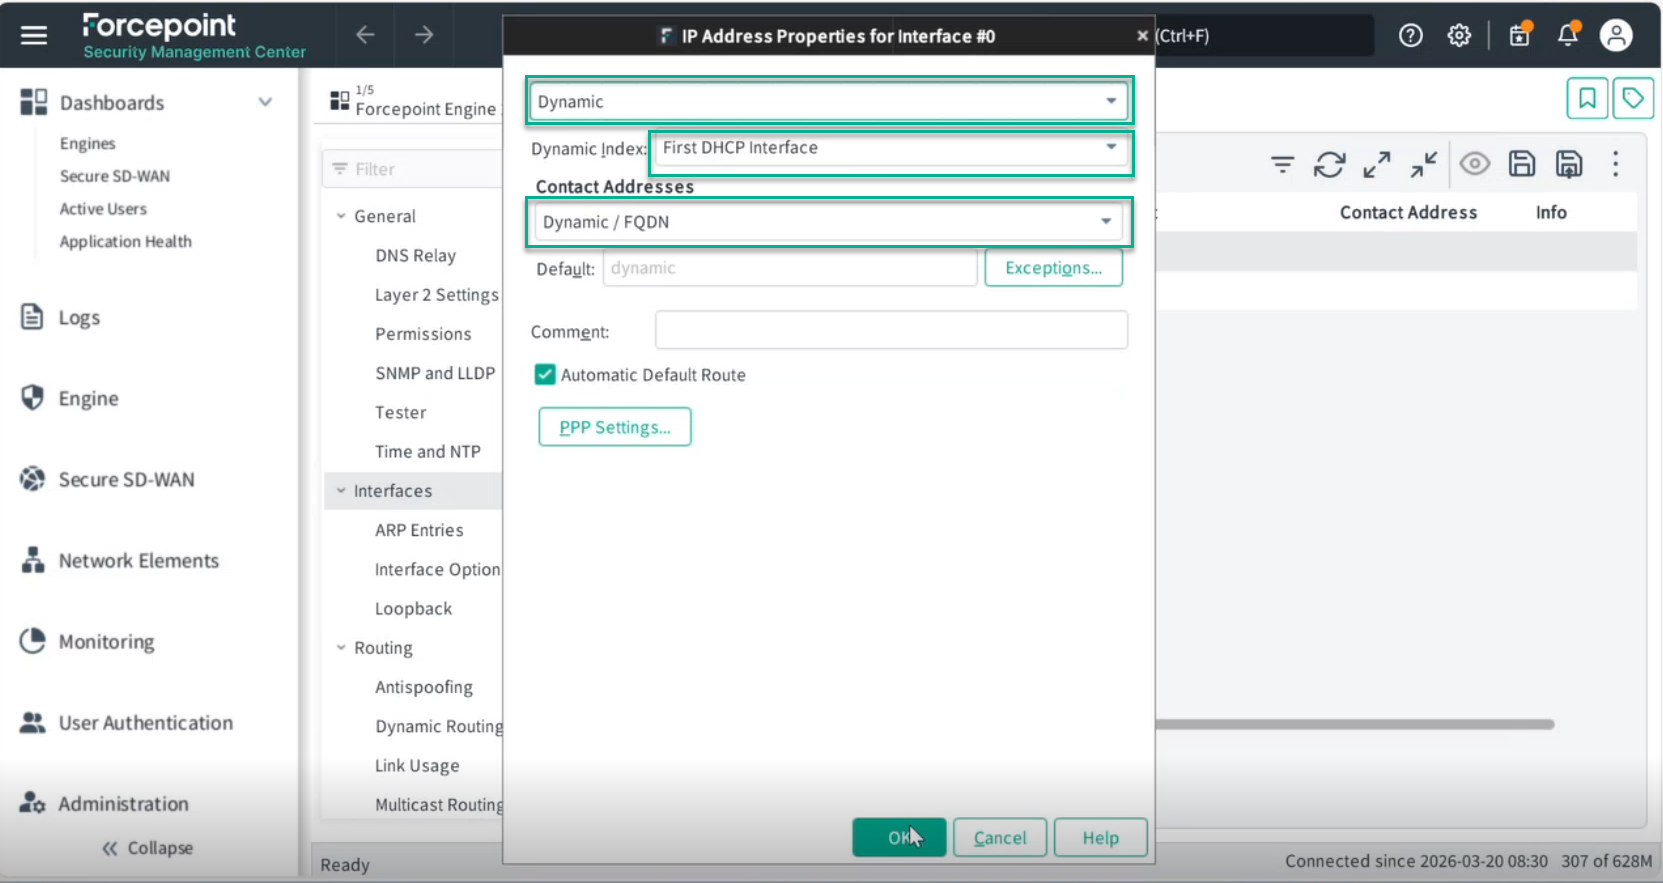
A pop-up window will appear where you can set the IP address properties for Interface #0.
- Set the IP address status to Dynamic and set the Dynamic Index field to First DHCP Interface.Note: This indicates that the interface will obtain its address via DHCP.
- Set the Contact Address field to Dynamic/FQDN.
- Click OK.
Note: Using Interface #0 or Interface #2 is not mandatory; these are the default interfaces provided.
Setting Up Interface #2
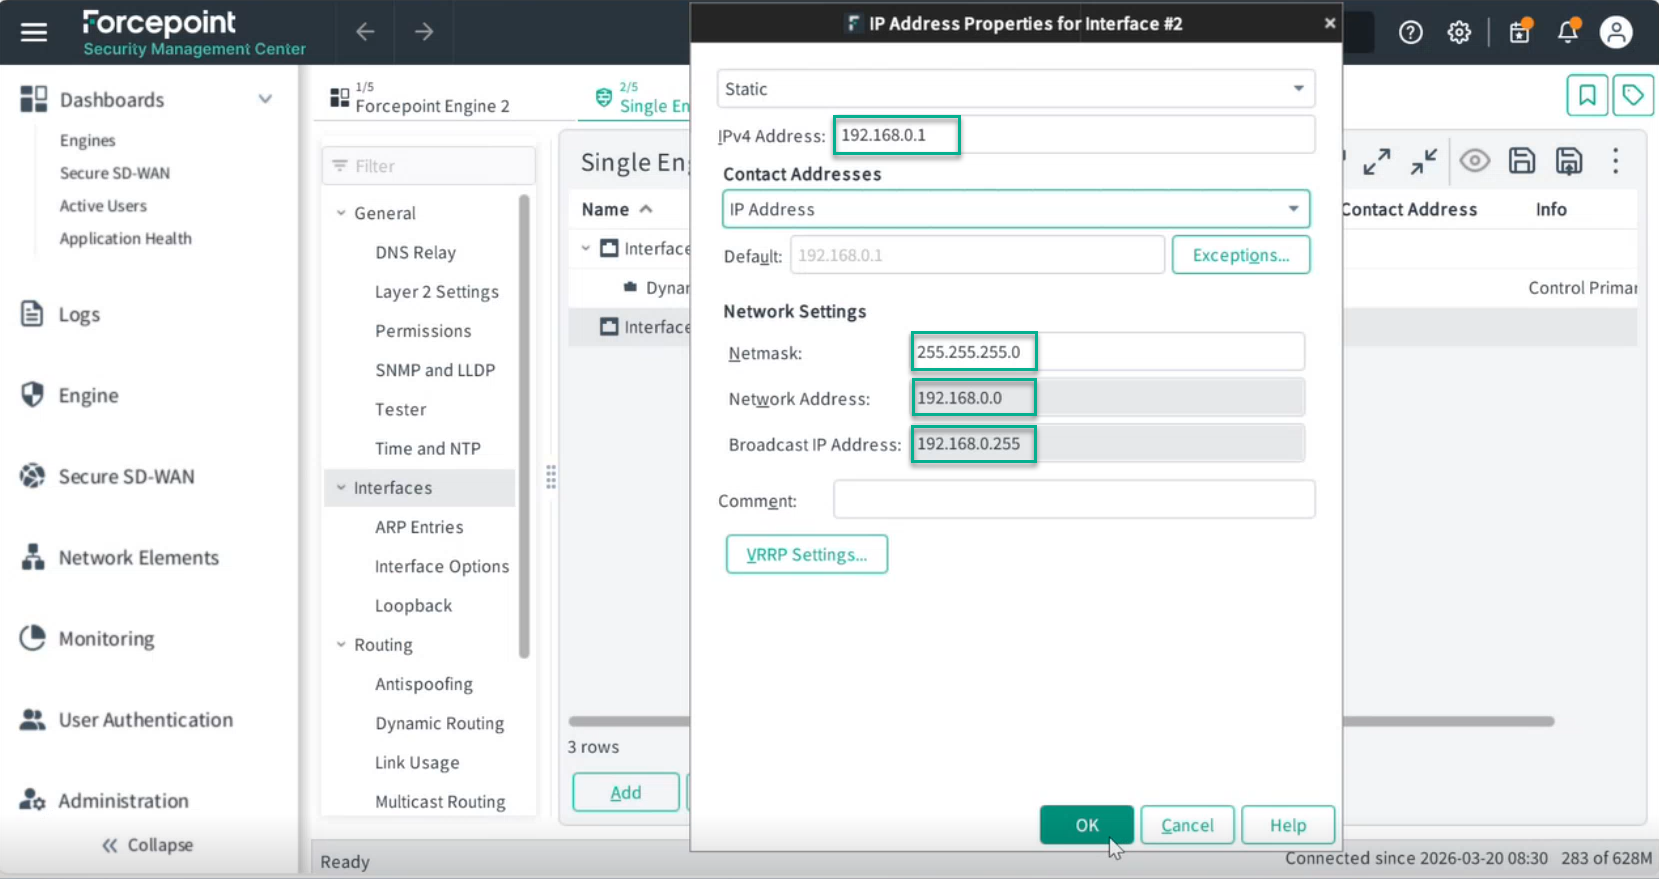
Configure a static IPv4 address and network settings for Interface #2.
- Right-click Interface 2 and, from the context menu, select .
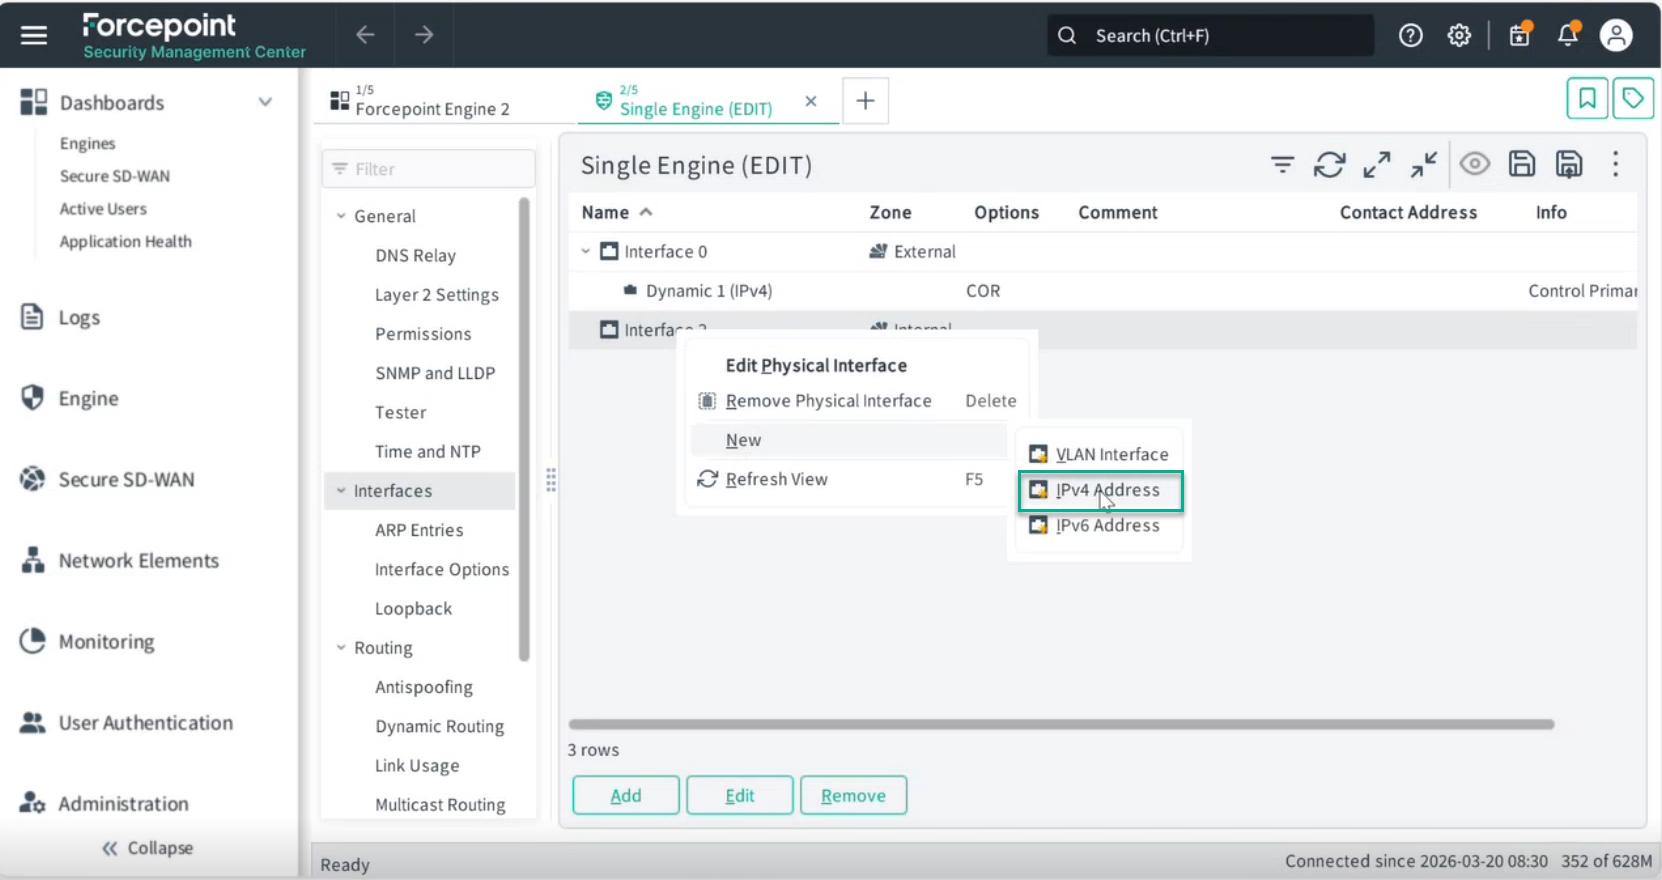
A pop-up window will appear where you can configure the settings for Interface #2.
- Select the IP address type as Static.
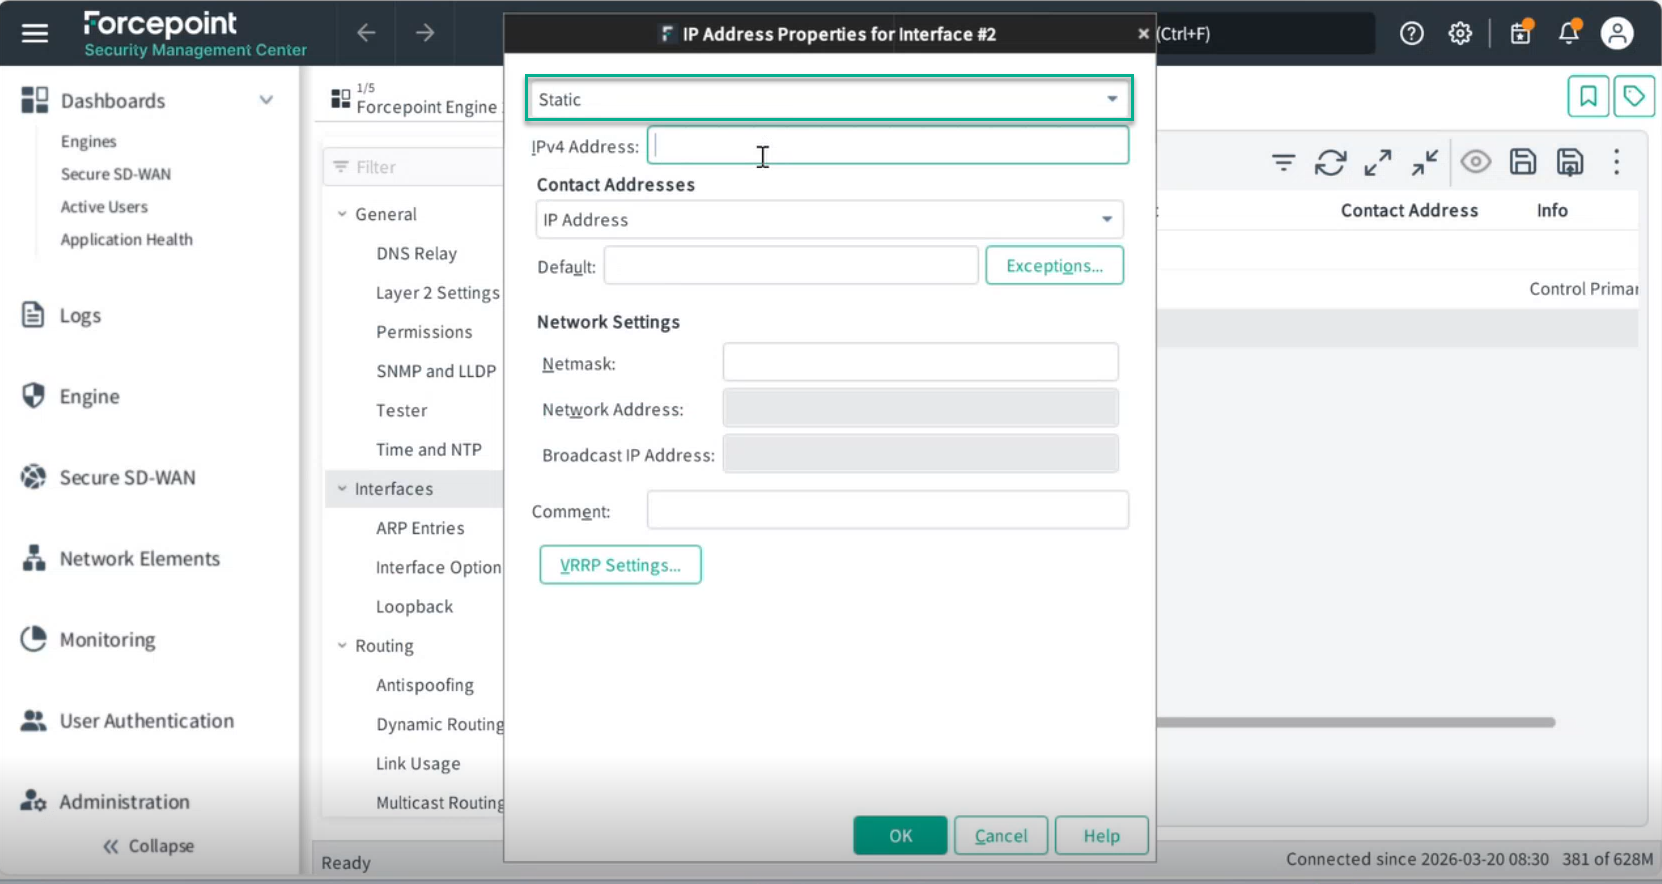
- In the IPv4 Address field, enter the internal IP address of the network, for example, 192.168.0.1.
- In the Network Settings section, enter the following:
- Netmask — 255.255.255.0
- Internal Network Address — 192.168.0.0
- Broadcast IP Address — 192.168.0.255
- Click OK.