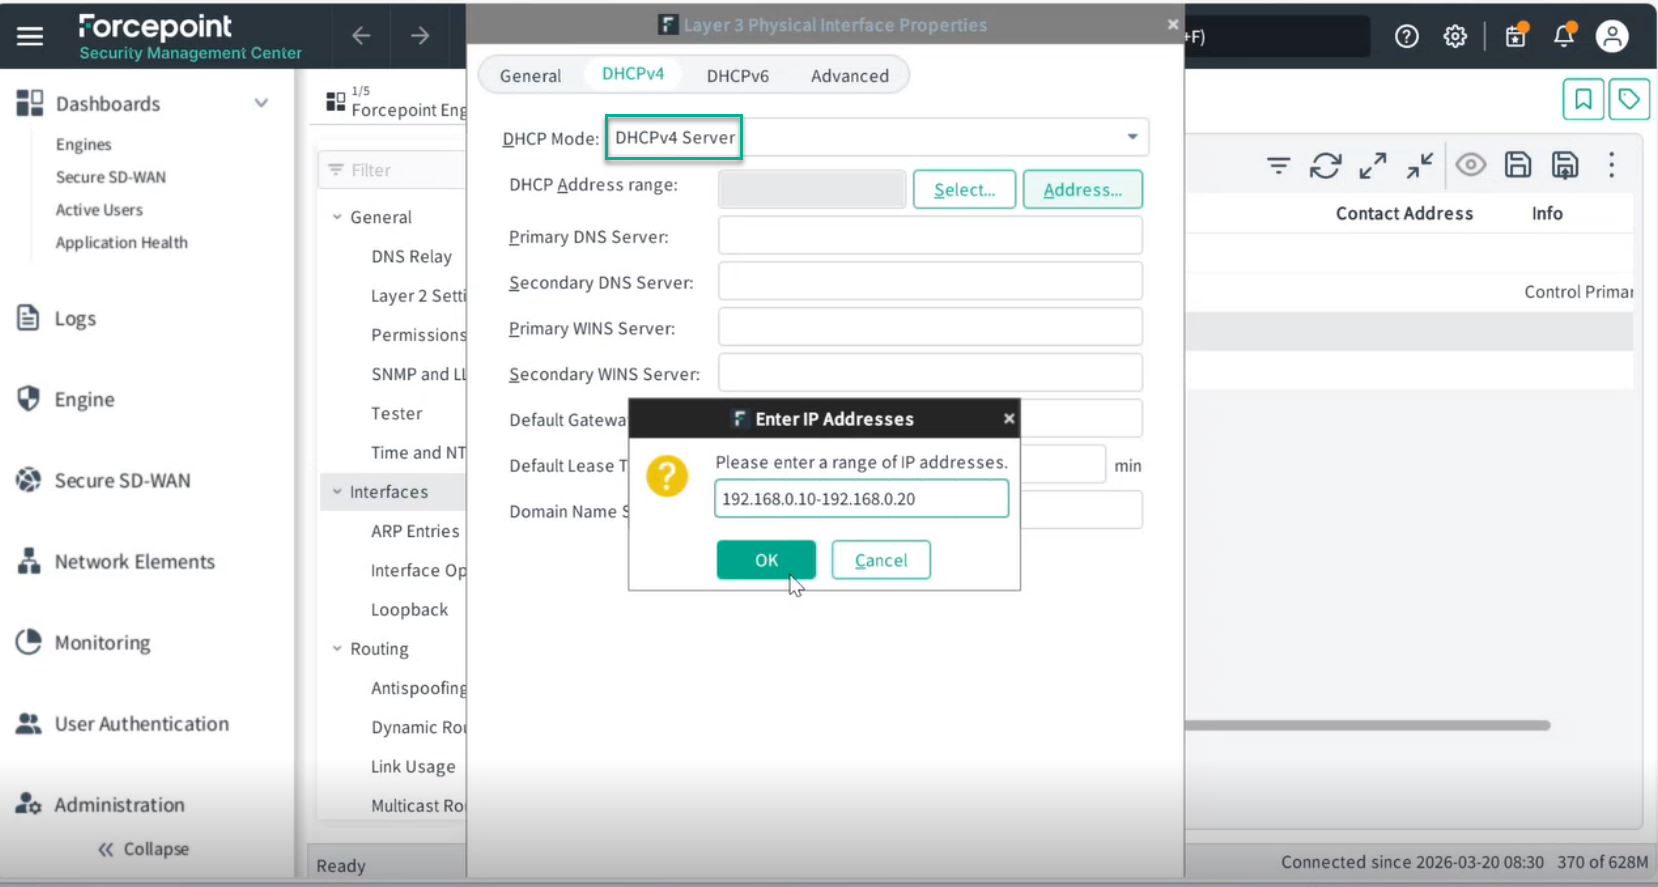
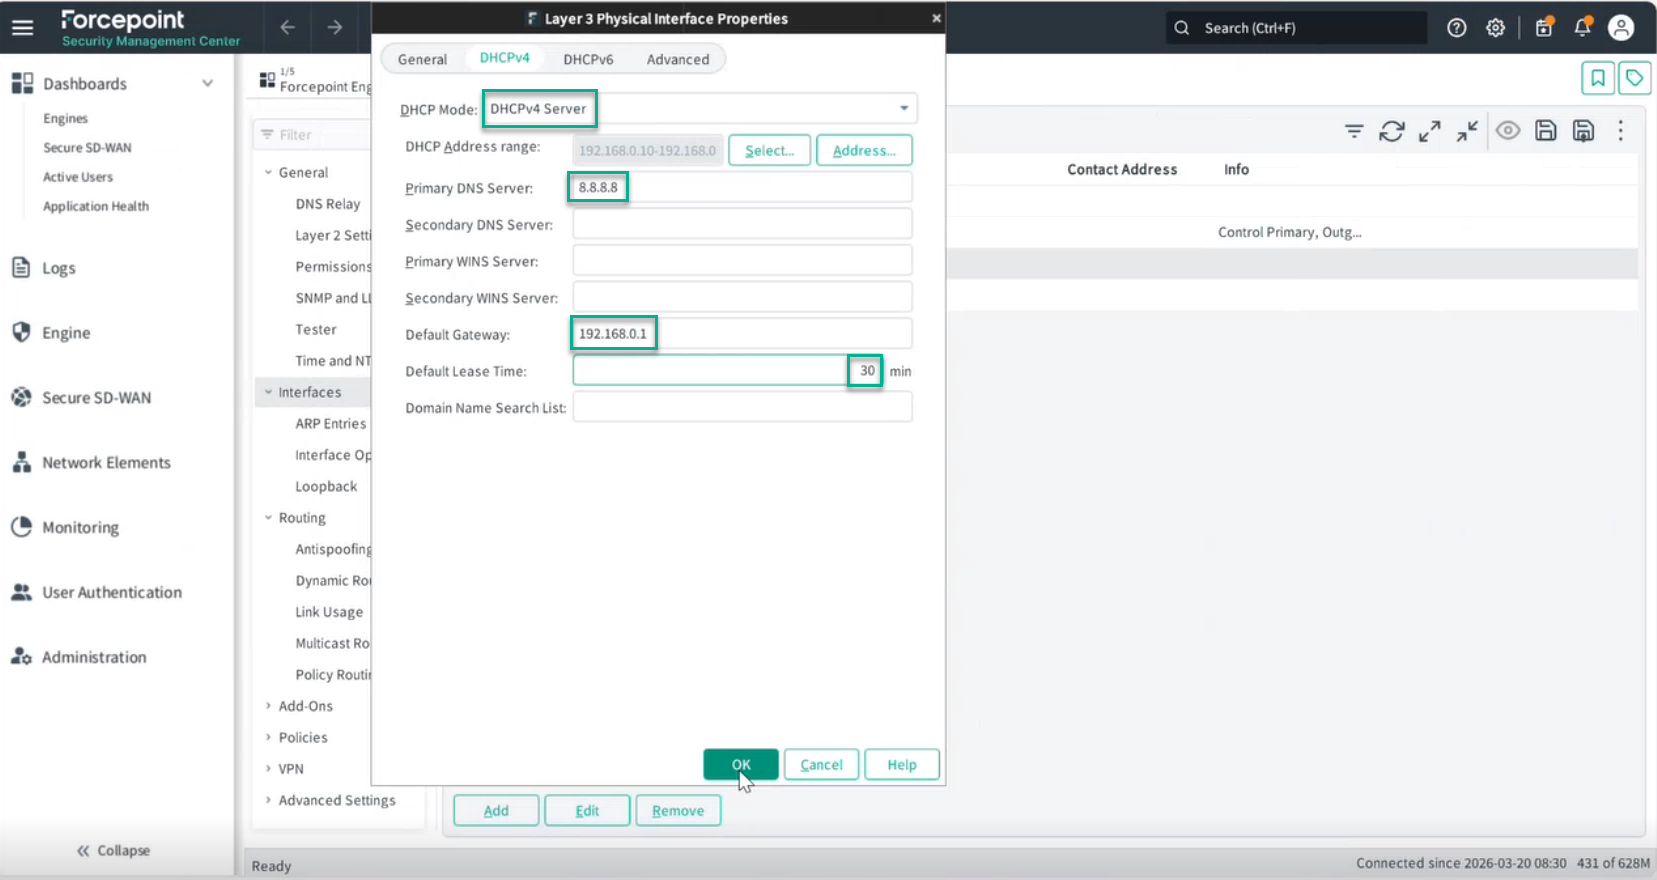
Enable the DHCPv4 server on Interface #2 and define its address range, gateway, and lease settings.
Before you begin
Ensure that Interface #2 has been configured with a static IP address before proceeding. See Setting Up
Interface #2.
Steps
-
Double-click Interface #2.
The Layer 3 Physical Interface Properties pop-up window will appear.
-
Set the DHCP Mode to DHCPv4 Server.
-
In the DHCP Address Range field, click the Address Browse button and enter the IP address range, for example, 192.168.0.10–192.168.0.20.
-
Click OK.
-
Enter the primary DNS server address, for example, 8.8.8.8.
-
Set the Default Gateway to 192.168.0.1.
-
Set the Default Lease Time to 30 minutes.
-
Click OK.