This use case is designed to route the emails with DLP X-Header response “DLP reject” to your organization’s admin for approval. It is optional but can be adjusted to be DLP admin or a
single shared mailbox.
Steps
-
In Microsoft Exchange admin center page, navigate to . The Rules screen appears.
-
Click . The New transport rule screen appears.
-
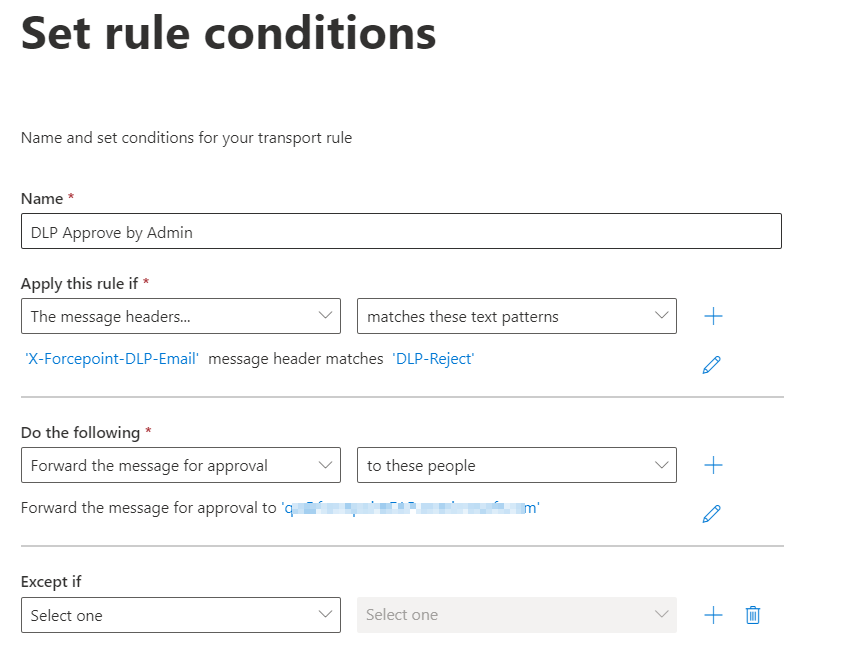
On the Set rule conditions page,
-
Enter a unique name (ex. DLP Approve by Admin) for the rule in the Name field.
-
In Apply this rule if* field:
- Select The message headers… from the first drop-down list.
- Then select matches any of these text patterns from the second drop-down list.
- Click Enter text. The specify header name window appears.
- Enter message header X-Forcepoint-DLP-Email and then click Save.
- Click Enter words. The specify words or phrases window appears.
- Enter header text DLP-Reject and then click Save.
-
In Do the following* field:
- Select Forward the message for approval from the first drop-down list.
- Then select to the these people from the second drop-down list.
- In Select members pop-up, enter admin email and press Enter.
- Click Save.
-
When you complete setting the Set rule conditions page, click Next.
-
On the Set rule settings page, configure the following settings:
-
Select Enforced as Rule mode.
-
Select High as Severity.
-
Tick Stop processing more rules.
-
When you complete setting the Set rule settings page, click Next.
-
On the Review and finish page, verify the settings and click Finish.
-
The Transport rule created successfully message appears. Then, click Done.
The inbound mail flow rule for the DLP Approve by Admin is created.
Note: After creation of the mail flow rule (DLP Approve by Admin), it might take 30 minutes or more for the new rule to be applied to emails.