This use case designed to block and notify the sender of an email with DLP X-Header response “DLP reject” about the email’s unsuccessful delivery, along with an explanation message and
status code. However, if you use Forcepoint Security Manager notifications or Microsoft Office 365 notifications, this requirement is already
fulfilled.
Steps
-
In Microsoft Exchange admin center page, navigate to . The Rules screen appears.
-
Click . The New transport rule screen appears.
-
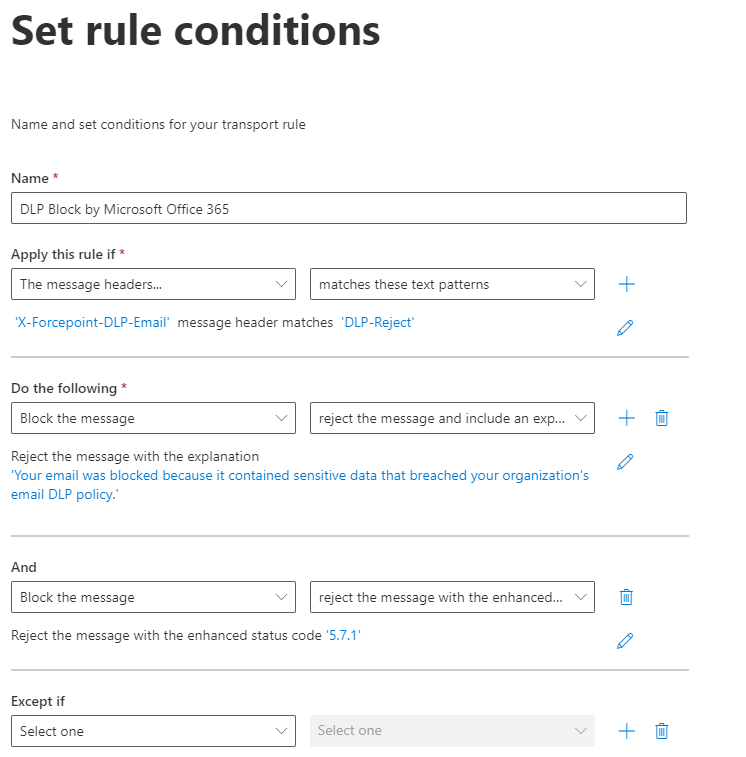
On the Set rule conditions page,
-
Enter a unique name (ex. DLP Block/Alert by Microsoft Office 365) for the rule in the Name field.
-
In Apply this rule if* field:
- Select The message headers… from the first drop-down list.
- Then select matches any of these text patterns from the second drop-down list.
- Click Enter text. The specify header name window appears.
- Enter message header X-Forcepoint-DLP-Email and then click Save.
- Click Enter words. The specify words or phrases window appears.
- Enter header text DLP-Reject and then click Save.
-
In Do the following* field:
- Select Block the message from the first drop-down list.
- Then select reject the message and include an explanation from the second drop-down list.
- In specify rejection reason prompt, enter the alert message (ex. Your email was blocked because it contained sensitive data which breached your organization's
email DLP policy).
- Click Save.
- Then click + in Do the following* field. New And field will opens.
-
In And field:
- Select Block the message from the first drop-down list.
- Then select reject the message with the enhanced status code of from the second drop-down list.
- In enter enhanced status code prompt, enter the status code (ex. 5.7.1).
- Click Save.
-
When you complete setting the Set rule conditions page, click Next.
-
On the Set rule settings page, configure the following settings:
-
Select Enforced as Rule mode.
-
Select High in Severity.
-
Tick Stop processing more rules.
-
When you complete setting the Set rule settings page, click Next.
-
On the Review and finish page, verify the settings and click Finish.
-
The Transport rule created successfully message appears. Then, click Done.
The inbound mail flow rule for the DLP Block/Alert by Microsoft Office 365 is created.
Note: After creation of the mail flow rule (DLP Block/Alert by Microsoft Office 365), it might take 30 minutes or more for the new rule to be applied to emails.