Configuring BYOS: Amazon S3
Configure the Forcepoint Data Security Cloud | DLP cloud portal with the Amazon S3 bucket. This allows replicating the objects like Alerts, Events, or Audit logs from the Forcepoint Data Security Cloud | DLP cloud portal to the Amazon S3 buckets.
Before you begin
Forcepoint cannot read your storage. Forcepoint Data Security Cloud | DLP has no read access to your storage, so any feature that needs to read data from it is not available. After Forcepoint deletes its own copy, the data is available only in your storage.
Data in your storage is not encrypted. Forcepoint writes data to your storage unencrypted, so anyone with access to the storage can read it. This data can include sensitive content, such as forensic evidence. You are responsible for protecting your storage, including access controls, encryption at rest, network access, monitoring, and retention.
Steps
-
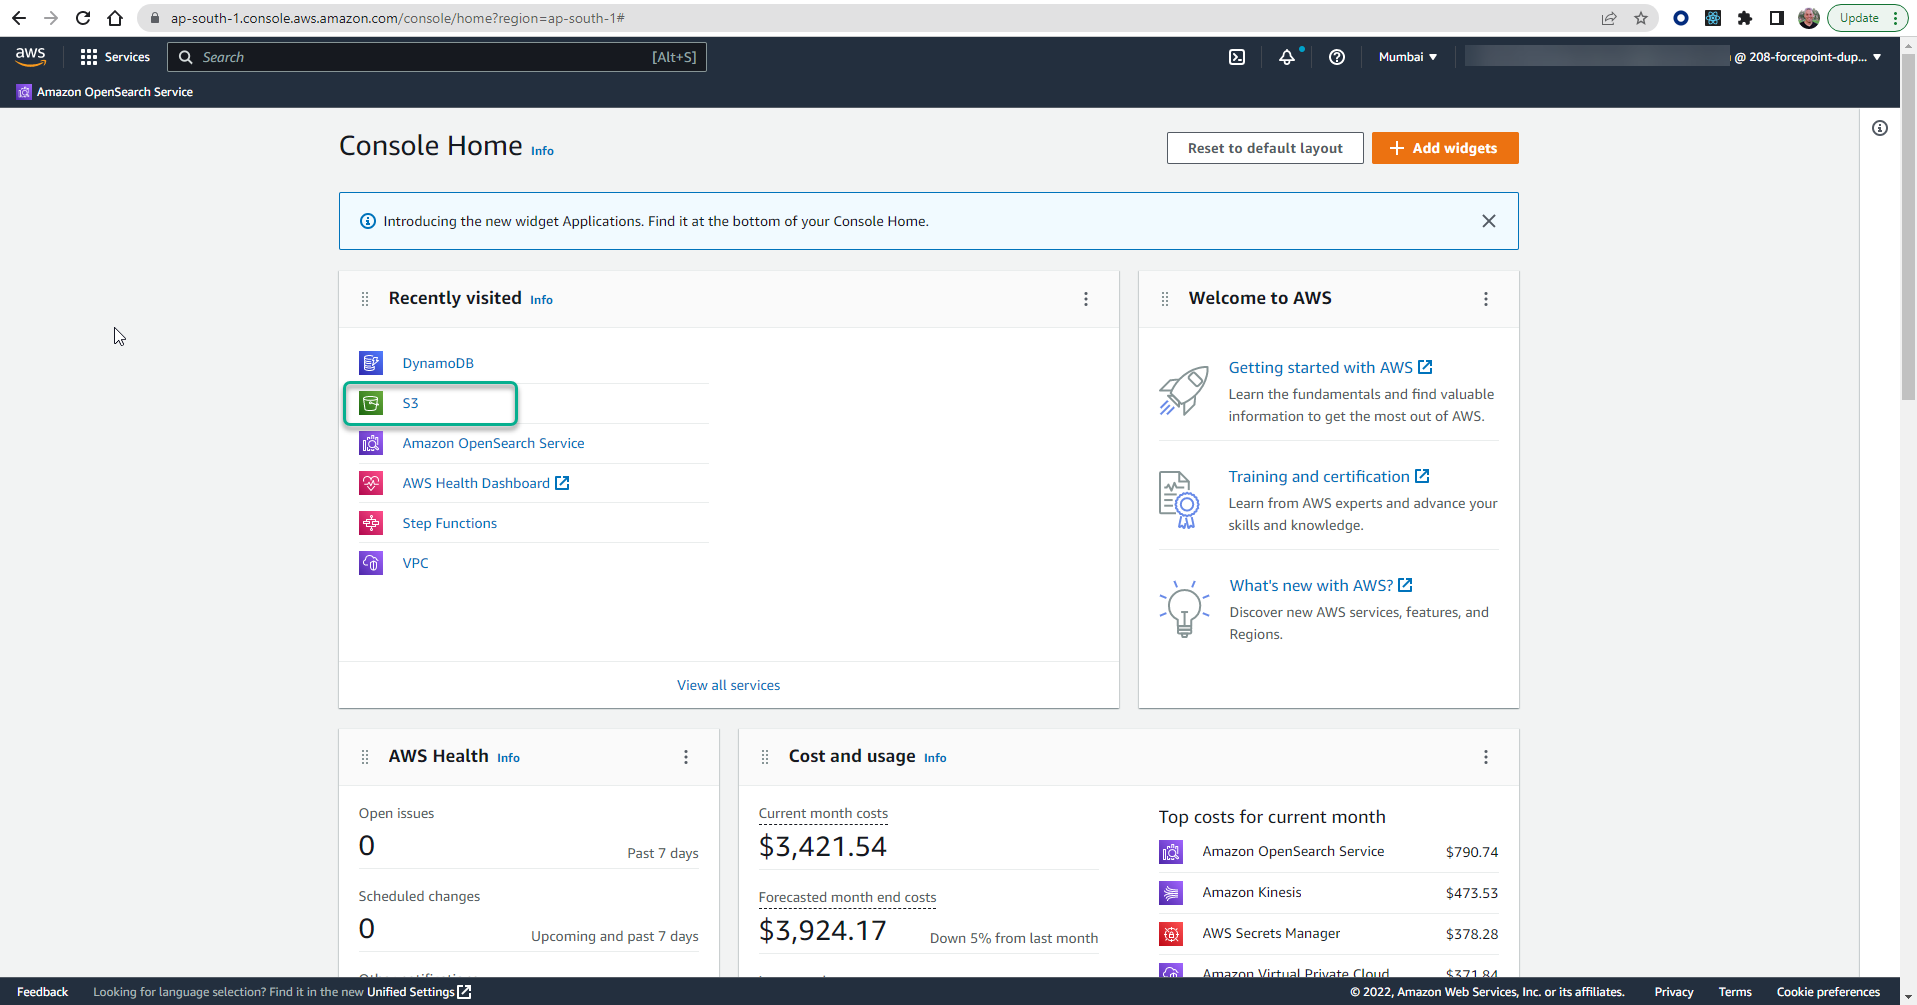
Sign into the AWS Management Console and click the Amazon S3 option. The default Buckets page opens.
-
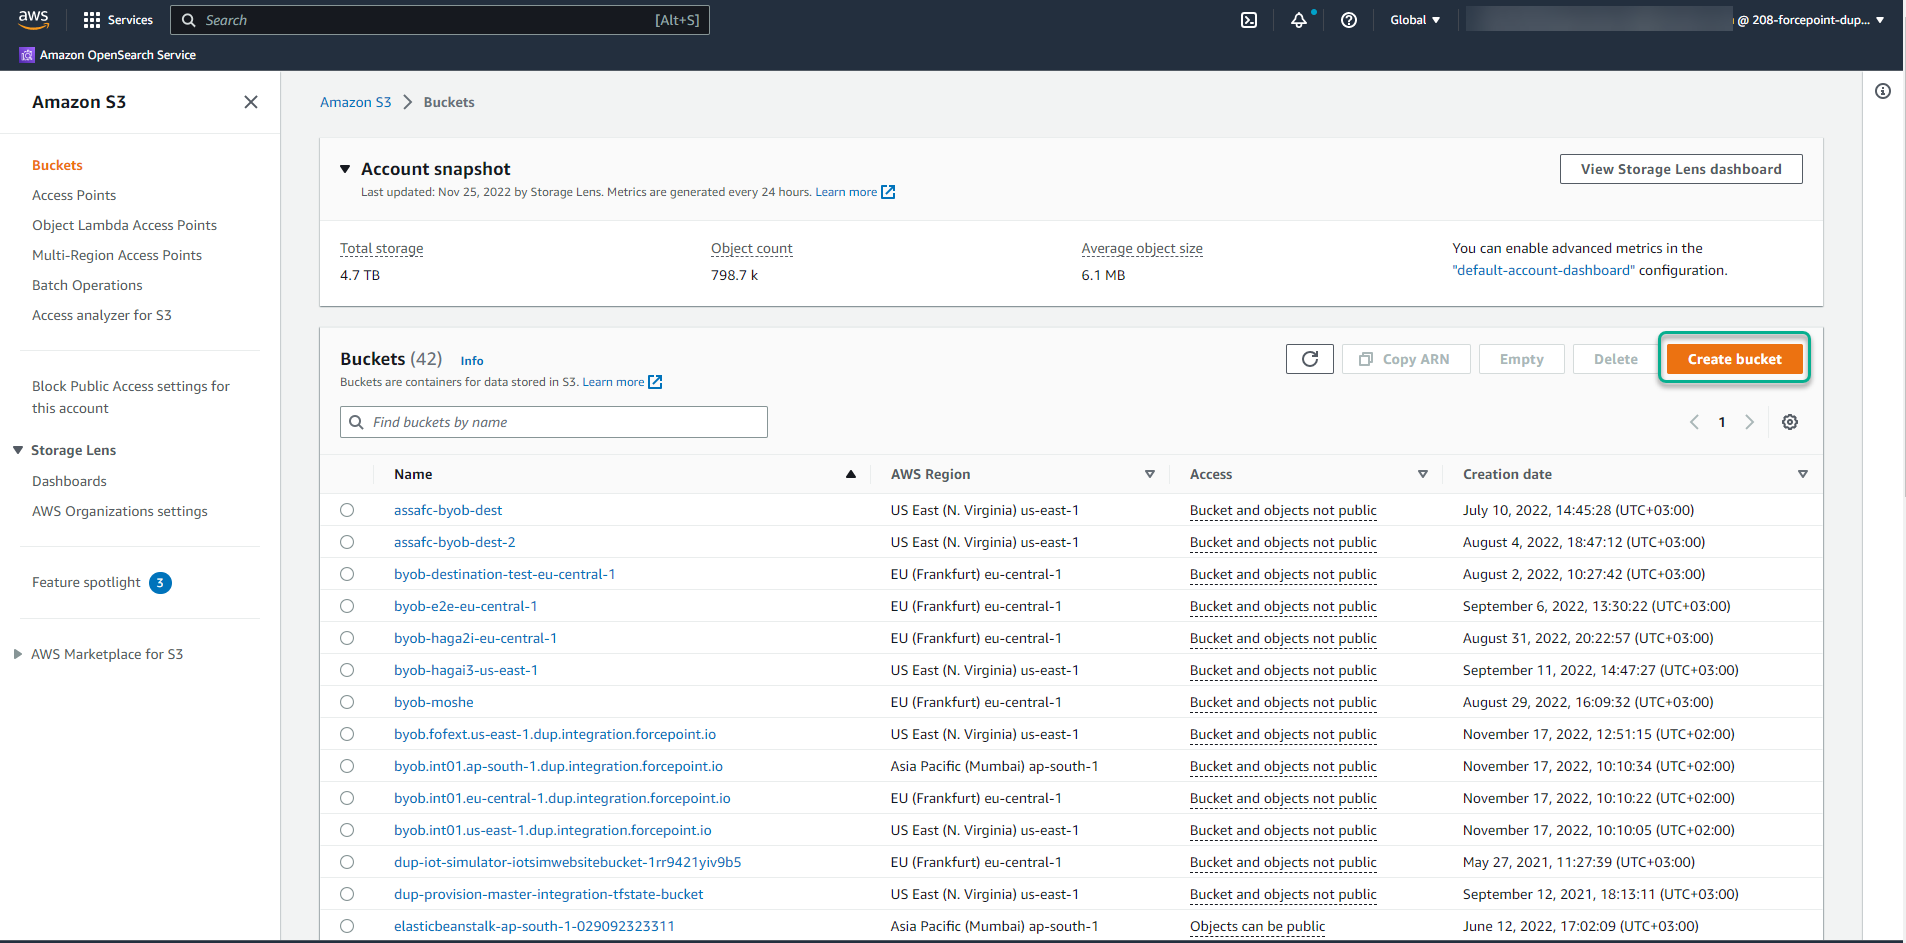
Under the Buckets section, from the top bar, click the Create bucket button.
-
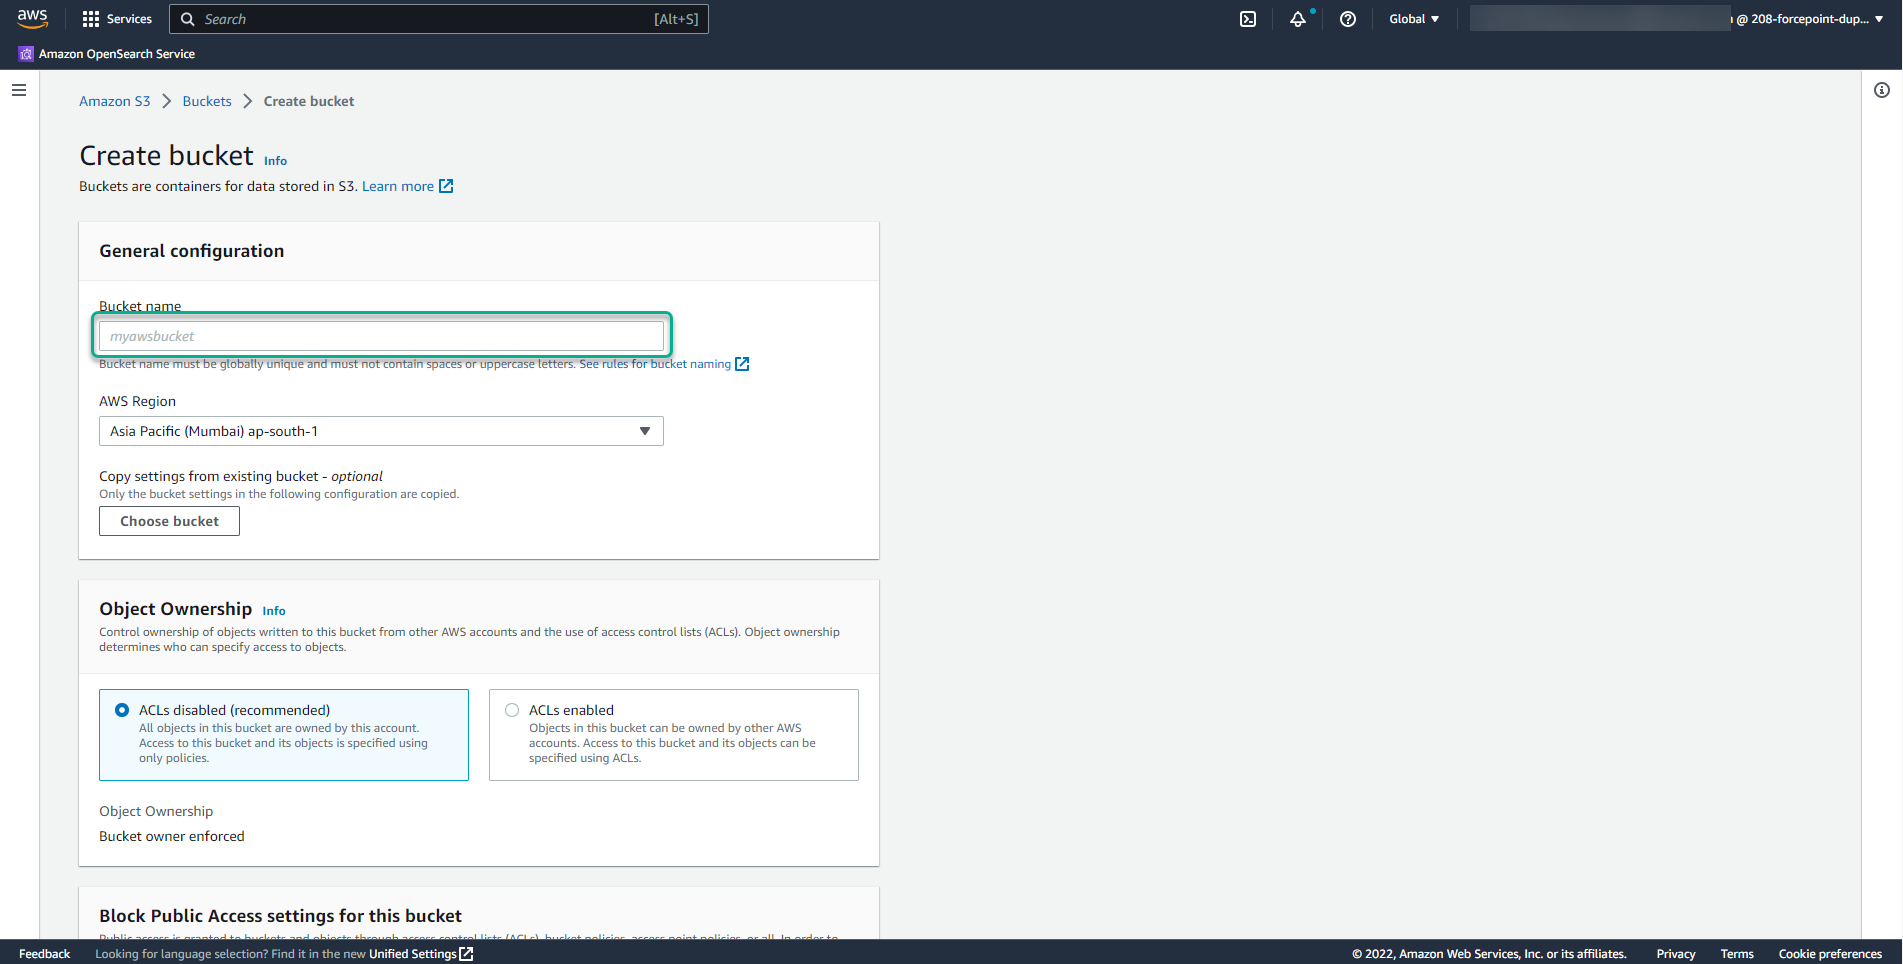
On the Create bucket dialog:
-
In the Bucket name field, enter a name for your bucket.
-
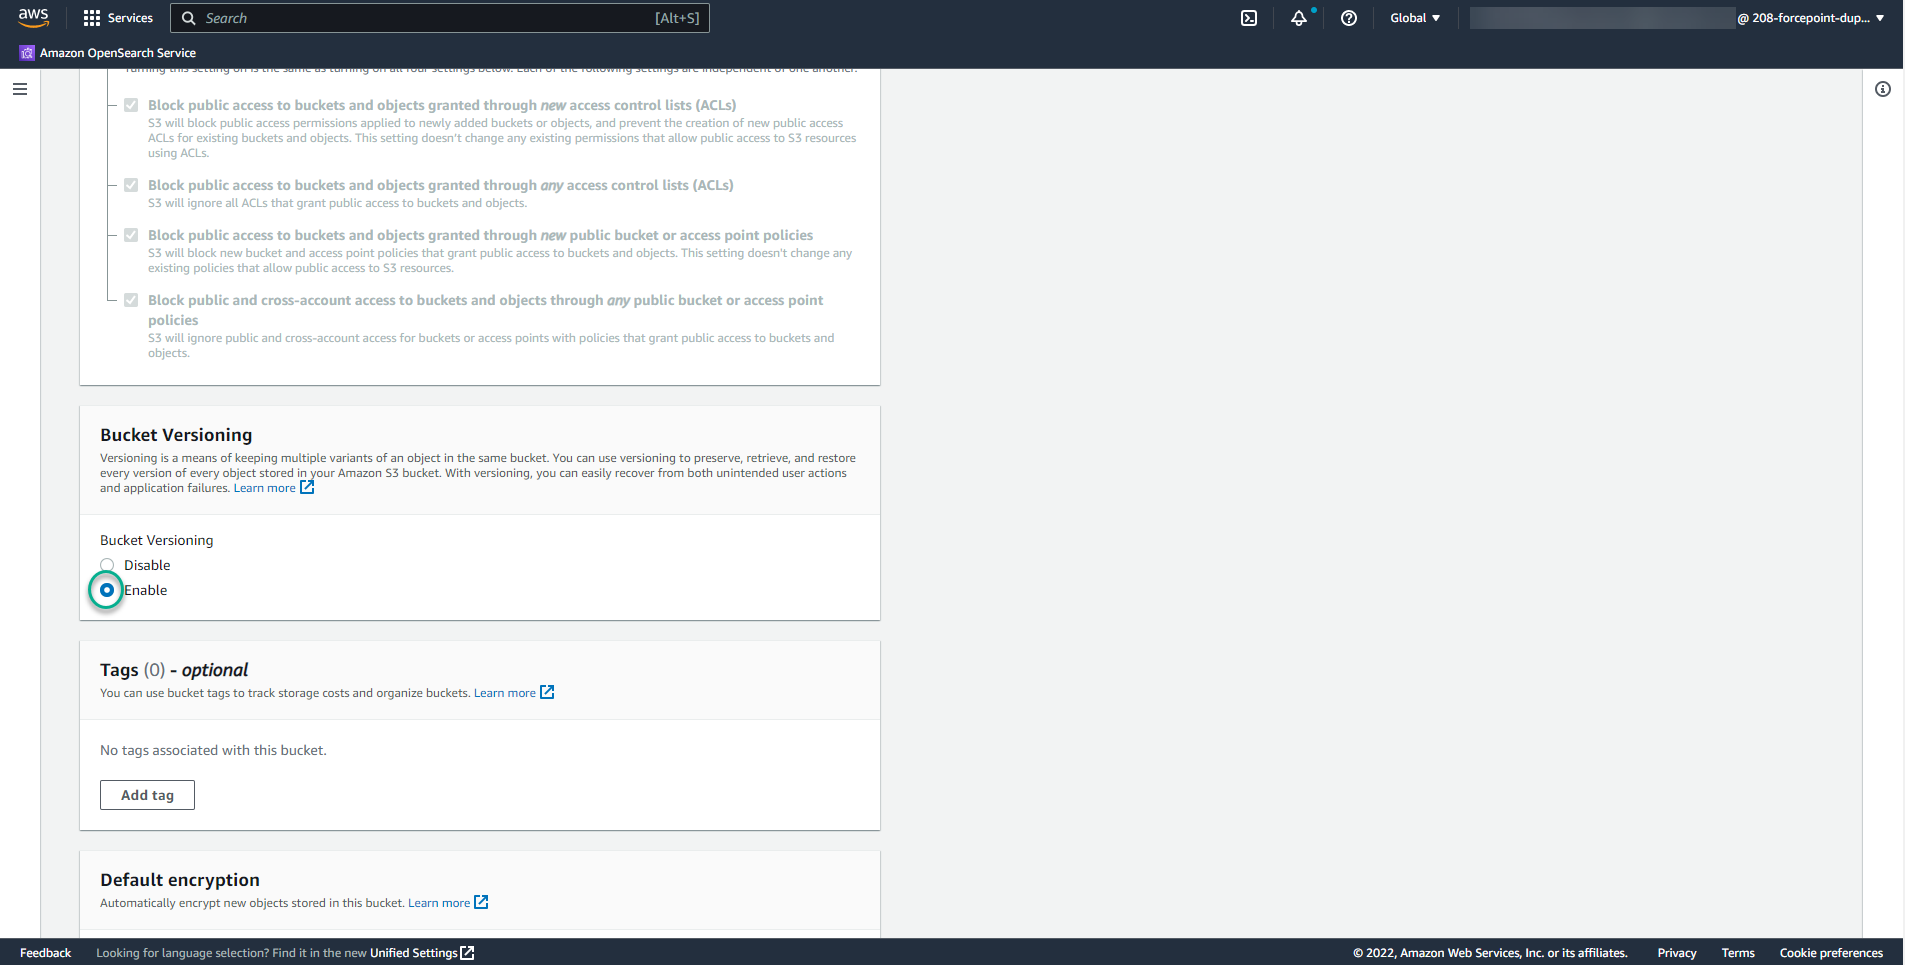
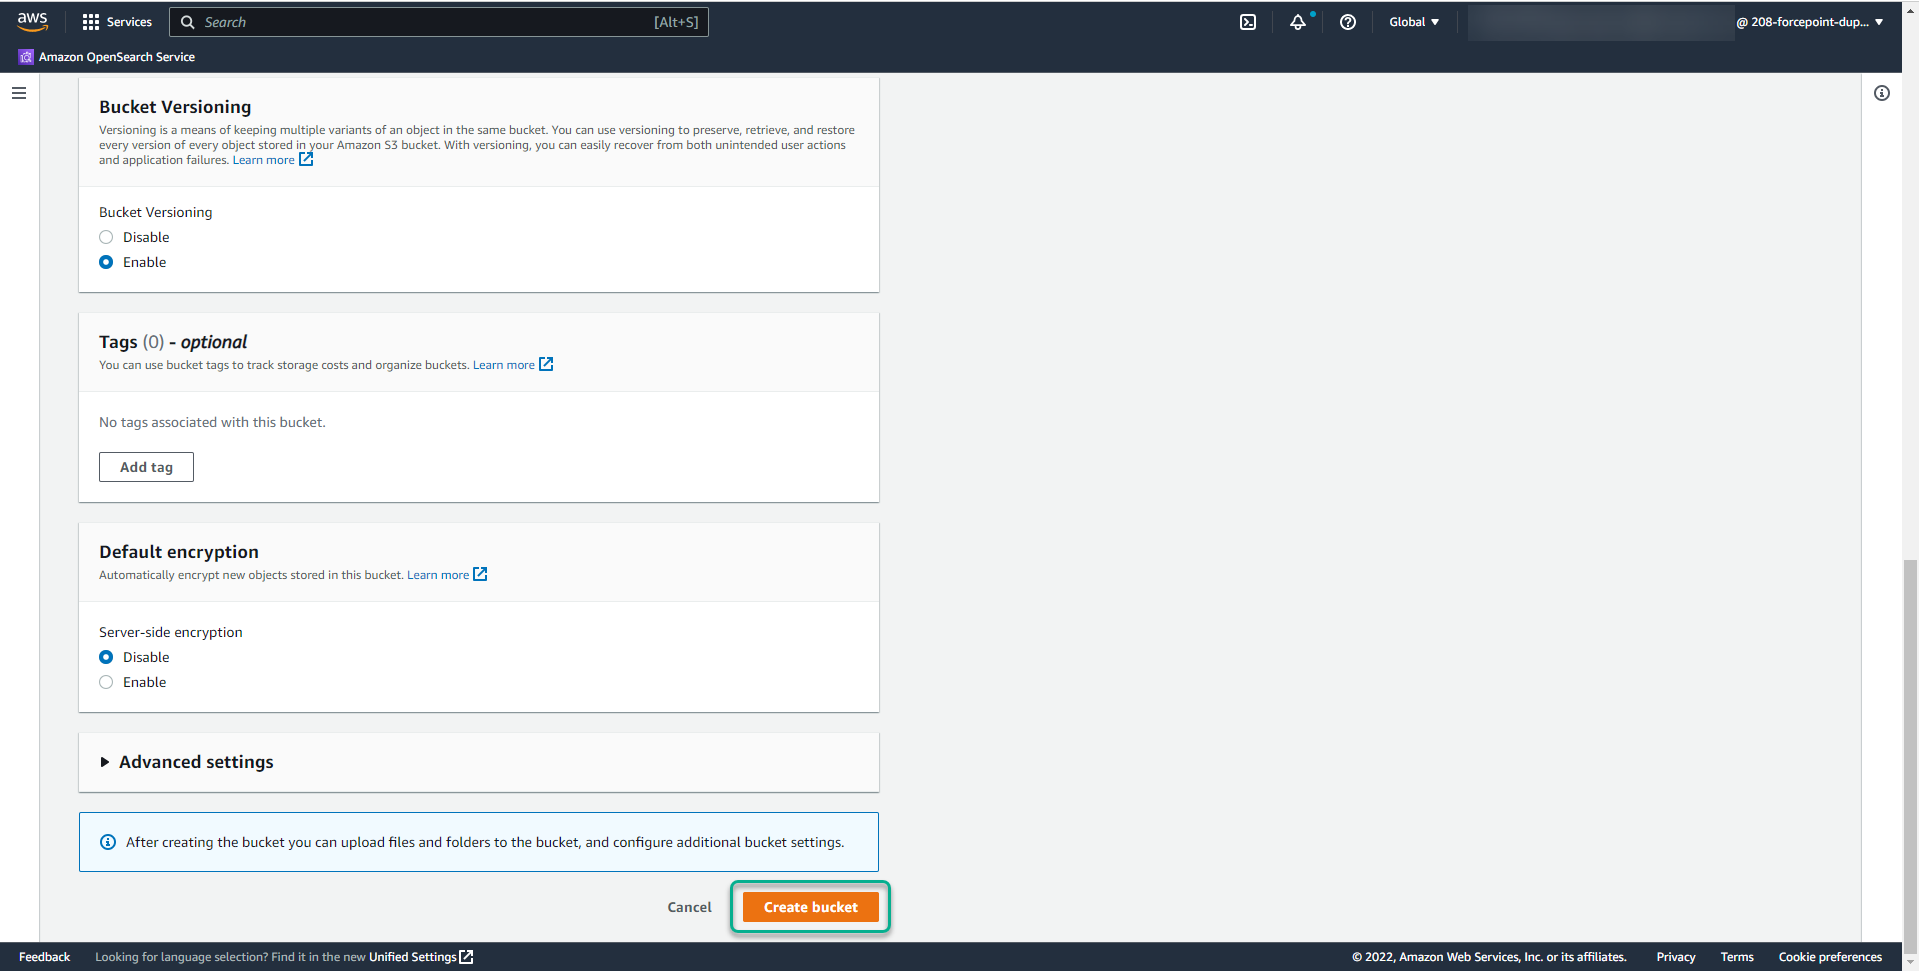
Scroll down for the Bucket Versioning section, select the Enable radio button. Keep the other sections of the
Create bucket dialog with no changes.
-
Scroll down and click the Create bucket button. It toggles back to the Amazon S3 Buckets page and a success message is prompted
on the screen. The new S3 bucket is created now.
-
In the Bucket name field, enter a name for your bucket.
-
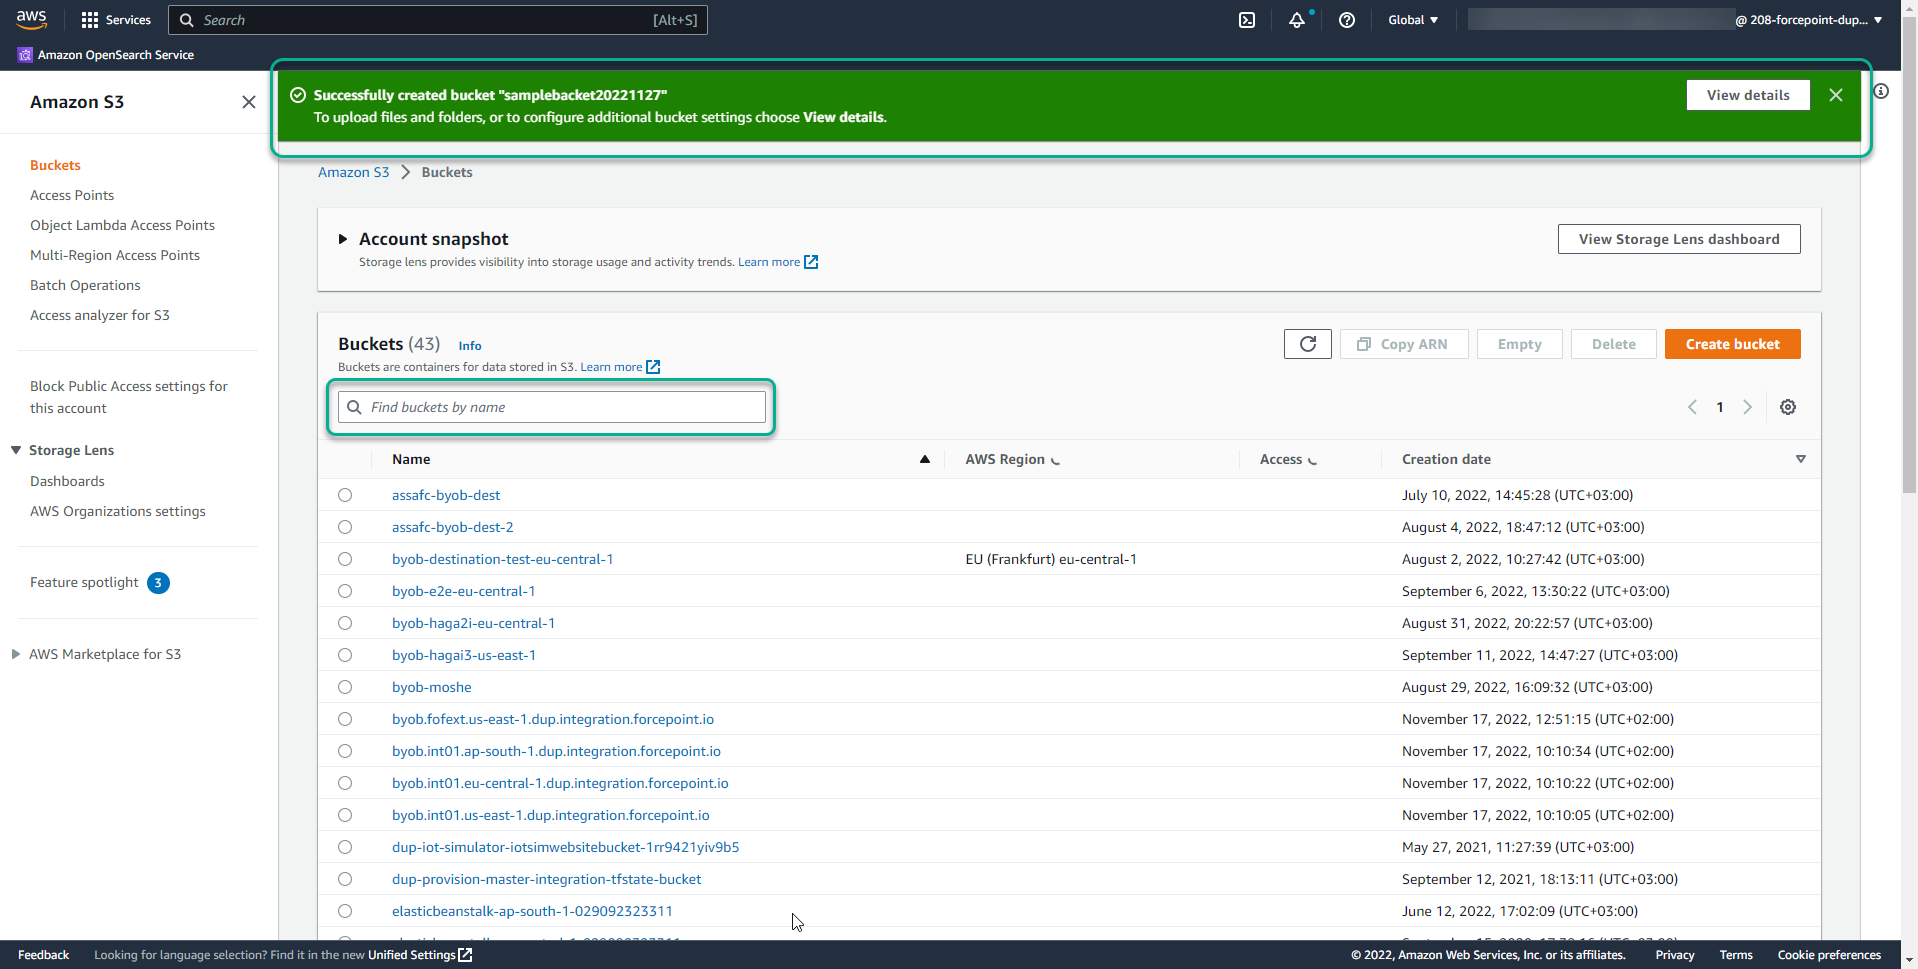
On the Buckets section, search for the new S3 bucket name in the search bar.
-
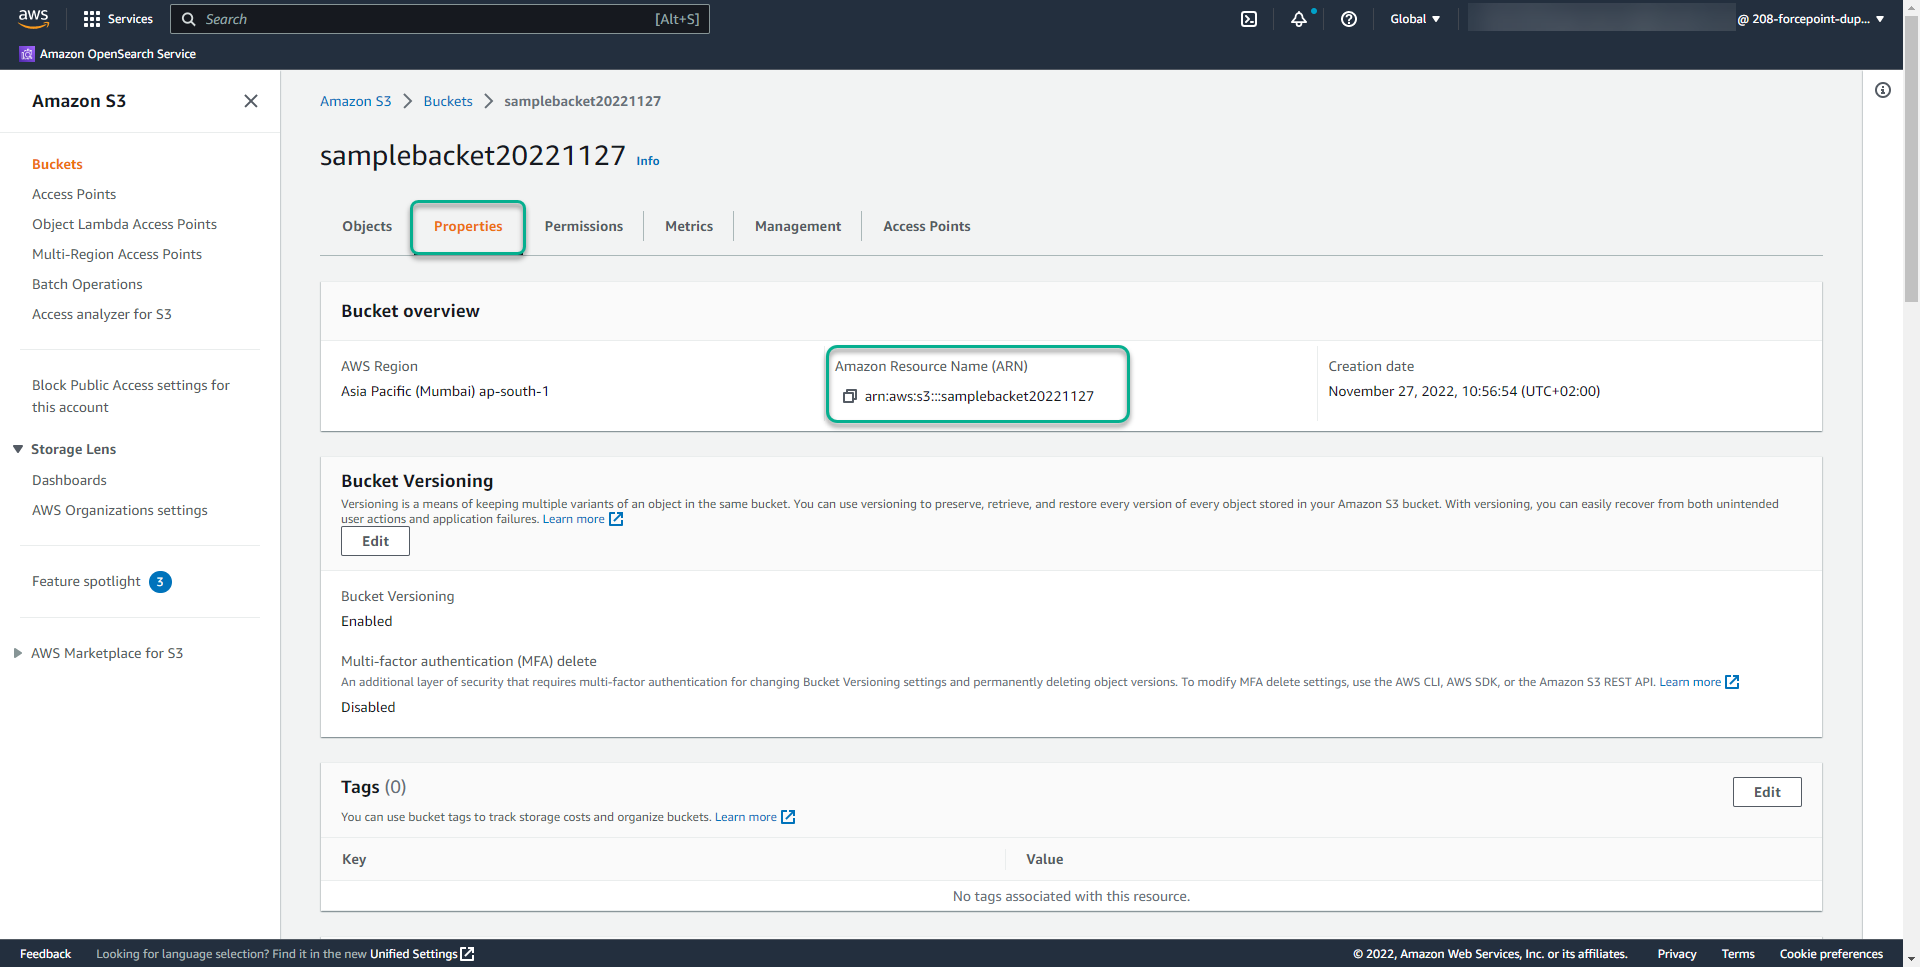
Under the Properties tab, from the Bucket overview section, copy the Amazon Resource Name (ARN).
-
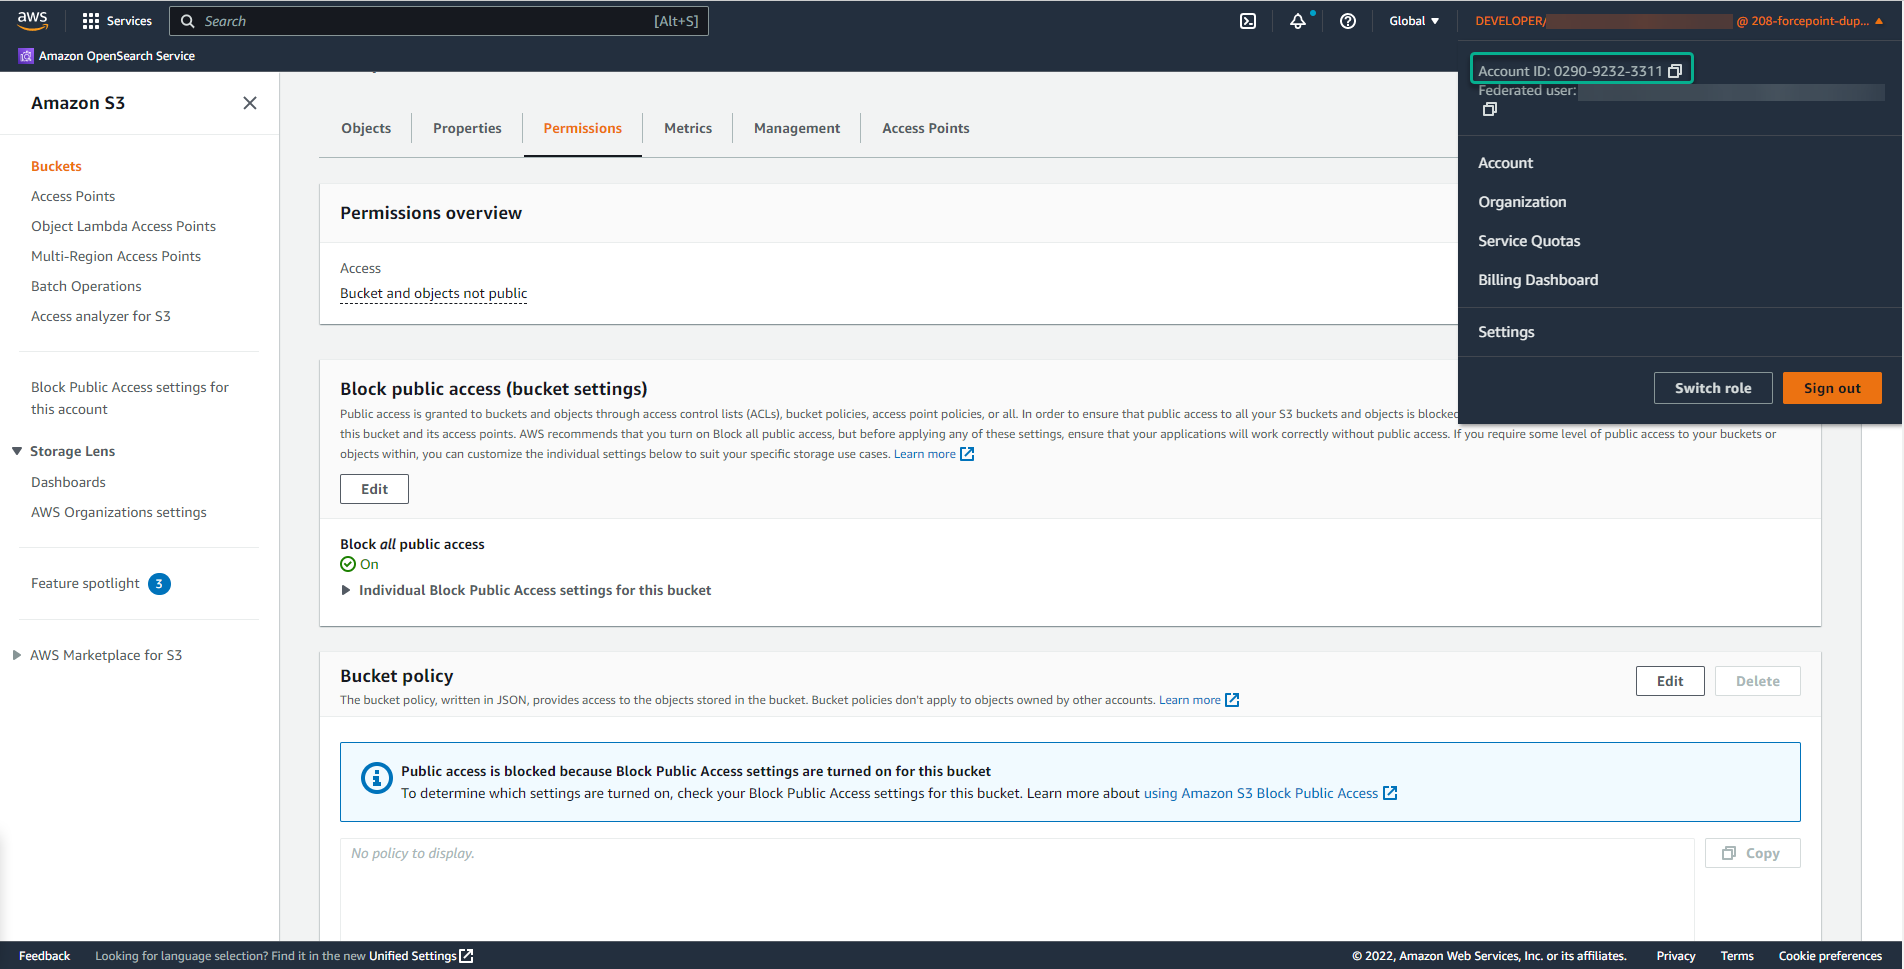
From the dialog, copy the Account ID.
-
Under the Configuration wizard section, click the Start Configuration button. The configuration section opens.

-
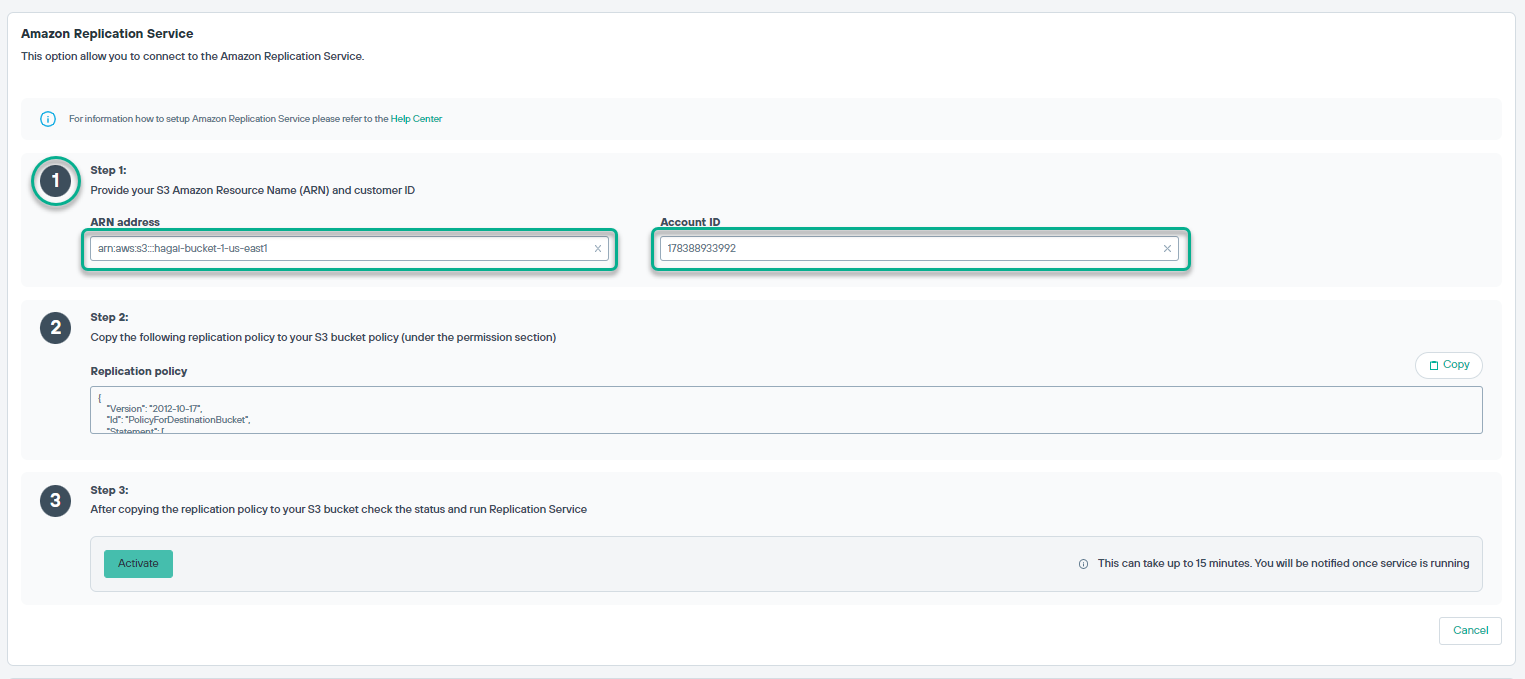
Under the Step 1, in the ARN address field, enter the copied Amazon Resource Name (ARN) and in the
Account ID field, enter the copied Account ID from the Amazon S3 bucket.
-
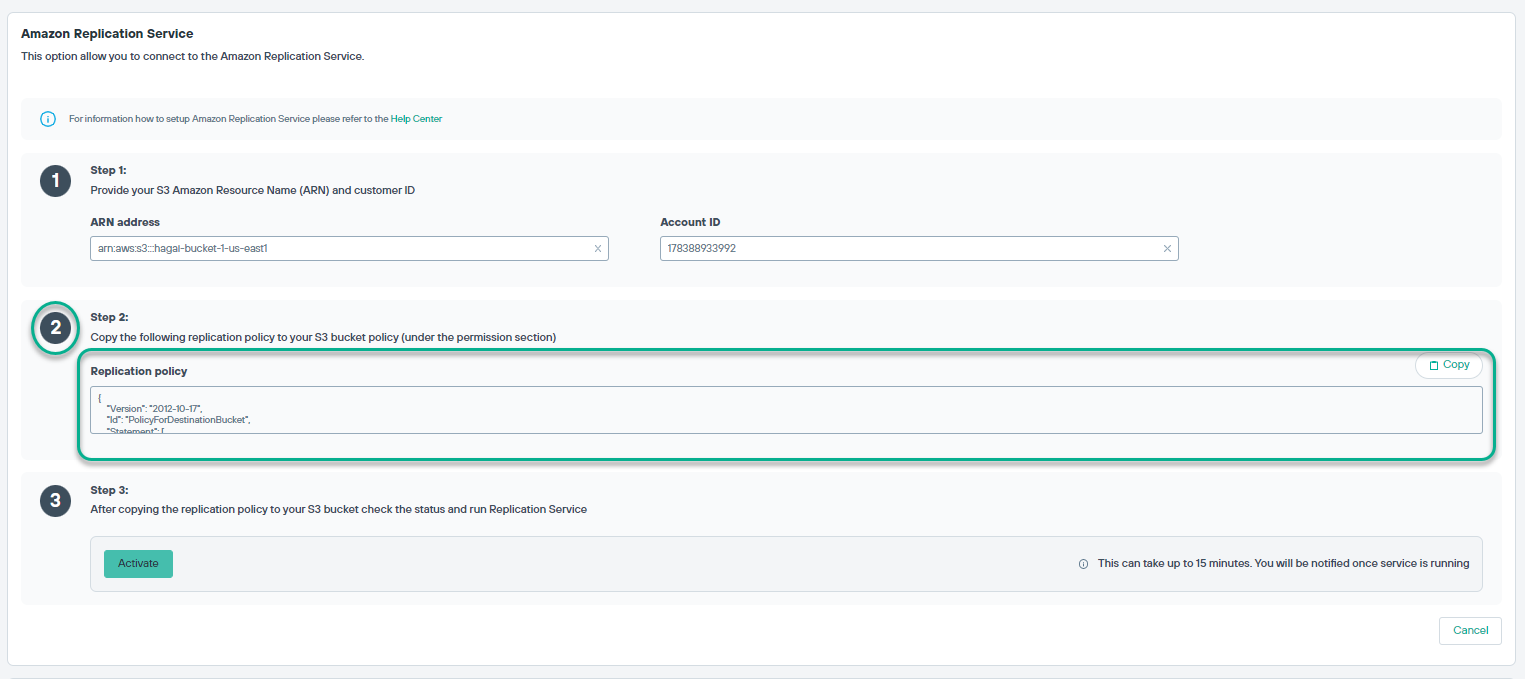
After you enter the details in the Step 1, under the Step 2, in the Replication policy section,
Replication policy appears. Copy the Replication policy.
-
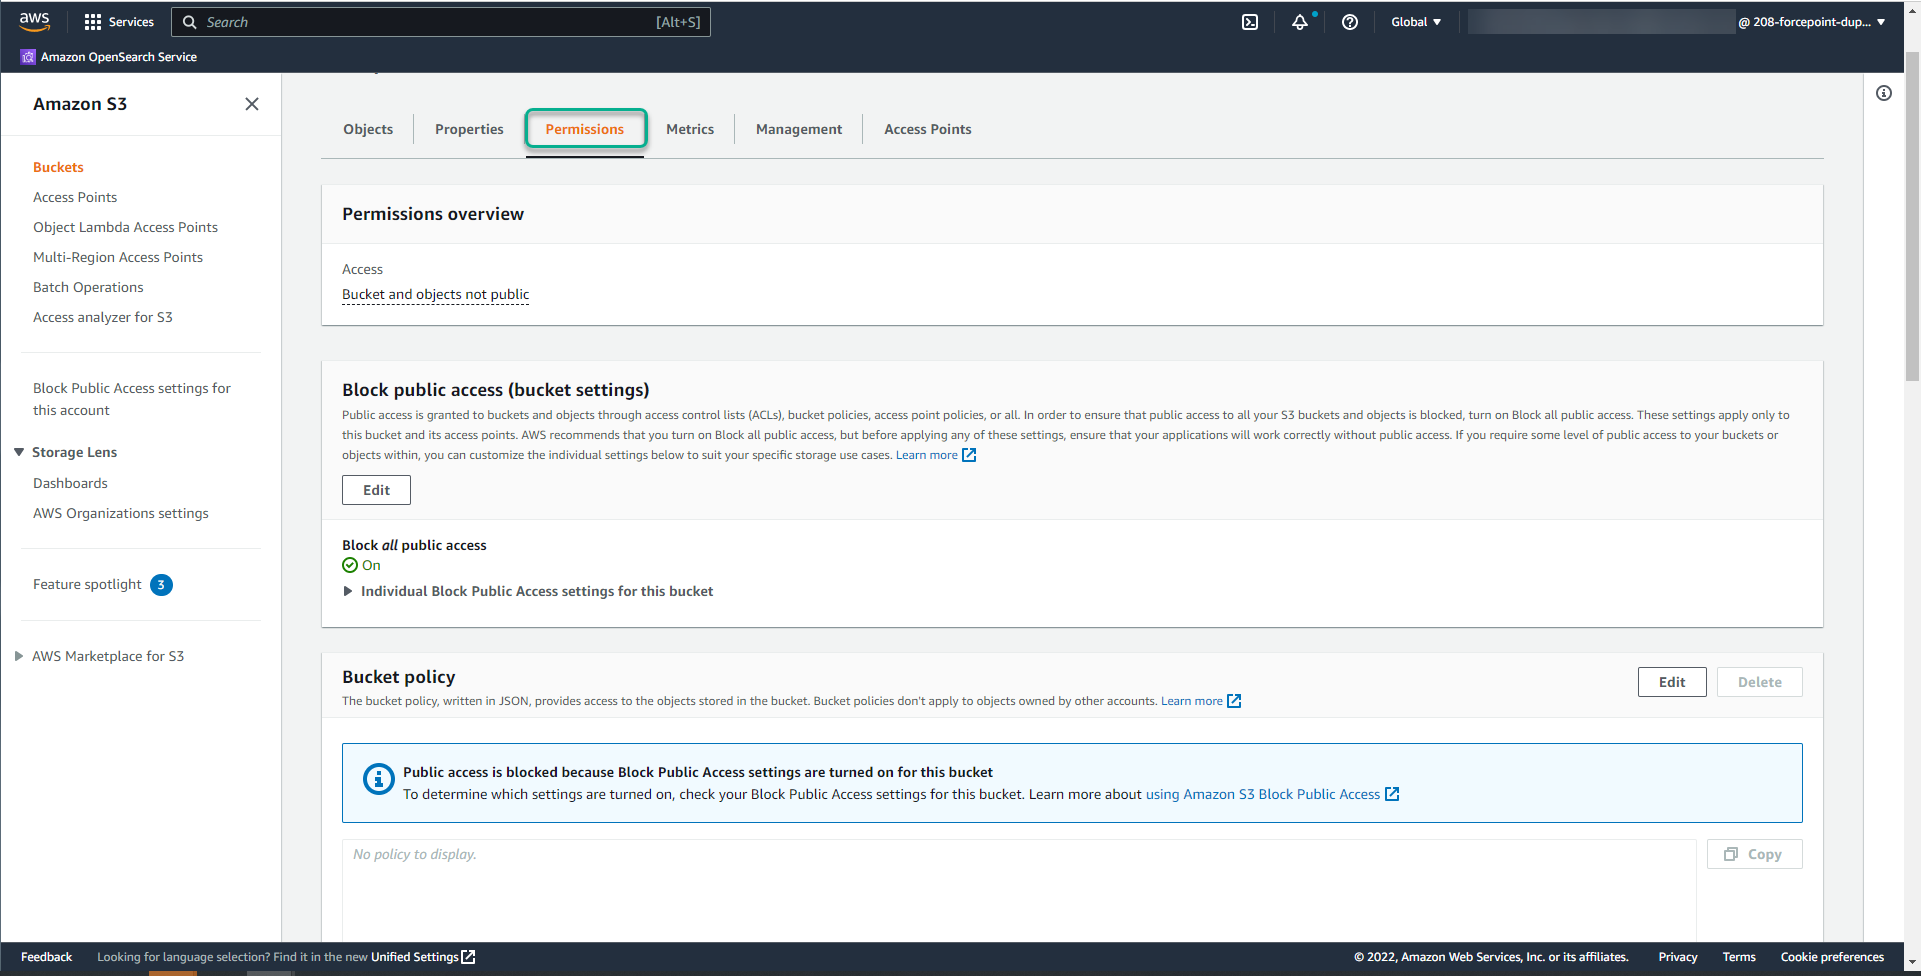
Navigate to Amazon S3 Buckets page, under the new S3 bucket, select the Permissions tab.
-
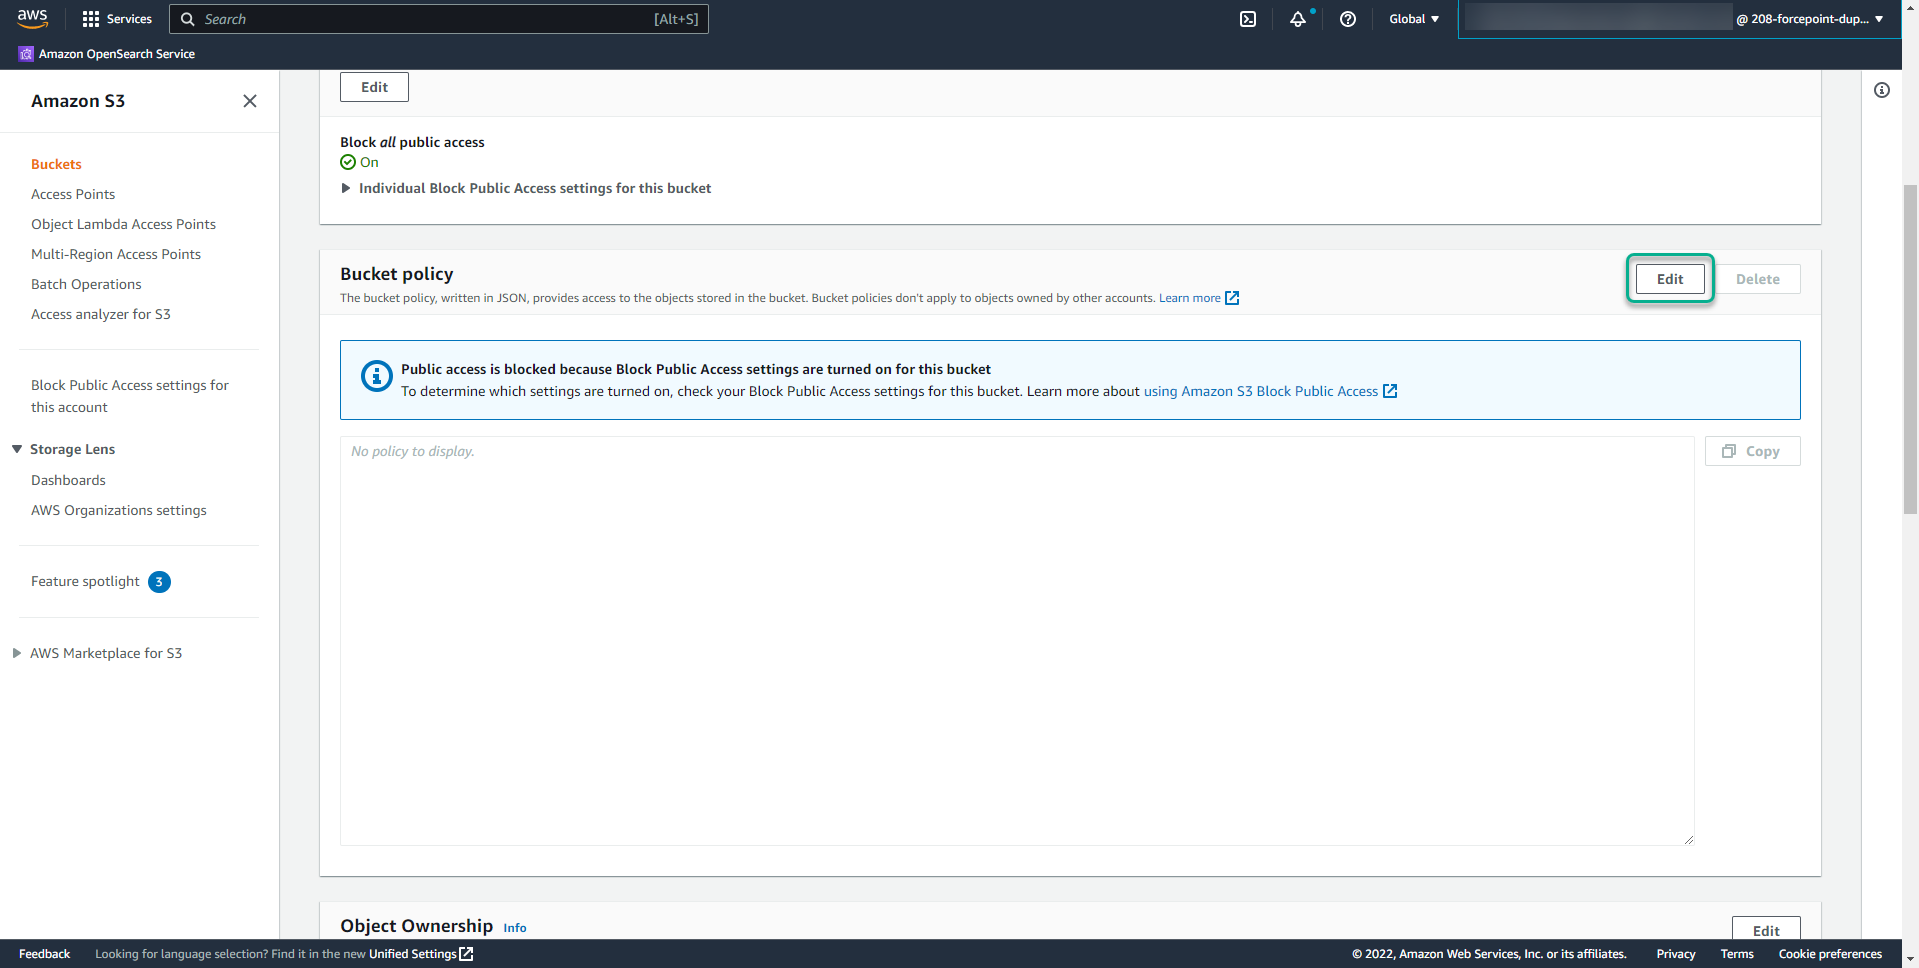
On the Permissions page, in the Bucket policy section, click the Edit button.
-
In the Policy field, enter the copied Replication policy from the Forcepoint Data Security Cloud | DLP cloud portal.
Scroll down and click the Save changes button.
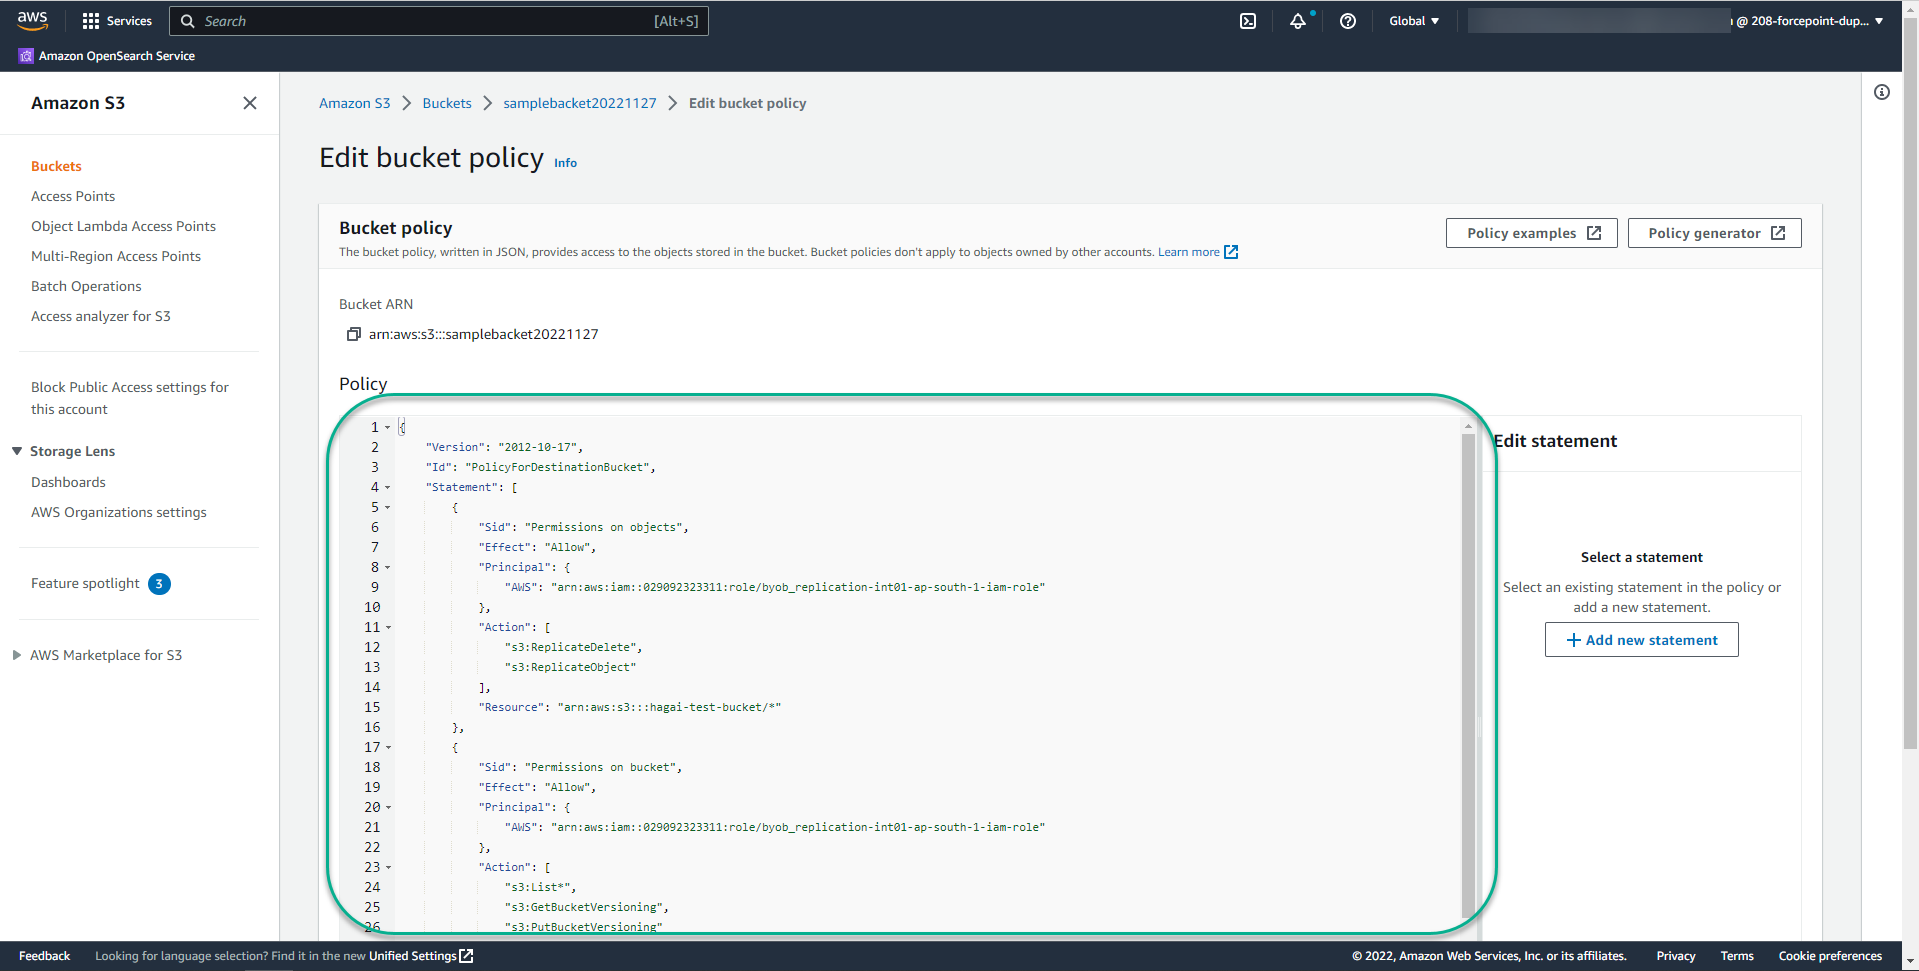 Note: Paste the complete policy without editing it. The policy allows Forcepoint to replicate objects into your bucket and to check and set bucket versioning. It does not allow Forcepoint to read your replicated objects. If the policy is later removed or changed, replication fails and the status changes to Failed.
-
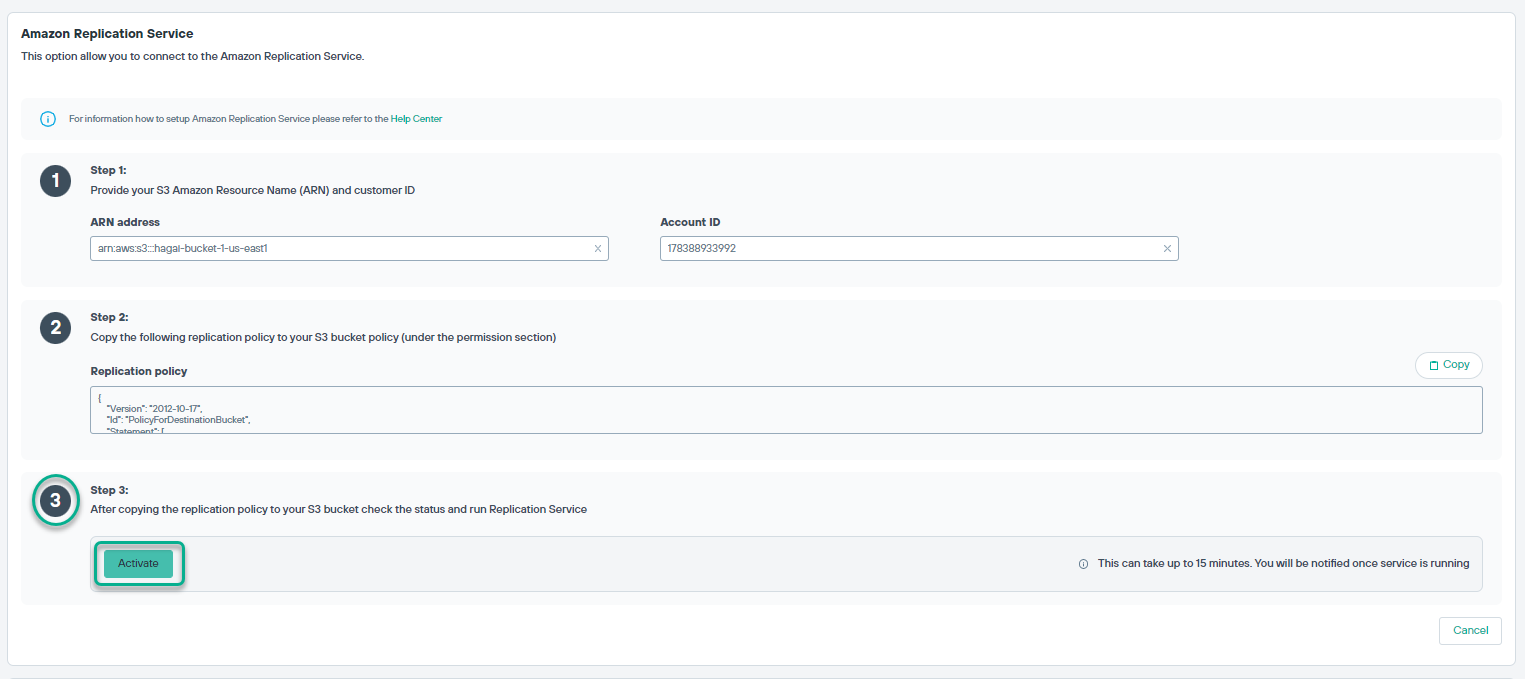
Once a success message is prompted on the top of the screen, navigate to . Under the Step 3, click the Activate button. New Bring your own storage widget will
open.
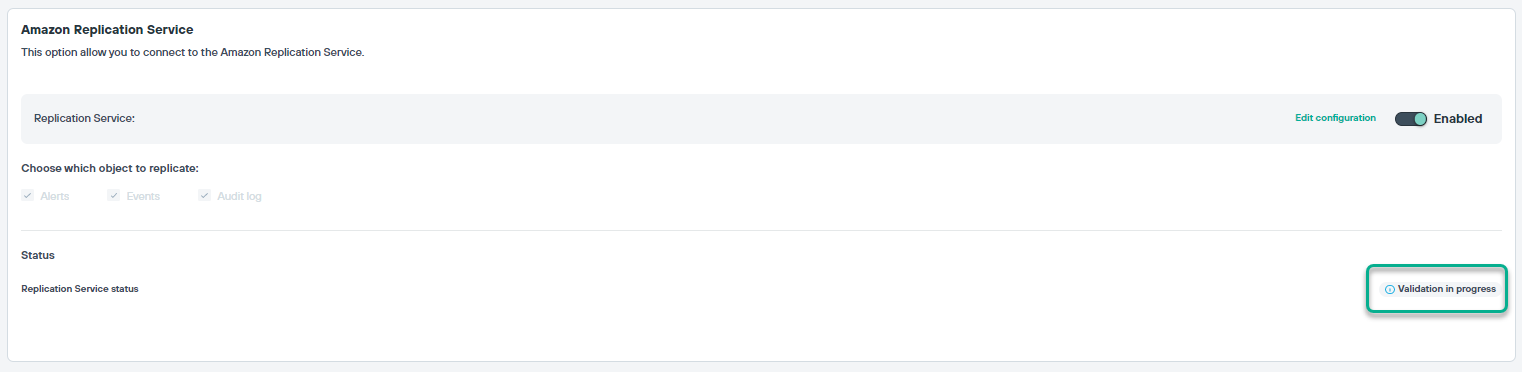
In the Status section, display the status Validation in progress. This can take up to 15 minutes, and you are notified when the service is running. When validation succeeds, the status changes to Running.
-
Once the status changed to Running, under the Choose which object to replicate section, check the Alerts,
Events, or Audit log check boxes.
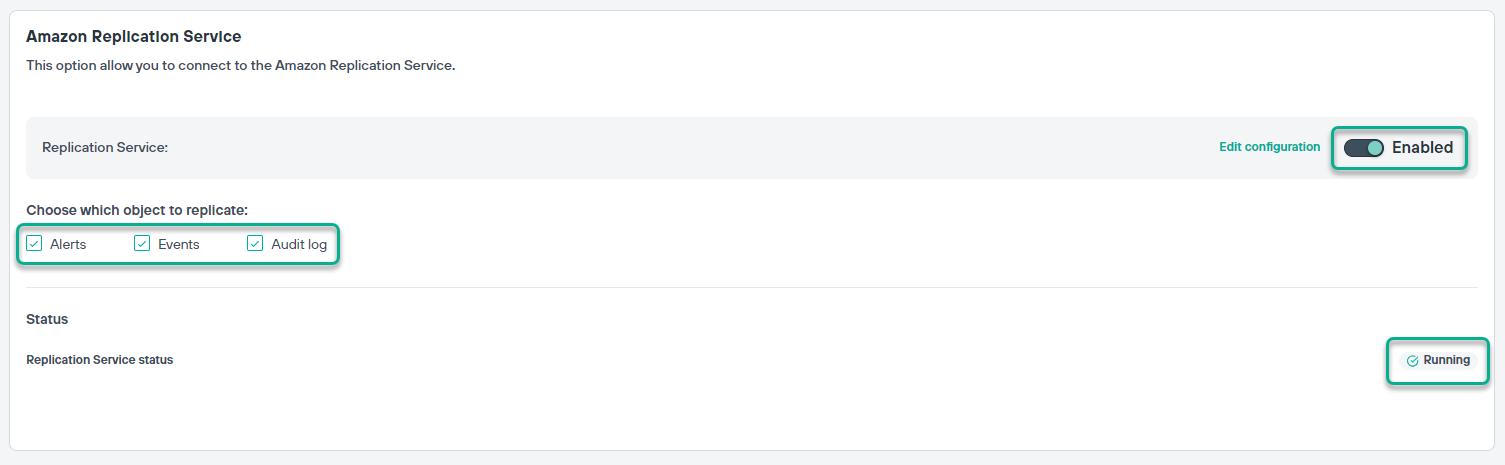
You must choose at least one object to replicate. The toggle button is default Enabled to keep objects synchronized with Amazon S3 bucket.
Result
The selected objects are replicated to your S3 bucket. If you selected Forensics, the forensic evidence for each new alert is copied to your bucket automatically
under <tenant ID>/forensics/<alert ID>/. Evidence for alerts created before you selected Forensics is not copied, but it remains
available for download in the portal.
Next steps
- To stop replicating forensic evidence, clear the Forensics check box. Your bucket configuration is kept, so you can select Forensics again later without re-entering it. Evidence already in your bucket is not removed, and copies that are in progress are completed.
- To change the bucket or account, click Edit configuration.