Inviting multiple users
You can create multiple users by simply inviting users to Forcepoint Data Security Cloud.
Steps
-
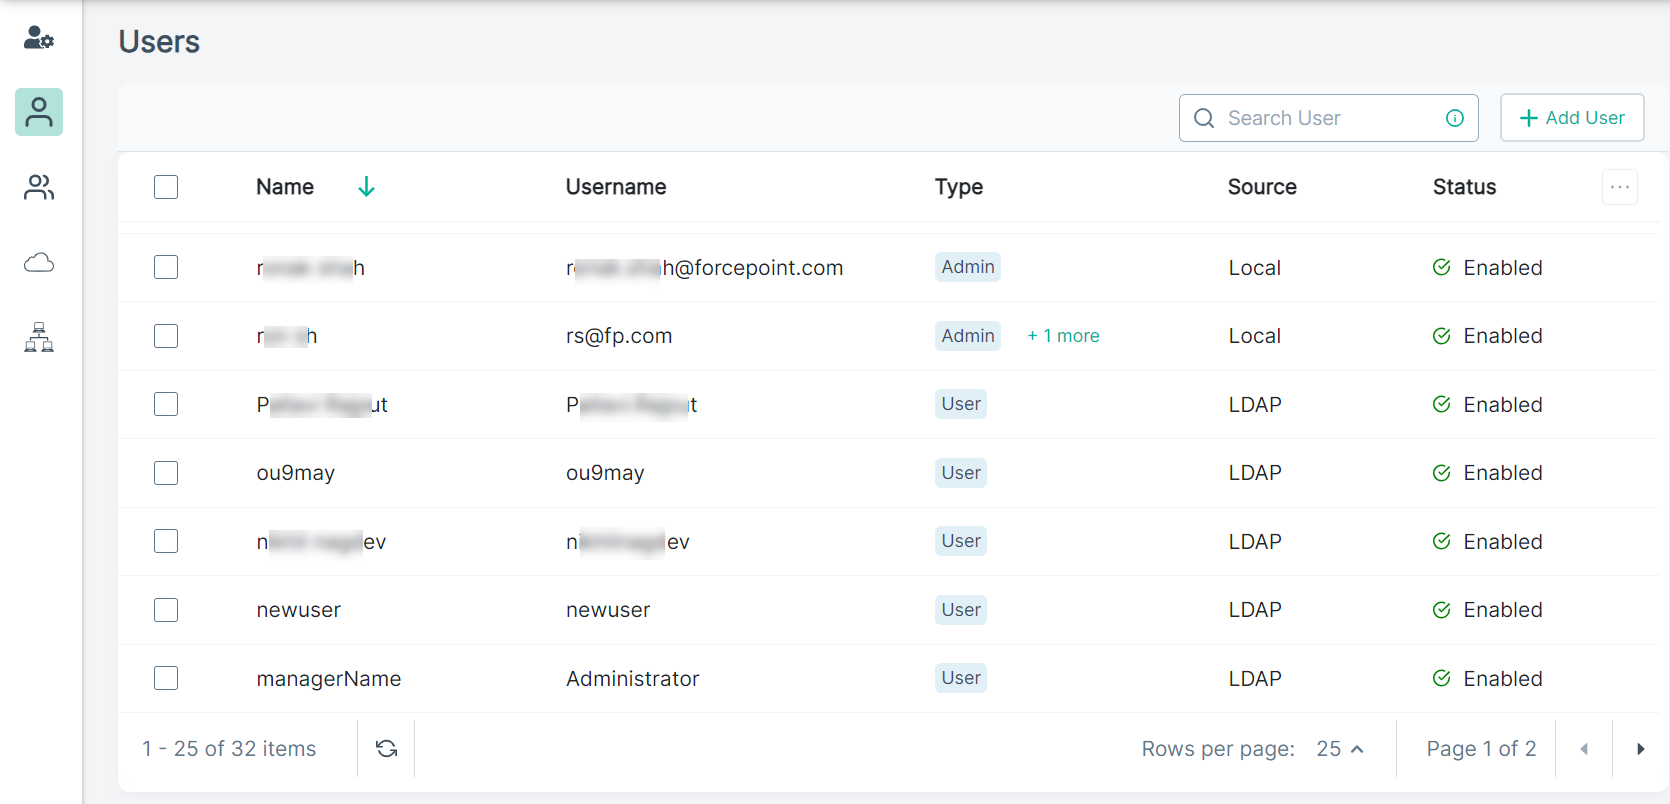
From the left Navigation Pane, click the Users
 icon.
icon.
The following page opens displaying existing users.
-
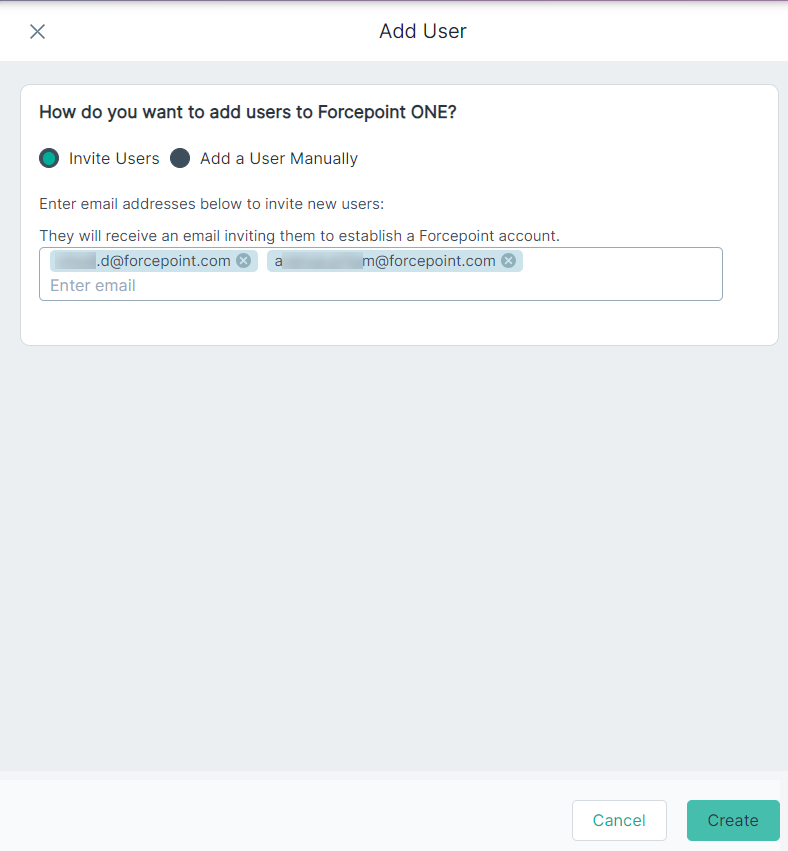
Select the Invite Users option from the How do you want to add users to Forcepoint ONE? section to invite multiple users at
once.
Available options are:
- Invite Users - To create multiple users by sending an invitation email with a link.
- Add a User Manually (default) - To create a user by manually entering all the required details for the user.
-
To send an invitation email to users, click Create.
Note: The invitation email is only sent if the user's email domain is configured for Local Authentication under the page.
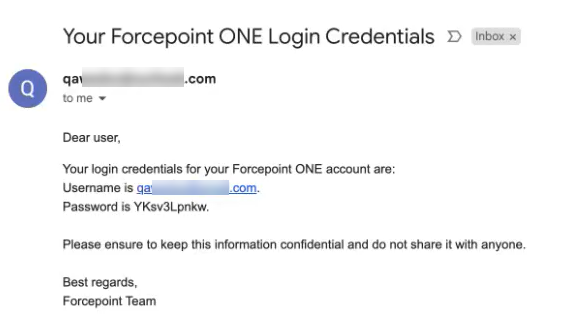
Invited users' accounts are created and can be viewed from the Users page with Status set to Pending Activation.
When the Administrator invite users, Forcepoint Data Security Cloud sends each user an invitation email with login credentials.
For example:
-
The invited user should login to Forcepoint Data Security Cloud using the login credentials received in invitation email.
-
To continue with password change, click Save and Sign In.
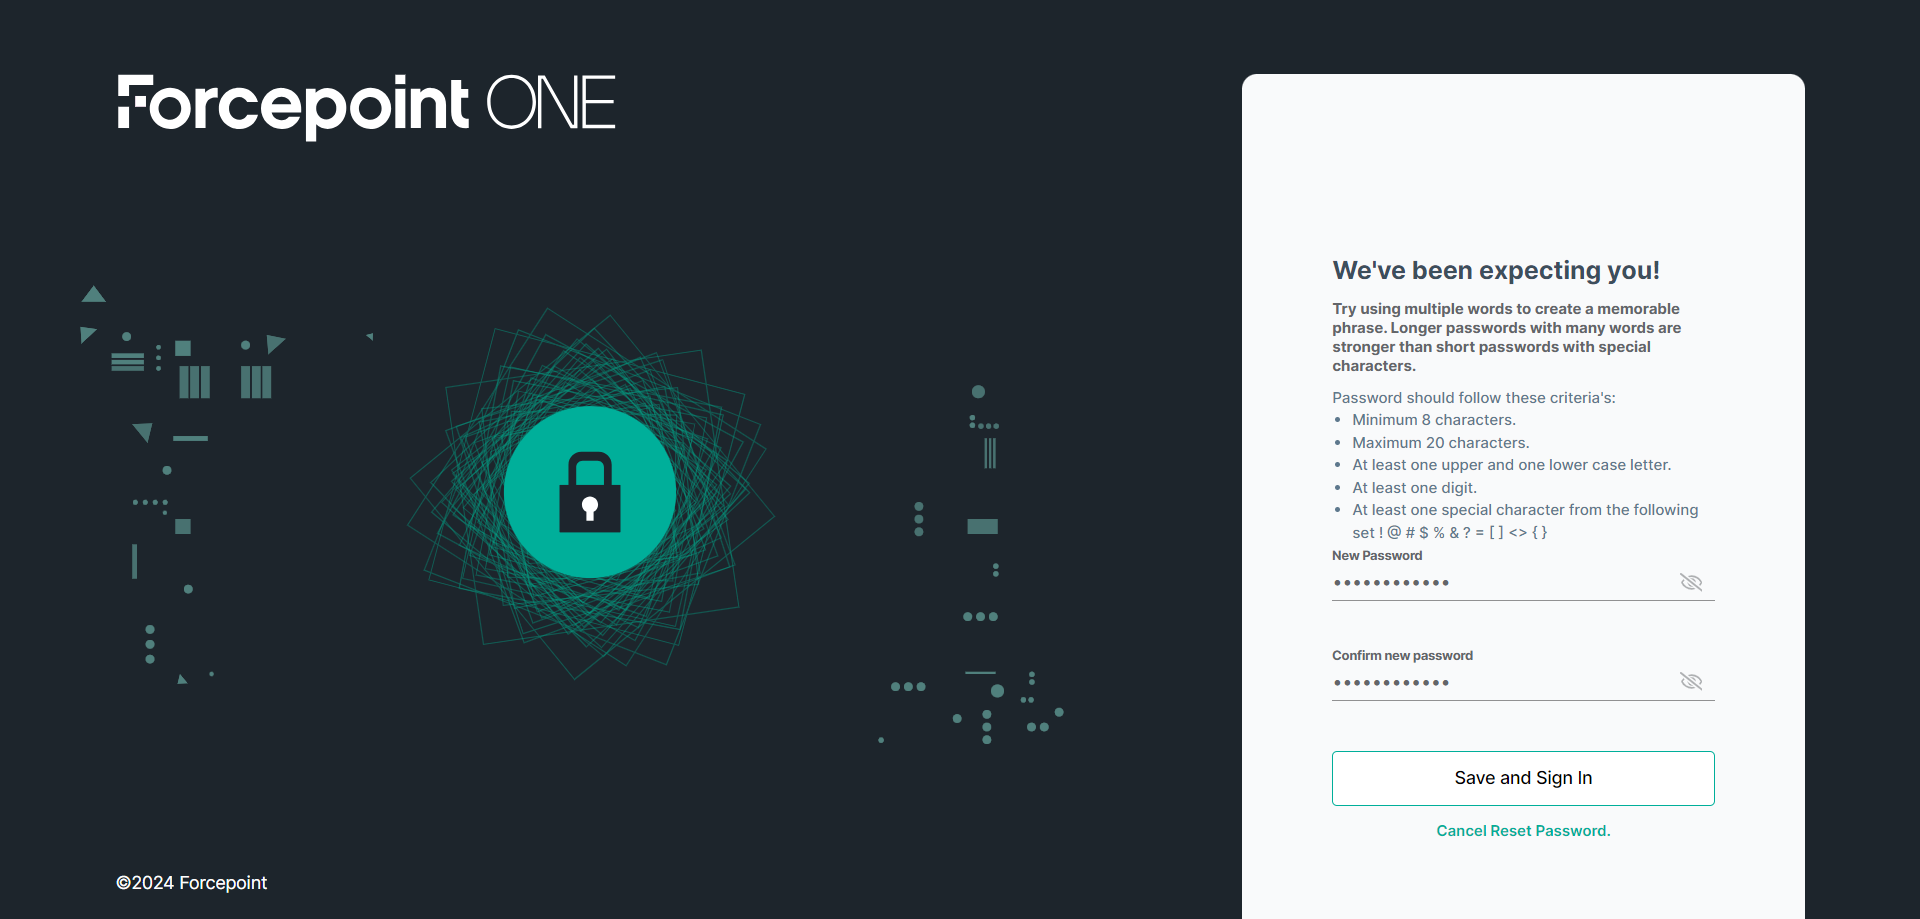
Based on the Roles assigned, You will be redirected to the Insights Application landing page. If no Roles are assigned, then blank page is displayed.
After successfully logging into Forcepoint Data Security Cloud for the first time, the user's Status is changed to Enabled.
-
To continue with password change, click Save and Sign In.