Registering an app for iManage Cloud
Steps
-
Click username in the upper right corner and click Control Center.
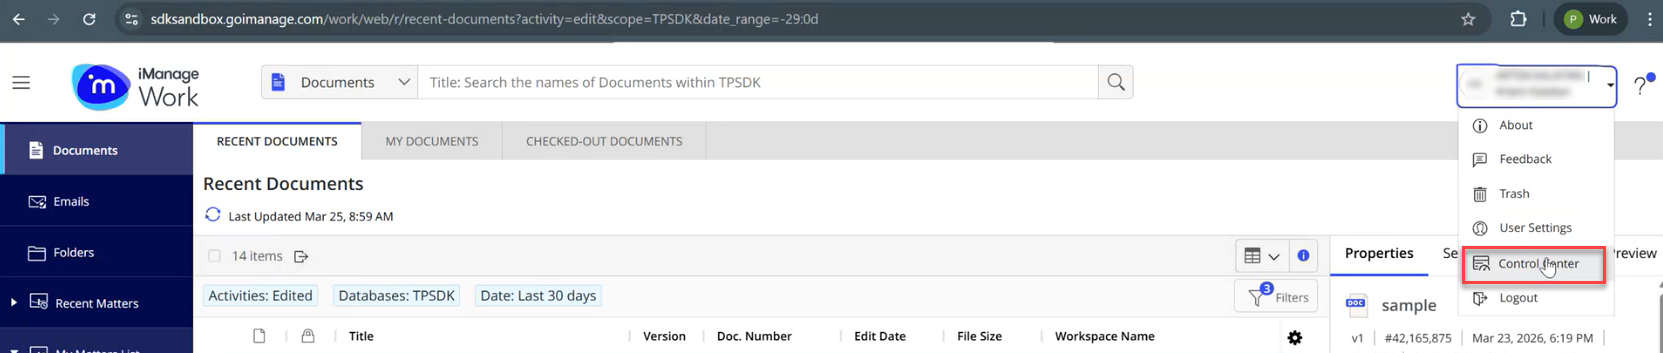 Note: Only users with admin role have access to Control Center.
 -
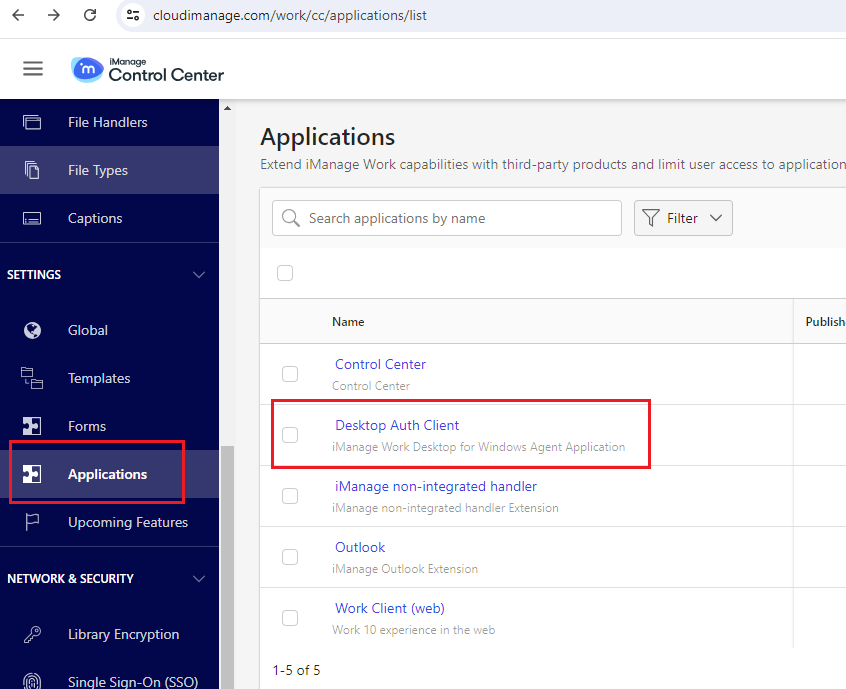
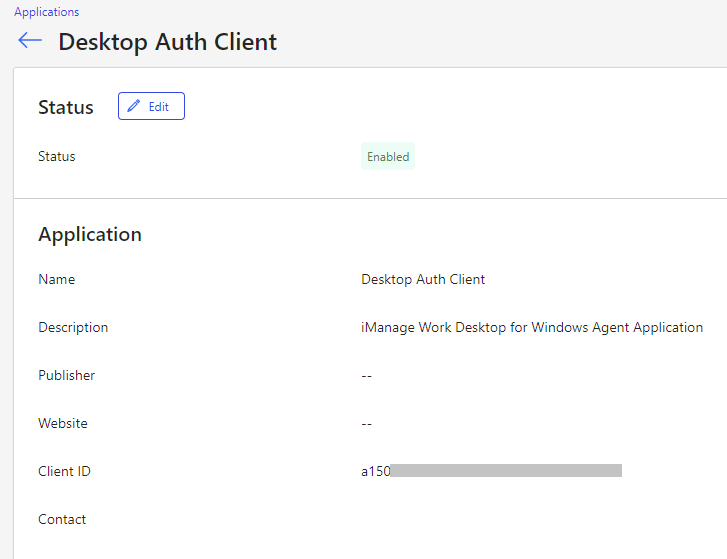
Go to Applications menu item, click Desktop Auth Client and find Client ID.
-
Customer ID should be provided by iManage admins, but if it is not provided, it can be retrieved from the /api response.
- Get Access Token
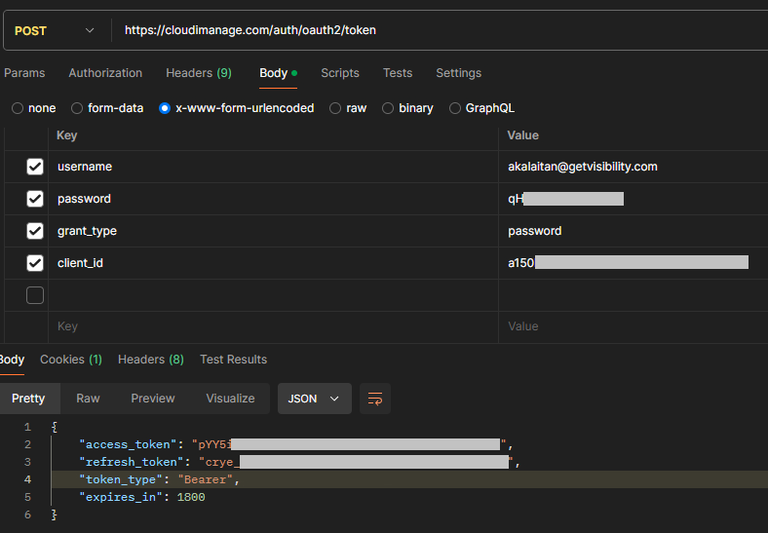 The
Thecurlcommand to get the Access token:curl -k --location "https://cloudimanage.com/auth/oauth2/token" --header "Content-Type: application/x-www-form-urlencoded" --data-urlencode "username={username}" --data-urlencode "password={password}" --data-urlencode "client_id={client_id}" --data-urlencode "grant_type=password"Note: The username, password, client ID, and host values will vary by customer. - Get Customer ID
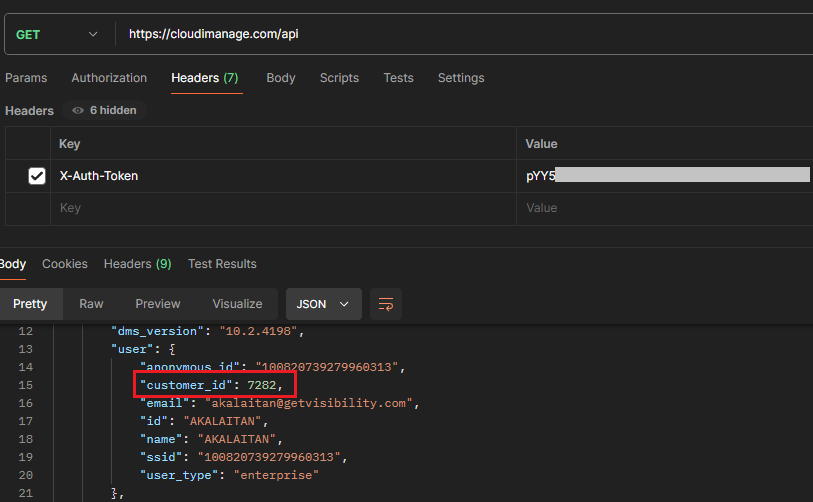 The
Thecurlcommand to get the Customer ID:curl -k --location "https://cloudimanage.com/api" --header "X-Auth-Token:{access_token}"Note: Replace theX-Auth-Tokenvalue with theaccess_tokengenerated above.
- Get Access Token
-
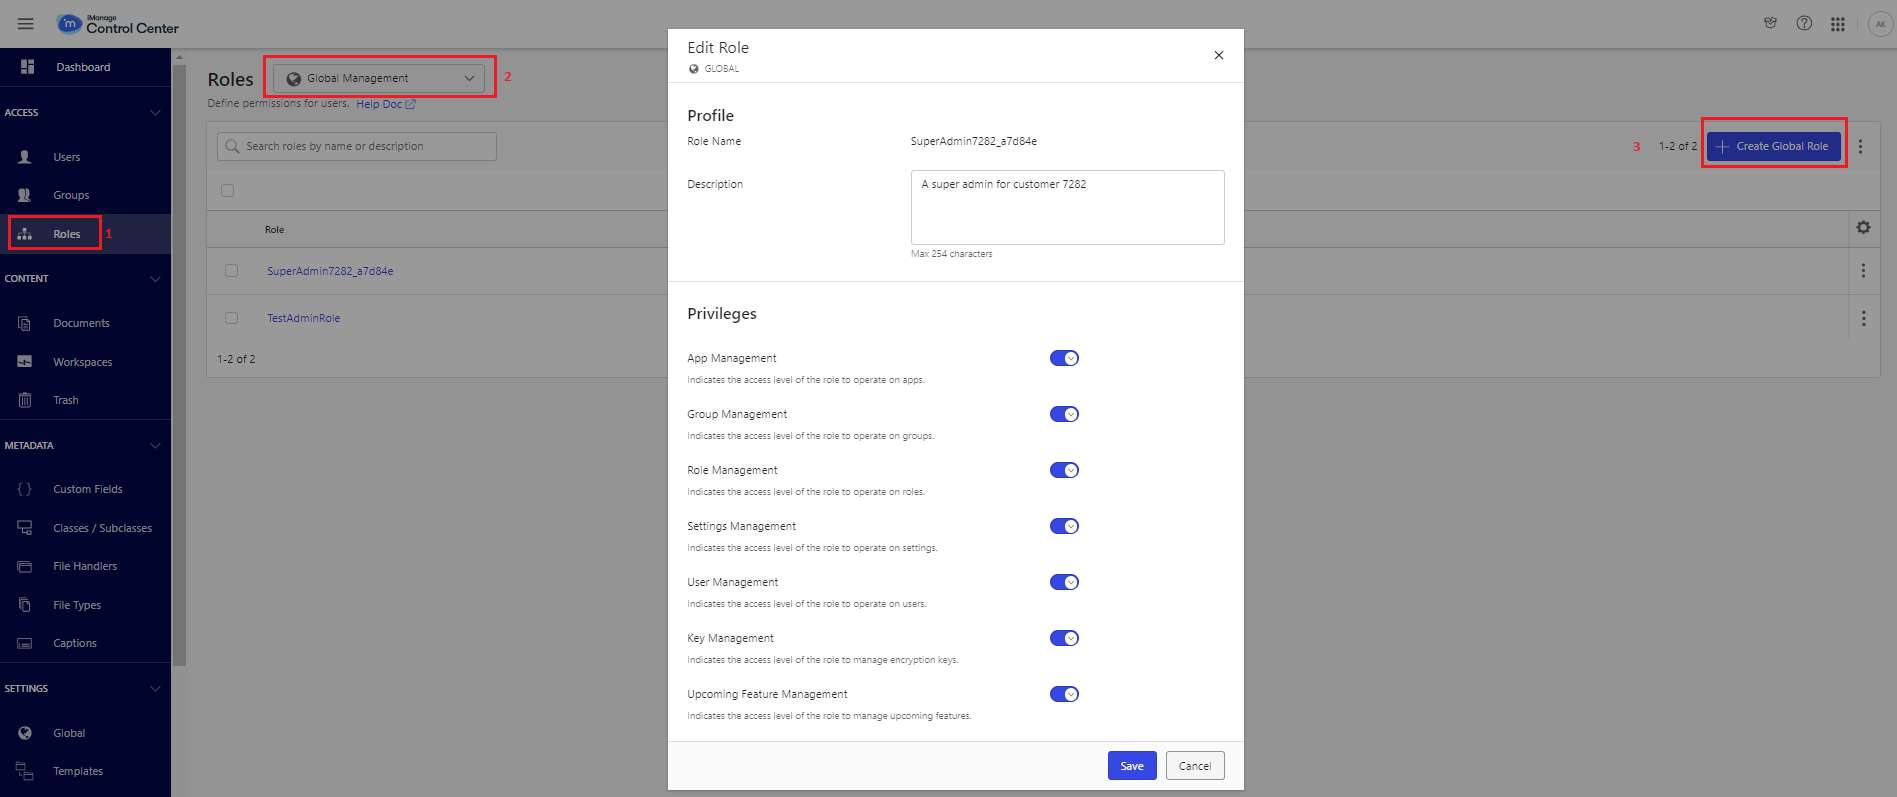
Go to the Roles menu item and set the following:
- Select Global Management to setup admin roles. Enable the necessary options.
- Select Library-level Management to setup library roles.