Steps to modify IDP policy rules.
Steps
-
Sign in to Forcepoint Data Security Cloud.
-
From the application waffle, select Admin.
-
From the left Navigation Pane, click the IDM Policy
 icon.
icon.
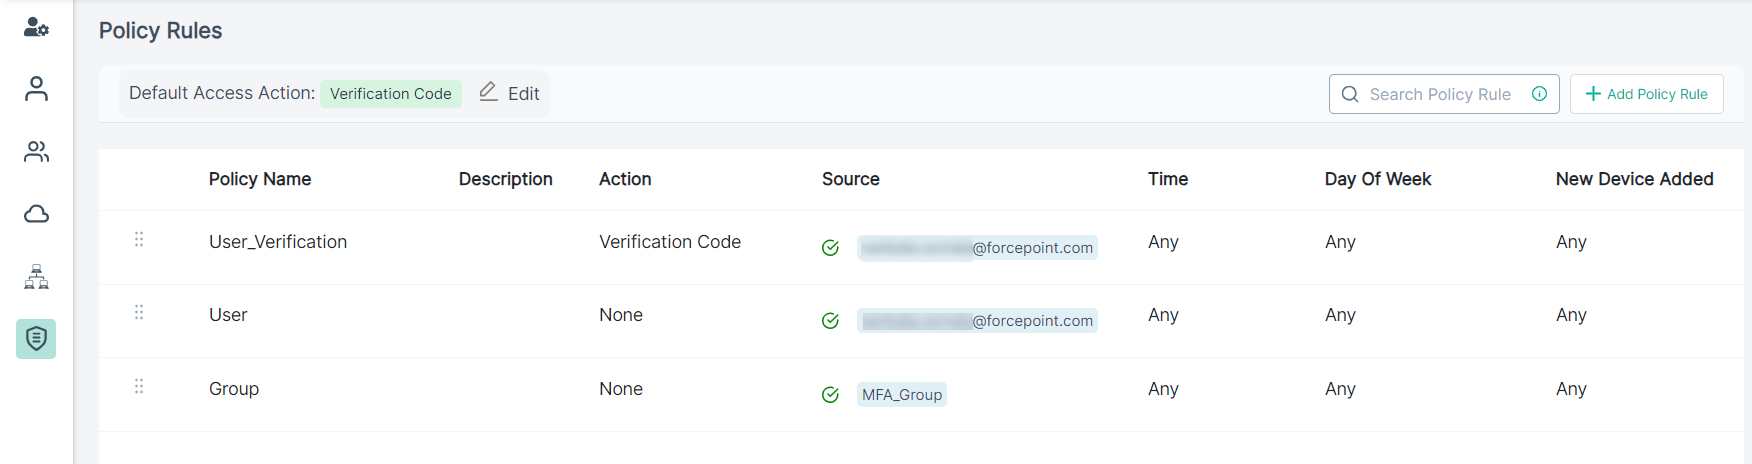
The Policy Rules page opens displaying existing policy rules.
-
Select the policy rule you wanted to modify from the list.
-
On the Edit Policy Rule pane, make the necessary changes if required.
You can modify all the fields except the Policy Rule Name.
-
Enter short Description of policy rule not longer than 256 characters.
-
On the Action section, select one of the following action to be taken when policy rule is matched:
- Verification Code - Select this option to enforce verification code MFA check via Authenticator application after a user authentication before
granting access.
- None - Select this option to avoid the MFA check.
-
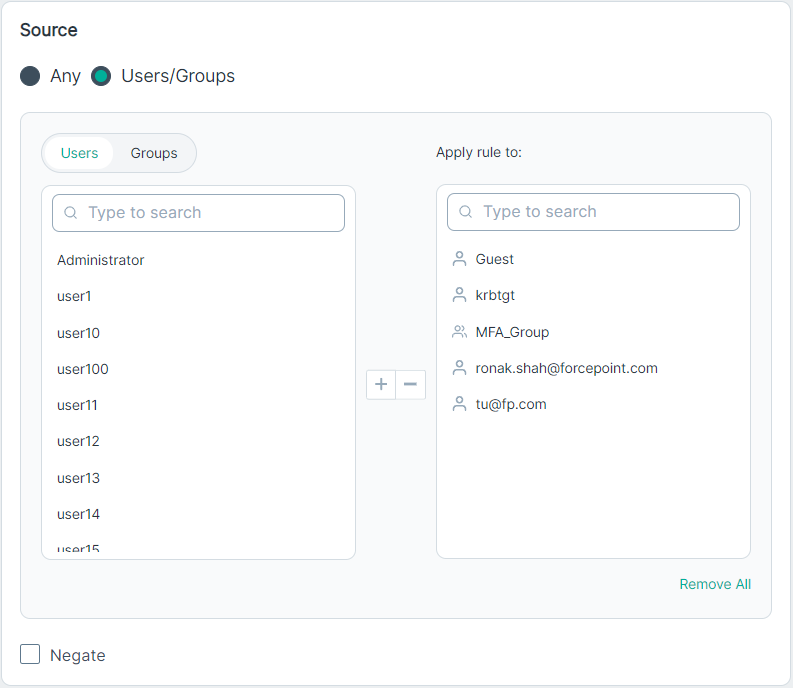
To specify which Source the policy rule applies to:
Available options are:
- Any (default) - Select this option to include all users and groups.
- Users/Groups - Select this option to select limited number of users and groups so that the policy rule is applied to those users and groups
only.
To select specific Users/Groups, follow the below steps:
-
To limit the policy to selected users, select multiple users (by holding the Ctrl/Command keyboard key) under
Users tab, then click + icon to add them to the Apply rule to field.
Users can be locally defined and pulled from active directory.
-
To remove a user, click the user under Apply rule to, then click - to remove them from the Apply rule
to field.
-
To limit the policy to selected groups, select multiple groups (by holding the Ctrl/Command keyboard key) under
Groups tab, then click + icon to add them to the Apply rule to field.
Groups can be locally defined groups, security groups and OUs pulled from active directory.
-
To remove a group, click the group under Apply rule to, then click - to remove them from the Apply rule
to field.
-
Select the Negate checkbox to apply policy rule to every group and user except the groups and users you selected.
-
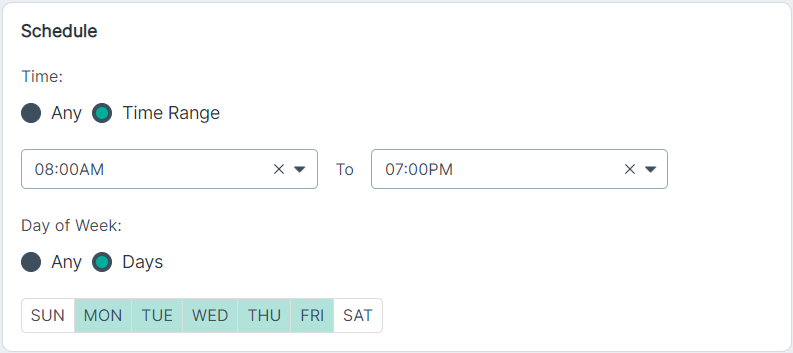
Select a specific Time range (working hours) from the Schedule section to which the policy rule applies to.
Available options are:
- Any - Select this option to apply the policy anytime of the day.
- Time Range - Select this option to prevent users (for example, contractors) from having accessing beyond work hours of the day.
To select the Time Range, follow the below steps:
-
From the drop-down, select the Start time.
-
From the drop-down, select the End time.
-
Select a specific Day of Week (working days) from the Schedule section to which the policy rule applies to.
Available options are:
- Any - Select this option to apply the policy any week of the day.
- Days - Select this option to prevent users (for example, contractors) from having accessing beyond working days.
To select specific Days, select the applicable Day(s).
Available options are Sun,
Mon, Tue, Wed, Thu, Fri and
Sat.
-
To trigger the policy rule when a new device is detected that they have not used before, select the New Device Detected checkbox.
-
To save the changes made, click Update.
The updated policy rule gets displayed in Policy Rules page.