Configuring Any API Field Encryption
The API encryption and field mapping will instead be performed in the Any API app you added.
Steps
-
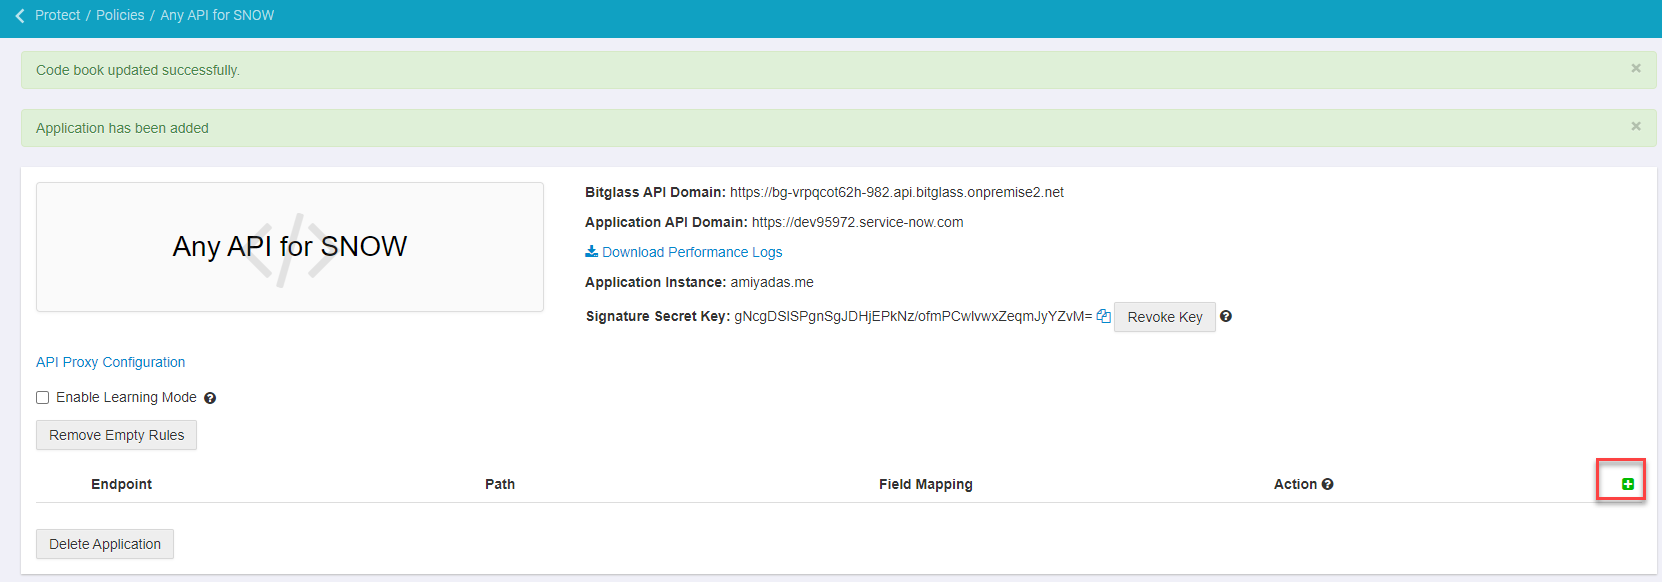
Back on the API application settings page, click the green plus icon to add a new Endpoint.
-
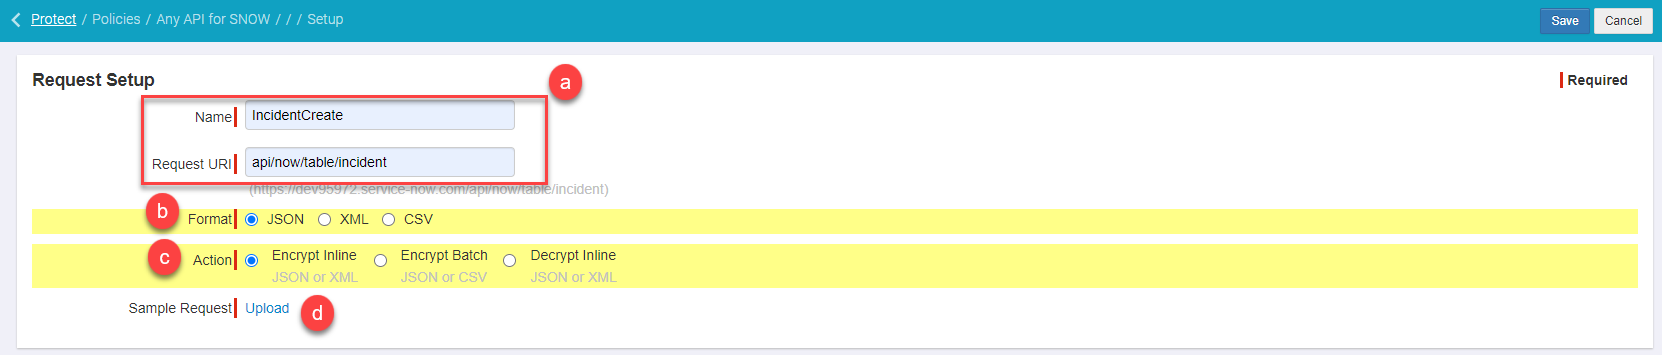
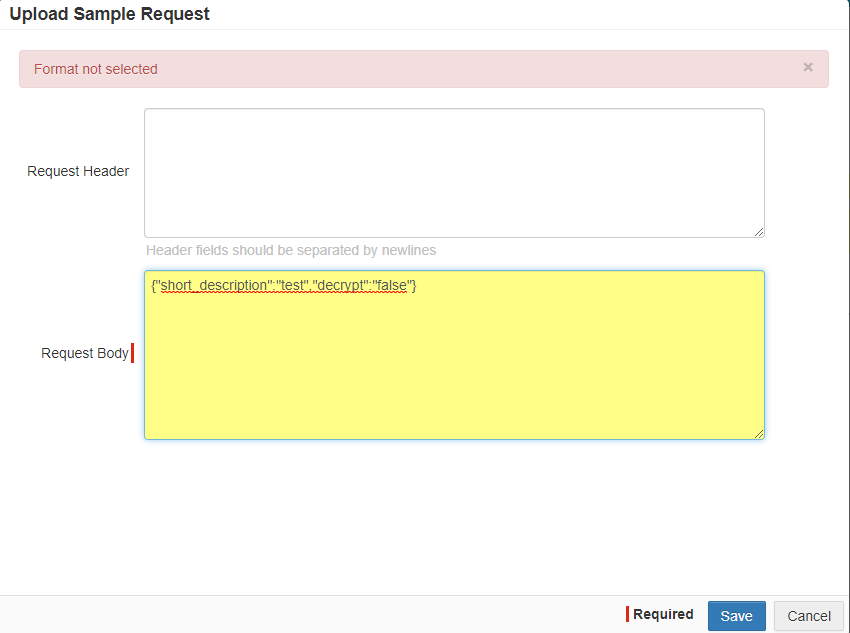
Click the Sample Request option and enter an example of a data request that will be uploaded using this API and click Save at
the bottom.
-
Click Save at the top right of the Request Setup page.
-
Click the Sample Request option and enter an example of a data request that will be uploaded using this API and click Save at
the bottom.
-
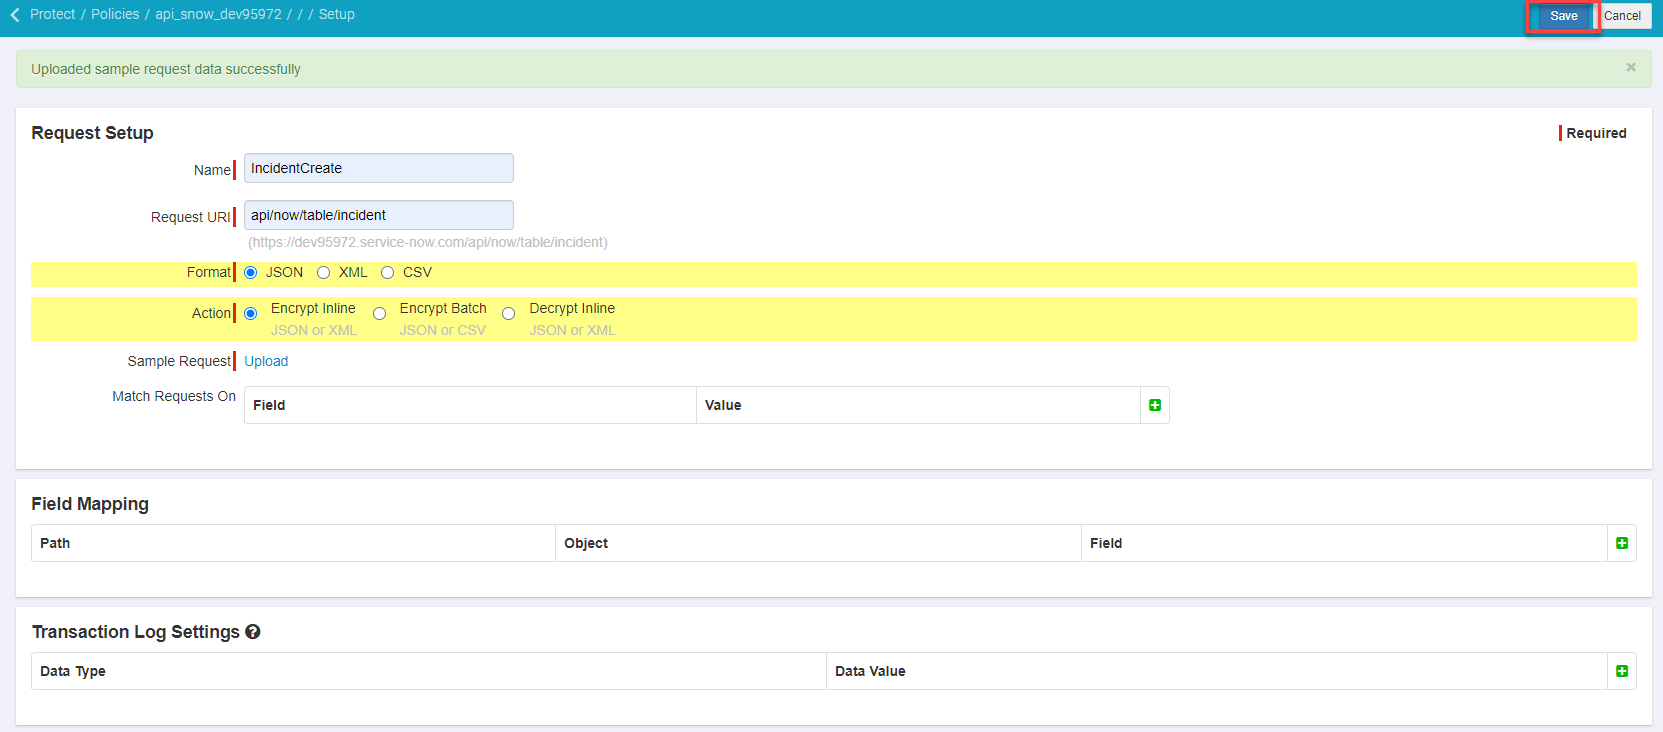
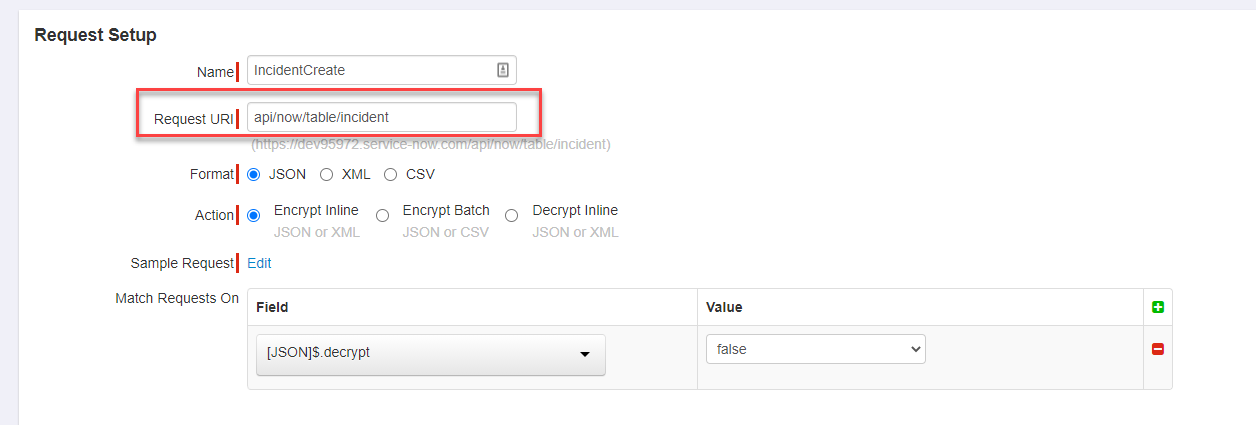
After uploading the Sample Request, you are presented some new fields to configure:
-
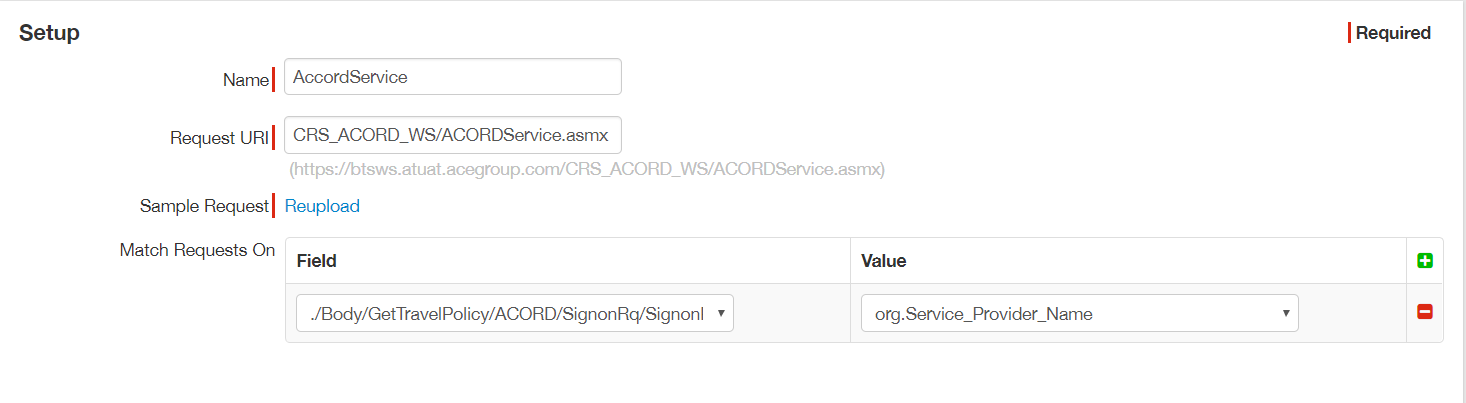
Match Requests On: This table allows you to select which field and value needs to be present before performing any actions. Click the Green Plus icon to add a new
line and select the Field from the drop-down and select the appropriate Value that needs to be present before you take
actions.
If an API request contains a field name such as Content Type and values of Account Name, Client Name, and Social Security Number, then the actions configured on the Actions Taken on Matched Requests card will be applied. If no fields are configured in the Match Requests On table, then the actions will be applied during all API requests based on the selected fields in the Actions Taken On Matched Requests card. In my example. I have input a field of decrypt with a value of false. Meaning if I include that field and value in my post then the data I am pushing will follow the action in the field mapping (in this case encrypt). If I don't include that then no actions will be taken.
-
Field Mapping: This card will let you select which particular fields will be encrypted or tokenized. Click the Green Plus to add a new line and select the
JSONPath you wish to take an action on. Then select the encryption Object you created above in step 2 of the main
encryption setup as well as the field to specify the exact action being taken. Again actions will only be taken if a particular value is matched based on the
Match Requests On table. If nothing was filled out for Match Requests On then your configured fields will always be
encrypted or tokenized in your API requests.


-
Match Requests On: This table allows you to select which field and value needs to be present before performing any actions. Click the Green Plus icon to add a new
line and select the Field from the drop-down and select the appropriate Value that needs to be present before you take
actions.
- Once you have configured the field mapping you are now set and can move on to pushing data via the API and having it be encrypted or tokenized as desired.
Note:
When making API calls you must ensure the following two items:
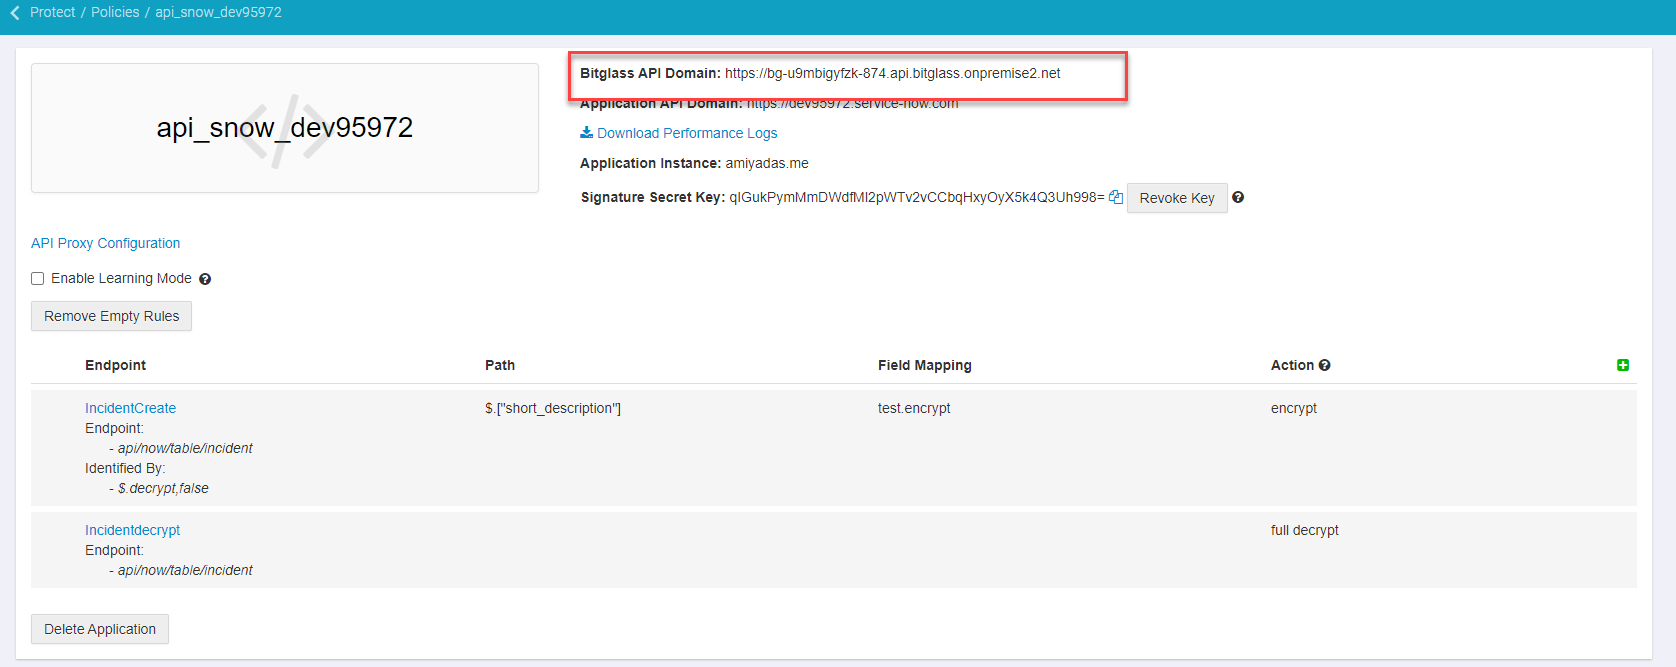
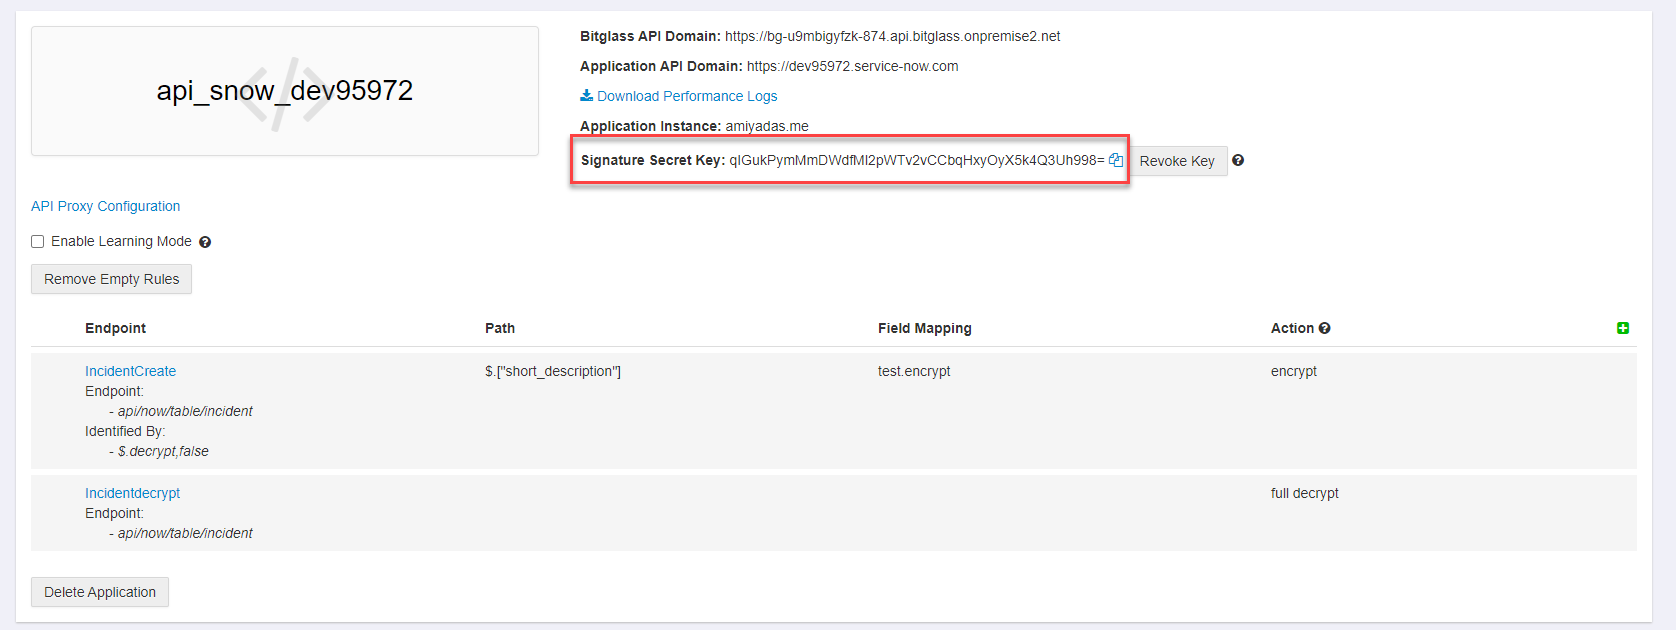
- The API endpoint you are posting to equals the Forcepoint Data Security Cloud | SSE API Domain URL you find in the API app settings appended by the API
endpoint URI you are trying to post to. For example with our app we created the URL would be "https://bg-u9mbigyfzk-874.api.bitglass.onpremise2.net" and the endpoint
URI is "/api/now/table/incident/" so combined we would get "https://bg-u9mbigyfzk-874.api.bitglass.onpremise2.net/api/now/table/incident"
- You must also ensure that your API calls include a custom Forcepoint Data Security Cloud | SSE header "X-BG-SIGV2" with the value of the header being the
signature key generated on your API app. Please see the example Postman calls below if you would like to see an example of data being pushed through this API flow to be
encrypted in ServiceNow.
- The API endpoint you are posting to equals the Forcepoint Data Security Cloud | SSE API Domain URL you find in the API app settings appended by the API
endpoint URI you are trying to post to. For example with our app we created the URL would be "https://bg-u9mbigyfzk-874.api.bitglass.onpremise2.net" and the endpoint
URI is "/api/now/table/incident/" so combined we would get "https://bg-u9mbigyfzk-874.api.bitglass.onpremise2.net/api/now/table/incident"
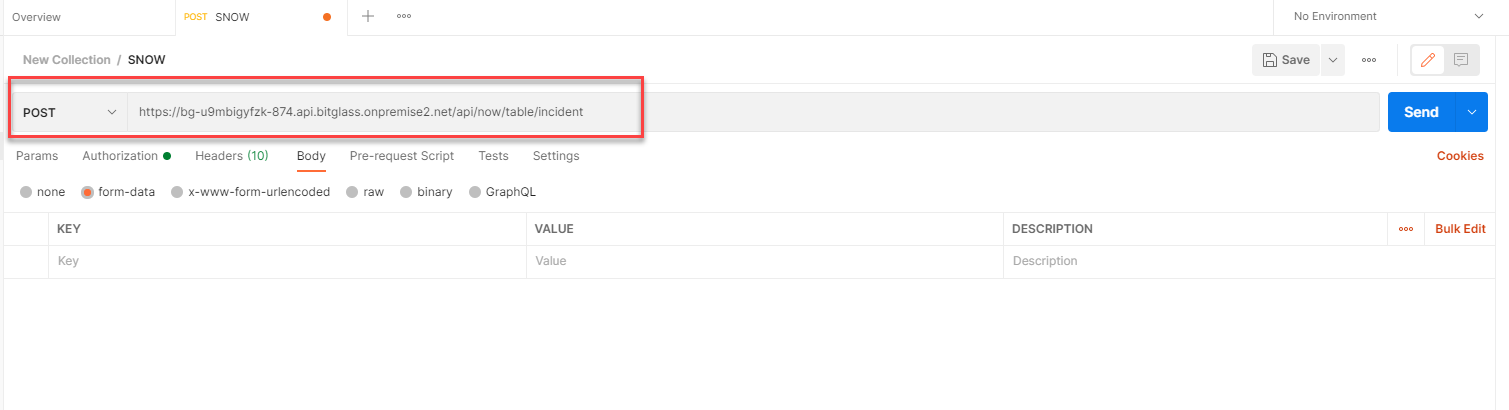
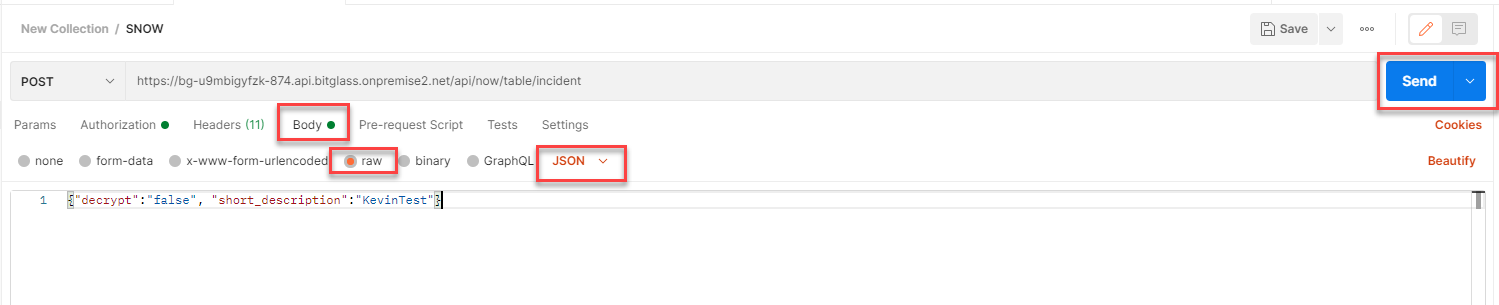
Example Postman Setup
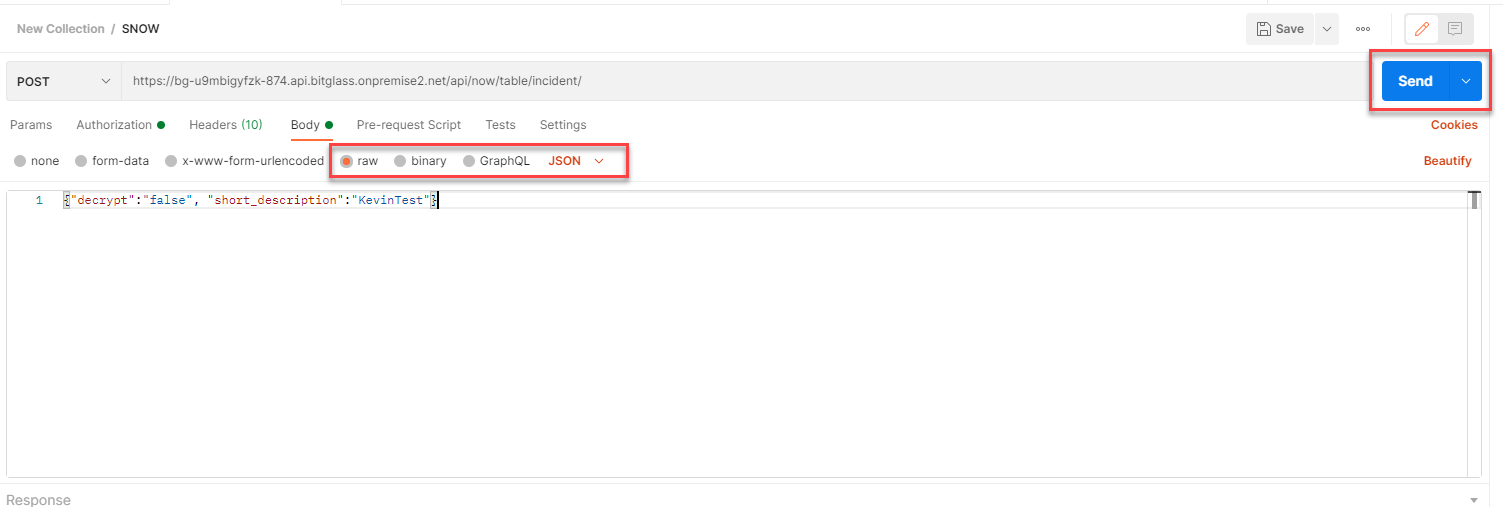
- Create a new Post and enter the full Forcepoint Data Security Cloud | SSE API domain URL and API endpoint for your app. Again for this example we get: "https://bg-u9mbigyfzk-874.api.bitglass.onpremise2.net/api/now/table/incident"
- Click on the Authorization tab to set up your authorization details. Here for ServiceNow we will select Basic Auth and enter our
ServiceNow admin credentials.

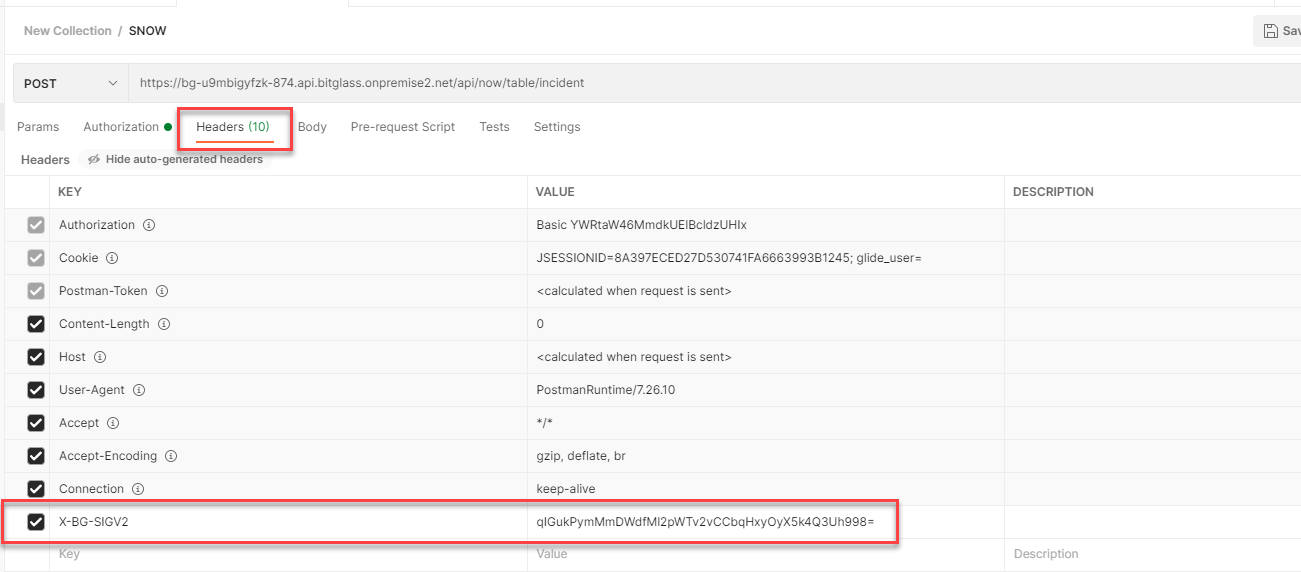
- Now click on the Headers tab and add an additional header at the bottom for the custom Forcepoint Data Security Cloud | SSE header with your
Signature Key. Header is X-BG-SIGV2 while the signature key is found on the API app settings page
- Now click on the Body tab, select Raw and then JSON from the dropdown and then fill out the body with the
information you will be posting. Click Send when you are ready. Notice I included the decrypt:false field and value so it should match
my rules from above and encrypt the short description field when pushed into ServiceNow.
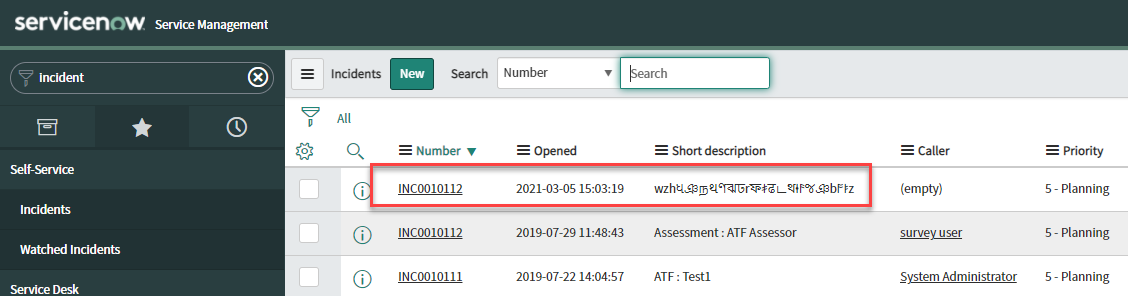
- Once sent you will see a verification in the bottom window. We can login to ServiceNow to verify that the short description of the new incident is encrypted: