Setting Encryption/Tokenization
Forcepoint Data Security Cloud | SSE provides a number of available encryption/tokenization options depending on your current needs/requirements.
- Encrypt: Encryption uses AES 256 bit encryption. Each data point is uniquely encrypted and stored in the codebook, associated encrypted handle is placed in the field in it's place.
- Tokenization: Tokenization is similar to encryption except it will always tokenize the data and apply the same handle if the data is the same. For example if you tokenized the name Acme-gadget and then later deleted it. When you add that exact name again it will use the same tokenization and associated handle.
- DDM: Places a marker around the actual text. For example if the text was Acme-gadget then we would store it as DDMEncrypt (Acme-gadget). If viewed without permission the field will appear blank as opposed to seeing an associated handle. This means the data is not stored in a Forcepoint Data Security Cloud | SSE codebook but remains in the app.
- Vaultless Encryption: Vaultless encryption is unique in that Forcepoint Data Security Cloud | SSE will encrypt the text and place the newly encrypted text back into the application. Since we are placing the actual encrypted text and not a handle, you must set the Max Length field to at least 10x the actual characters you would support in that field. For example if you were encrypting an address field that supported up to 50 characters then you would need to input 500+ for the Max Length.
- Vaultless Local Tokenization: Vaultless Local Tokenization works similarly to vaultless encryption in that we will tokenize the plaintext and place the ciphertext back into
the application. If multiple form paths are mapped to the same Object.Field and we see the same plaintext within a single request (even across different form paths) then we will
tokenize the first instance of the plaintext with a tokenized ciphertext and then use that same ciphertext for each other instance of that plaintext that we see within that
request. For new requests or requests in different Object.Fields we will create new ciphertexts.
- For example if you have path1 and path2 configured for Object.Field1 and you sent a single request through with plaintext abc appearing in both path 1 and path 2 then Forcepoint Data Security Cloud | SSE will tokenize the plaintext abc with a ciphertext and use that same ciphertext for both instances of abc in path1 and path2. If you send a new request with abc through path 1 and path 2 then Forcepoint Data Security Cloud | SSE will tokenize abc with a new ciphertext and use that for both instances. If in a single request
- If you sent abc to path1 and path2 in Object.field1 and also to path3 and path4 in Object.Field2 in the same request then abc will be tokenized once and given the same ciphertext for path1 and path2 in Object.Field1 and then a different ciphertext will be used for path3 and path4 in Object.Field2.
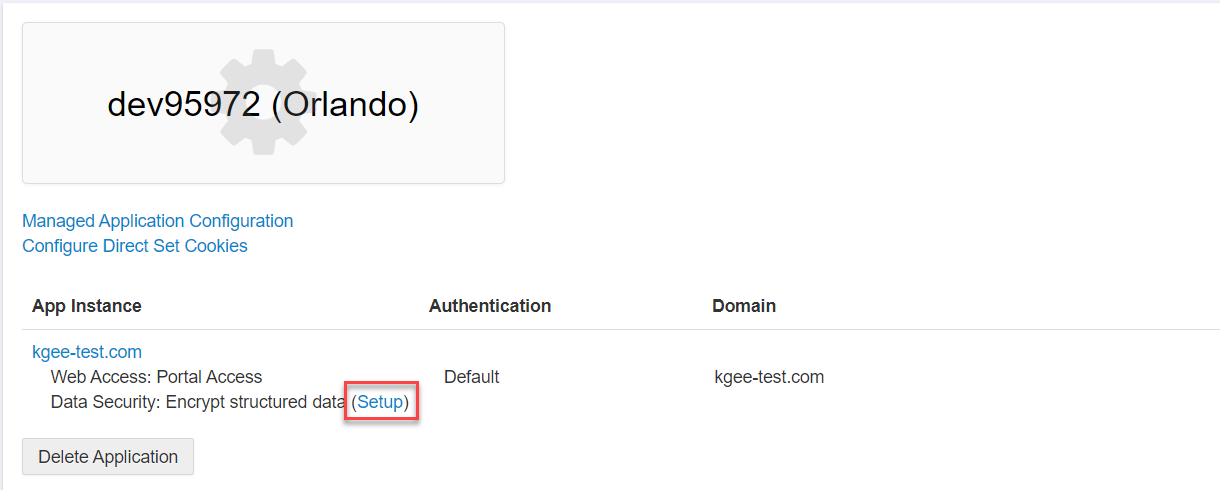
To begin you need to navigate back to the custom application you created and click on the Data Security: Encrypt Structured Data option.
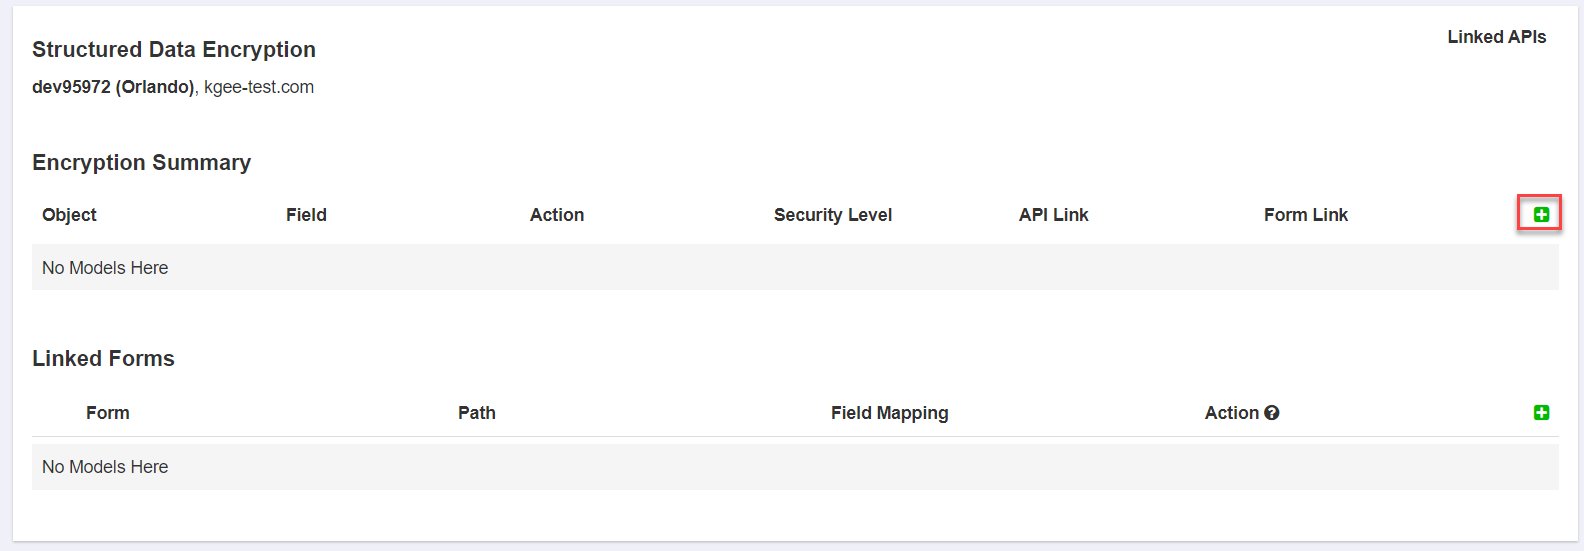
- Under Encryption Summary, click the green plus icon to create a new object. You will need to create at least one object which will be the primary key.
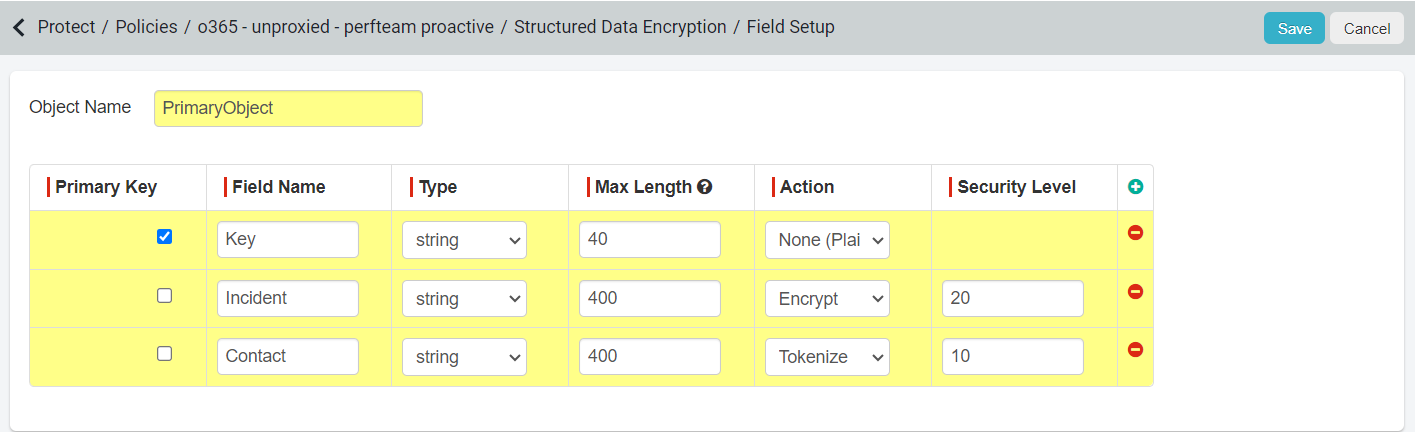
Provide an Object Name, a Field, Type, Max Length, Action, and Security Level. You can add additional objects once you have set the primary key to specify actions you will want to take
on the data. There are a few caveats when adding the objects:

- Object needs at least one field that's marked as a primary key.
- For the primary key you cannot select encrypt as an option, only tokenize or none (plain text). This is because the key will be used by both the endpoint and the end service and must be recognized as the same. Encryption would cause the ciphertext to be different each time.
- A field needs to be at least 40 characters to be able to select encrypt or tokenize for the action.
- While you must set a Security Level if you select tokenize, the number you enter does not matter for the primary key. Security Level will be used when encrypting the data in order to control user access or ability to view the data.
- Now you can add new objects to specify the action you will be taking - for either inline or via API in the later configuration - and what security level you want to set. The
security level number is arbitrary and you can choose to set it to whatever. When configuring policy you will denote what security levels users will get based on the policy line they hit.
For example if you set the action to encrypt at a level 10 for an object key and another encrypt at a level 20. When you apply these different encryption levels to the data, users can be assigned specific security levels based on policy line they hit. An admin on a managed device can get a higher level (say 20 or more) while a user on an unmanaged device will get a lower security level (10 or less). This will control what data they will be able to view/access.
- After configuration click Save and then Publish Fields back on the Structured Data Encryption page.
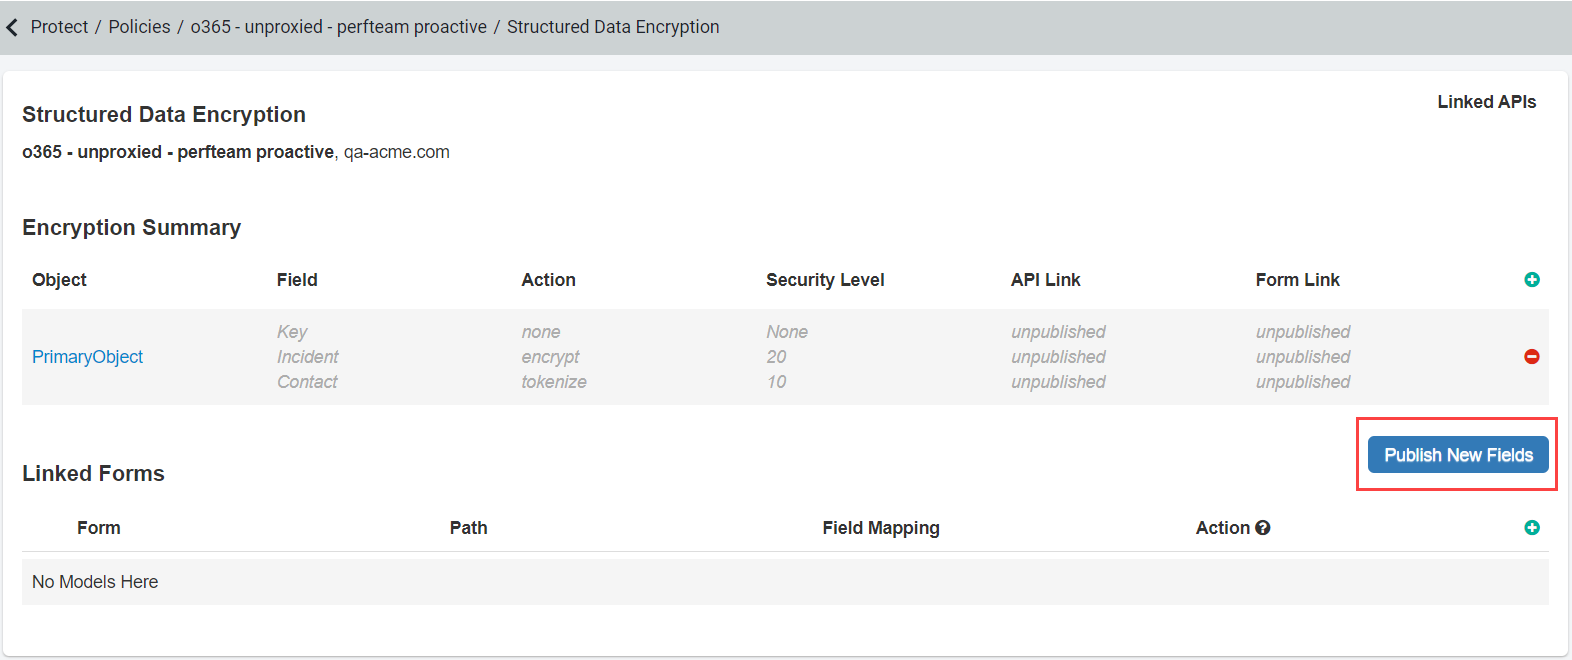
Note:- You can add as many encryption objects as needed to separate the types of encryption/tokenization used later for inline or API protection.
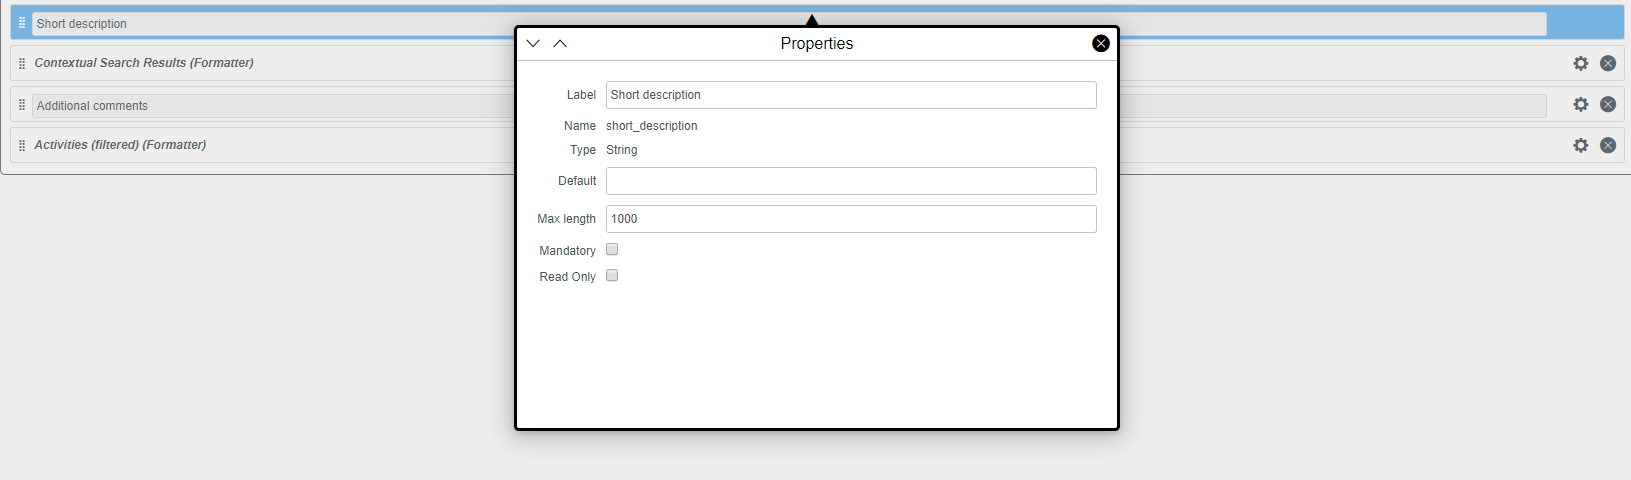
- For ServiceNow you are able to configure/set the character length for any of the fields you are using. You will need to make sure that the max field length you set in
Forcepoint Data Security Cloud | SSE is equal to or less than the field length you set in ServiceNow since Forcepoint Data Security Cloud | SSE
will not be able to place the encrypted text back into the field if the character length exceeds what the field can hold.