Rolling centralized certificates for macOS via MDM
From macOS Big Sur onwards, user intervention is required to trust the certificate generated by the Forcepoint Data Security Cloud | SSE SmartEdge agent which is unique per device.
Steps
-
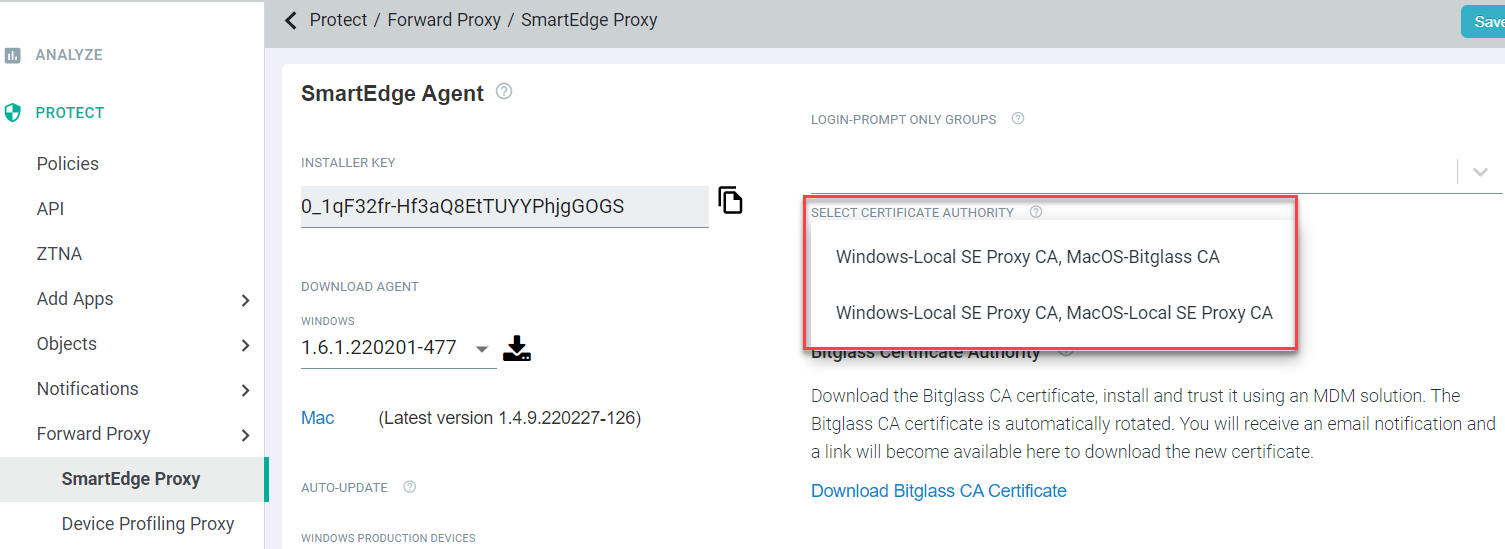
In the Forcepoint Data Security Cloud | SSE portal on the page, you will see a drop-down in the top right corner title SELECT CERTIFICATE AUTHORITY. This will present two primary options for managing
how the SmartEdge agent handles the cert. You'll notice both options mention Windows, but the Windows options are the same (the SmartEdge just generates a client cert that is
trusted/used).
- Windows-Local SE Proxy CA, MacOS-Local SE Proxy CA: Should be used with older versions of macOS before Big Sur and will use the SmartEdge generated client cert.
- Windows-Local SE Proxy CA, MacOS-Bitglass CA: Should be used with MacOS Big Sur or new version devices. This will then give you the below option to
download the Bitglass root CA that can be pushed to devices and will auto generate client certs that are automatically trusted on the device.
-
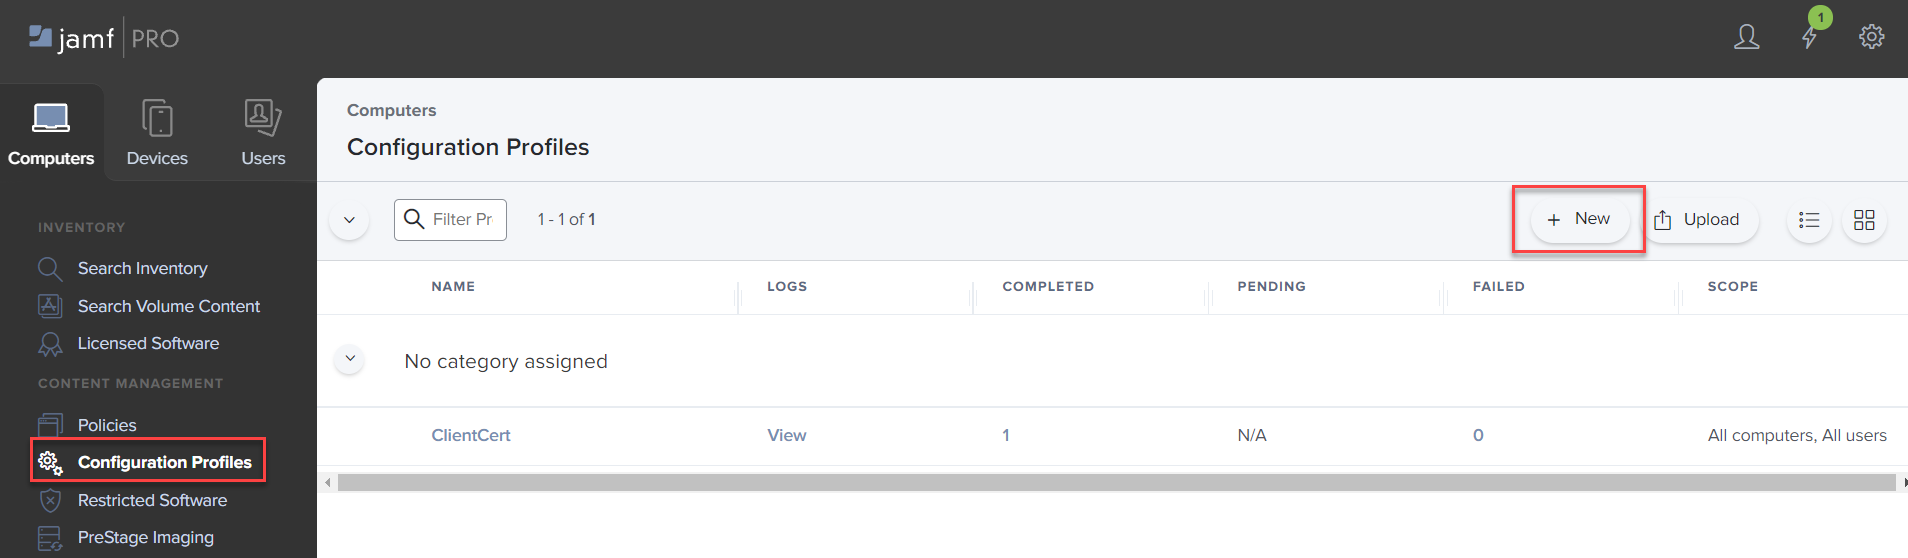
Open a new window and login to your MDM of choice, in this example we will be using JAMF. In Jamf, select Configuration Profiles in the left column and then
click New to create a new profile.
-
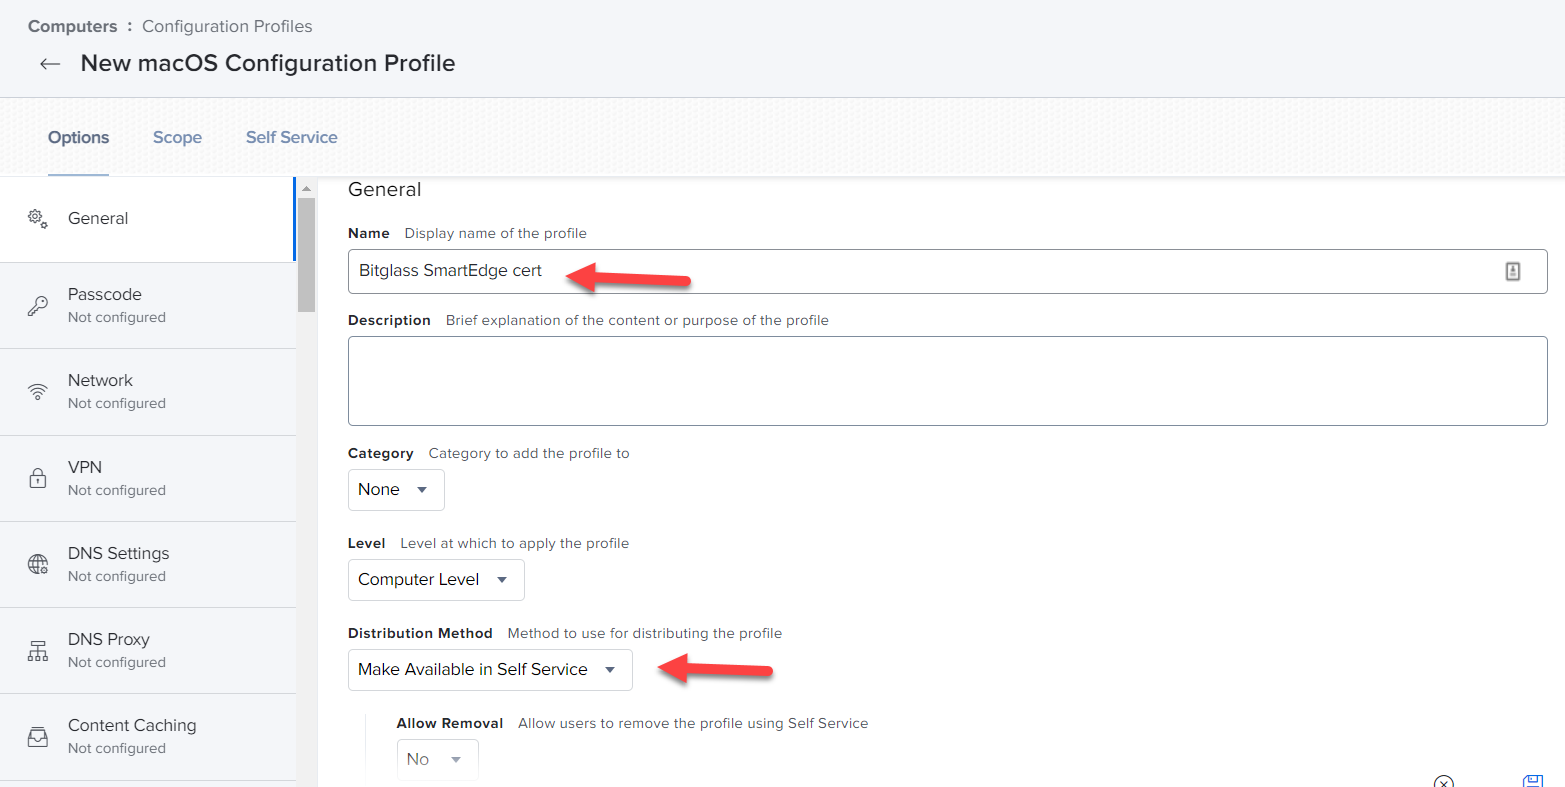
Provide a name for your profile and optionally a description for future reference, leave most options as default but change Distribution Method to
Make available in Self Service.
-
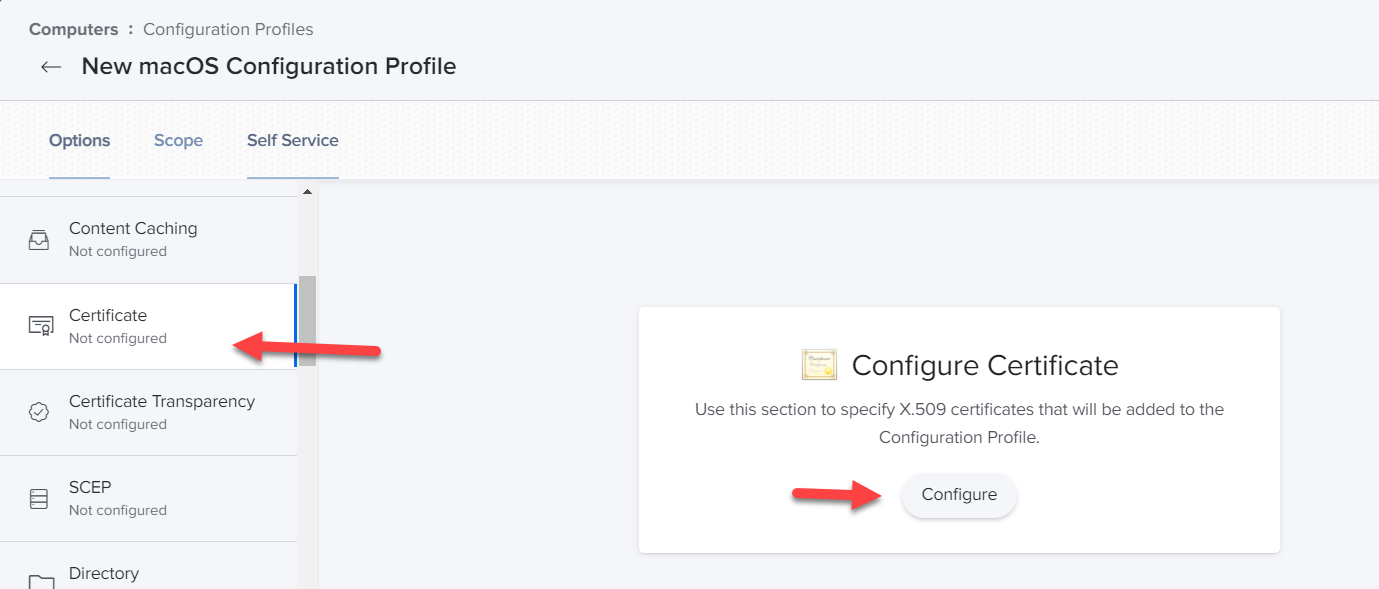
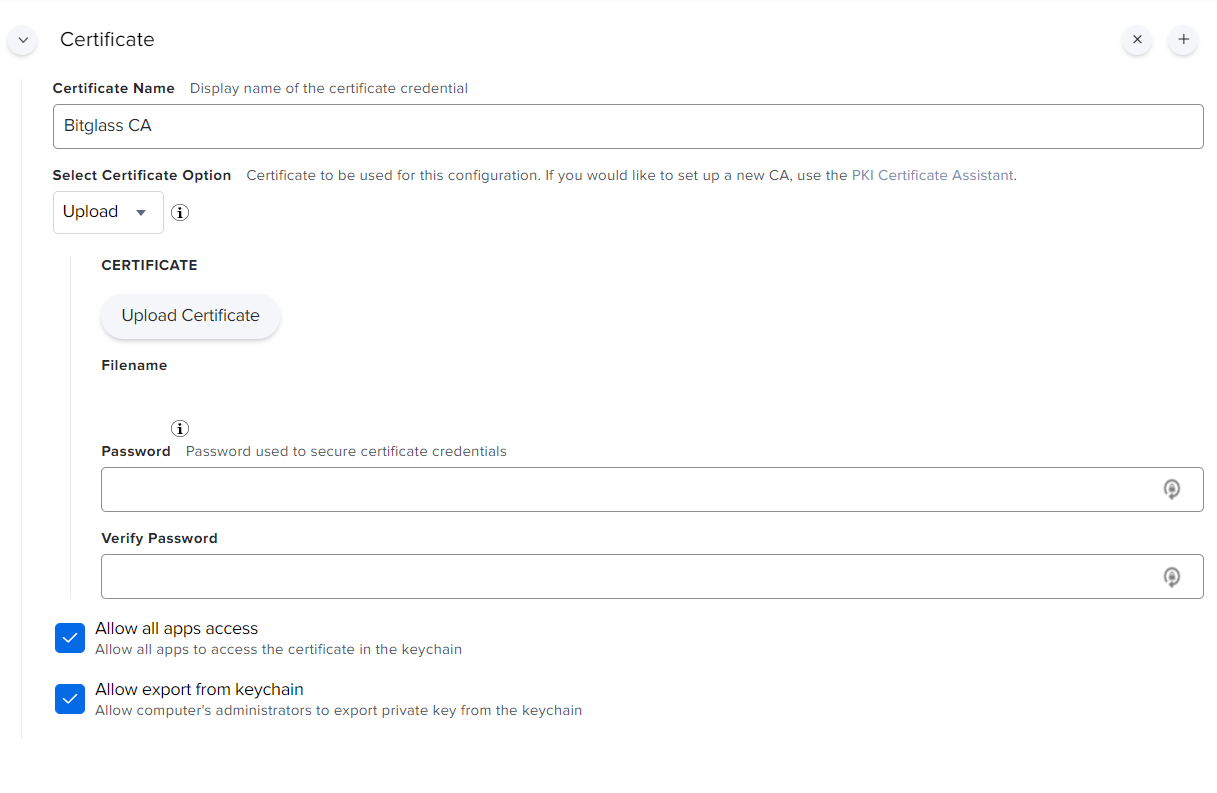
Next in the left column scroll down and select Certificate then select Configure in the main screen.
-
In the new window, provide a name for the cert, select upload and then upload the cert we download from Forcepoint Data Security Cloud | SSE. Provide a password if desired and then make sure to
check the box Allow all apps access to ensure the CA has the proper access it needs to generate self trusted certs.
Note: The CA that is downloaded is in PEM format. You can rename the extension so that it matches the requirement of whichever MDM system you might be using to push out the cert (for JAMF we can change the cert from .crt to .cer).