Deploying Forcepoint Data Security Cloud | SSE SmartEdge Agent on macOS via JAMF Pro
Steps to deploy the SmartEdge agent to wider audience connected to JAMF Pro for macOS.
Steps
-
Follow the steps below to push and trust certificates via JAMF to target user devices running macOS:
-
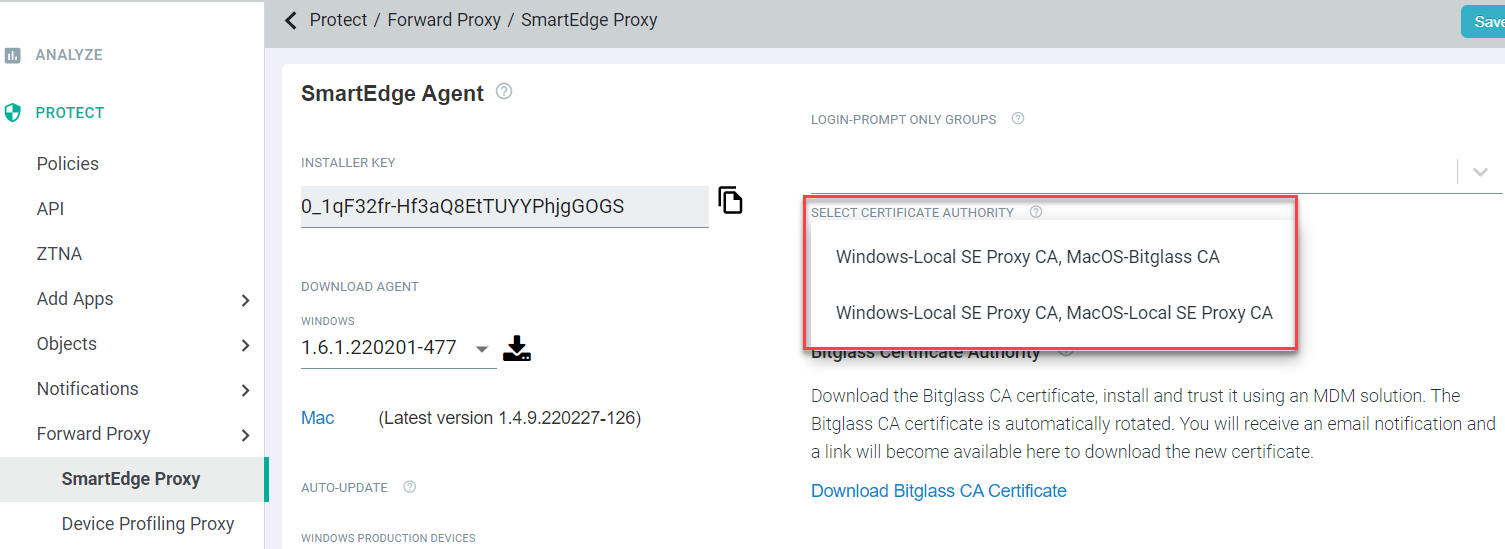
From the Select Certificate Authority drop-down, select one of the option based on which certificates will be handled by SmartEdge agent.
You will notice both options mention Windows, but the Windows options are the same (that is the SmartEdge just generates a client cert that is trusted/used).
- Windows-Local SE Proxy CA, MacOS-Local SE Proxy CA: Should be used with older versions of macOS before Big Sur and will use the SmartEdge generated client cert.
- Windows-Local SE Proxy CA, MacOS-Bitglass CA: Should be used with MacOS Big Sur or new version devices. This will then give you the option to
download the Bitglass root CA that can be pushed to devices and will auto generate client certs that are automatically trusted on the device.
-
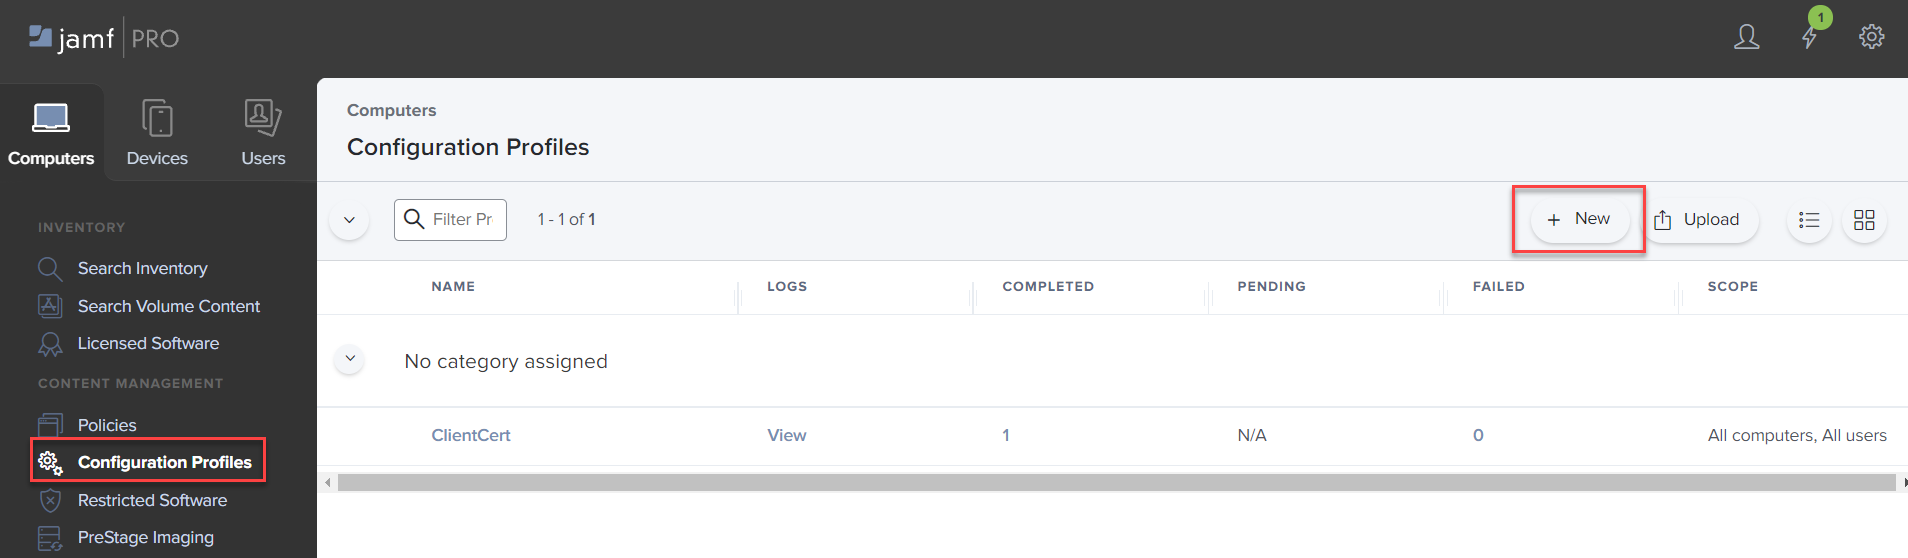
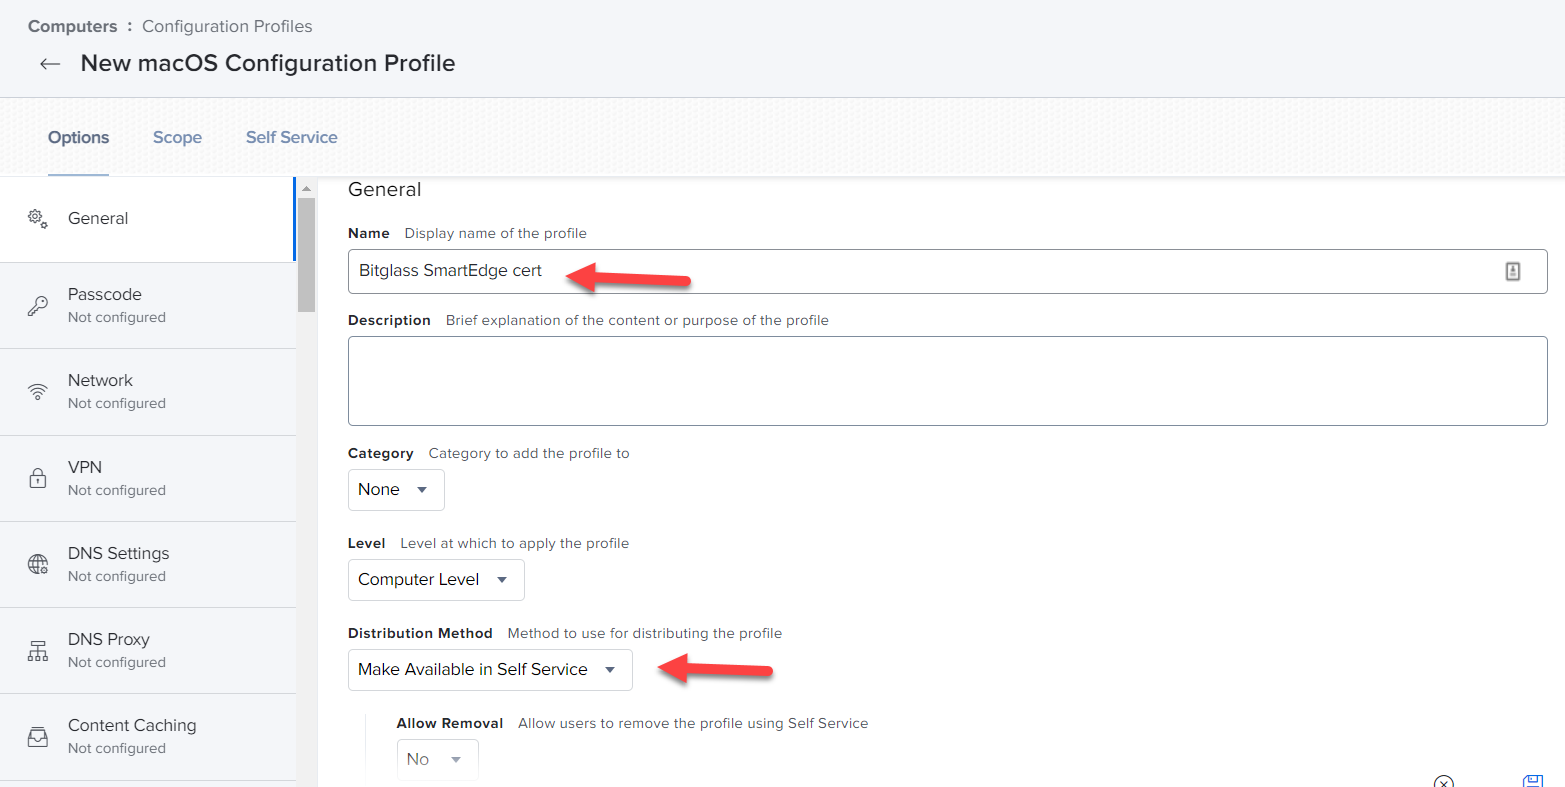
On the left column, select Configuration Profiles and then click New to create a new profile.
-
Provide a name for your profile and optionally a description for future reference, leave most options as default but change Distribution Method to
Make available in Self Service.
-
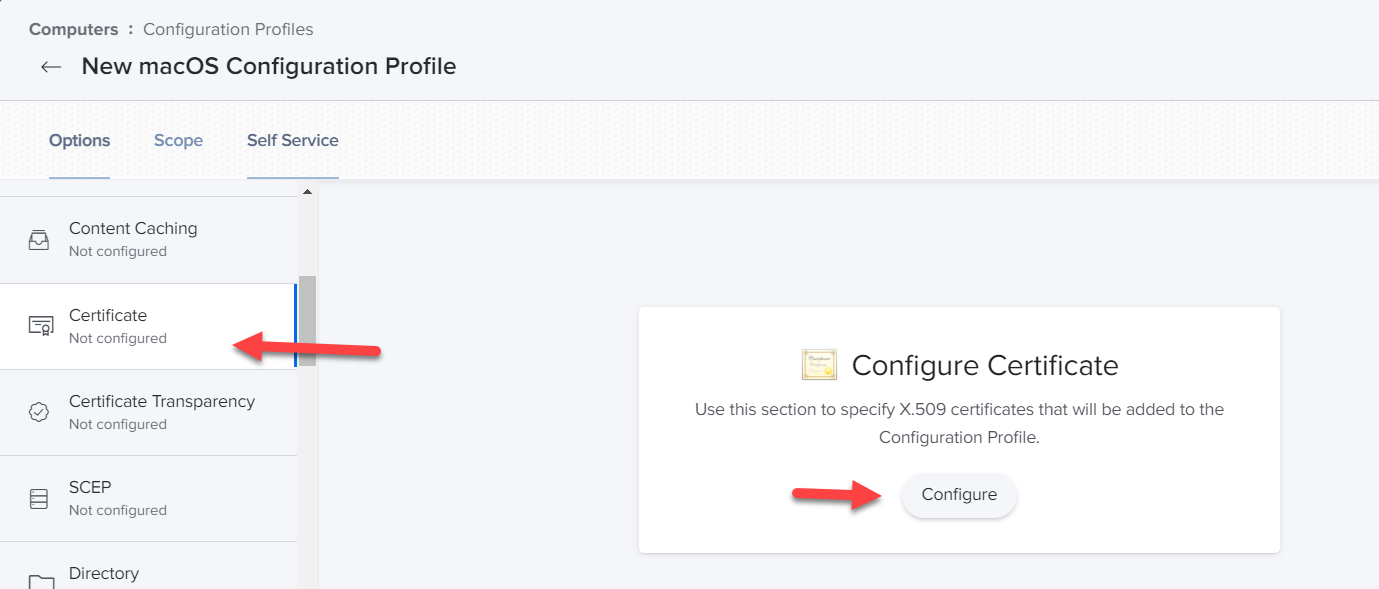
On the left column, scroll down and select Certificate and then select Configure in the main screen.
-
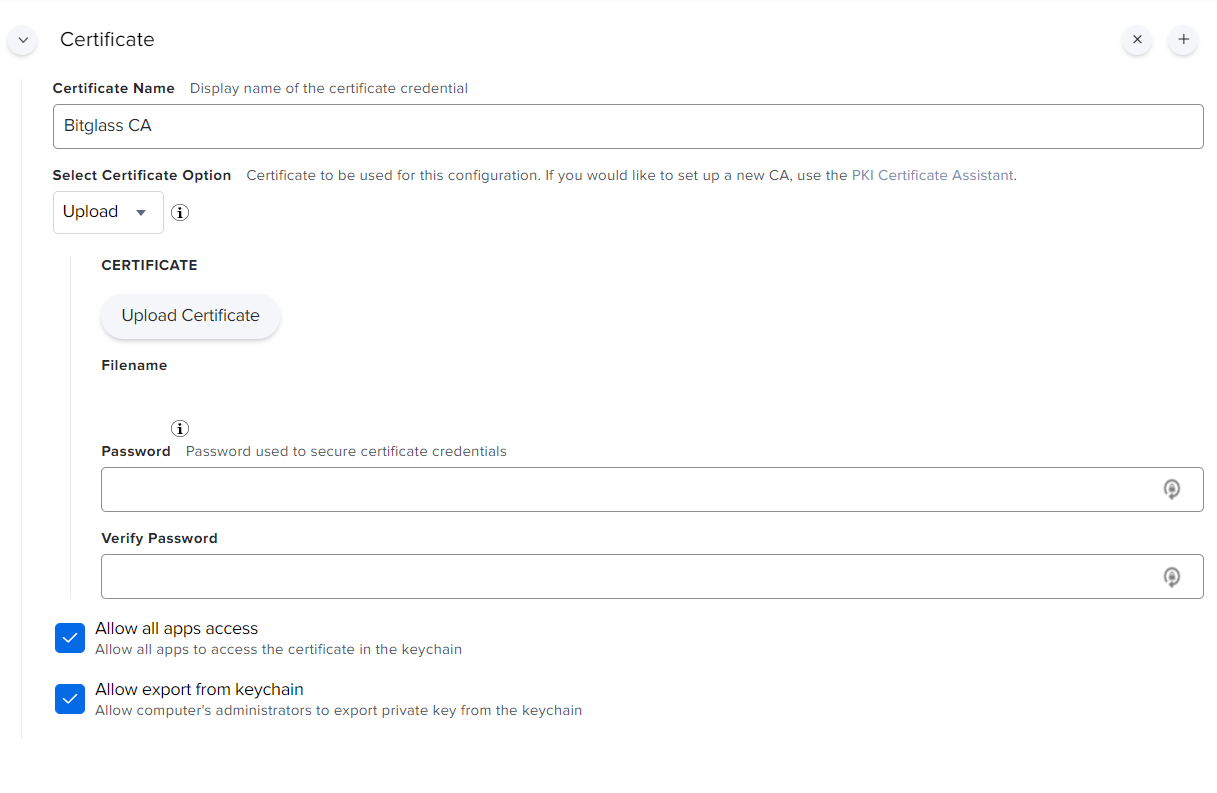
In the new window, provide a name for the cert, select upload and then upload the cert you download from Forcepoint Data Security Cloud | SSE. Provide a
password if desired and then make sure to check the box Allow all apps access to ensure the CA has the proper access it needs to generate self
trusted certs.
-
Save the certificate profile.
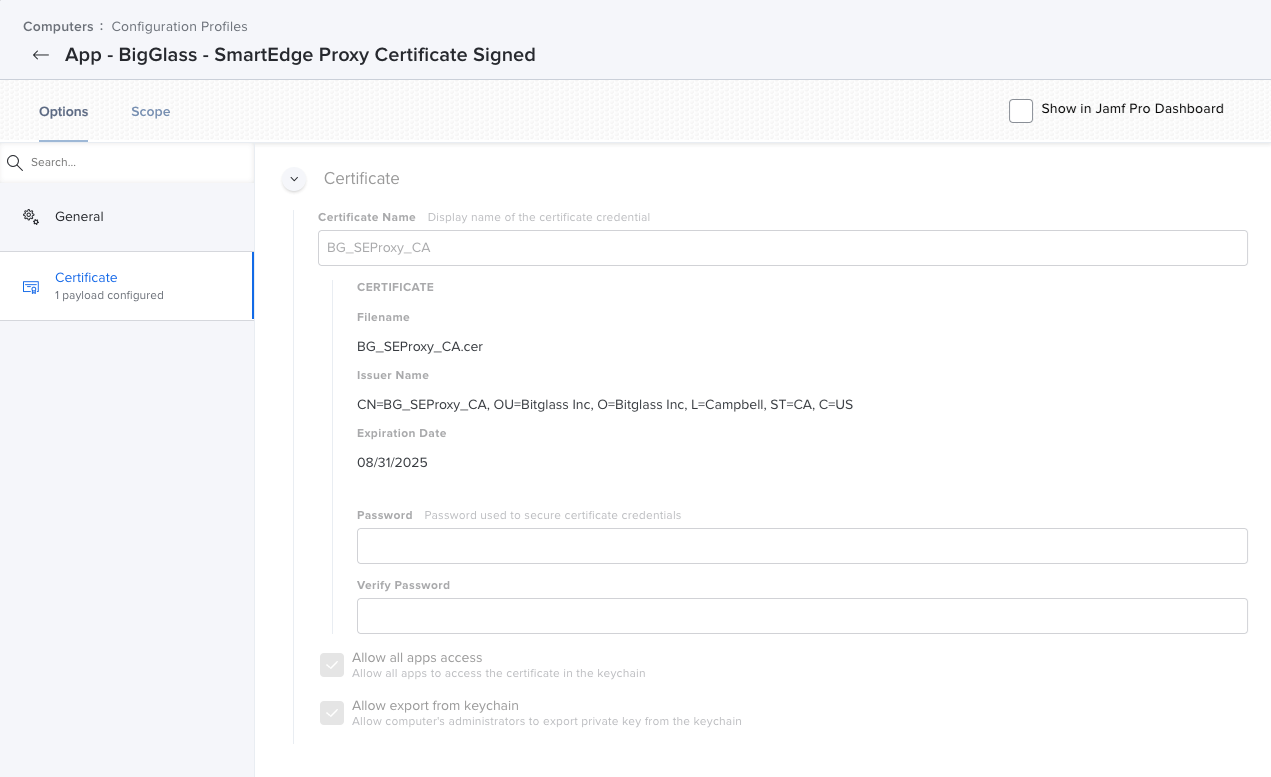
The finished configuration profile should look like the following:
Repeat the same process for your root certificate.
You are ready to push the certificate to your devices. This will now allow the SmartEdge agent on Big Sur or newer version devices to generate dynamic certs.
-
From the Select Certificate Authority drop-down, select one of the option based on which certificates will be handled by SmartEdge agent.
-
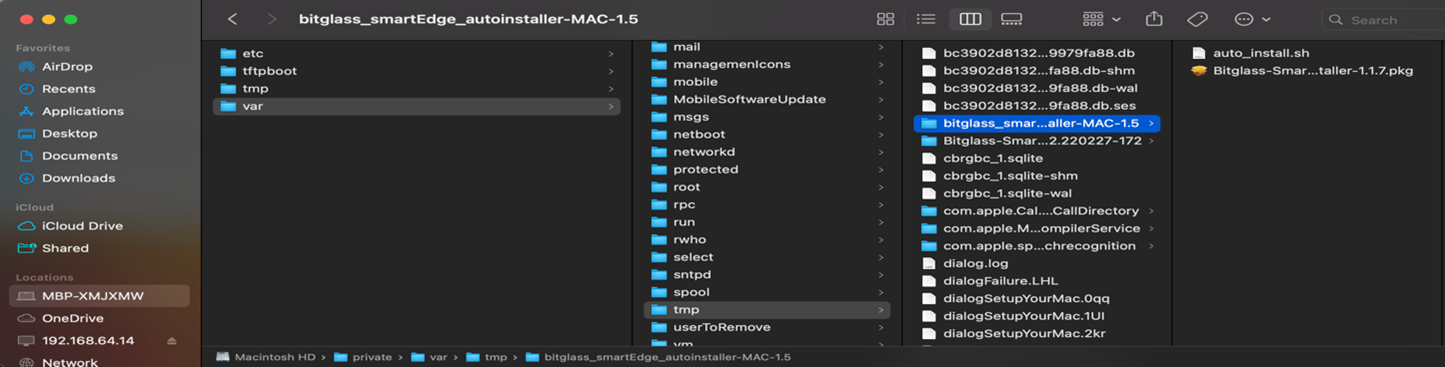
Open the /private/var/tmp location and then locate the folder.
Your folder structure should be similar to the following.
-
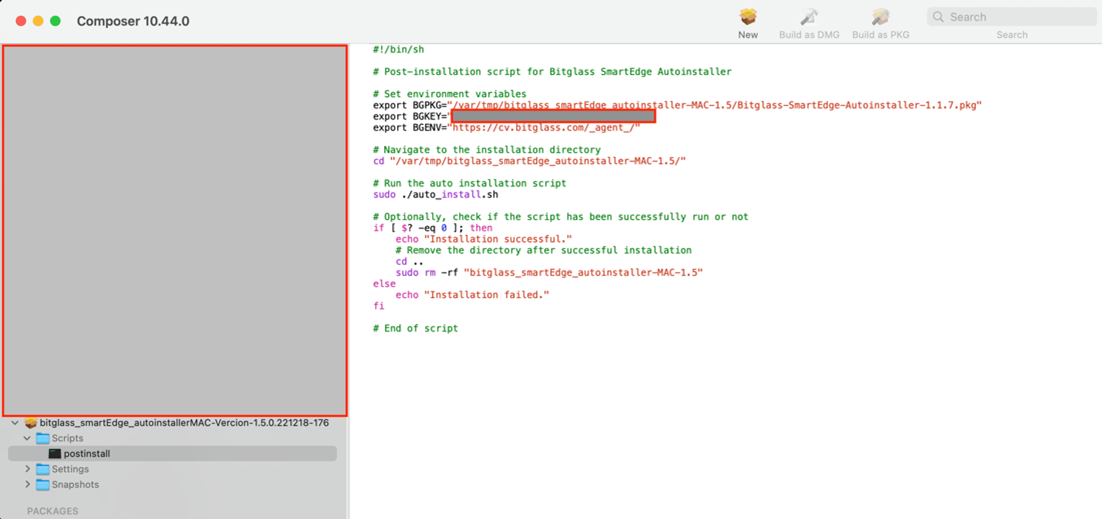
Copy the package and script from the /private/var/tmp location to the source folder in JAMF Composer.
After moving the components, ensure that your package has the correct permissions and matches the appearance shown in the following screenshot.

-
Follow the steps below to create new source package:
-
Save your changes and click Build as PKG to build the source file.
-
Save your changes and click Build as PKG to build the source file.
-
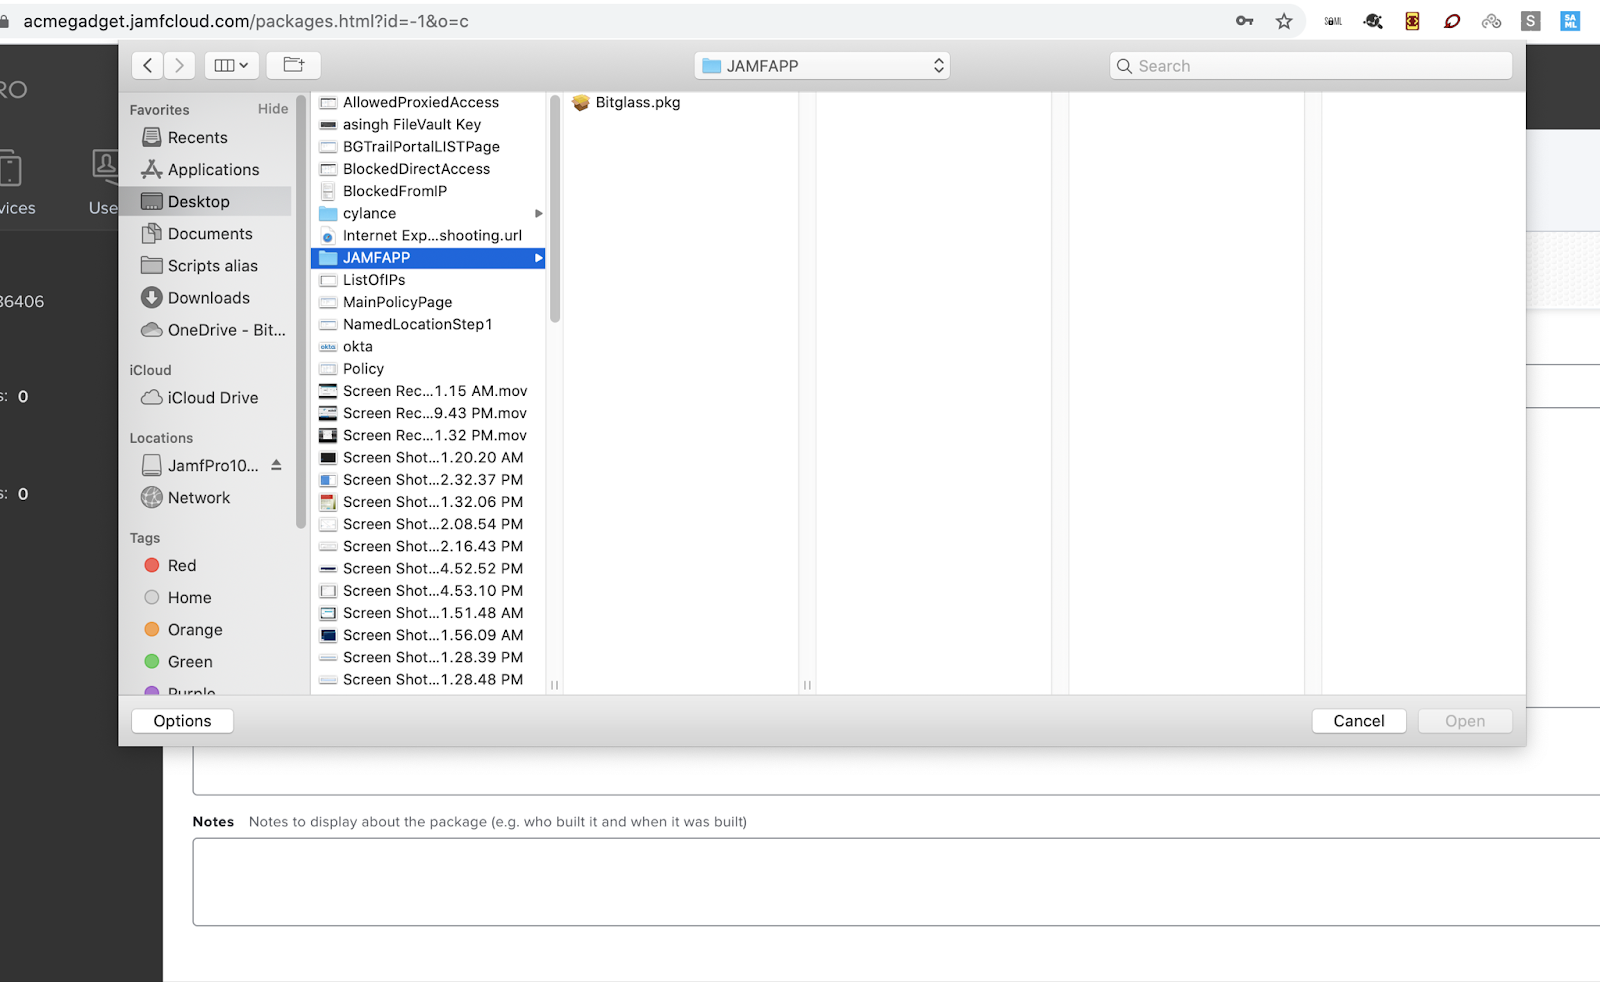
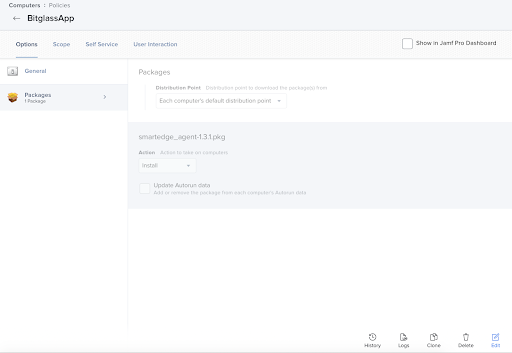
On the JAMF admin portal and upload the new source file into a JAMF policy.
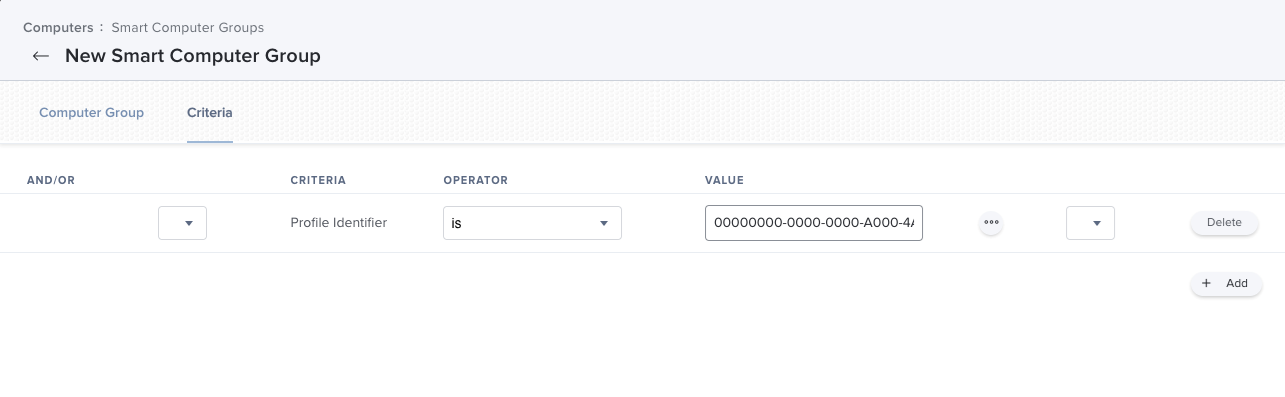
To minimize down time and prevent users running into any connection issues, Forcepoint recommends you to create a smart group with the Criteria set to Profile Identifier, Operator set to is and Value set to your profile identifier. This way the application will install only on the devices that have both configuration profiles installed.
-
Save and apply policy in the JAMF admin portal.
-
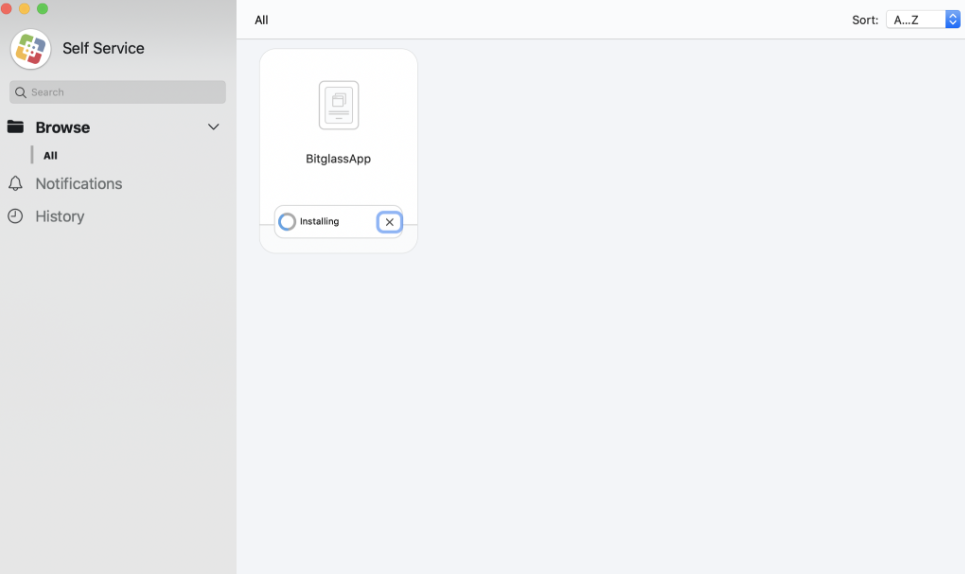
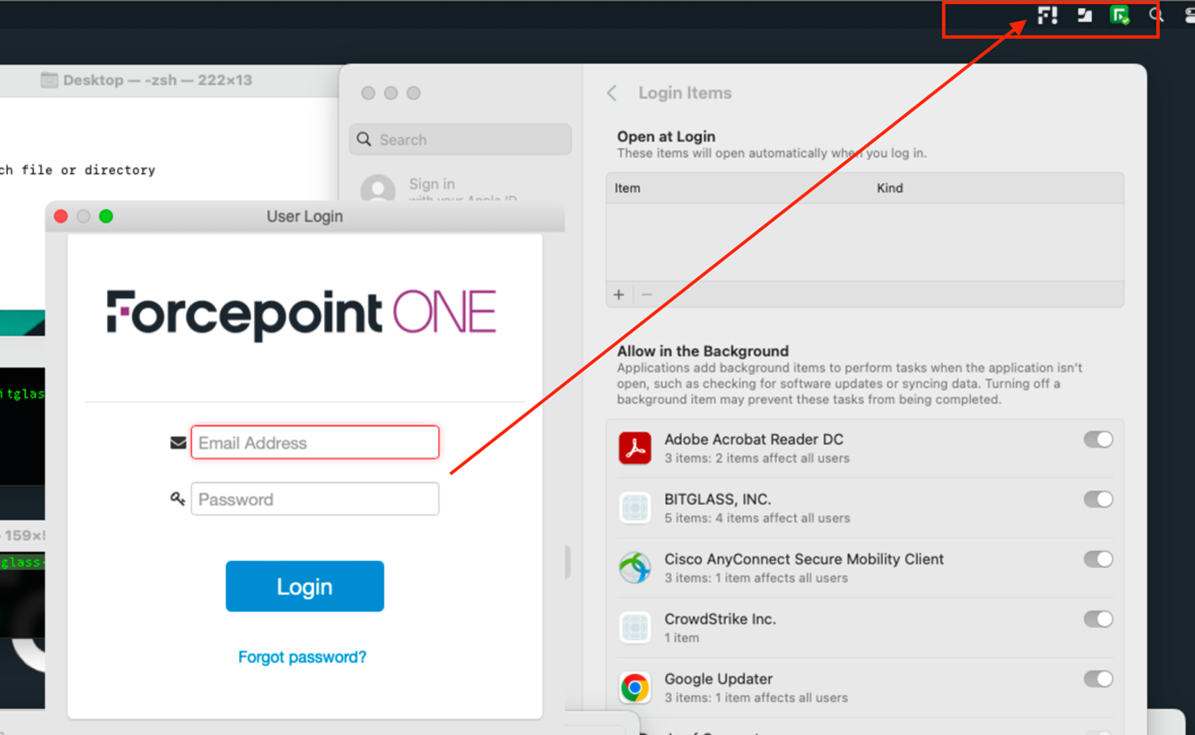
You can verify by looking at an endpoint that is being controlled by your JAMF policy and verify the agent is being installed. Once done, you will see the agent icon in the top
bar.