Forcepoint provides a list of built-in applications you can choose to monitor when you set up your endpoint policy. These applications, including
web applications and SaaS applications, are included in Endpoint Applications.
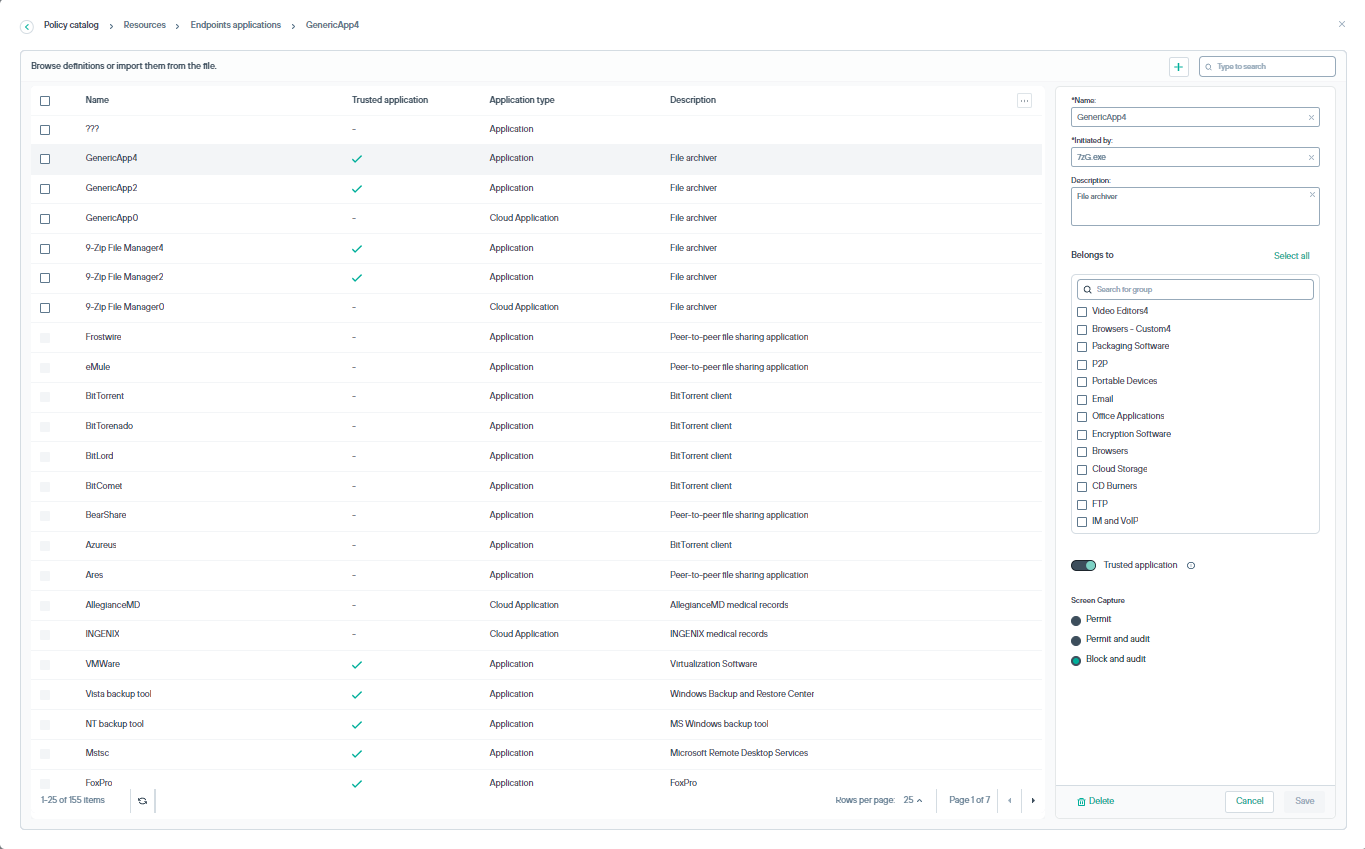
Use the Endpoints applications dialog to review the built-in applications and define custom applications.Complete the following steps to add an endpoints
application:
It is possible now to edit predefined endpoint applications. Also, it is now possible to Save a predefined resources (i.e. change their configurations) or
Save as – i.e. create a new, similar resource. When Save is selected, the policies that use the predefined resources will be affected, while when
Save as is selected, only policies that will use the new resource will be affected. Also, once a predefined resource is saved, there is an option to Reset it to the
original, predefined settings.

Steps
-
Navigate to . The Endpoints applications dialog opens.
-
Click the
 . From the context menu, select either Application or Cloud
Application.
. From the context menu, select either Application or Cloud
Application.
-
Enter a Name for this application, such as Microsoft Word.
-
In the Initiated by field:
- For Windows desktop applications, enter the name of the executable file (for example, winword.exe).
- For Mac or Windows Store apps, enter the app name (for example, Microsoft.SkypeApp* for the Windows Store app).
- For cloud applications, enter the URL.
-
Enter a Description for this application.
-
To associate the application with an existing application group, mark Belongs to, then select the group of interest.
-
If enforcement is not needed for an application, set the Trusted application toggle button to enabled.
Trusted applications are permitted to write any type of information to a removable media device, such as a USB drive. They are also permitted to copy any type of data to a remote shared drive
on a network.
Specify up to 50 trusted endpoint applications. If necessary, a trusted application can be configured to represent multiple applications. Contact Forcepoint Technical Support for assistance.
-
Trusted application: You can enable or disable this toggle button. This option is available only for cloud applications. You can trust up to 50 applications. Trusted
applications are permitted to write any type of information on removable media or to a shared drive over a LAN. They are normal filtering rules.
-
Select from following for Screen Capture:
- Permit
- Permit and audit
- Block and audit
-
Click the Save button.