Auto-updating SmartEdge Agent
Forcepoint Data Security Cloud | SSE supports the ability to automatically push out selected version of SmartEdge agent to the devices.
Steps
-
For each of the above drop-downs contain the following options:
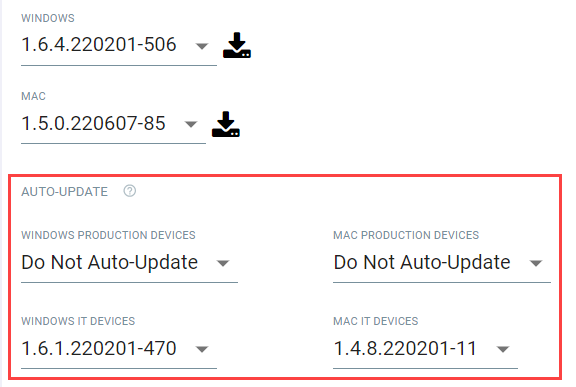
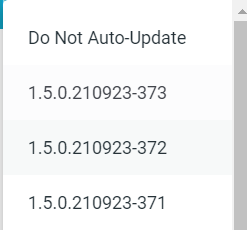
- Do Not Auto-Update: Will not enforce an auto-update for the device selected (production or IT).
- Version Number: Will ensure the device option selected has the SmartEdge agent updated automatically to the version selected.
-
You can designate devices as IT by navigating to . Find the device you wish to add the IT tag to, click on the 3 dots and then select Add to IT Device.

-
Once added, you'll notice a small IT icon appearing next to the device name. You can also click the 3 dots to remove the IT tag. You
can add the tag to as many devices as needed to granularly control which devices receive the auto-update (or not).

-
The selected version of SmartEdge agent gets downloaded to the device, the Forcepoint Data Security Cloud | SSE tray displays the Update available - reboot
device to update message and the Forcepoint Data Security Cloud | SSE
icon gets updated to
 on Windows
and
on Windows
and  on Mac devices.
Once downloaded, the selected version of the SmartEdge Agent gets installed on the next reboot of the device.CAUTION:Rarely, if a Mac running Ventura OS is restarted within one minute of the SmartEdge Agent completing an auto-upgrade or auto-downgrade, the agent may fail to initialize properly and remain in an unhealthy state. To avoid this issue, it is recommended to wait at least one minute after the agent completes the upgrade or downgrade before restarting the system.
on Mac devices.
Once downloaded, the selected version of the SmartEdge Agent gets installed on the next reboot of the device.CAUTION:Rarely, if a Mac running Ventura OS is restarted within one minute of the SmartEdge Agent completing an auto-upgrade or auto-downgrade, the agent may fail to initialize properly and remain in an unhealthy state. To avoid this issue, it is recommended to wait at least one minute after the agent completes the upgrade or downgrade before restarting the system.