Understanding Event Logs in Proxy logs
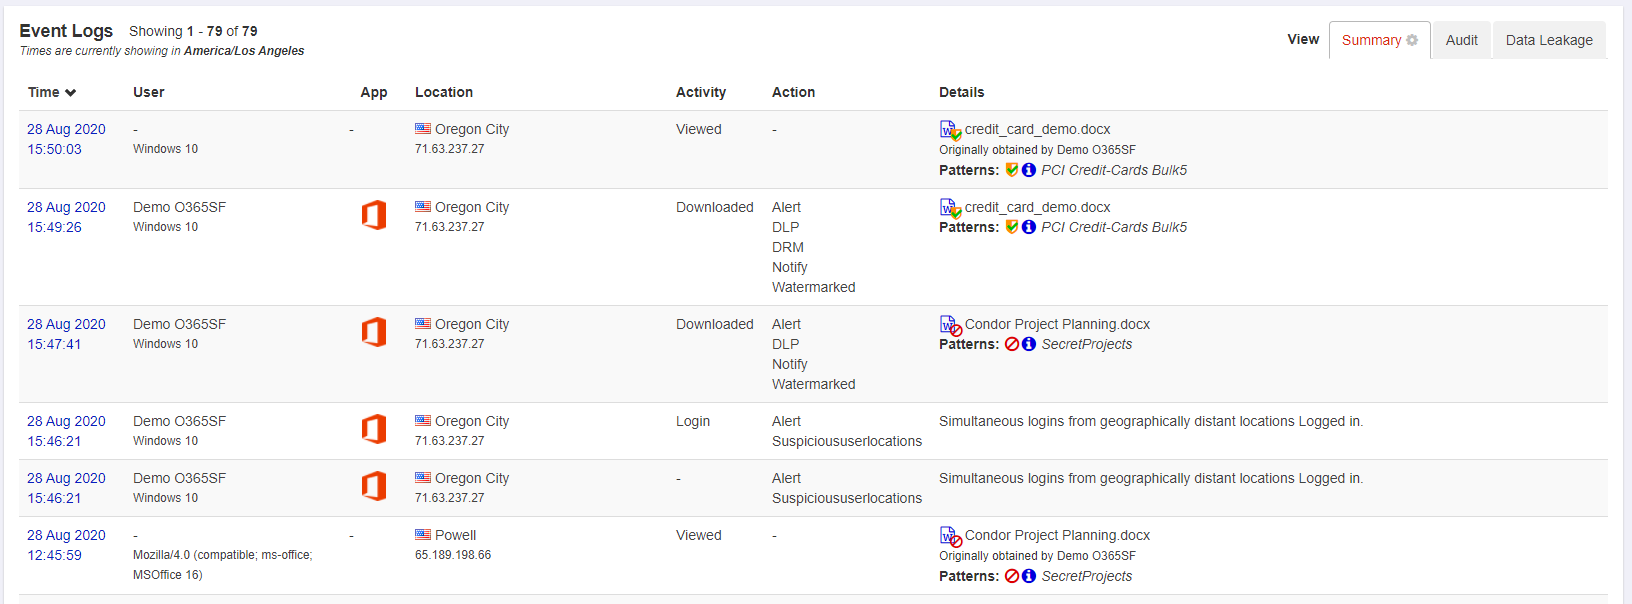
Event Logs show every transaction related to your SaaS application and data in-line through the proxies.

Event Log Actions
- Time Sorting: Allows you to click the column header to sort based event occurrence in an ascending or descending order. By default, the event log is sorted chronologically, with the most recent events occurring first.
- Filter: You can click on any entry in the log viewer (with the exception of Time) to filter based on that entry. For example, you can click on a Keyword in order to
filter on that particular keyword. The filter will be column specific and matches will be highlighted in red.
- Filters can be removed by clicking the x on the filter in the Display Filter, or by clicking on the red text in the event log.
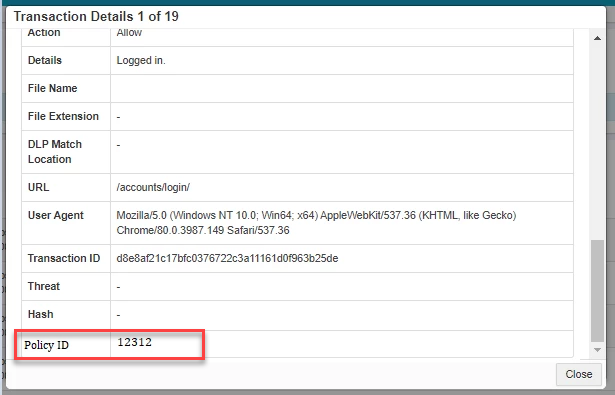
- Additional Transaction Details: Every event has additional details that are not displayed in the main Event Log. Clicking on the Time for any event will pull up a window displaying the Transaction Details for that event.
Event Log Tabs
In the top right corner of the Event Log card are 4 tabs providing different report views of the logs based on their category:
- Summary: Default view. Displays events selected by the Role admin.
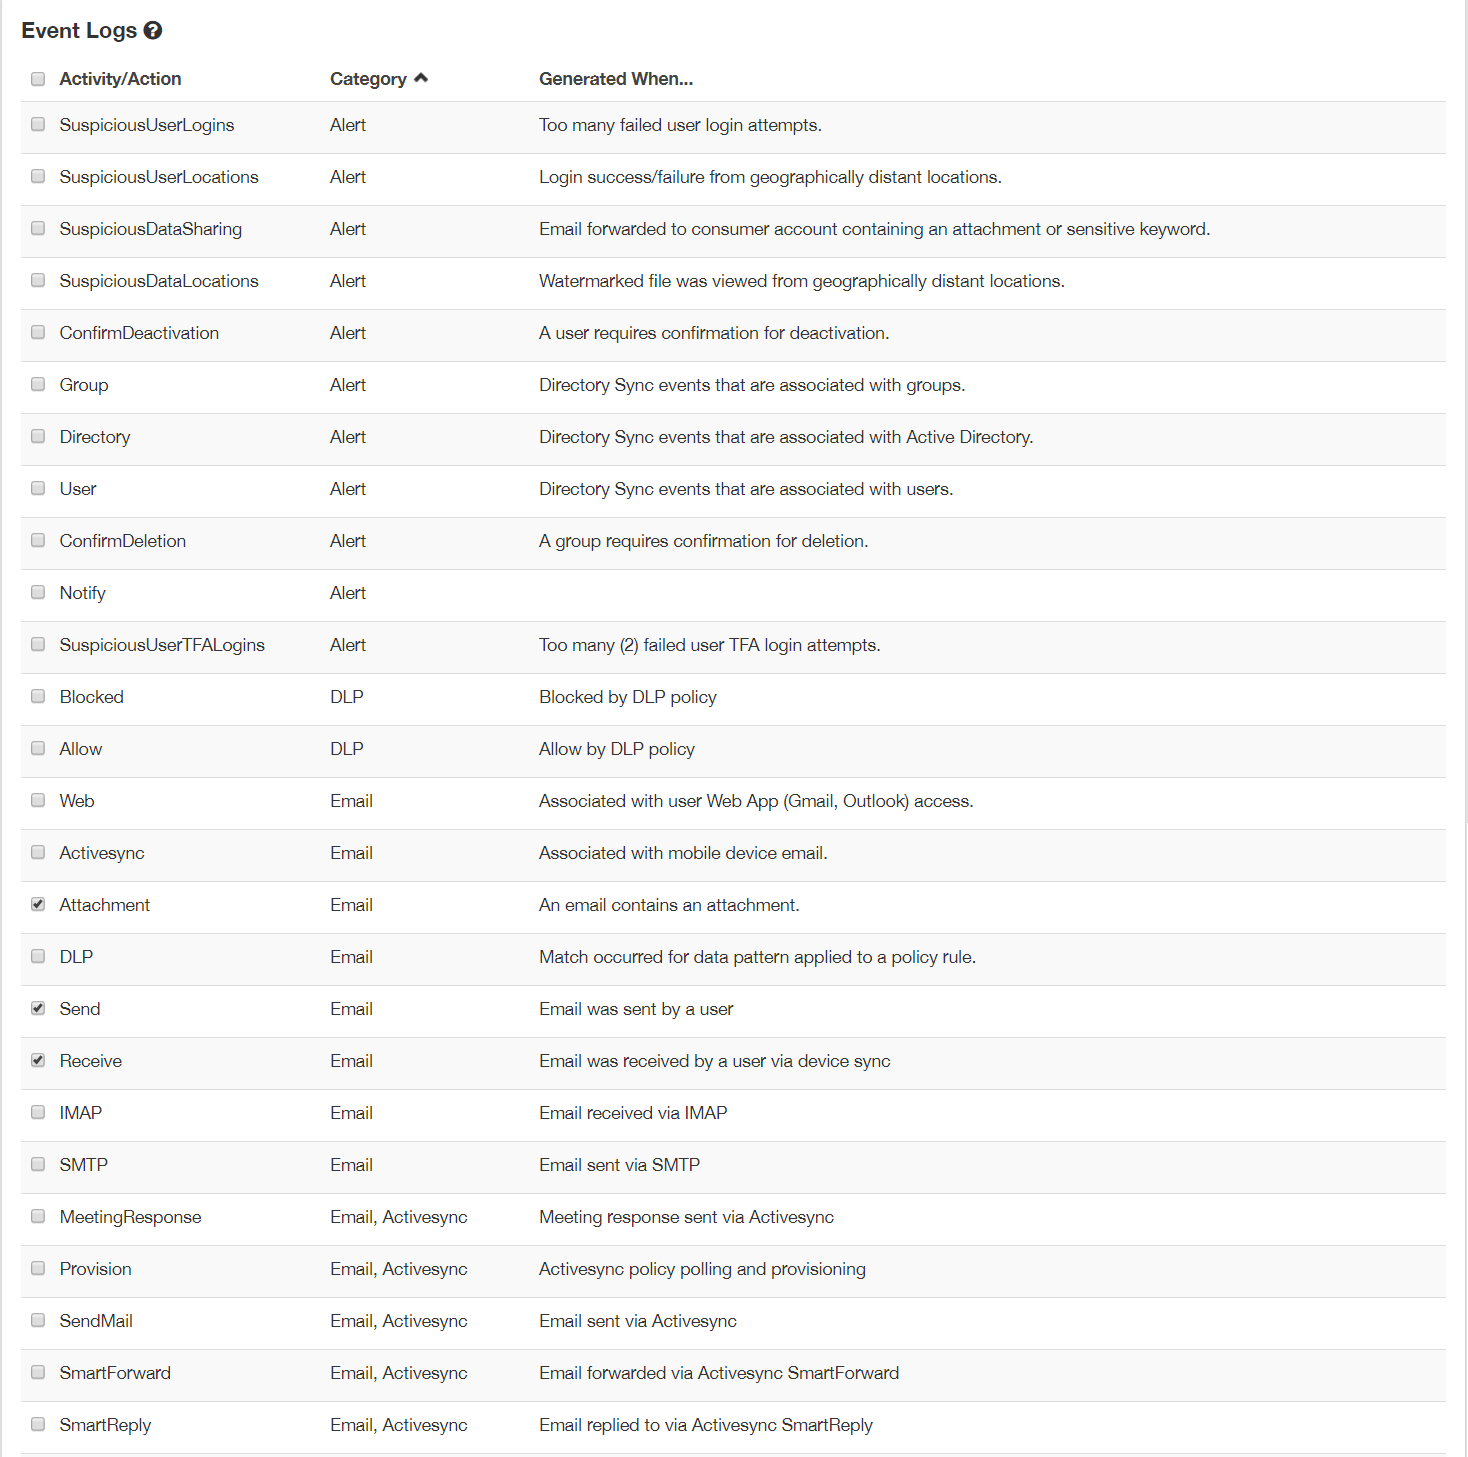
- You can customize what is displayed on the Summary view by clicking on the gear icon on the Summary tab. From the resulting page, you can select or deselect from the
complete set of Activity and Action tags, hiding or showing them in the summary view.


Note: Depending on what items are selected to be viewed, the unique user count displayed on the Proxy Logs might differ between Role admins.
- You can customize what is displayed on the Summary view by clicking on the gear icon on the Summary tab. From the resulting page, you can select or deselect from the
complete set of Activity and Action tags, hiding or showing them in the summary view.
- Audit: Complete log of all transactions by users in protected applications.
- Data Leakage: Prefiltered display of potential data leakage events (That is, any event tagged with DLP action).
Event Log Columns
Each column represents a piece of detailed information related to the event log. Again, each item in each column is an active-link button that can be clicked to create a filter.
- Time: This is the time of the event. Clicking on the event time will show a Transaction Details dialog with more information related to the event.
- User: This is the User that performed the activity, as well as the device type associated with the transaction.
- The User field will be empty for Viewed events, as there is not typically a logged-in Forcepoint Data Security Cloud | SSE user that can be associated with the event. Transaction Details and Information for Viewed events will show you the Originating User - the specific person that downloaded the tracked data originally.
- App: Application associated with the event.
- Location: Geographic as well as IP location of the device in the event.
- If the User opts to allow Forcepoint Data Security Cloud | SSE to track their location, this will be a specific location based on the a browser lookup. If not, Forcepoint Data Security Cloud | SSE will provide best effort location through Geo-IP mapping.
- If a Custom Location has been configured under , then that location will be displayed instead of a standard location based on the browser lookup. In the example, you can see that on the Event logs. You can quickly identify
users that are using the corporate network by viewing their location information:

- Activity: Shows the activity the user was performing that Forcepoint Data Security Cloud | SSE tracked/logged.
- Action: The action that Forcepoint Data Security Cloud | SSE took on the event, such as identifying it matched a DLP pattern policy or that we sent a notification based on the event.
- Details: Details about the event. Can display the file name that was identified, what pattern it matched and exact action taken (such as block, encrypt, etc).
Transaction Details
When you click on the Timestamp, you will see a new dialog window pop up to display the Transaction Details. This dialog will provide the same information as covered above in the columns but also additional detailed information such as additional details about the file or email (depending on the transaction) as well as URL call being made and user agent used. In addition, there will be a field for the Policy ID that is generated and displayed for each policy line on the Policies page. This policy ID will help you identify which policy line was triggered when you are reviewing the event log line especially in cases where you have a large number of different policy lines for the application.
