Understanding Display Filter in Proxy logs
The Display Filter allows you to input selections and filters that will control what is viewed on the rest of the cards.
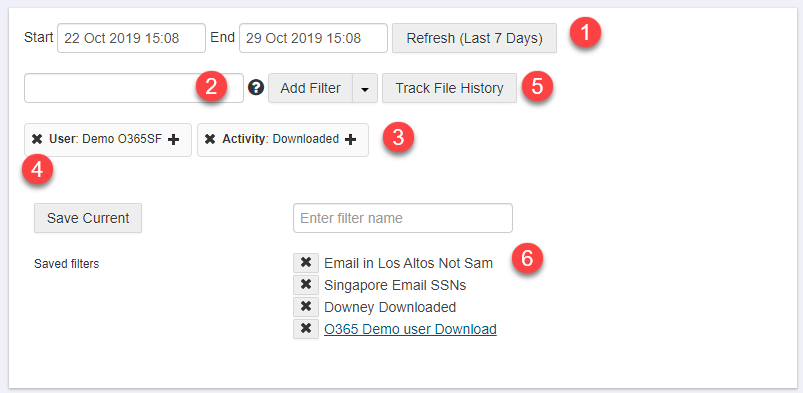
On the Display Filter you can:
- Specify a starting and ending day/time.
- Add keywords or terms as filter conditions.
- You can enter anything that you wish (keyword, user name, IP address, application, etc), and Forcepoint Data Security Cloud | SSE will add it to the filter conditions.
- You can also click on any field in the log itself in order to filter on that particular item.
- Adding a Column Specific filter will display match results only for the specified column.
- By default, when you add a new term as a filter condition, a + sign will appear next to that item. The + indicates that the filter is set to include only log entries where that term appears. You can toggle the + to a - which will result in the opposite-a filter that excludes all log entries where that term appears.
- Filter conditions can be removed by clicking on the X next to the filter condition you wish to remove.
- You can track the history of a file by clicking the Track File History button and uploading a file to Forcepoint Data Security Cloud | SSE. This will create a filter that displays the full history of that document, including all log entries that reference the file. For example, you can determine who downloaded a sensitive file that you found on a consumer file sharing service.
- At any point in time, you can also save the current set of filters by entering a name and clicking the Save Current button. You can access any saved filter by clicking on the appropriate name on the right side of the display filter.