Dropbox Streaming Configuration
Dropbox Streaming Configuration
This section provides steps on how to enable real-time data streaming for a Dropbox connection and monitor streaming events within the platform.
Prerequisites
1. Existing Dropbox app
- If you have not created Dropbox credentials yet, follow the steps in this section Dropbox to create one.
2. Additional scope to Dropbox app
- Data streaming needs events.read scope, as shown below, setting is located under Permissions for your app in Dropbox App Console

Steps to Enable Data Streaming for Dropbox
- From the Data Sources page, select Dropbox from the list of available data sources. In the Scan Configurations list, create a New
Configuration.

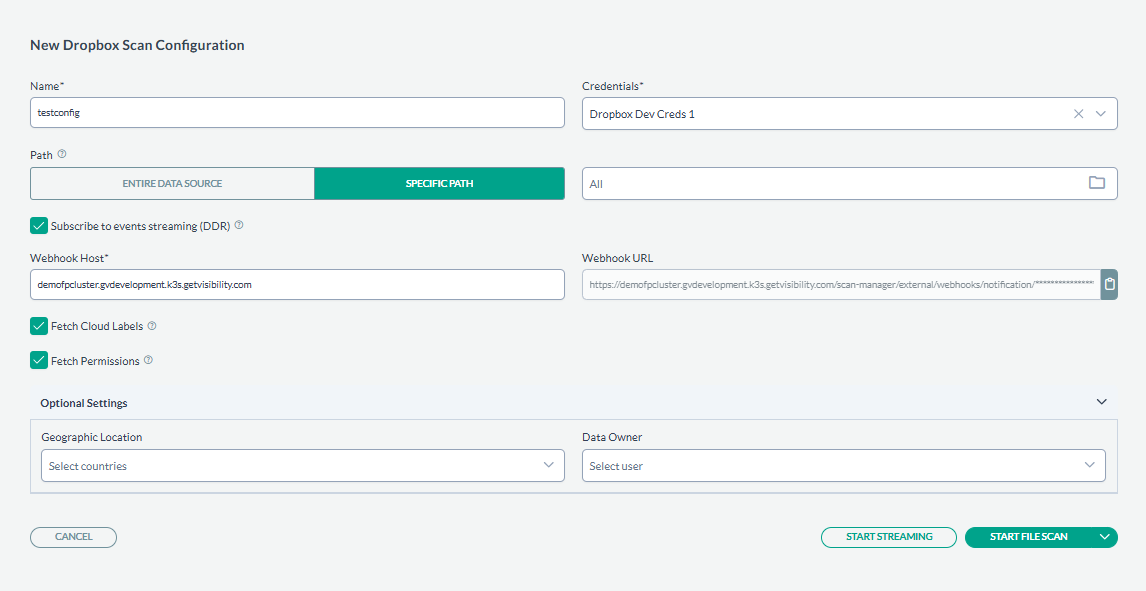
- Make sure the connection has a Name and Credentials set. Leave Path untouched. Dropbox supports only root level data streaming. Enable Data streaming checkbox
and copy Webhook URL.
- Go to Dropbox App Console, open app Settings for your credentials and paste
previously copied Webhook URL into Webhook URIs.
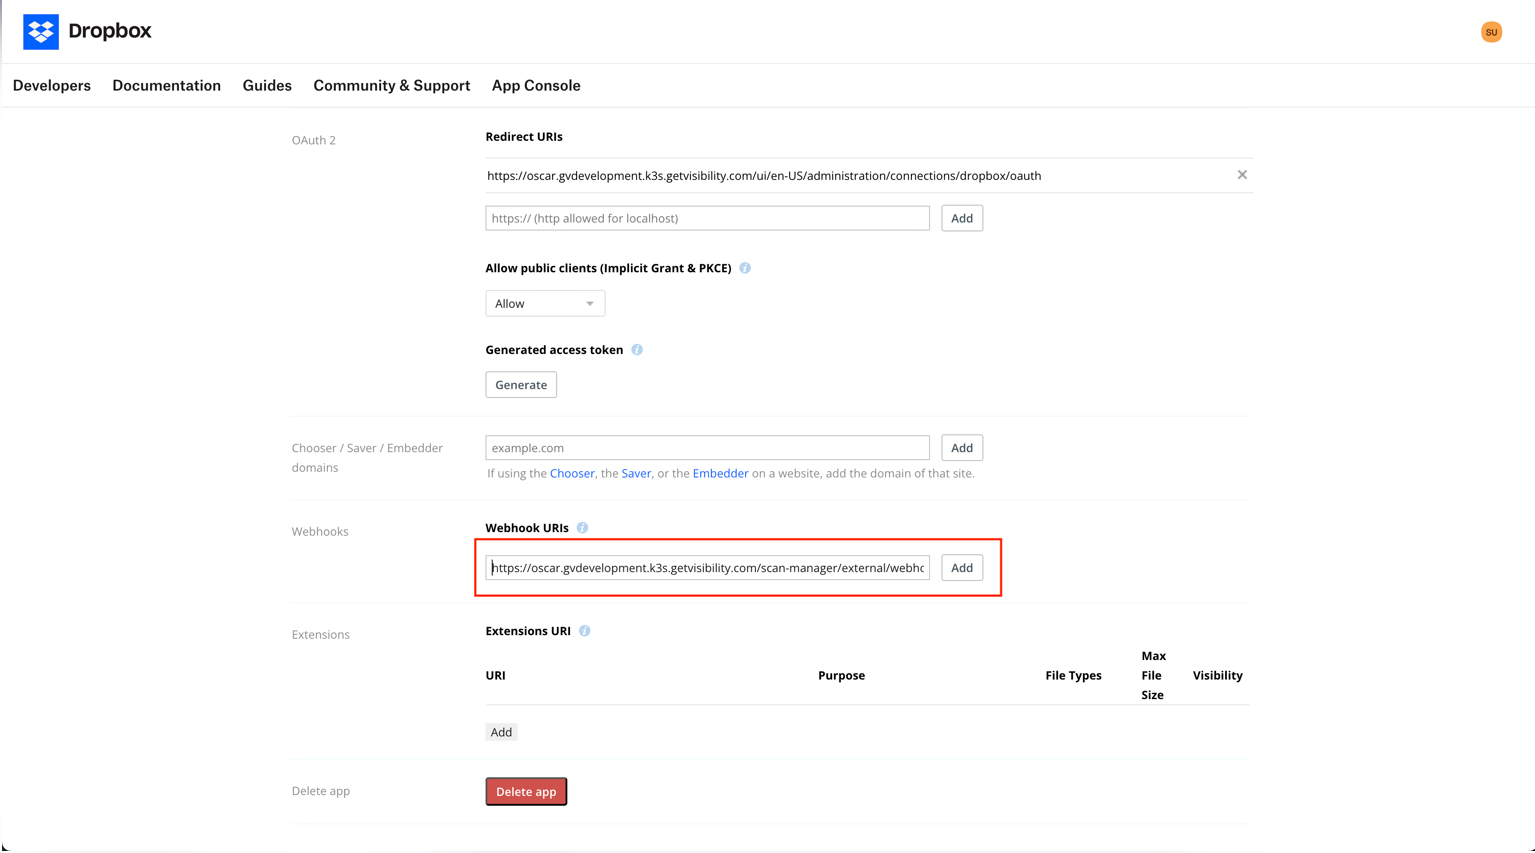
- After clicking Add webhook should have status enabled.

- Click Start Streaming on the New Dropbox Scan Configuration dialog box.
- Clock icon: When data streaming is being activated, the clock icon will appear, indicating that the subscription is being processed. On completion it will show created configuration with Requested Data Streaming.
Monitoring Real-Time Events
After the subscription is activated, real-time events will start flowing into the platform, and you will be able to monitor them from various sections of the console.
Viewing Events in the Live Events Section
- Navigate to the Live Events section under Administration to view a detailed audit log of all streaming events.
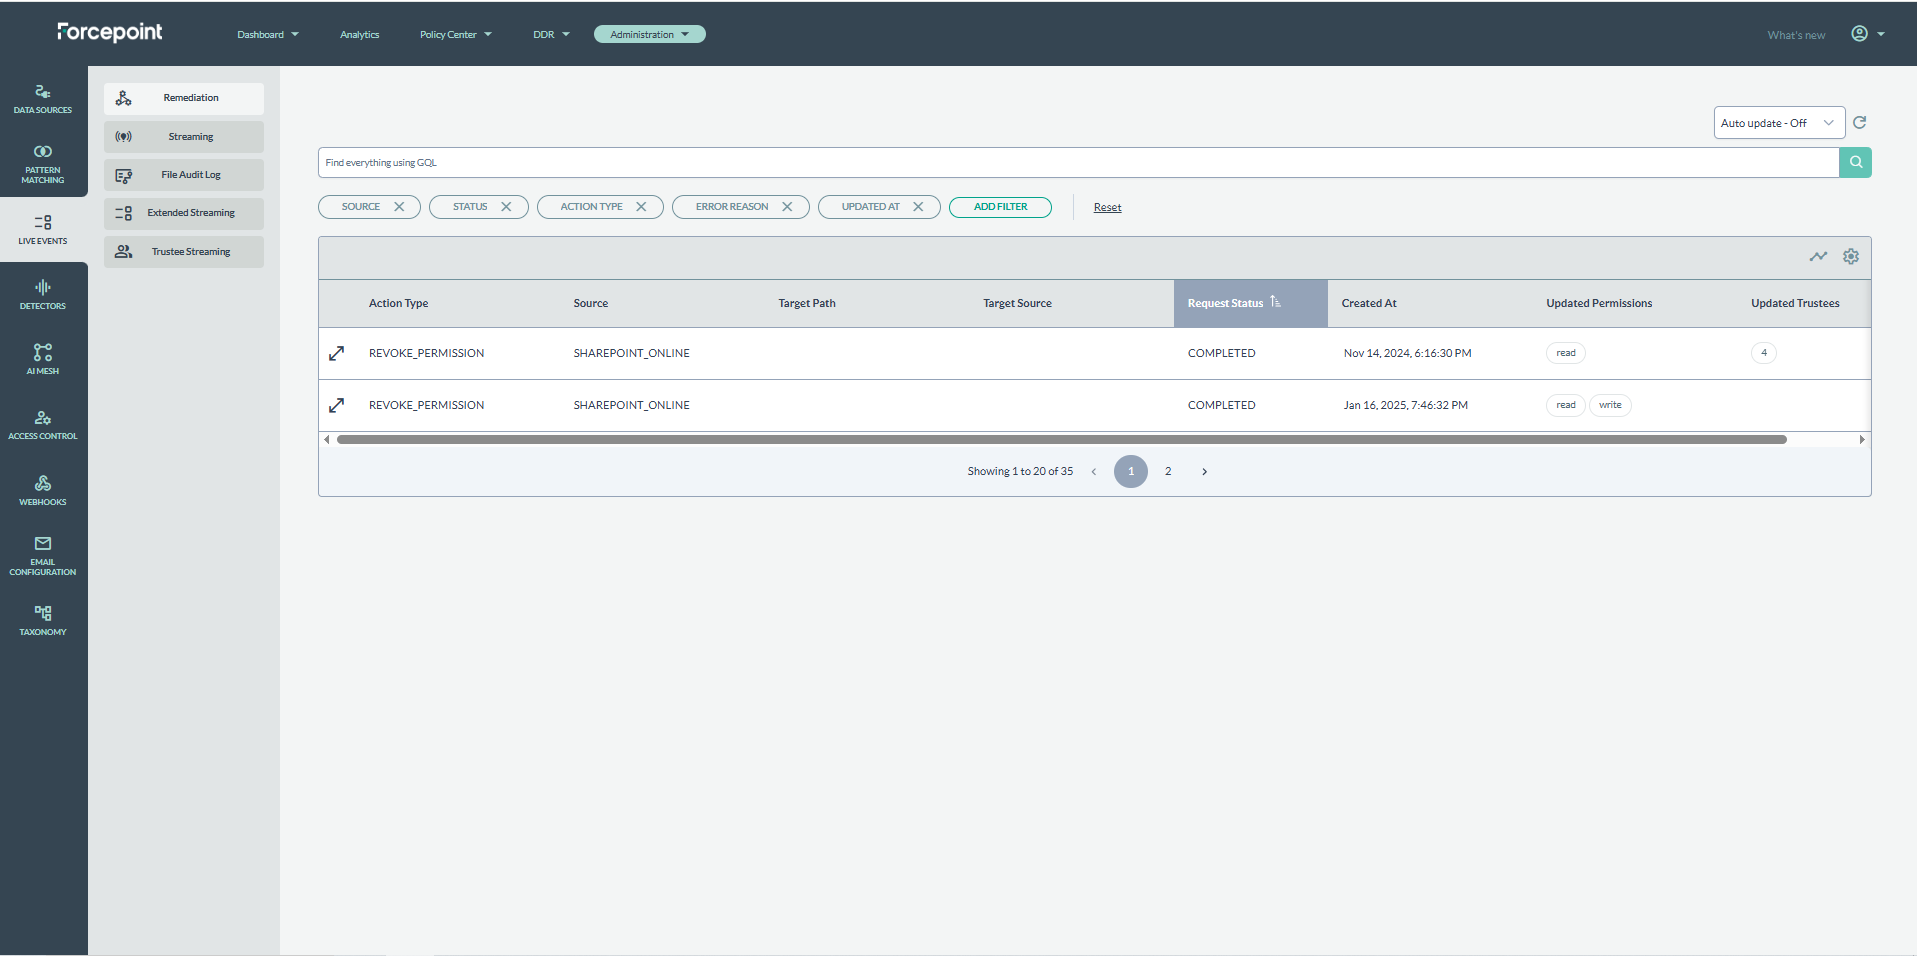
- View streaming event details by clicking Streaming under Live Events.
- It is also possible to monitor extended events. Select Extended Streaming under Live Events.