Confluence Cloud Streaming Configuration
This section provides information on how to configure an existing Confluence Cloud connection with real-time events monitoring and data streaming.
Enabling the real time events monitoring and data streaming
Ensure the following prerequisites are met:
- Existing Confluence Cloud Instance: You must have an active Confluence Cloud instance.
- Enable Development Mode: Activate Development Mode on your Confluence Cloud site. Refer to the official Confluence documentation.
- Deploy Proxy Container: Set up a container with a public proxy to allow integration with Confluence Cloud.
Steps to Enable Data Streaming
Step 1: Configure Confluence Cloud Data Streaming
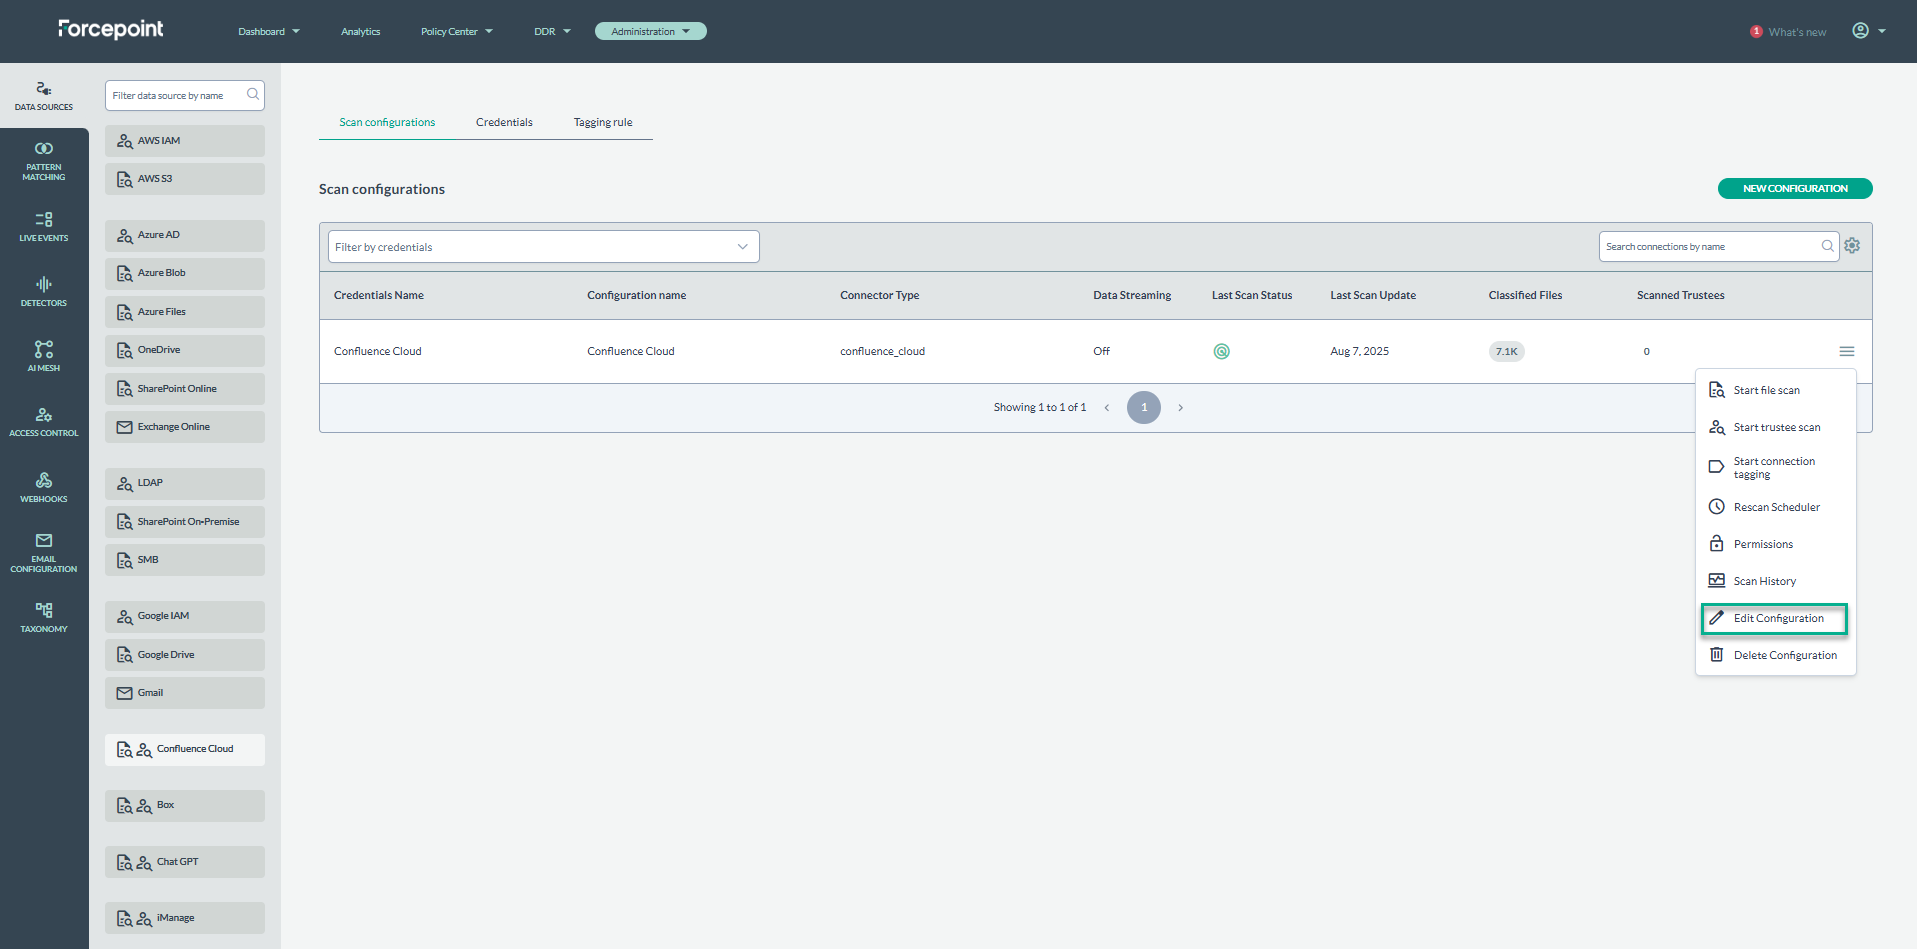
- In the console, navigate to the page.
- Locate your existing Confluence Cloud scan configuration and select Edit Configuration.
- Within the Edit Confluence Cloud Configuration page, check Subscribe to events streaming(DDR).
- Copy the Webhook URL provided, as you will use it later.
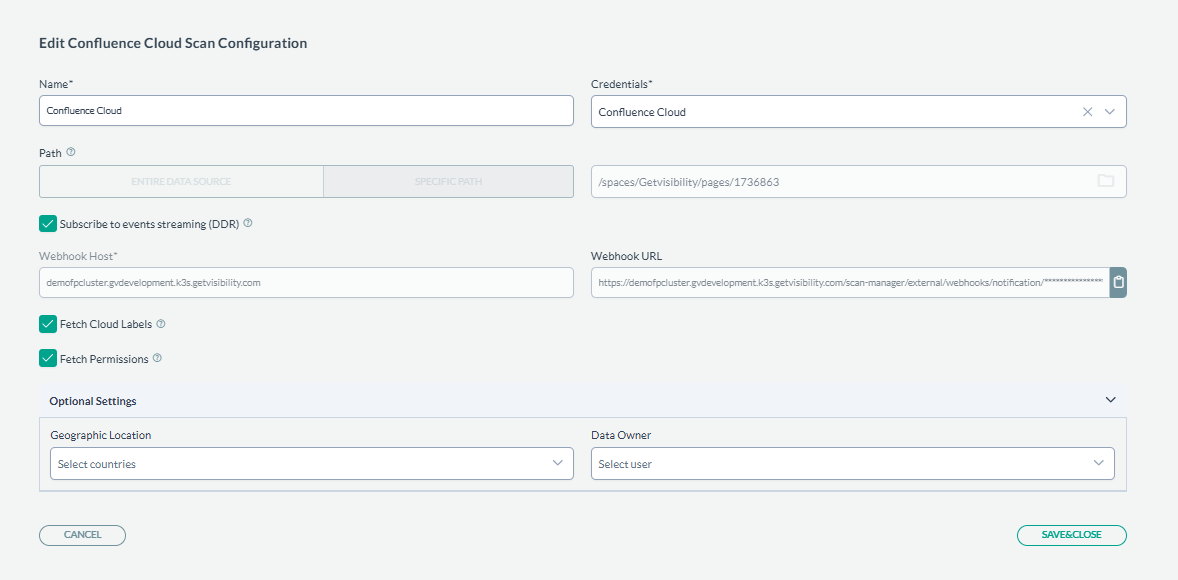
- Click Save & Close to apply changes.Note: To enable data streaming, you will need to deploy the
confluence-cloud-streaming-proxycontainer in your own infrastructure e.g. using Docker or Kubernetes. This step involves configuring environment variables and setting up Docker for integration with Confluence Cloud.
Step 2: Set Up confluence-cloud-streaming-proxy Application
Deployment Instructions
- Download Docker image parts: Download all files listed below:
- Merge Docker image parts:
cat confluence-cloud-streaming-proxy.tar.gz.part* > \ confluence-cloud-streaming-proxy.tar.gz.joined -
Load Docker image:
docker load --input confluence-cloud-streaming-proxy.tar.gz.joined - Prepare a Docker Environment: Ensure you have Docker installed and configured on the infrastructure where the
confluence-cloud-streaming-proxyapplication will be hosted. This will be the user environment. - Set Environment Variables: Configure the following environment variables to allow your Confluence Cloud instance to communicate with the proxy application.
Table 1. Environment variable Description APP_LISTENER_PUBLIC_ACCESSIBLE_URL Publicly accessible URL at which app can be accessed. It is used in communication between Confluence Cloud Webhook mechanism and app APP_WEBHOOK_URL Webhook URL (taken from Forcepoint DSPM UI Confluence Cloud connector configuration form) - Map Persistent Volume: Map a persistent volume to the
/app/db/directory within the container to ensure data retention across sessions.Example
docker-compose.ymlConfigurationUse the following example to help set up the Docker configuration. Update the values as needed for the specific environment:services: app: image: getvisibility/confluence-cloud-streaming-proxy:v0.3.2 ports: - "8080:8080" environment: APP_LISTENER_PUBLIC_ACCESSIBLE_URL: https://5977-88-156-142-22.ngrok-free.app APP_WEBHOOK_URL: https://tenantabc.getvisibility.com/scan-manager/external/webhooks/notification/71ccab3d56980a2d9c766f42c86d36ffedc34258a0f226aaf56a628f06e9d89d volumes: - ./app-db/:/app/db/Once configured, start the container by running
docker-compose up -dor an equivalent command based on configured setup.
Step 3: Expose the Application
To expose the application publicly, consult with relevant internal team such as IT or DevOps team. For testing https://ngrok.com/ to expose the app port as needed.
- Start the Application: Ensure the application runs before proceeding with the integration setup.
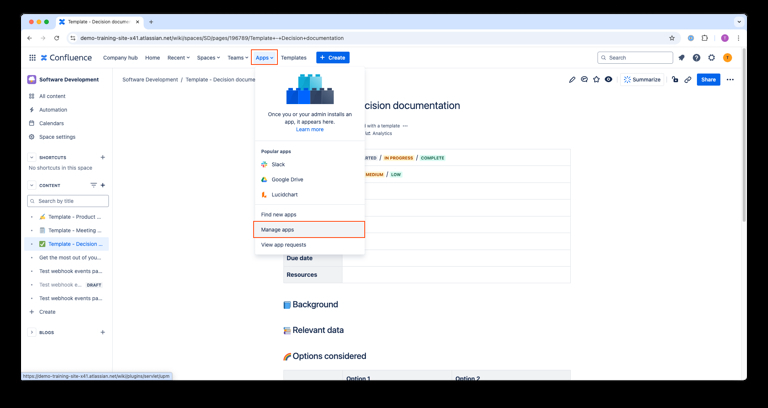
Step 4: Install the Integration in Confluence Cloud
To install the integration, follow the steps:
- Go to the Manage apps page in Confluence Cloud.
- Select the Upload app.
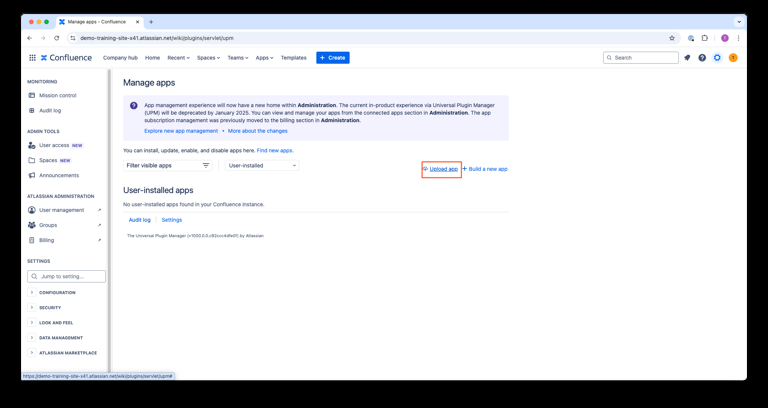
- Paste the publicly accessible address in the form and press Upload.
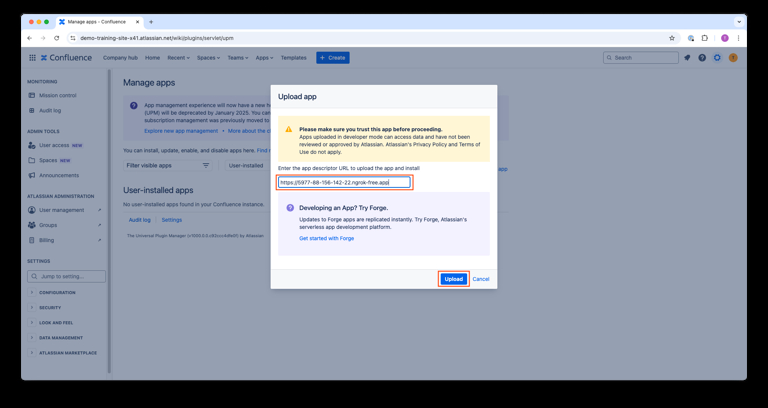
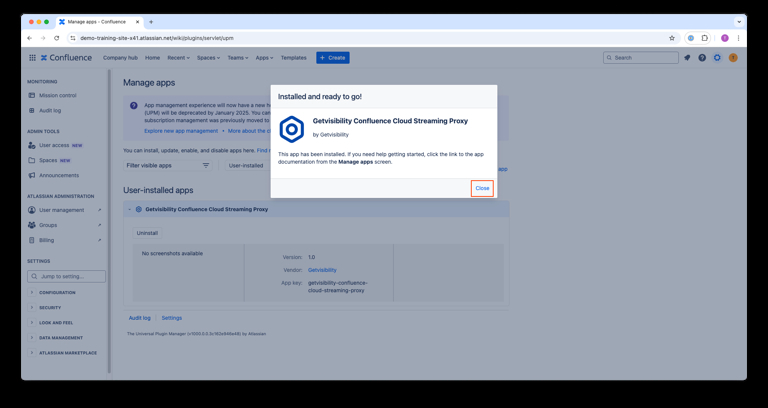
- The application will install, and your integration will be ready in a few seconds.
Uninstall integration from Confluence Cloud
To uninstall the integration, follow the steps:
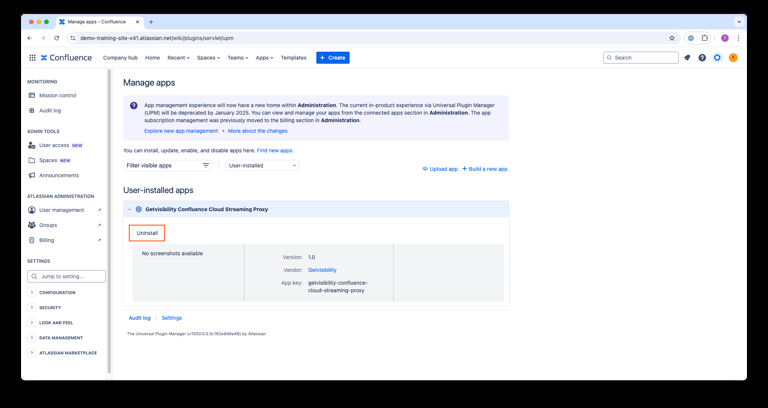
- Go to the Manage apps page in Confluence Cloud.

- Find Getvisibility Confluence Cloud Streaming Proxy and click Uninstall.
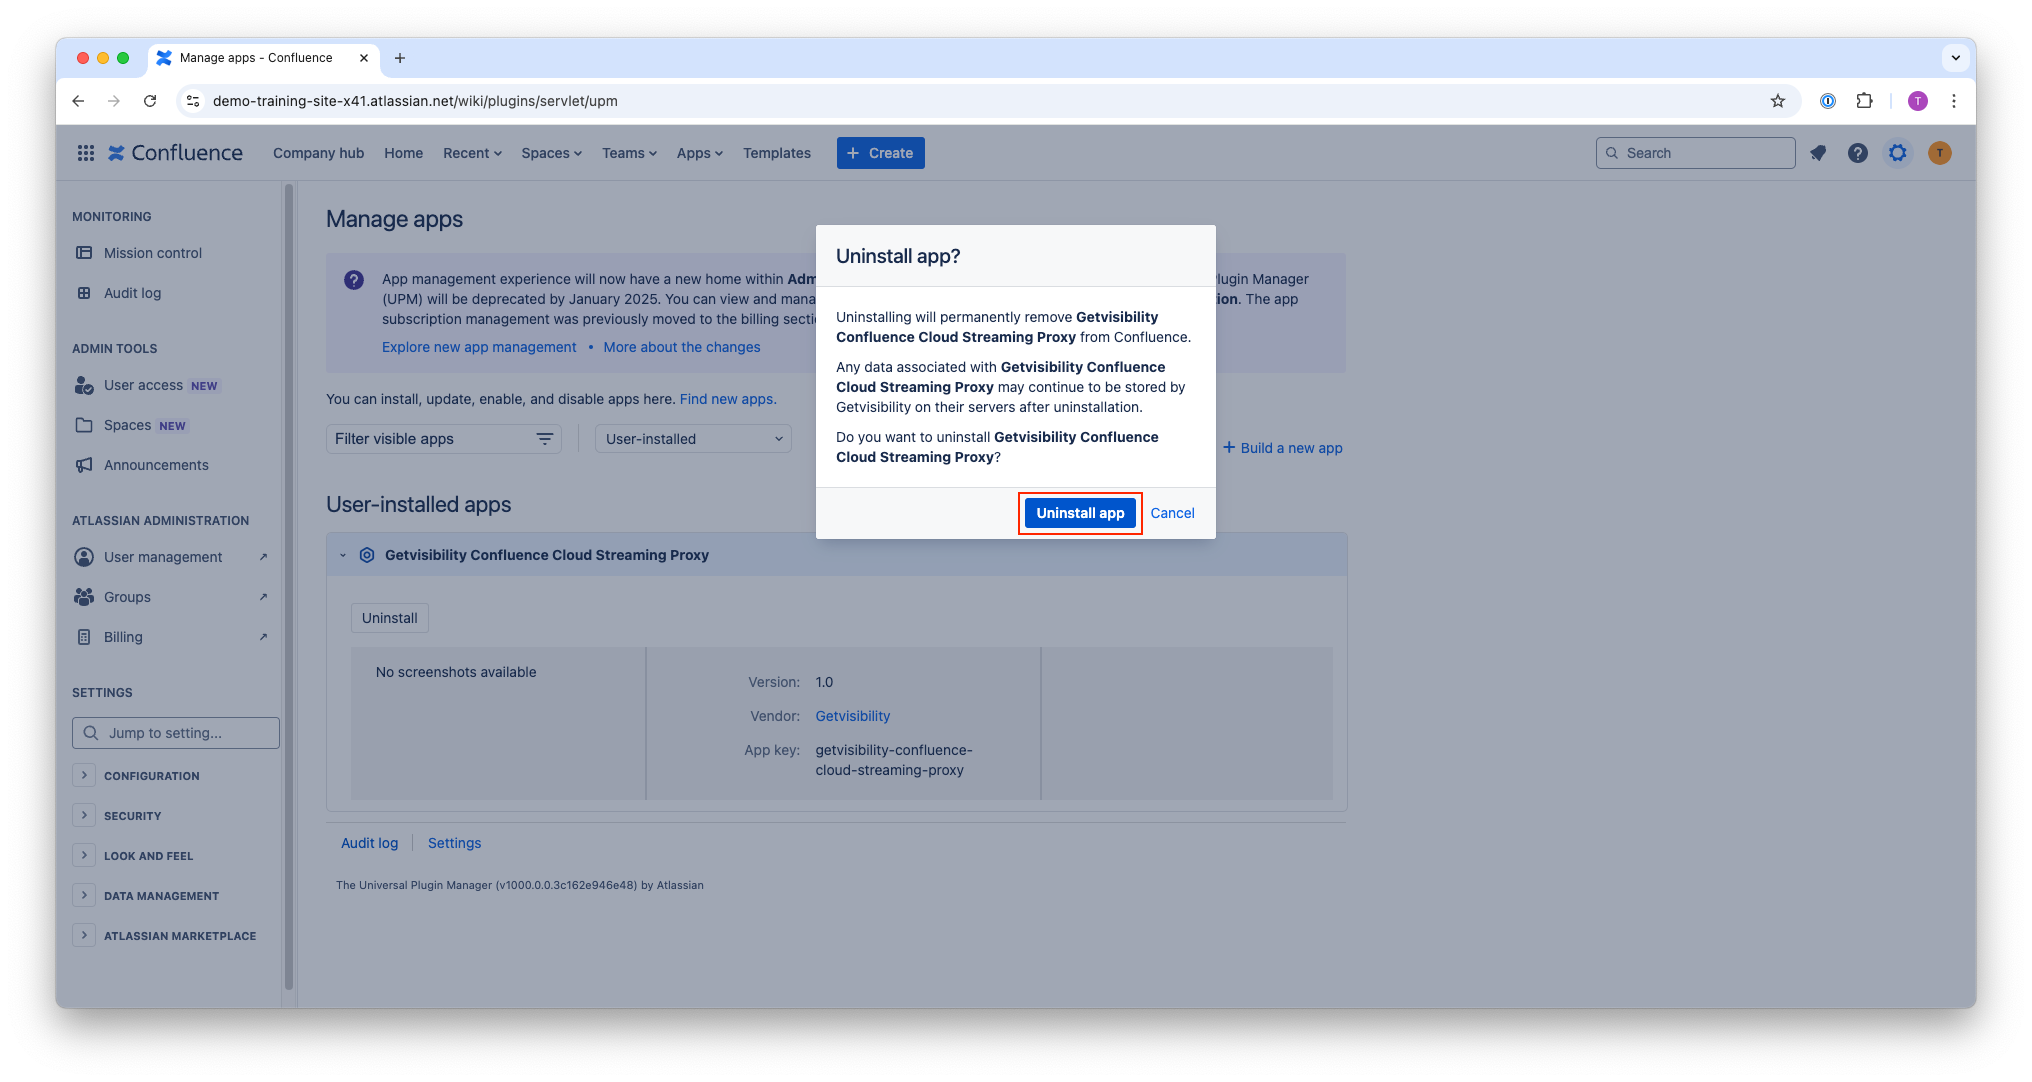
- Confirm by selecting Uninstall app.
- Delete any associated containers and settings from your organization's infrastructure.