SharePoint Online Streaming Configuration
This section provides steps on how to enable real-time data streaming for a SharePoint Online connection and monitoring streaming events within the Forcepoint DSPM platform.
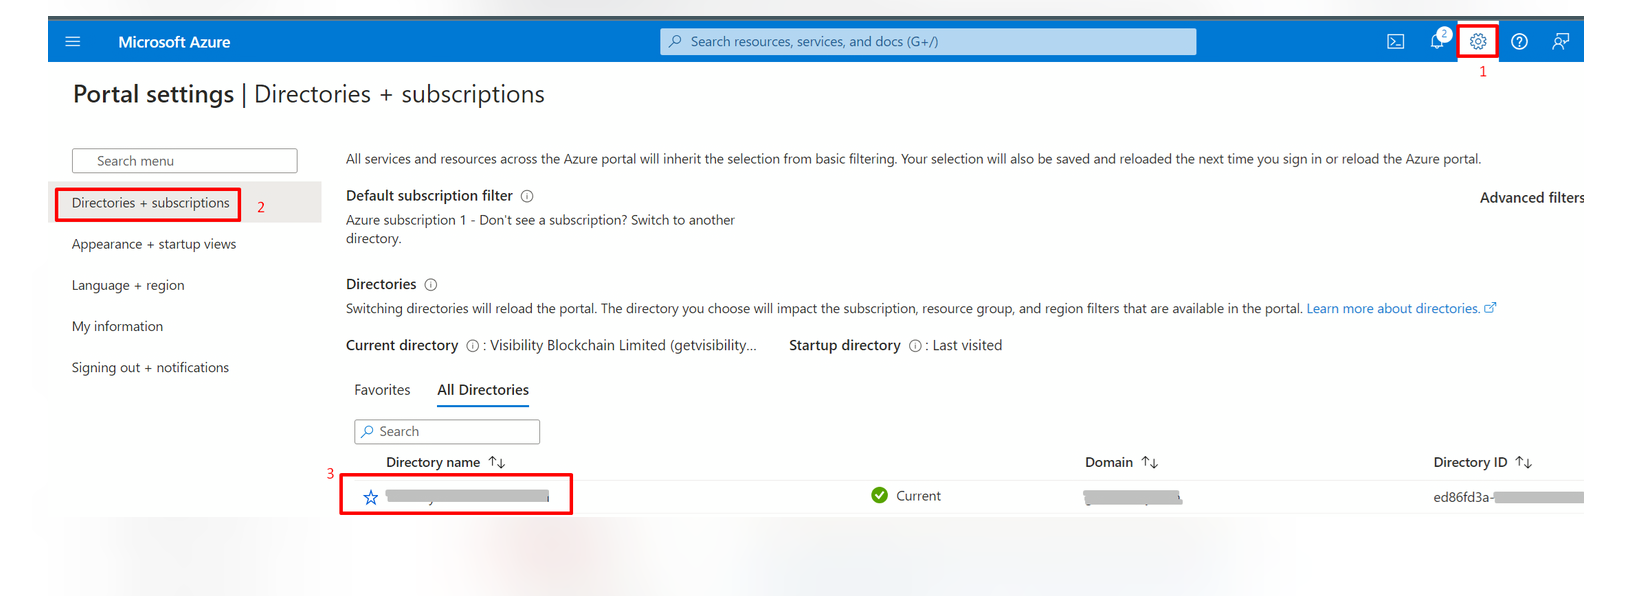
- Login to Azure Portal.
- If there are multiple tenants to choose from, use the Settings icon in the top menu to switch to the tenant in which needs to be registered to the application from the Directories +
subscriptions menu.
-
Browse to App Registration and select your application that was created for the scanning
-
Navigate to on the left menu, and select Add a permission.
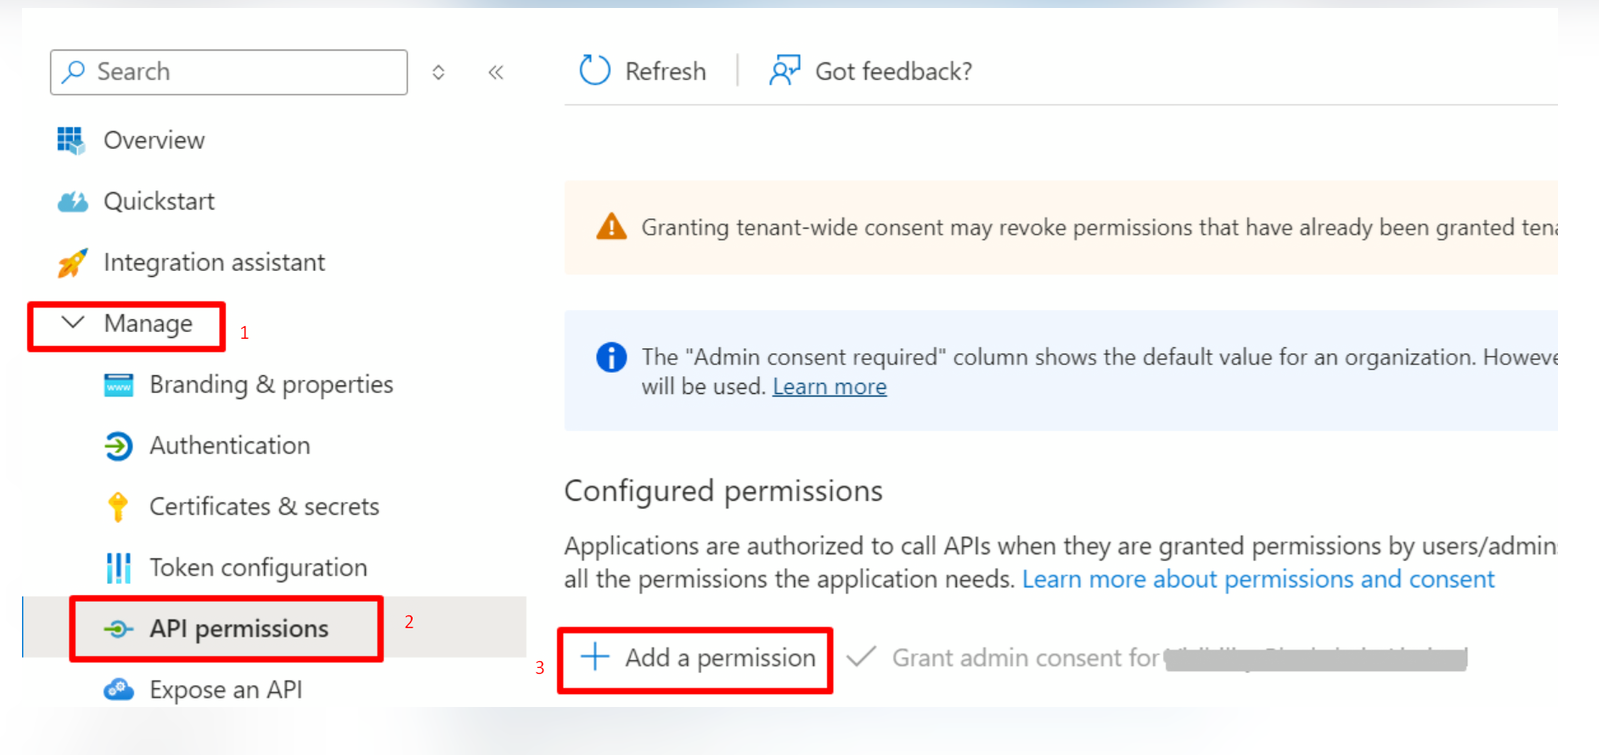
- Select .
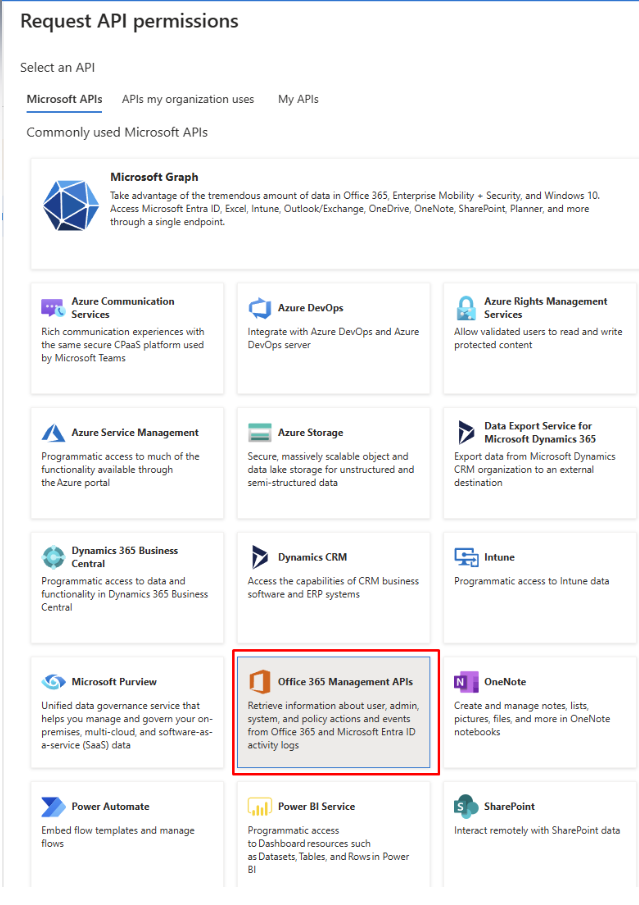
- Select and click Add permissions.
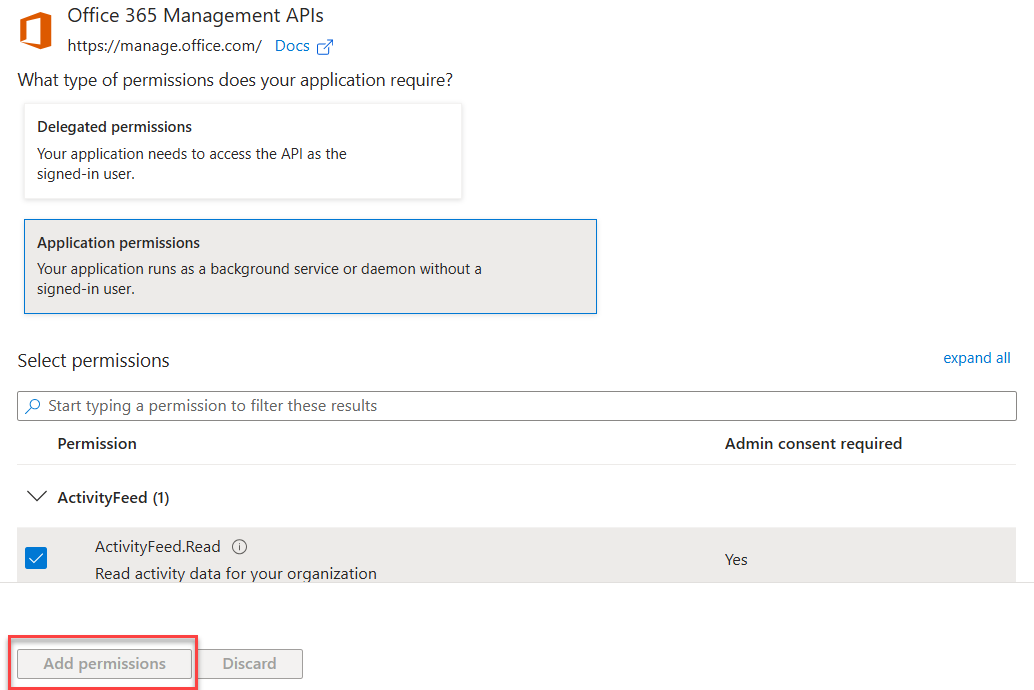
Once the required permission is added, click Grant admin consent.
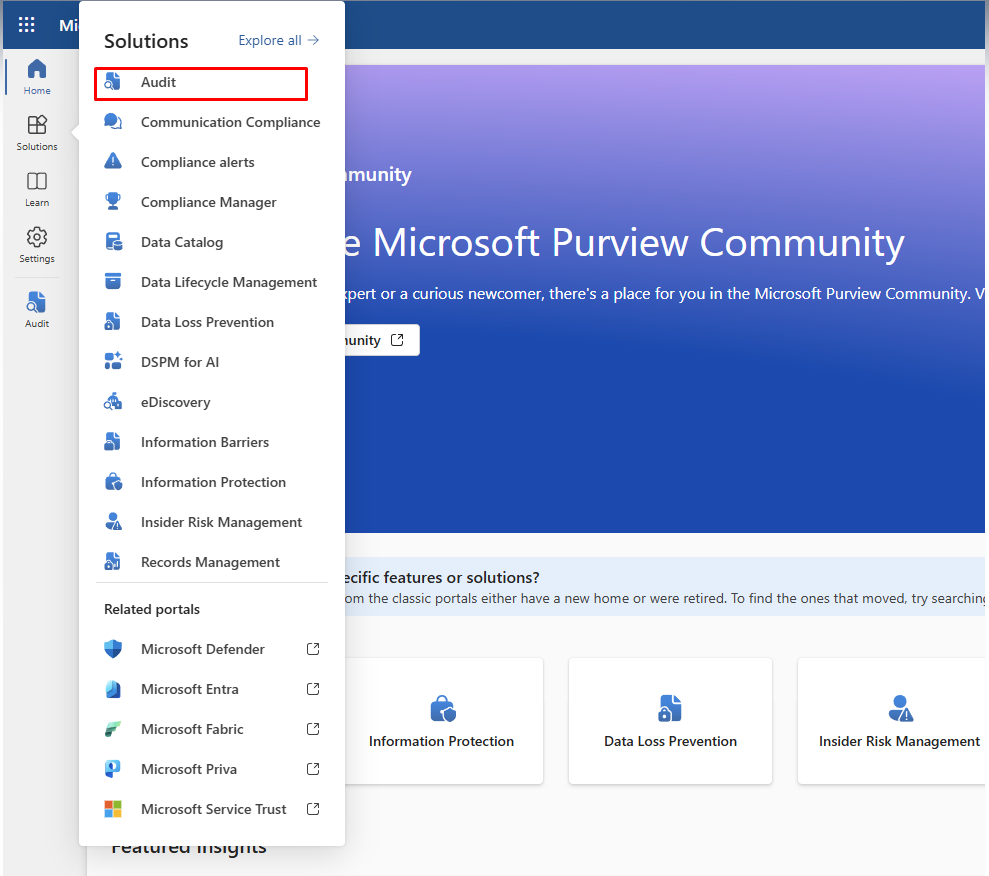
- Sign into the https://purview.microsoft.com/ portal using Microsoft Edge browser.
- Select the Audit solution card. If the Audit solution card is not displayed, select View all solutions and then select Audit from the Core section.
- If auditing is not turned on for your organization, a banner is displayed prompting you to start recording user and admin activity. Select the Start recording user and admin activity
banner.

- In certain cases, recoding cannot be enabled immediately and requires additional configuration. If this applies, users will be prompted to enable the customization setting. Select OK, and a new banner will appear, informing you that the process may take 24 to 48 hours to complete. After this waiting period, repeat the previous step to proceed with enabling recoding.
Steps to Enable Data Streaming for SharePoint Online
Create a New Scan Configuration
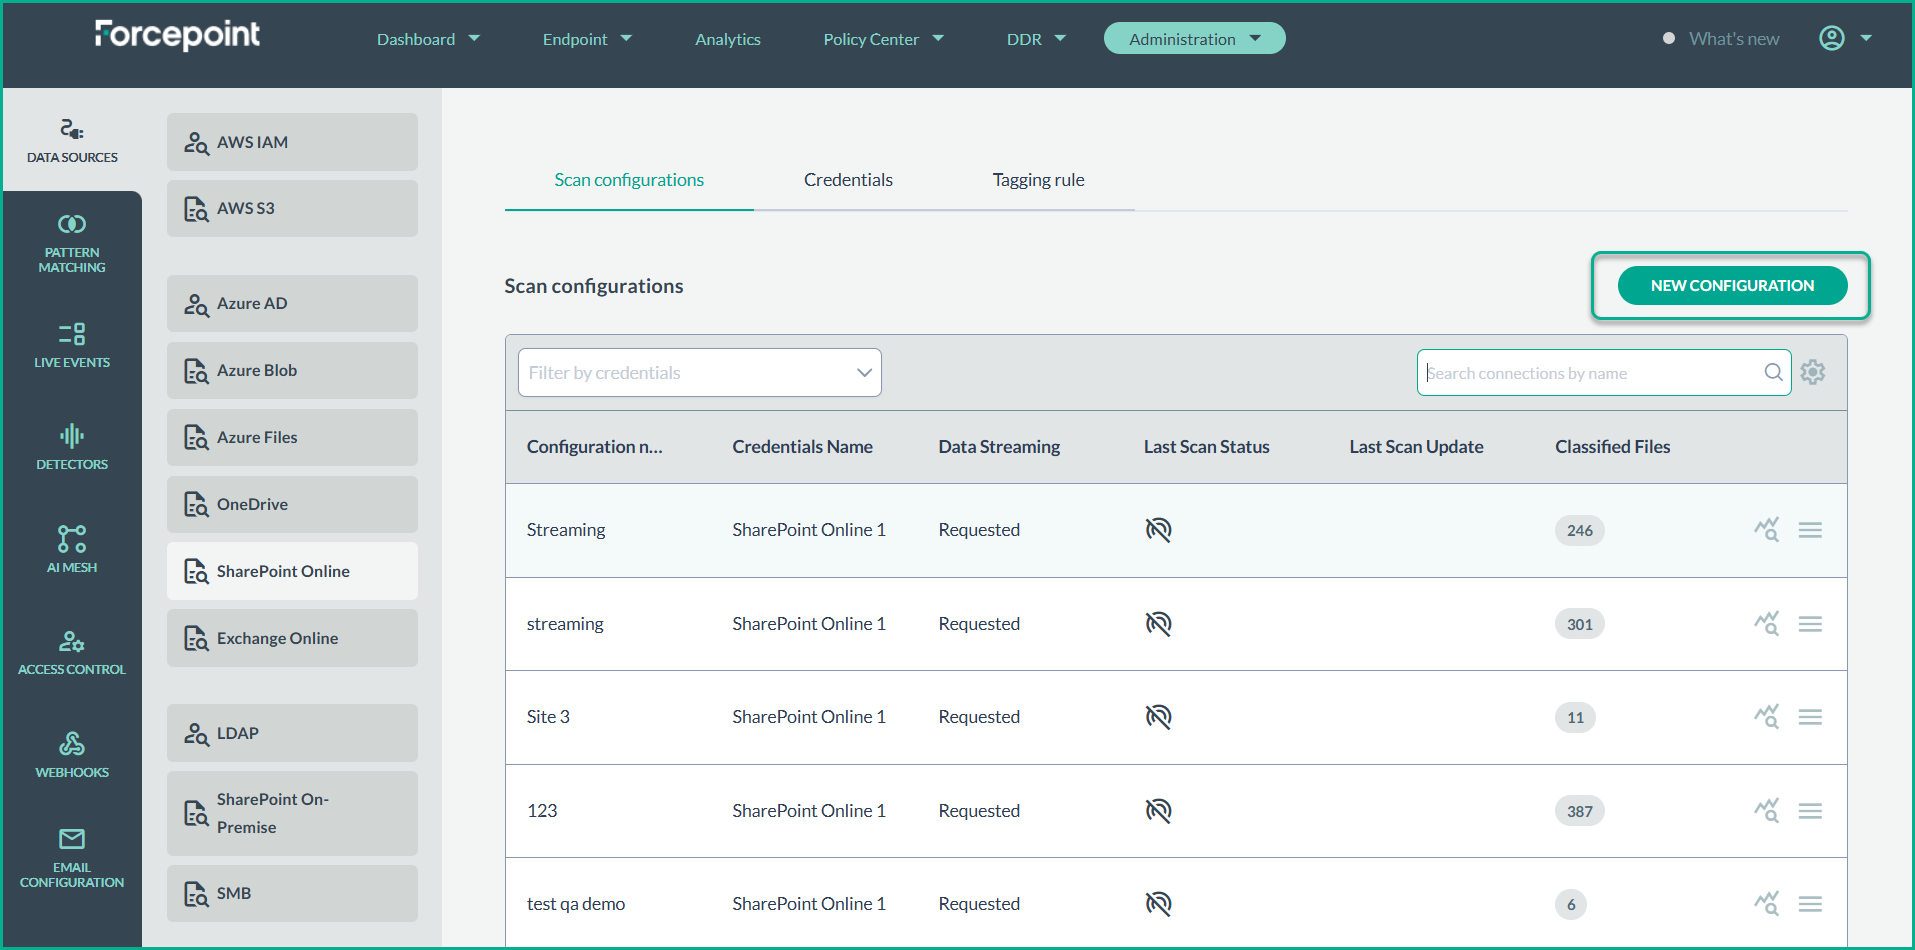
- From the Data Sources page, select SharePoint Online from the list of available data sources. Click New Configuration.
- Make sure the connection Name, Credentials are set. Check the Subscribe to events streaming (DDR) option.
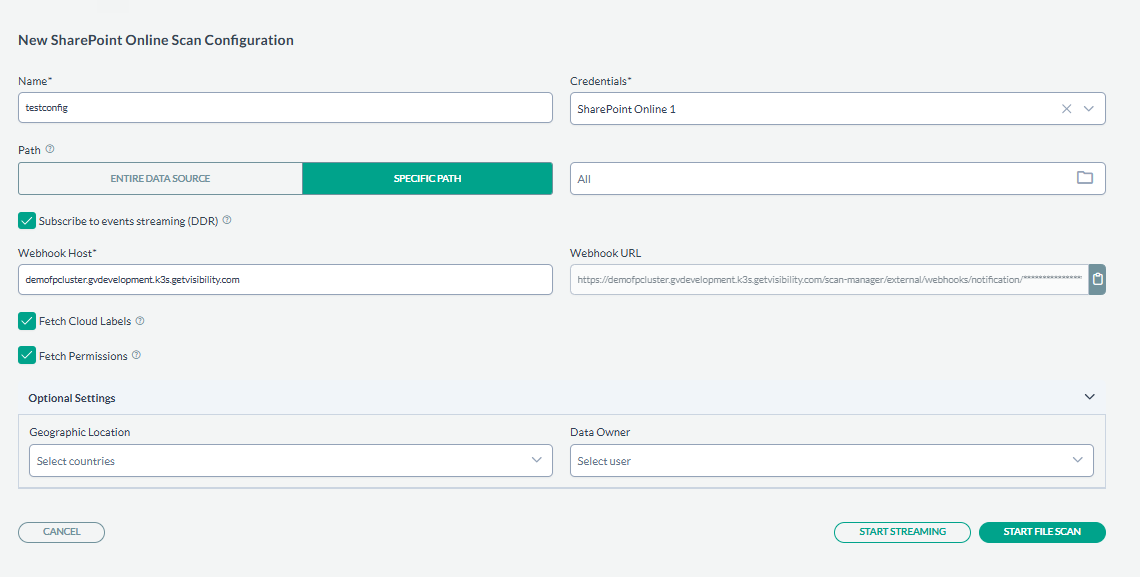
- Click on the Folder icon in the Path field to select the folder you want to monitor for real-time events. Magnifying glass icon: Folders with this icon next to them indicate that real- time events can be subscribed to from this directory.
- After selecting the folder, click Save & Close to finalize the changes.
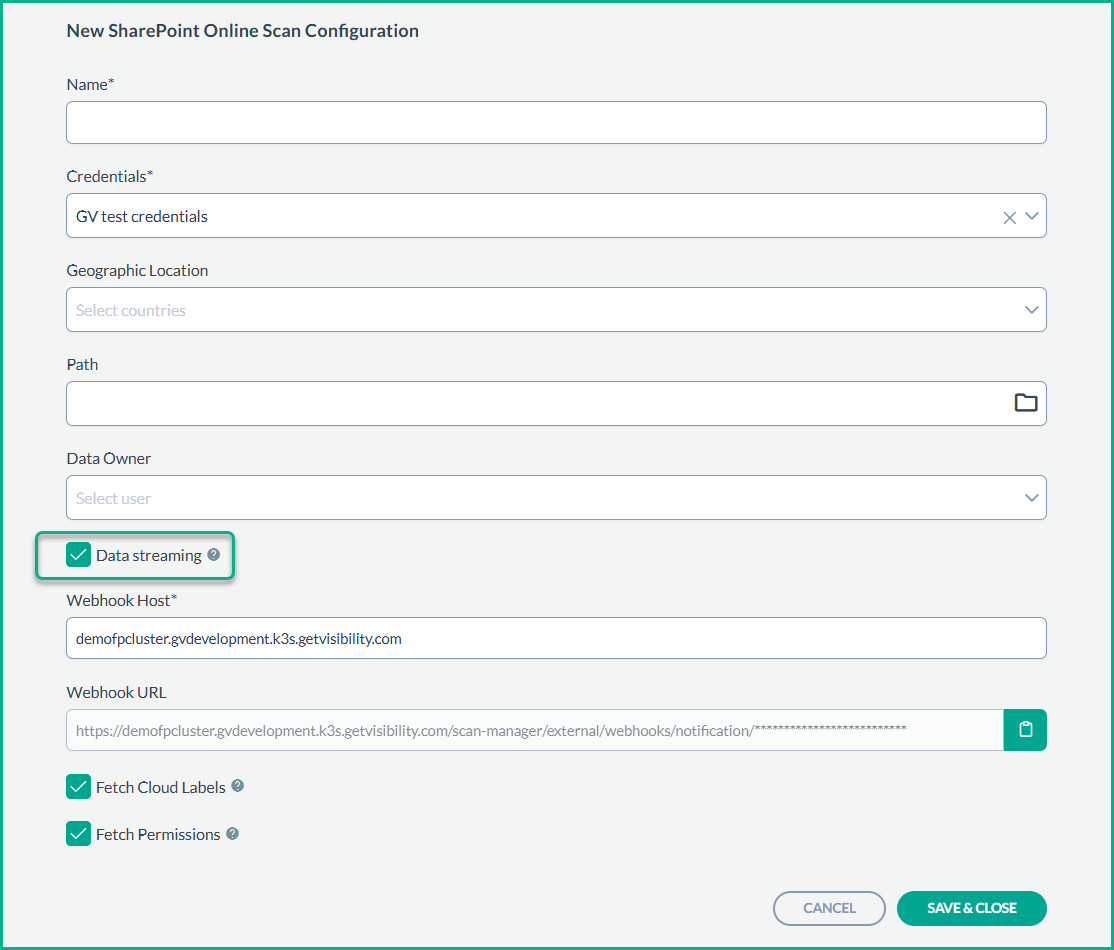
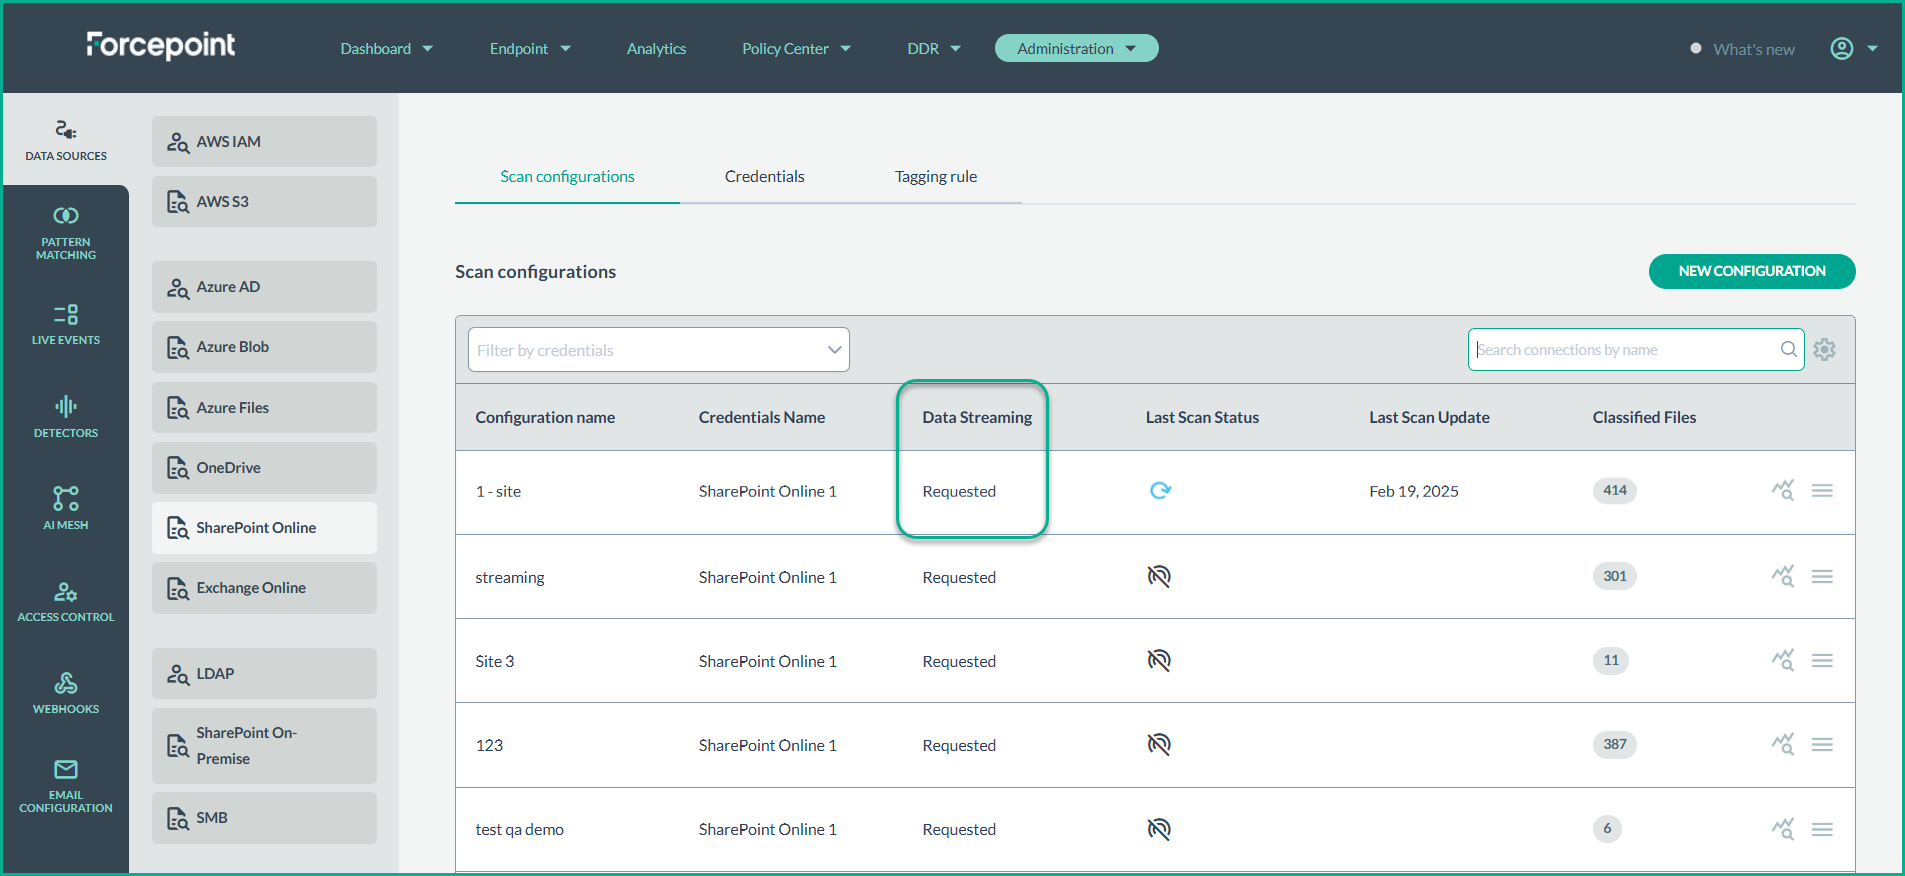
- Clock icon: When data streaming is being activated, the clock icon will appear, indicating that the subscription is being processed. Once the subscription is activated, this icon will change to a green magnifying glass.
- After enabling Data Streaming, the system will automatically handle the subscription to SharePoint Onlineʼs real-time events. There is no need to manually configure
Webhooks.
Monitoring Real-Time Events
After the subscription is activated (green magnifying glass icon), real-time events will start flowing into the platform, and you will be able to monitor them from various sections of the console.
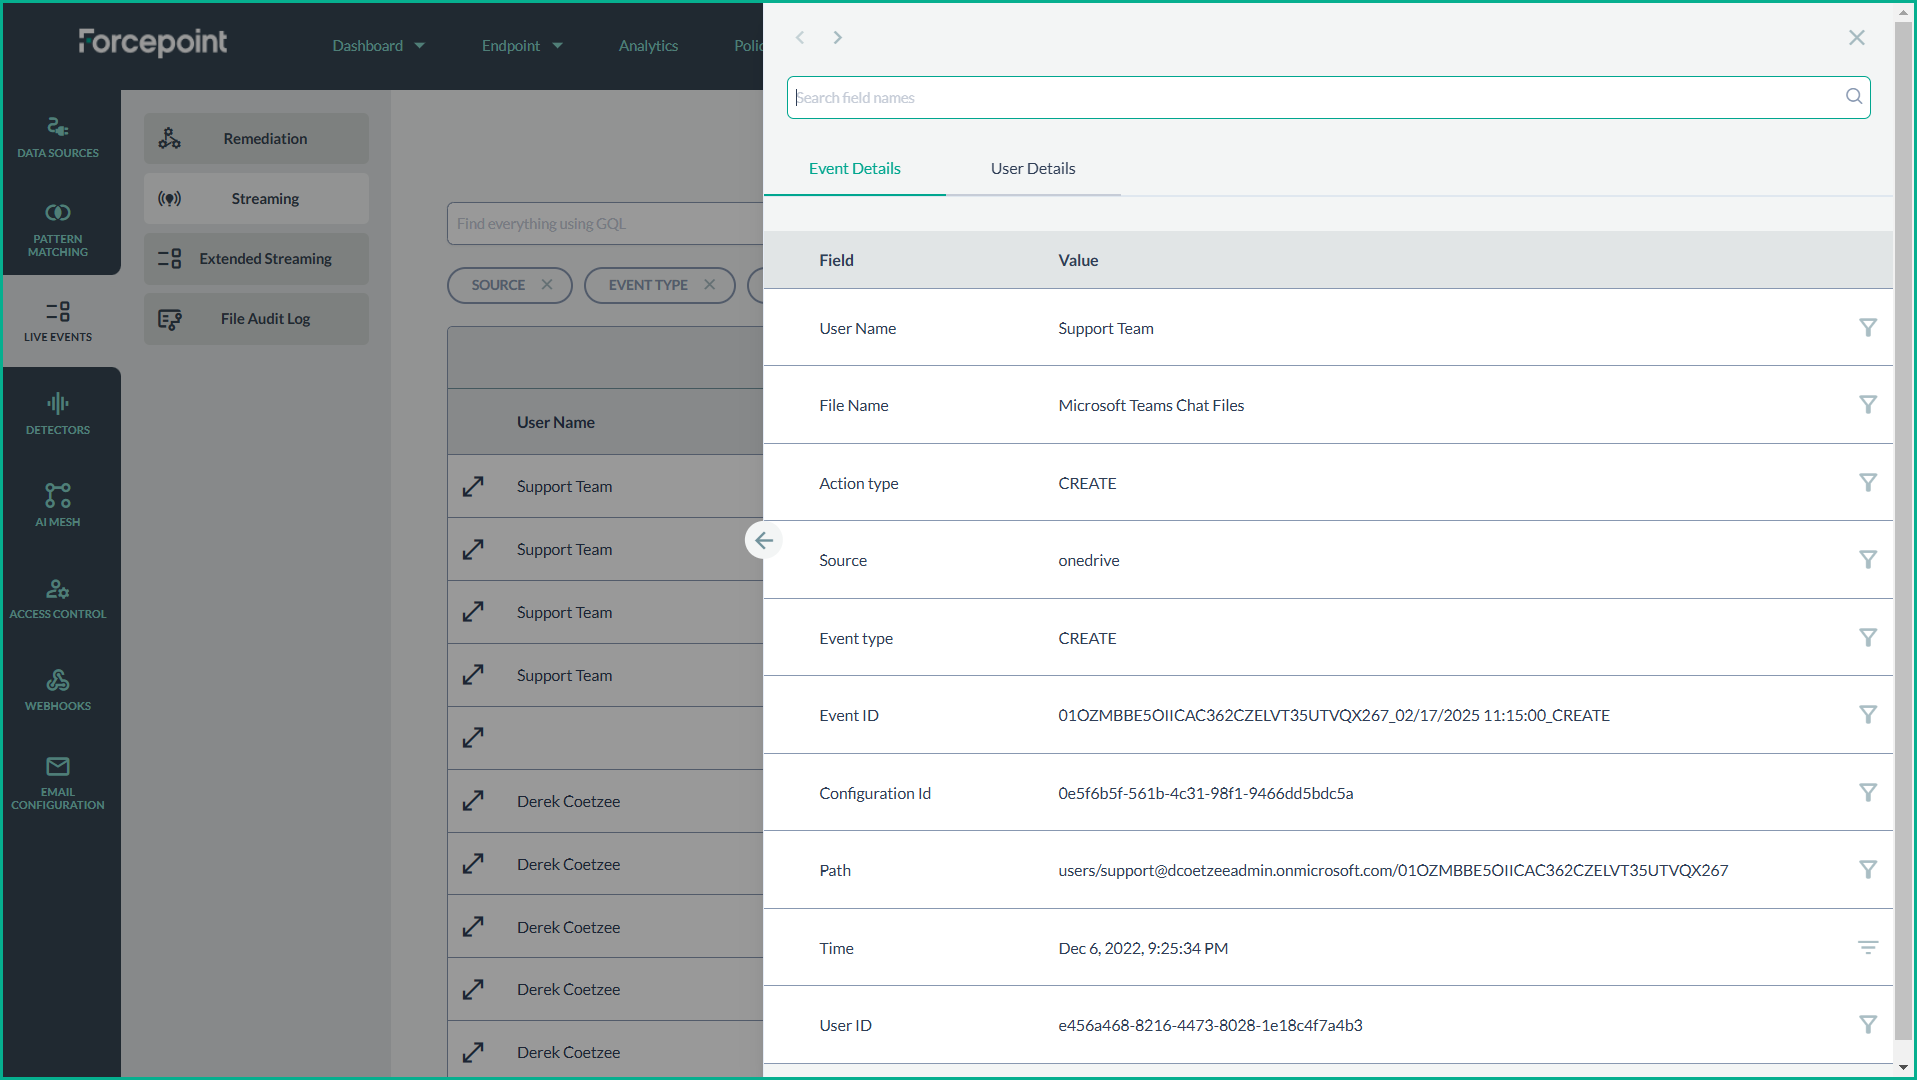
Viewing Events in the Live Events Section
- Navigate to the Live Events section under Administration to view a detailed audit log of all streaming events.
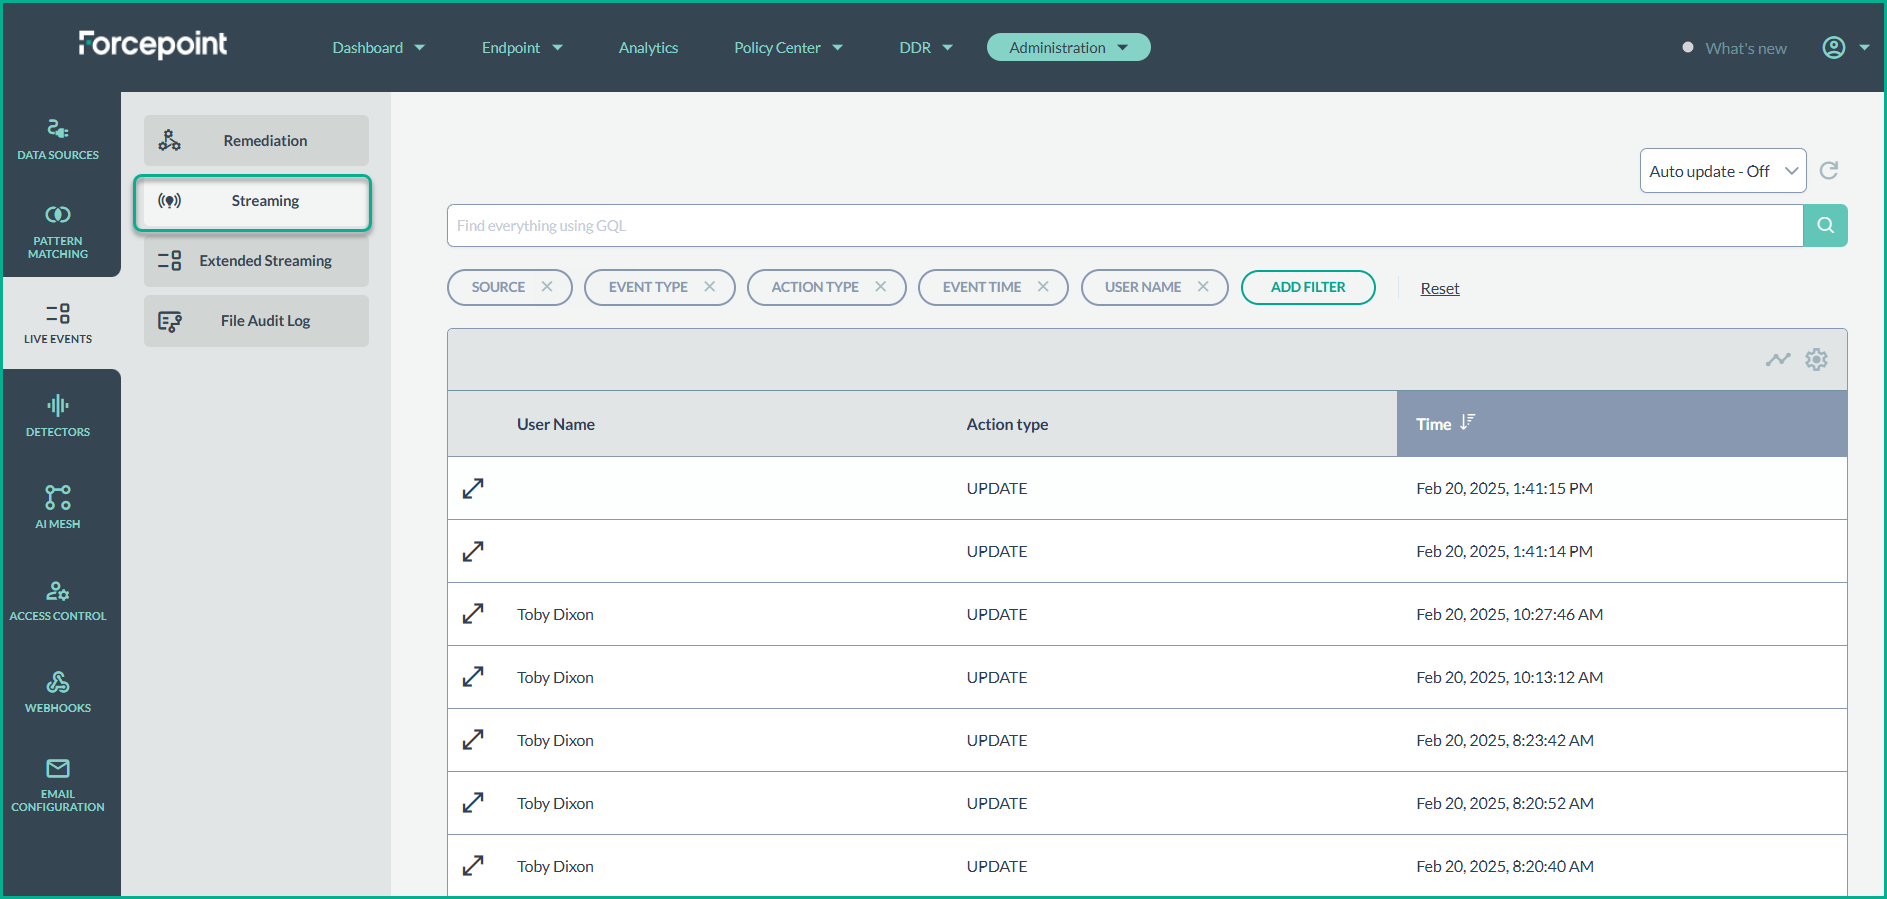
- In this section, you can filter and view event details.