Azure Blob Streaming Configuration
This section provides information on how to configure Azure Blob connection with real-time events monitoring and data streaming. To enable Real Time Events Monitoring (Streaming) for an existing Azure Blob connection, complete the below mentioned steps.
Prerequisites
Existing Azure Blob connection: An Azure Blob scan configuration must already exist. If you have not created an Azure Blob scan yet, follow steps in the section Azure Blob to set up a scan and ensure the necessary credentials are set up.
- Select an Existing Scan Configuration
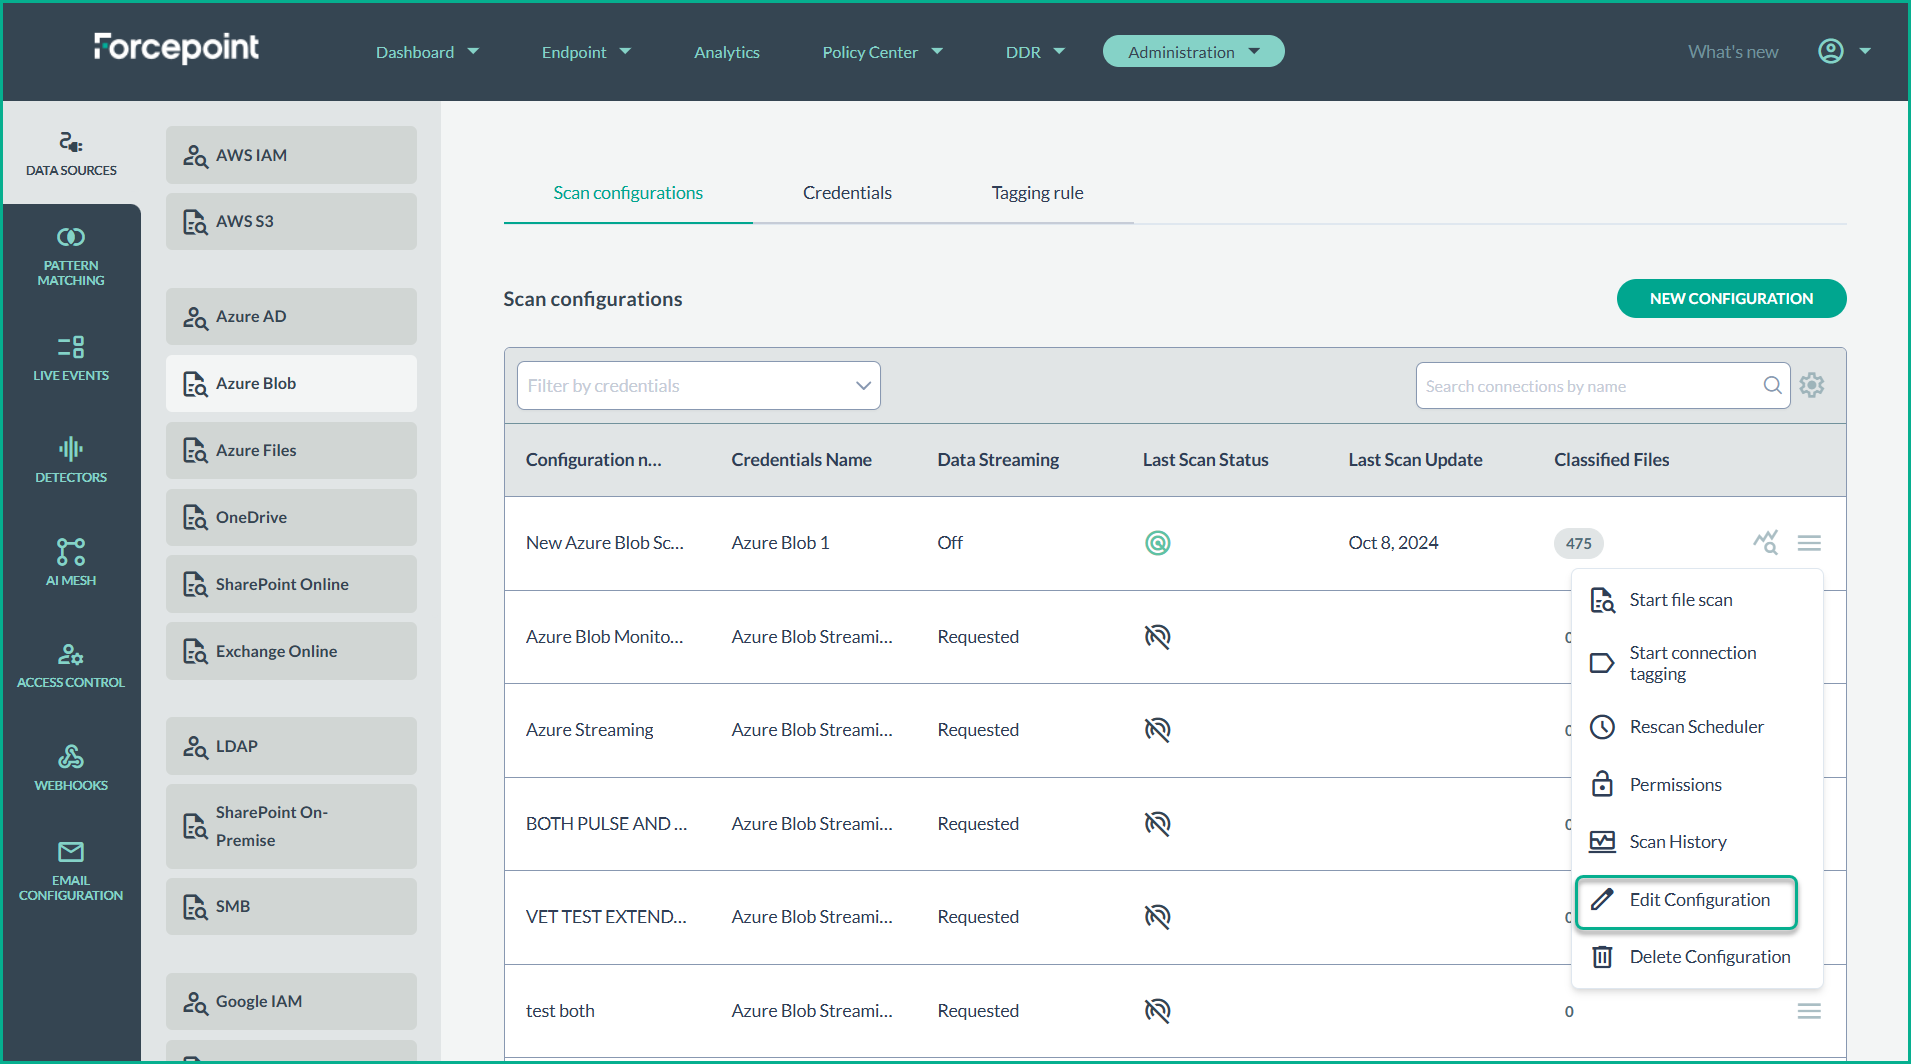
- Navigate to the Scan configurations page.
- Find the existing Azure Blob scan configuration and select Edit Configuration from the options menu.
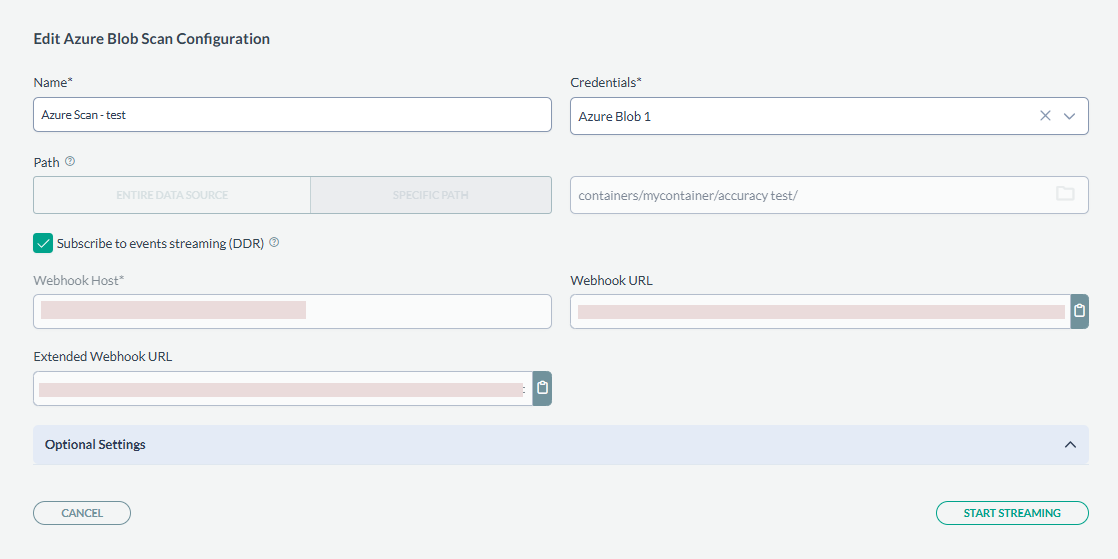
- Enable Data Streaming
- Within the Edit Azure Blob Scan Configuration page, check Subscribe to events streaming (DDR).
- Copy the Webhook URL provided, as you will use it later in the Azure Portal.
- Configure Azure Event Grid Subscription
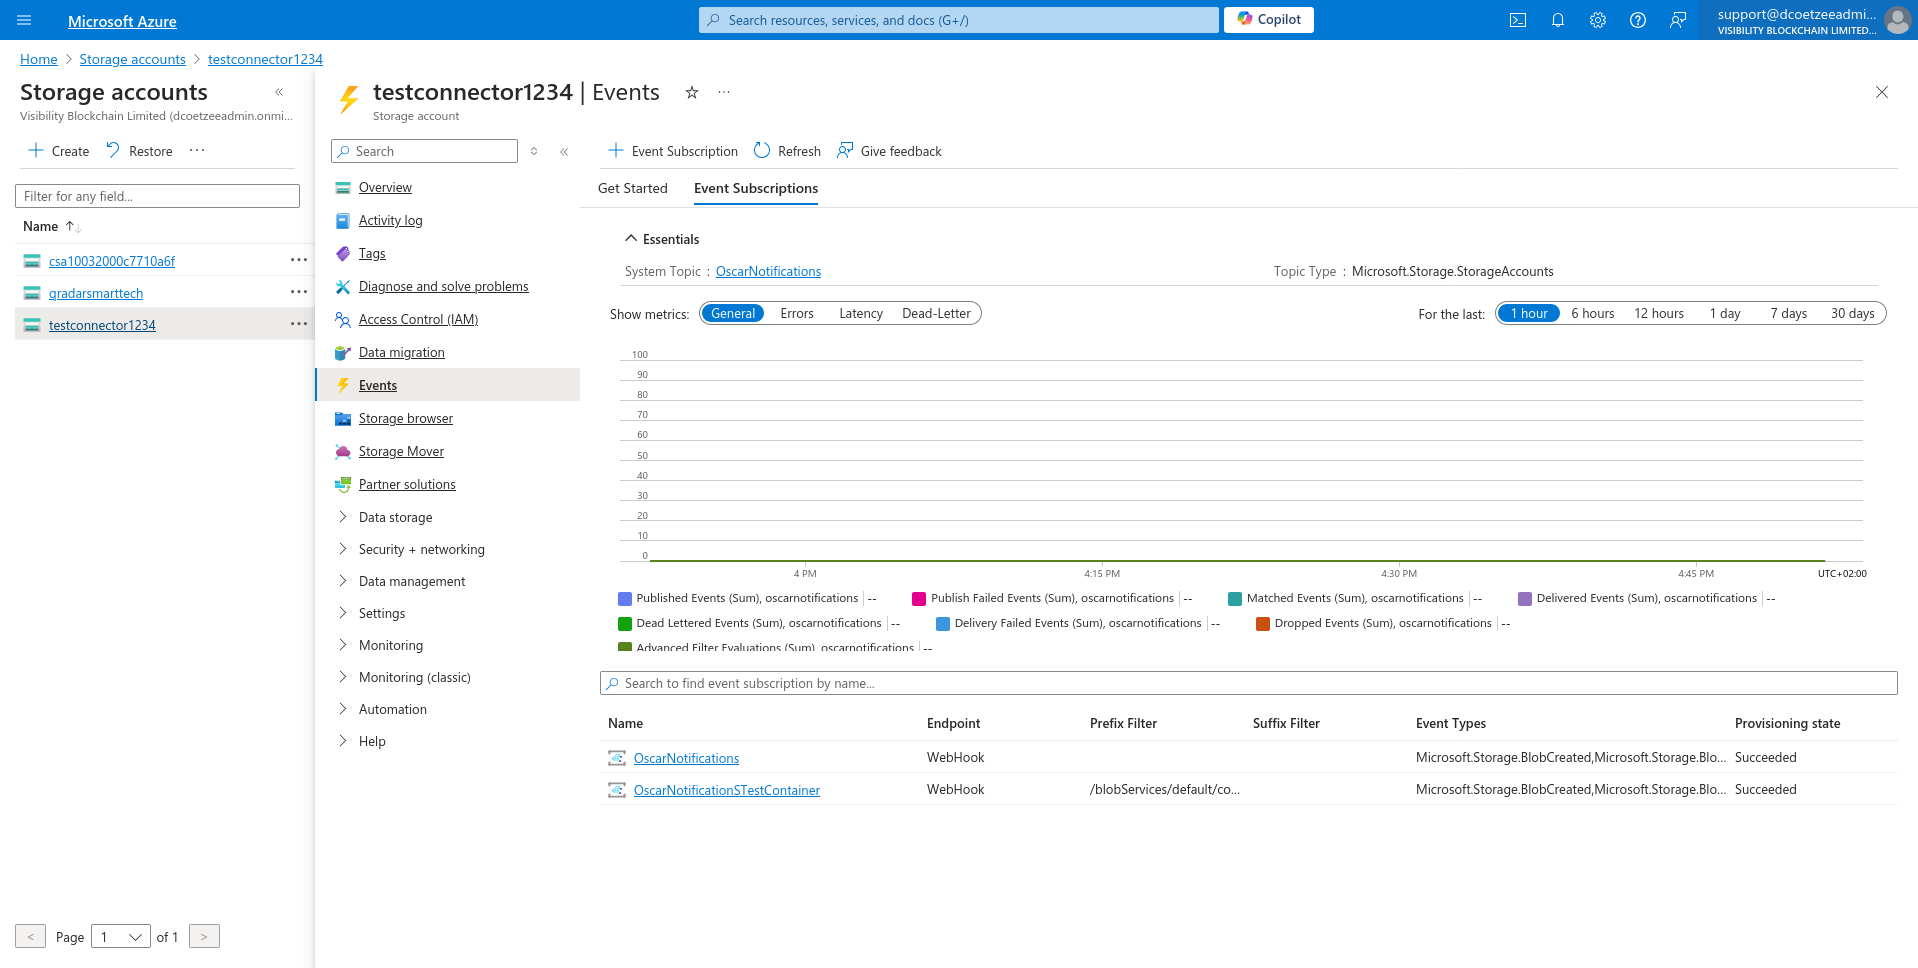
- Navigate to Azure Portal and open your Storage Account.
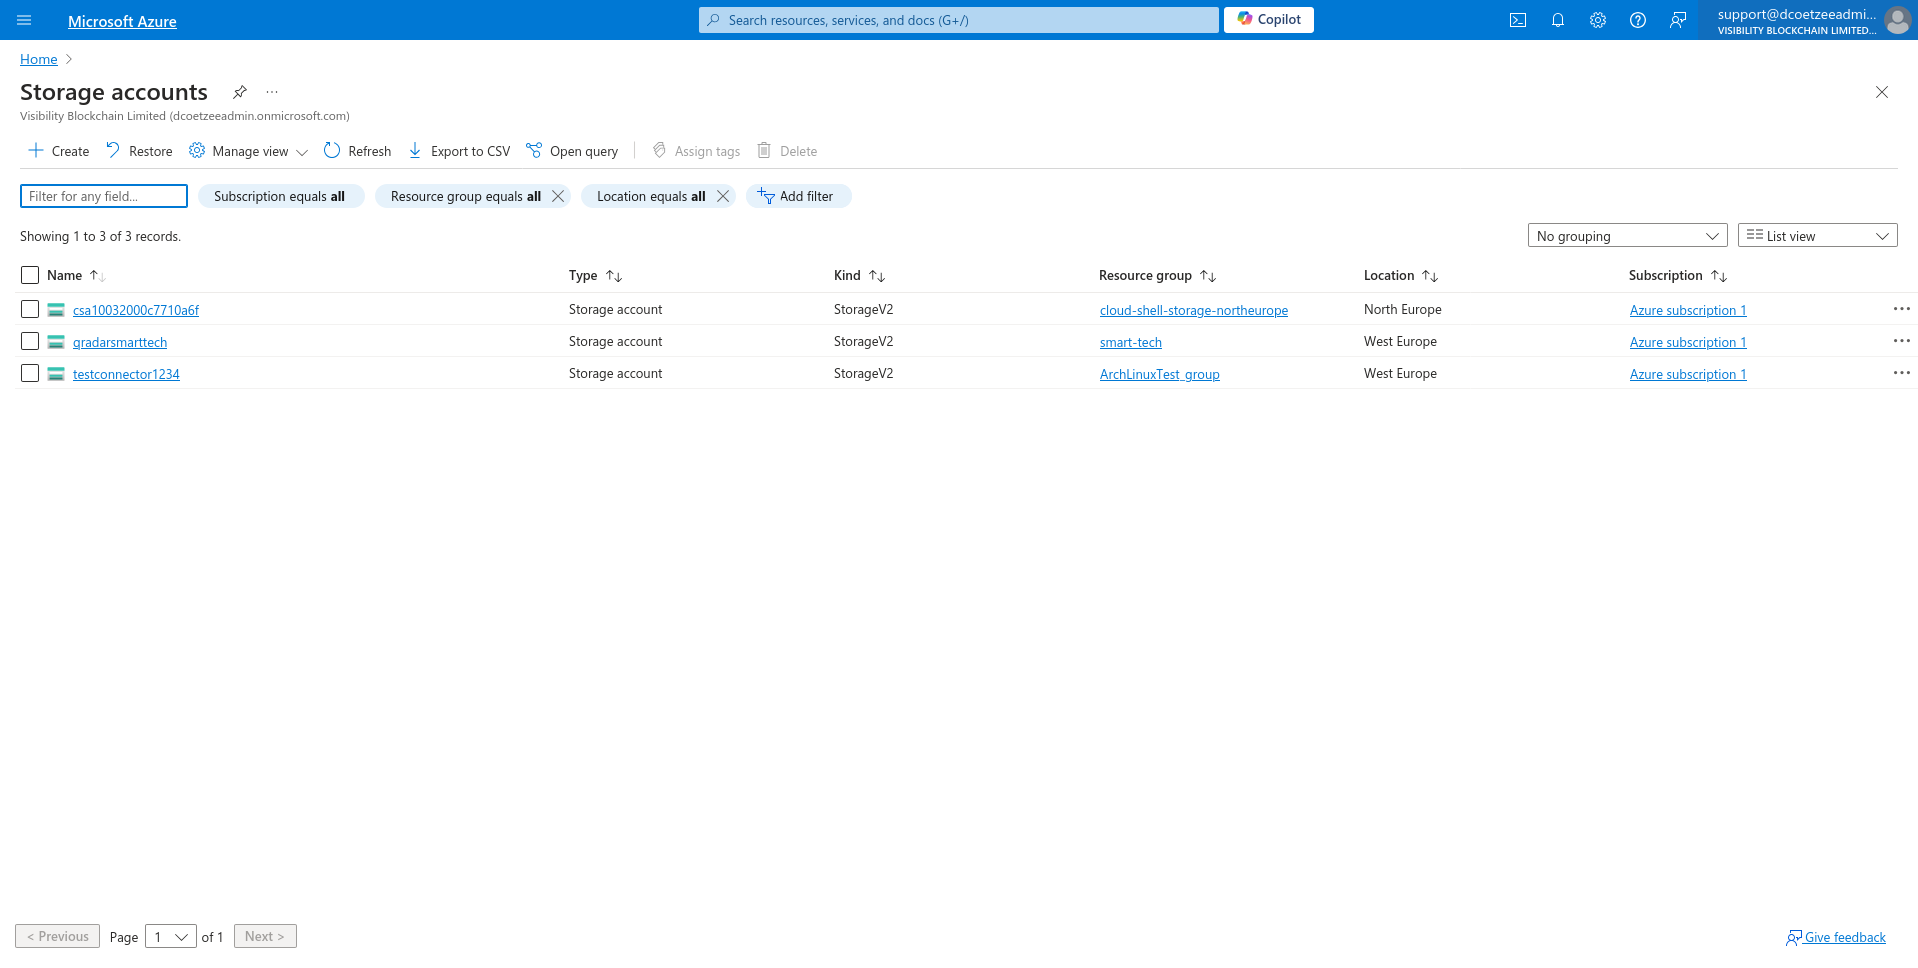
- Select one of the connectors from the Storage Accounts.
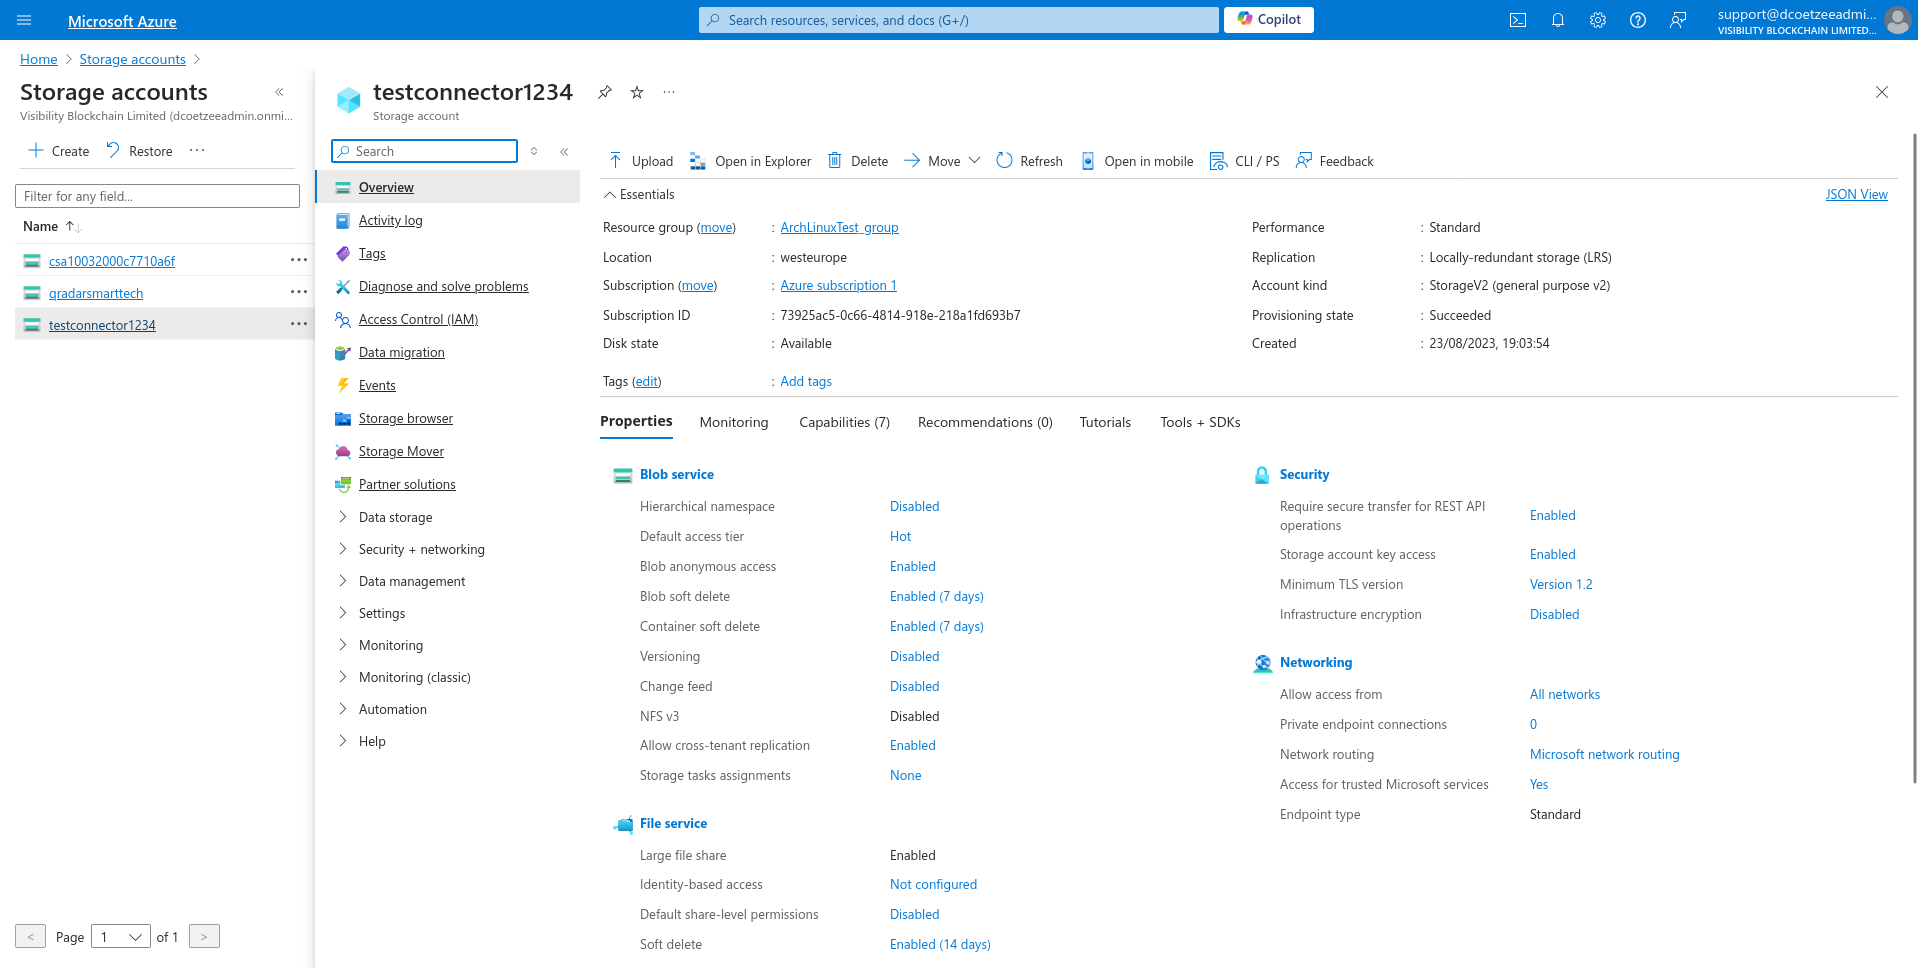
- In the left-hand menu, select Events and click Create Event Subscription from the menu.
- In Create Event Subscription Window fill in the details:
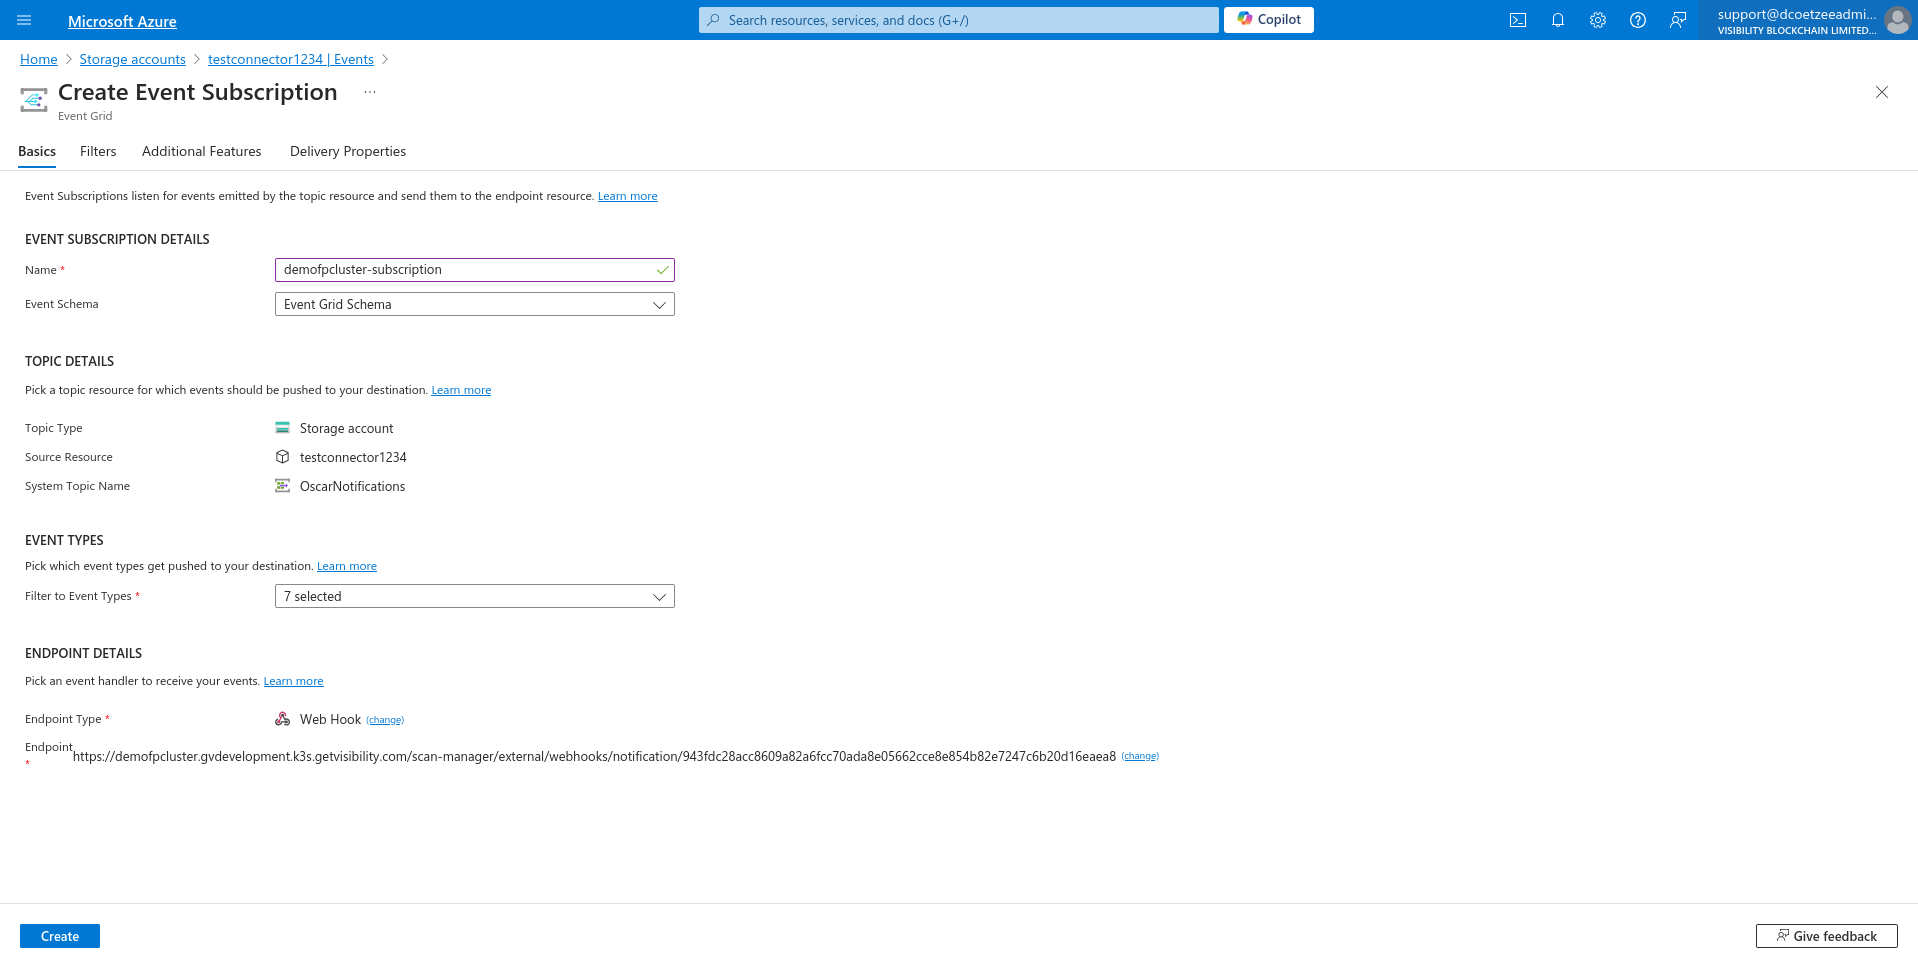
- Give it a Name.
- Select endpoint type Web Hook.
- Set configures an
endpoint.
<figure><img src="../../.gitbook/assets/cab519c5-725f-4f62-a8d4-3bce7eb60737 (1).png" alt=""><figcaption></figcaption></figure> - Use the Webhook URL provided in the step 2 to Subscriber endpoint and Confirm the selection.
- Go to Filters Menu on top.
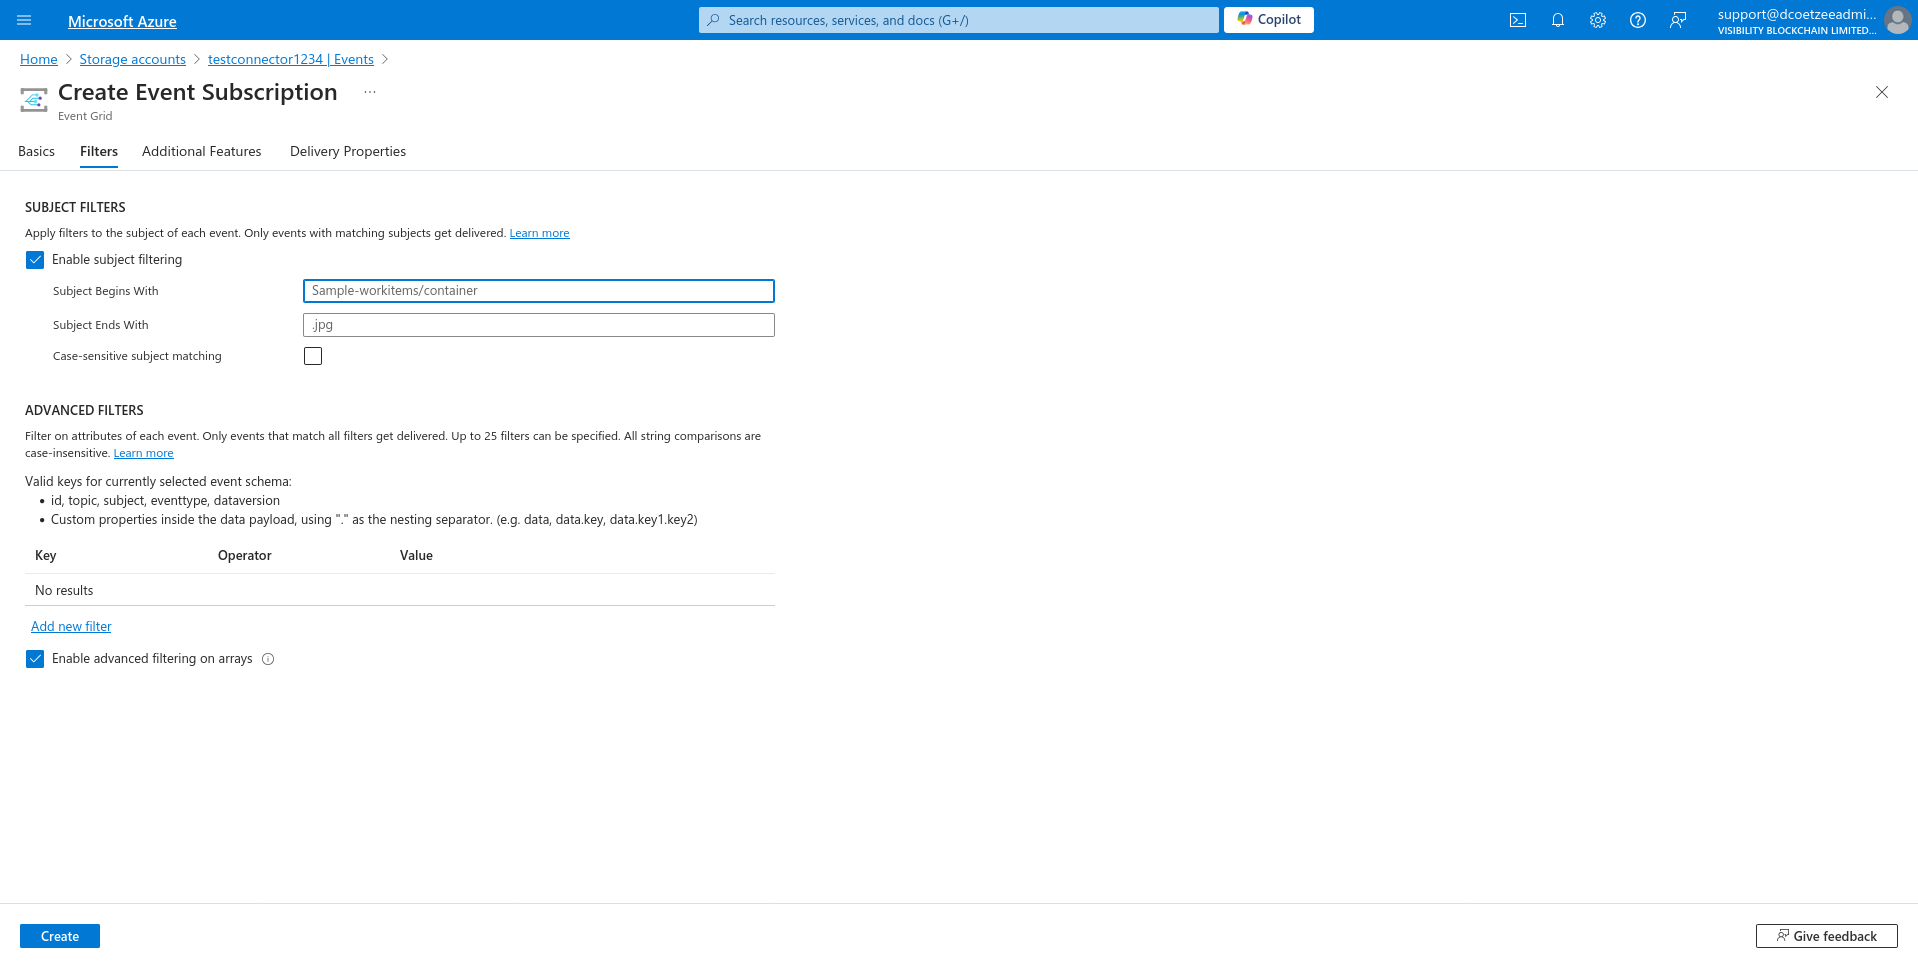
- In the Subject Filters section, enter the correct path format for your subscription:
- Use the following pattern:
/blobServices/default/containers/{connectionDetails.ContainerName}/blobs/{connectionDetails.FolderPath} - For example, if the container is
mycontainerand the folder path isaccuracy test/repository1, the path will look like:/blobServices/default/containers/mycontainer/blobs/accuracy test/repository1Make sure to replace
{connectionDetails.ContainerName}and{connectionDetails.FolderPath}with the actual container name and folder path from your scan configuration.
- Use the following pattern:
- Click Create to complete the Event Subscription setup.
- Navigate to Azure Portal and open your Storage Account.
- Assign Required Azure PermissionsEnsure the following permissions are assigned to the Azure Storage Account:
EventGrid Data ContributorEventGrid EventSubscription ContributorEventGrid TopicSpaces Publisher
For details on assigning these roles, refer to Azure Blob section.
- Create Azure Event Hub
- Navigate to Azure Portal Event hubs and click
Create.

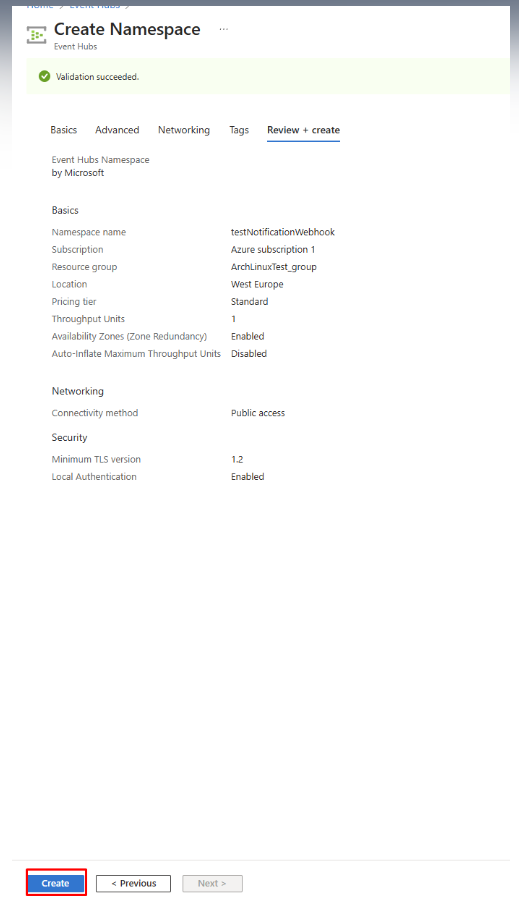
- In Create Namespace Window fill in the details:
- Give it a Name
- Select your subscription and resource group
- Select location
- Pricing tier - standard
- Throughput Units - 1

- Click on Review + Create and then Create after validation.
- After namespace is created, click on + Event Hub button.
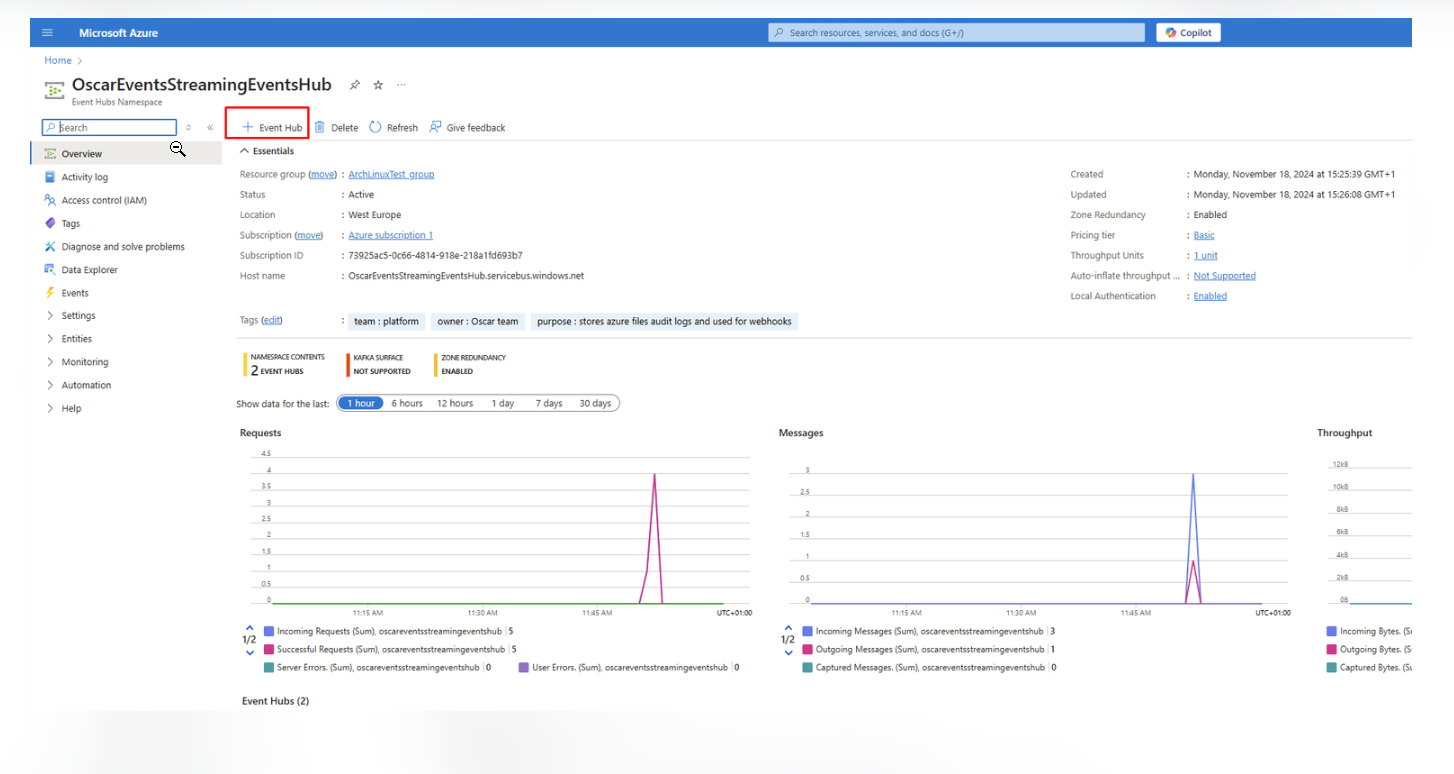
- In Create Event Hub Window fill in name and click Create + Review and Create after validation. Save the name of the Event Hub you
created in this step, as it will be used later in step 9 to replace
{eventHubName}.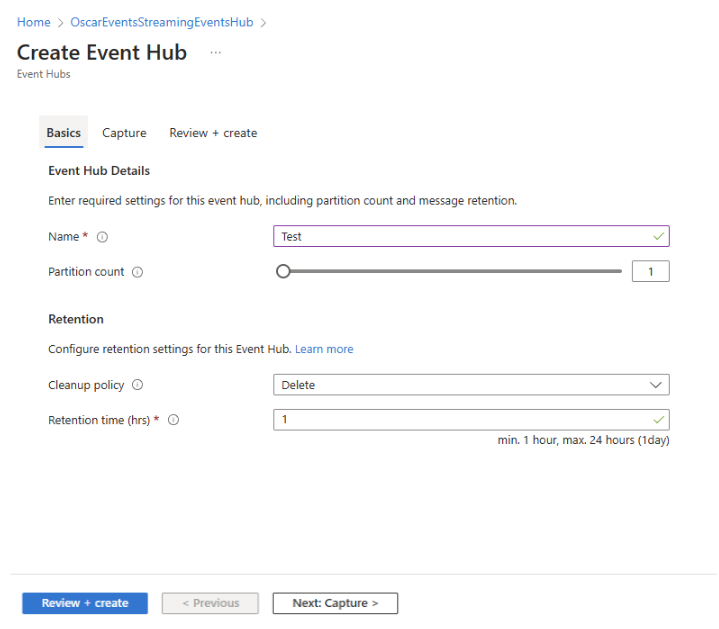
- Configure access policy:
- In the event hubs namespace window click on Settings/Shared access policies and then +Add button.
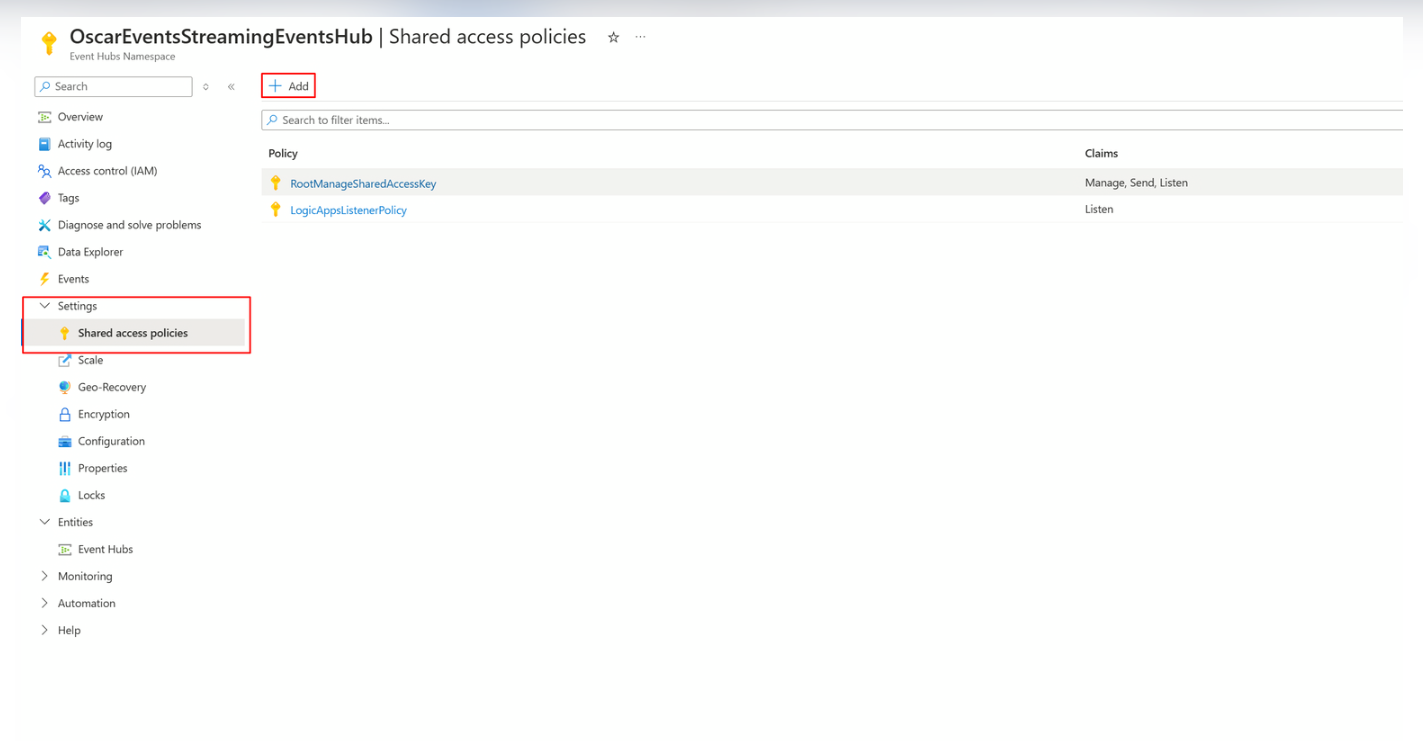
- Fill in the details in the new tab, set
LogicAppsListenerPolicyas name, select Listen policy, and click Save. - Click on the newly created policy, then copy and save the Connection string–primary key. This will be needed later in step 8b.
- In the event hubs namespace window click on Settings/Shared access policies and then +Add button.
- Navigate to Azure Portal Event hubs and click
Create.
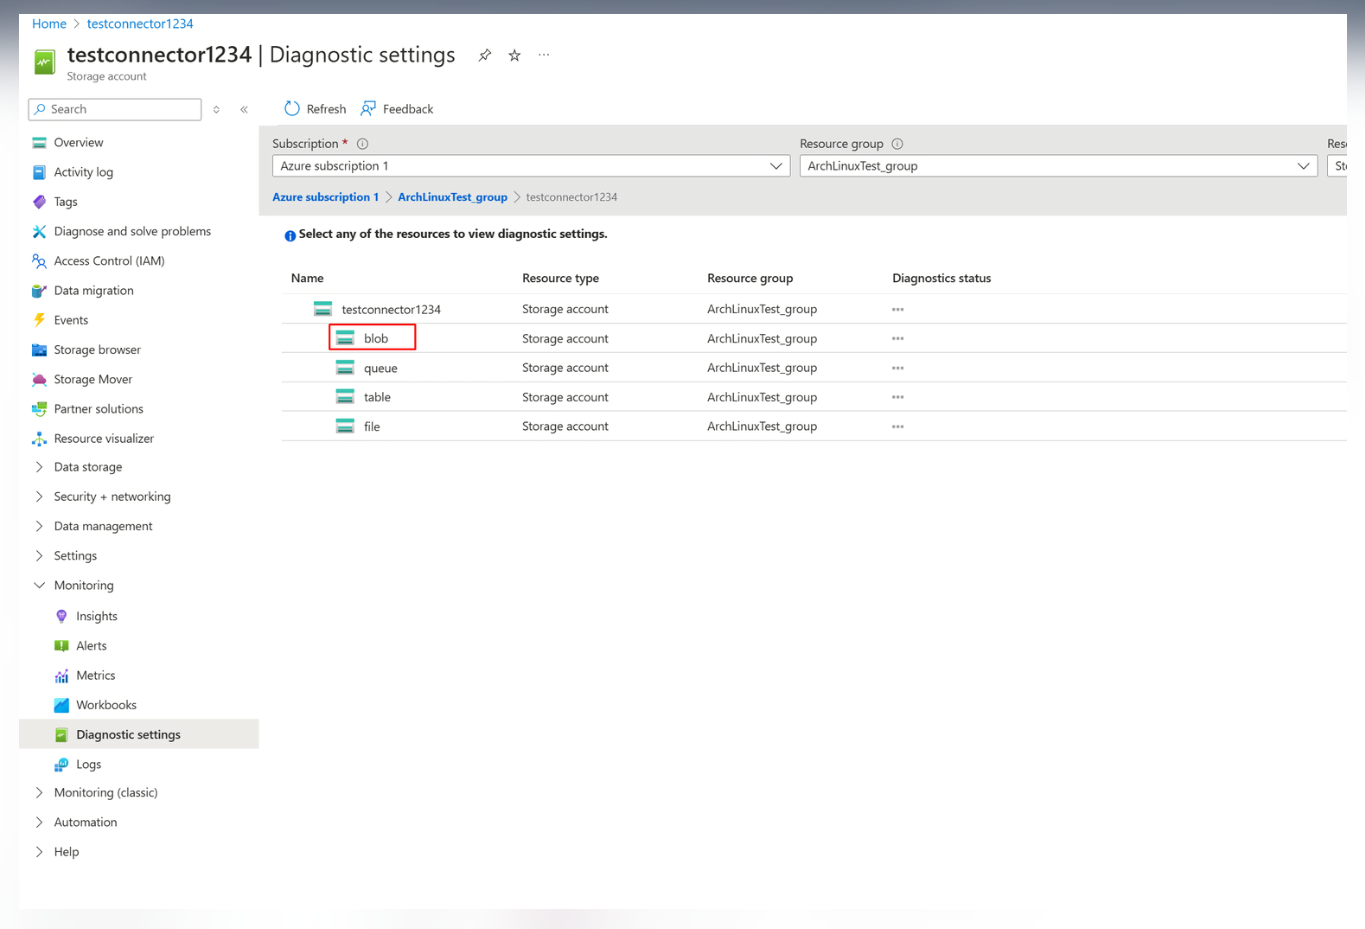
- Configure Azure Storage Diagnostic settings:
- Navigate to Azure Portal and open your Storage Account.
- Select needed account from the Storage Accounts.
- In the left-hand menu, select Monitoring/Diagnostic settings and click blob.
- In Diagnostic settings Window click on + Add diagnostic setting button.
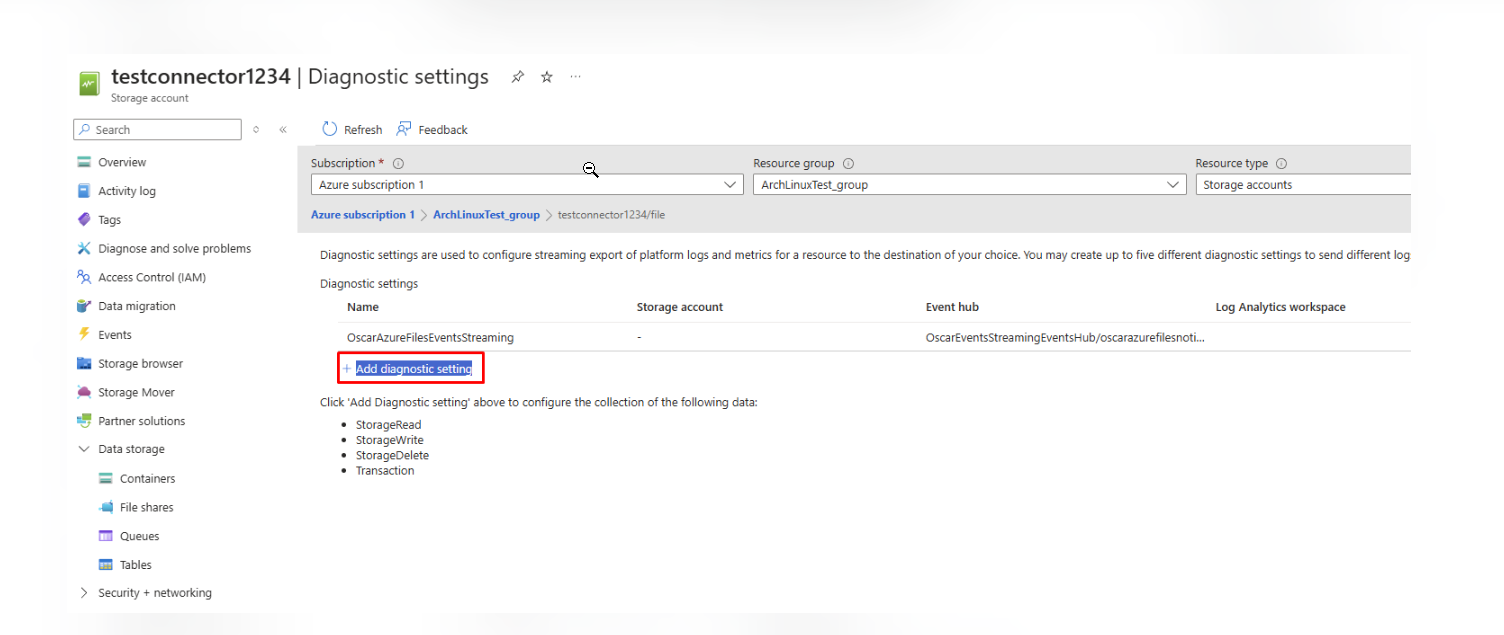
- Navigate to Azure Portal and open your Storage Account.
- In Create Diagnostic setting Window fill in the details:
- Give it a Name
- Select Category groups allLogs
- Select Destination details Stream to an event hub and select newly created Event Hub Namespace and Event Hub.
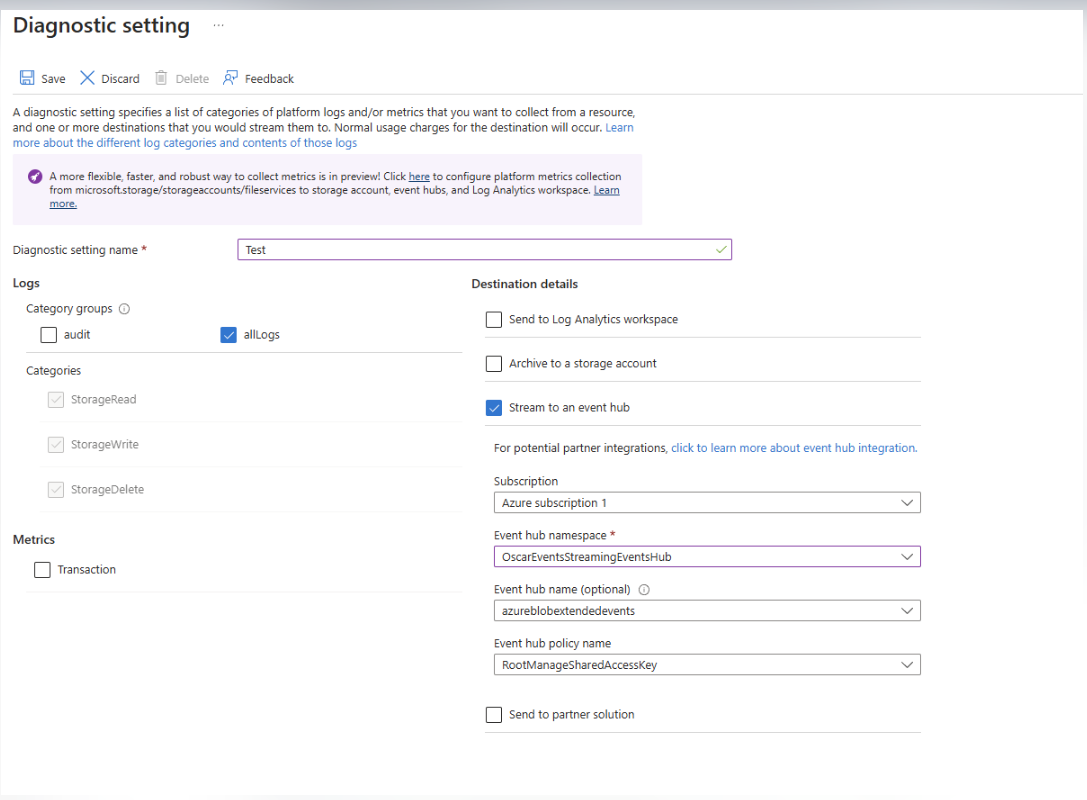
- Click Save.
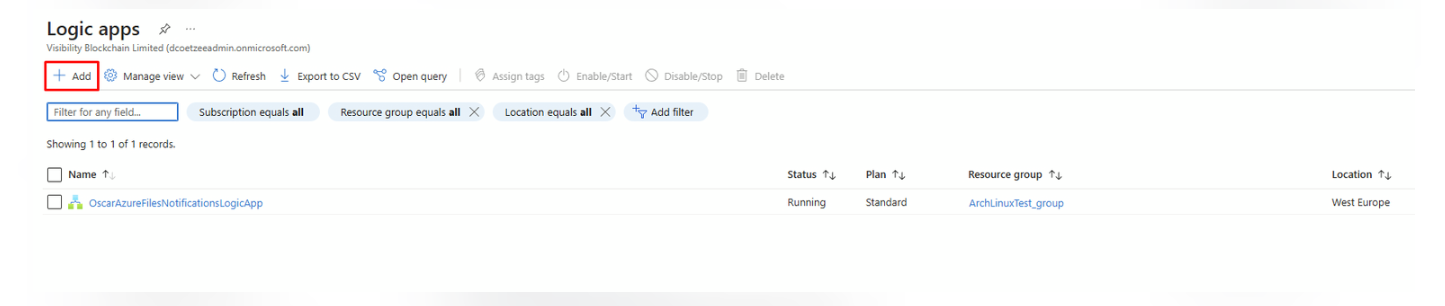
- Configure Azure Logic Apps
- Go to Azure logic apps and click Add
button.
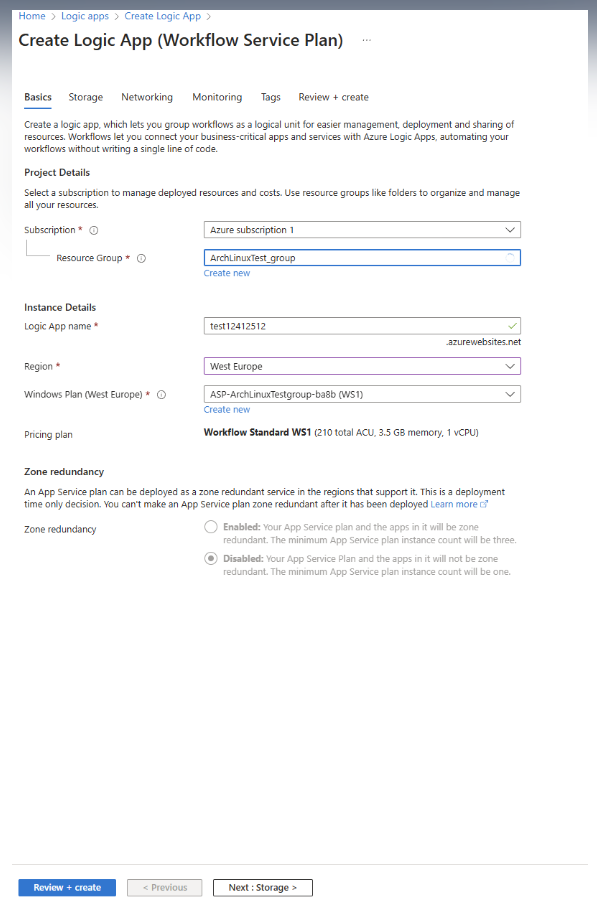
- In Create Logic App Window select Workflow Service Plan.
- In Create Logic App (Workflow Service Plan) Window fill in the details and click Review + create:
- Select your subscription and resource group
- Give logic app name
- Select region
- Pricing plan should be WS1
- In the monitoring tab select No for the application insights
- Click Review + create button.
- Click Create after validation.
- In newly created logic app click on Workflows/Workflows and then +Add button.
- In new workflow tab fill in name, select State type: Stateful and click Create.
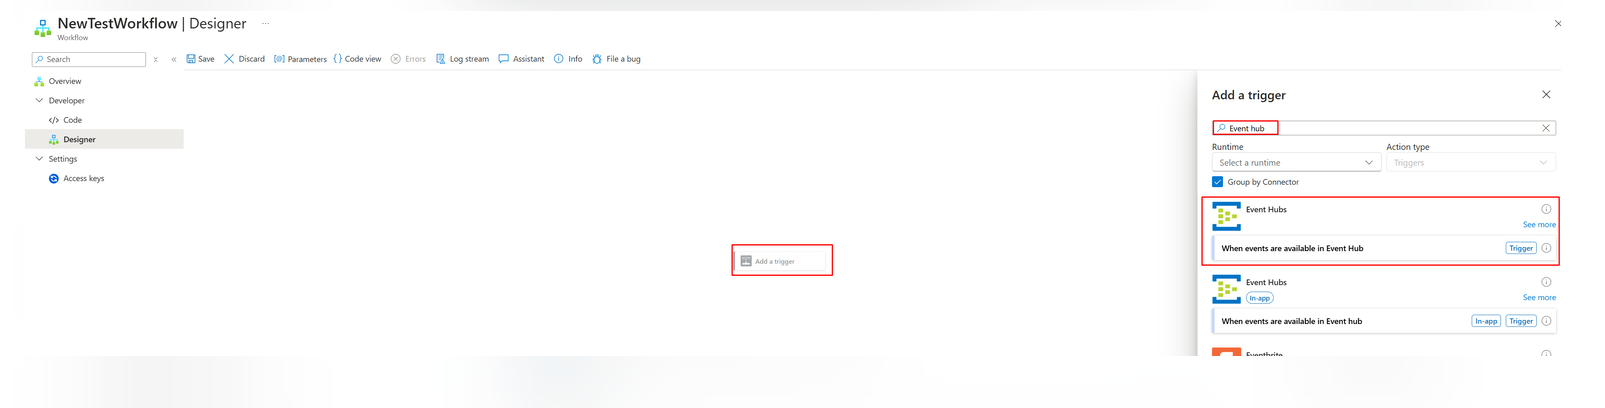
- In created workflow go to Developer/Designer and click on Add a trigger, then in search type Event hub and
select When events are available in Event Hub.
- Configure API connection
- Click on the trigger, set Temp for Event Hub Name and then click on Change connection.

- Then click Add New and fill in the details. Enter any name for the connection name and use the connection string
{Connection
                                    string–primary key}
from step 3.6.c. - On the Change Connection tab, click Details and copy the Name from the connection details. Save
this Name, as it will be used later in step 9 to replace
{connectionName}.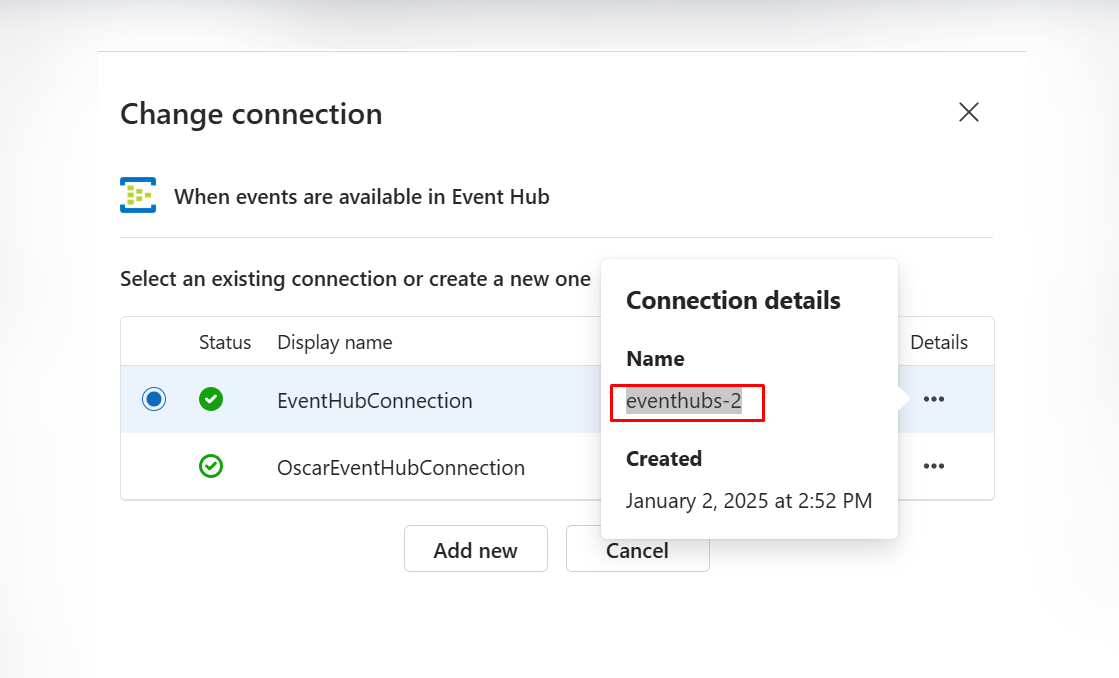
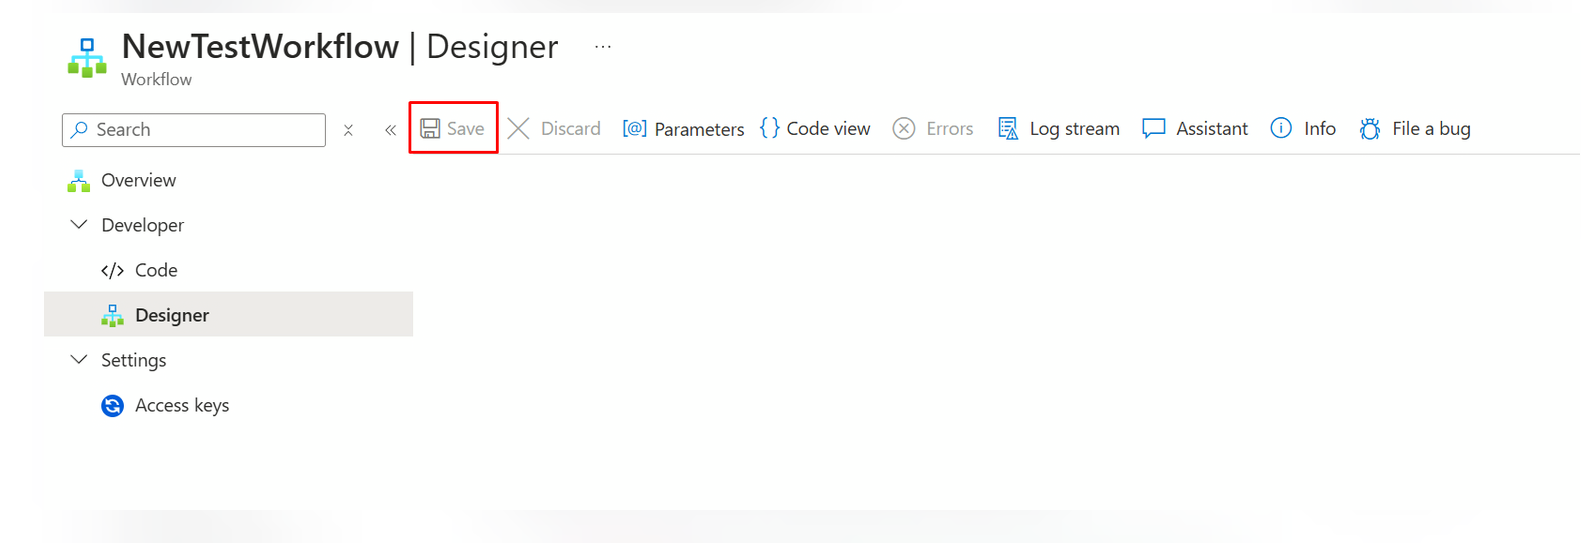
- Click Save on workflow designer window
- Click on the trigger, set Temp for Event Hub Name and then click on Change connection.
- In work flow navigation tab go to Developer/Code and set the provided code, then click Save:
- Replace
{FolderPath}with a path to the streaming folder. For ex., you want to get events from the folder "StreamingFolder" which is located in file share with the name "DocumentsShare" and in the folder with the name "Personal". In this case, the path should be "DocumentsShare/Personal/StreamingFolder". - Replace
{WebhookUrl}with webhook url provided in the application in the scan configuration window. - Replace
{eventHubName}with azure event hub name that was created previously. - Replace
{connectionName}with connection name from previous step.{ "definition": { "$schema": "https://schema.management.azure.com/providers/Microsoft.Logic/schemas/2016-06-01/workflowdefinition.json#", "actions": { "Filter_Records": { "type": "Query", "inputs": { "from": "@triggerBody()?['ContentData']?['records']", "where": "@and(not(empty(item()?['uri'])),or(contains(item()?['uri'], '{FolderPath}/'),contains(item()?['uri'], '{FolderPath}?')))" }, "runAfter": {} }, "Condition": { "type": "If", "expression": "@greater(length(body('Filter_Records')), 0)", "actions": { "HTTP-copy": { "type": "Http", "inputs": { "uri": "{WebhookUrl}", "method": "POST", "headers": { "Content-Type": "application/json" }, "body": { "event": "@setProperty(triggerBody(),'ContentData',setProperty(triggerBody()?['ContentData'],'records',body('Filter_Records')))" } }, "runAfter": {} } }, "else": {}, "runAfter": { "Filter_Records": [ "Succeeded" ] } } }, "contentVersion": "1.0.0.0", "outputs": {}, "triggers": { "When_events_are_available_in_Event_Hub": { "type": "ApiConnection", "inputs": { "host": { "connection": { "referenceName": "{connectionName}" } }, "method": "get", "path": "/@{encodeURIComponent('{eventHubName}')}/events/batch/head", "queries": { "contentType": "application/json", "consumerGroupName": "$Default", "maximumEventsCount": 50 } }, "recurrence": { "interval": 30, "frequency": "Second" }, "splitOn": "@triggerBody()" } } }, "kind": "Stateful" }
- Replace
- Go to Azure logic apps and click Add
button.
Troubleshooting
If you experience any issues with the configuration, ensure that:
- The Webhook URL is correct and matches the configuration in Azure.
- The required Azure permissions are correctly assigned.
- Steps 5.8 and 5.9 properly executed and all the variables are replaced with real values.
- You can also check if the trigger was unsuccessful by navigating to your configured in previous steps Logic App, then work flow and Trigger History. If you see any failed triggers, you can inspect the error details to identify the issue.
Next Steps
After configuring the event subscription:
- Documents may be uploaded to the configured path.
- The events triggered by these uploads will be processed by the Data Streaming setup, and the results will appear in the dashboard.