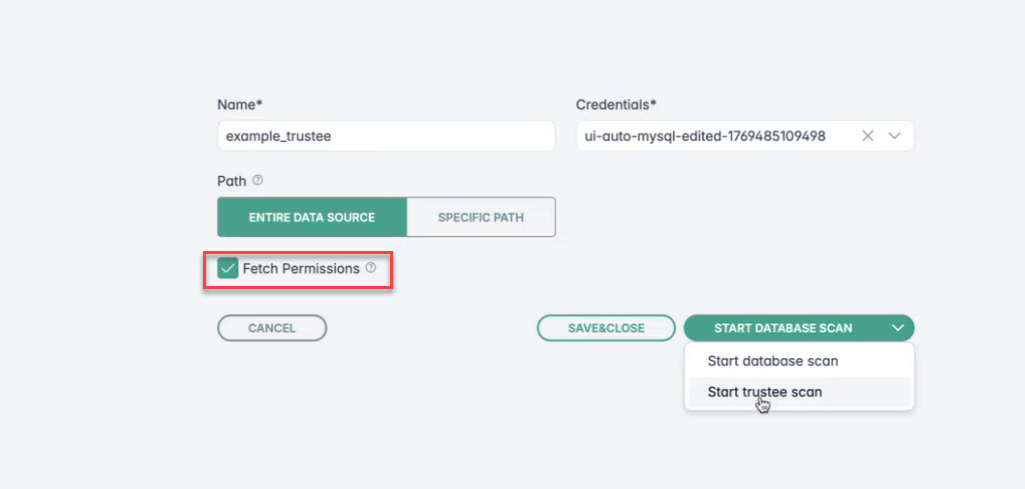
Creating and Starting Microsoft SQL Server (MS SQL) Scan Configuration
- If the connection succeeds, the New Scan Configuration page appears. Enter a Name and select the specific credential from drop
down.

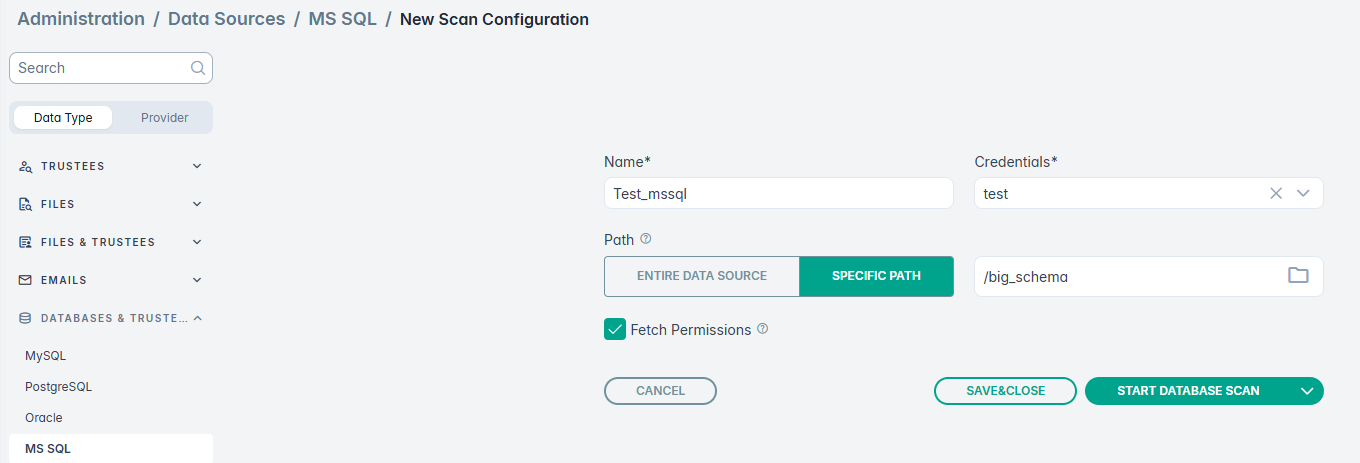
- Next, you can either choose to scan the entire data source by clicking Entire Data Source or select Specific Path to scan specific
schema in the window that opens.Note: Enable Fetch Permissions to gather access permission details for schema, table and any shared settings before initiating the database scan or trustee scan.
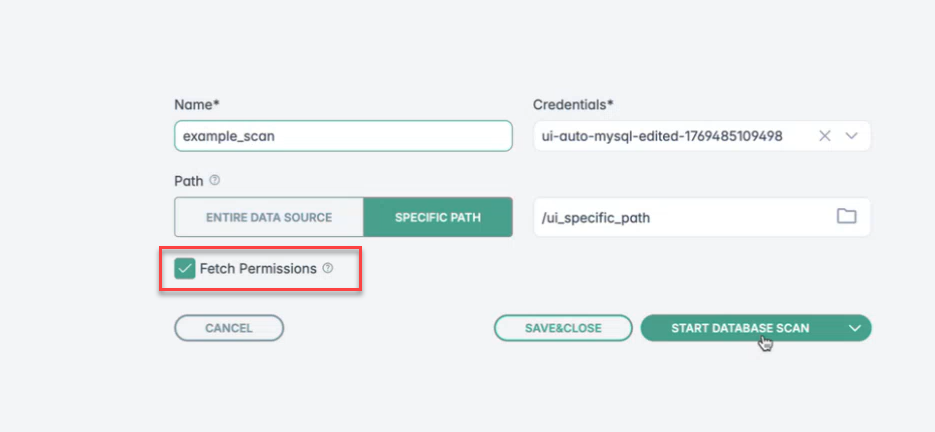
 Note: Trustee scan fetches permissions, and user groups.
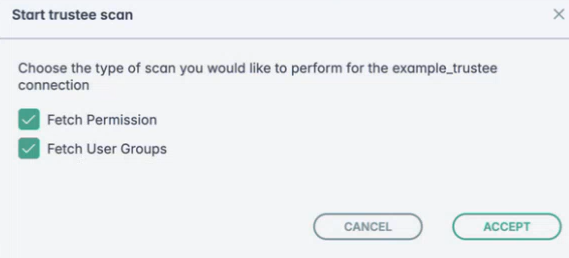
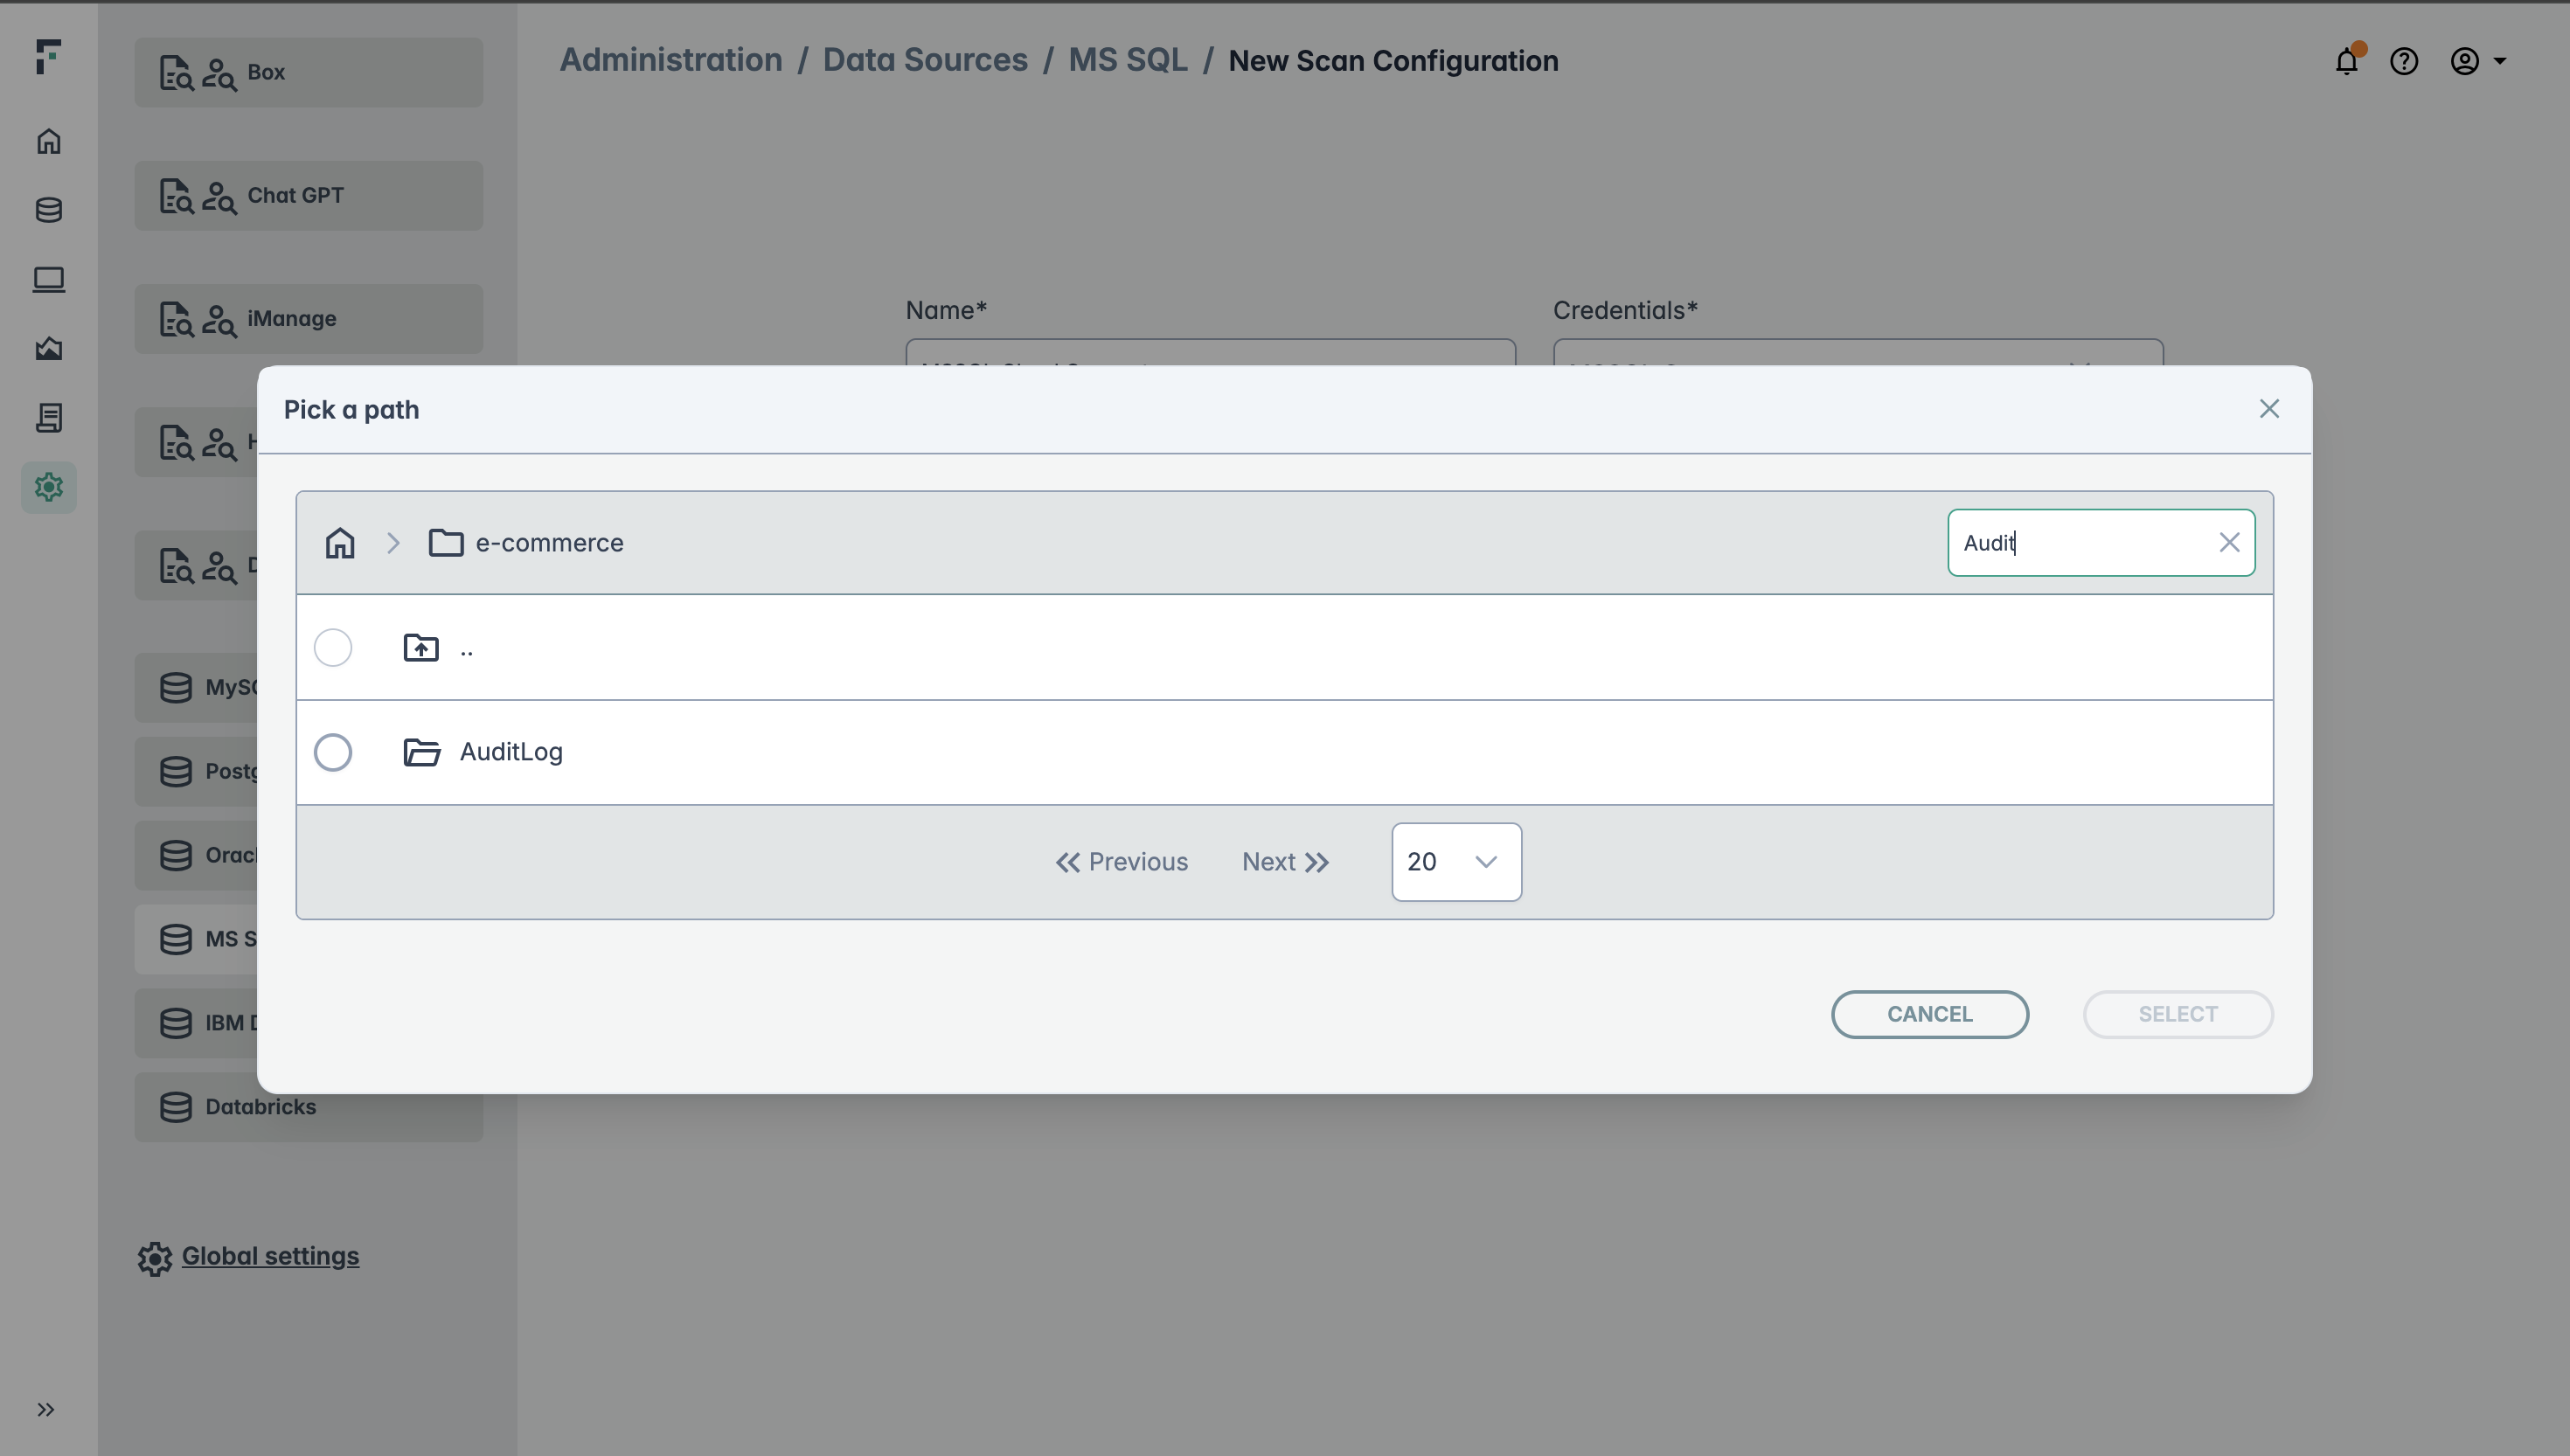
- If you selected Specific Path then you will be able to select the folder path on the window that opens. You can also use the Search
box to search for either schema or specific tables in a schema. Based on the table name searched for, the tables will be listed:
- Next, you can select the specific tables from the displayed list that you want to include in the scan and click Select.
- On the next screen, you can either select Save & Close to save the configuration for future scans, or you can click Start Database
Scan to start a scan.
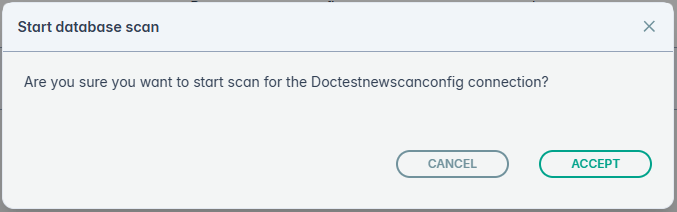
- If you selected Start Database Scan in previous step, then you will need to confirm if the scan can be started. Click Accept to start
the scan.
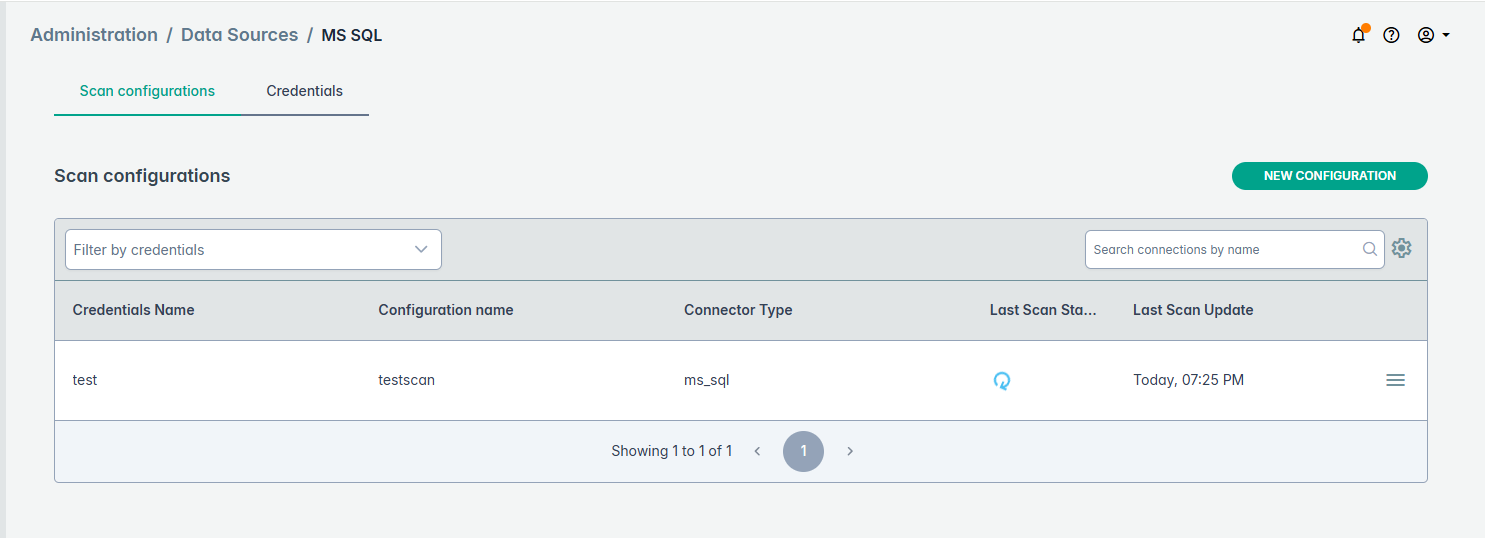
Once the scan is started it will be displayed on the list of scans running.
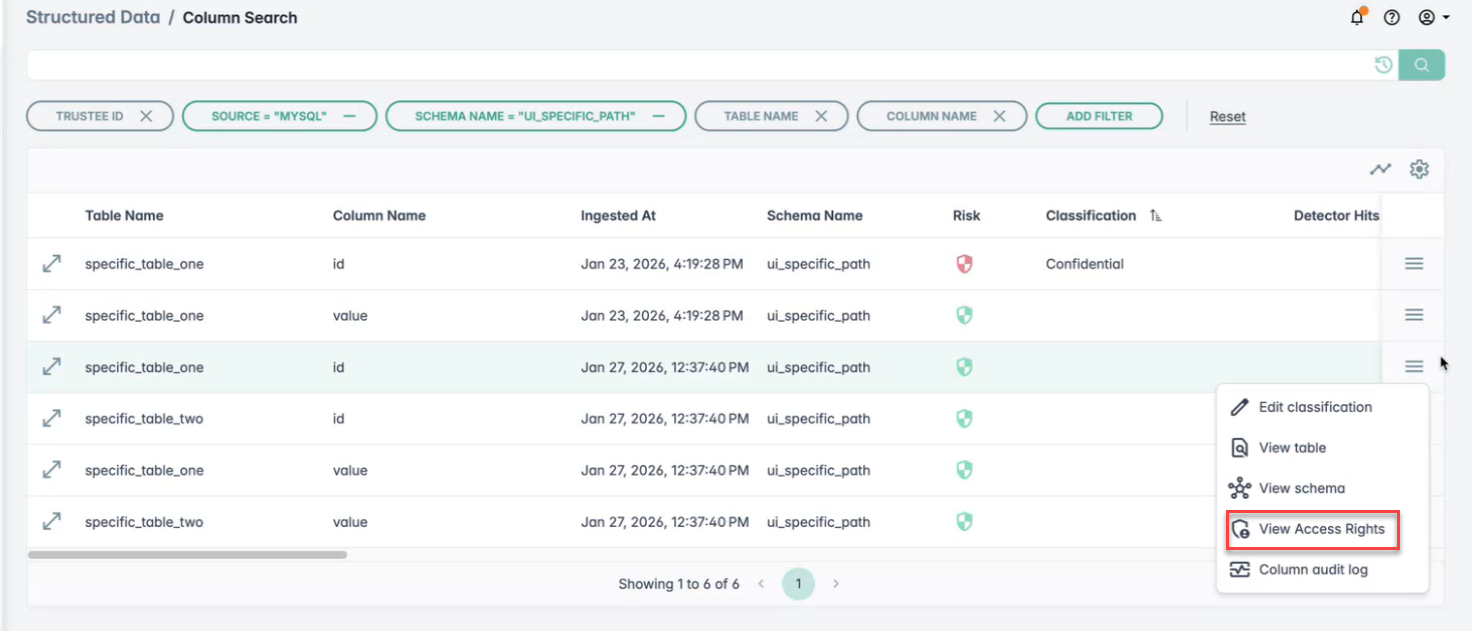
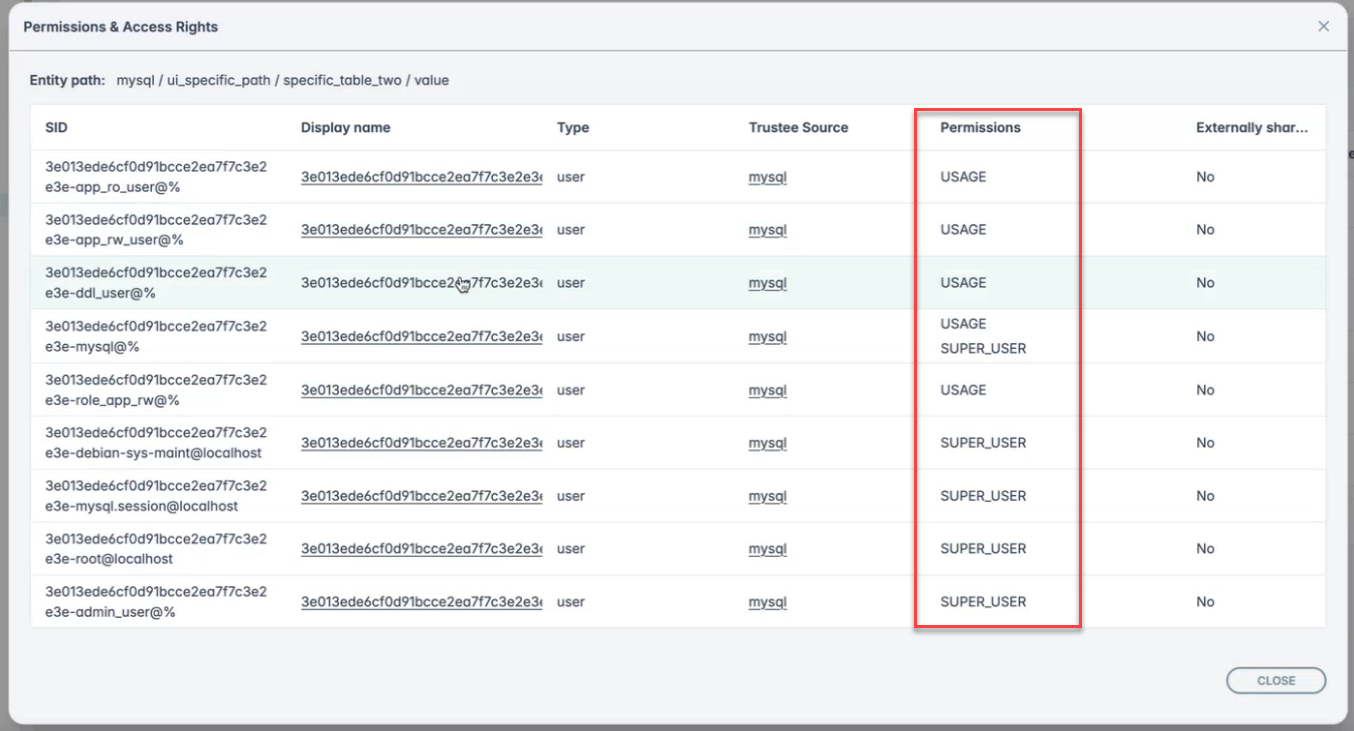
- Once the database scan is complete, navigate to and click View Access Rights to view the access rights information.
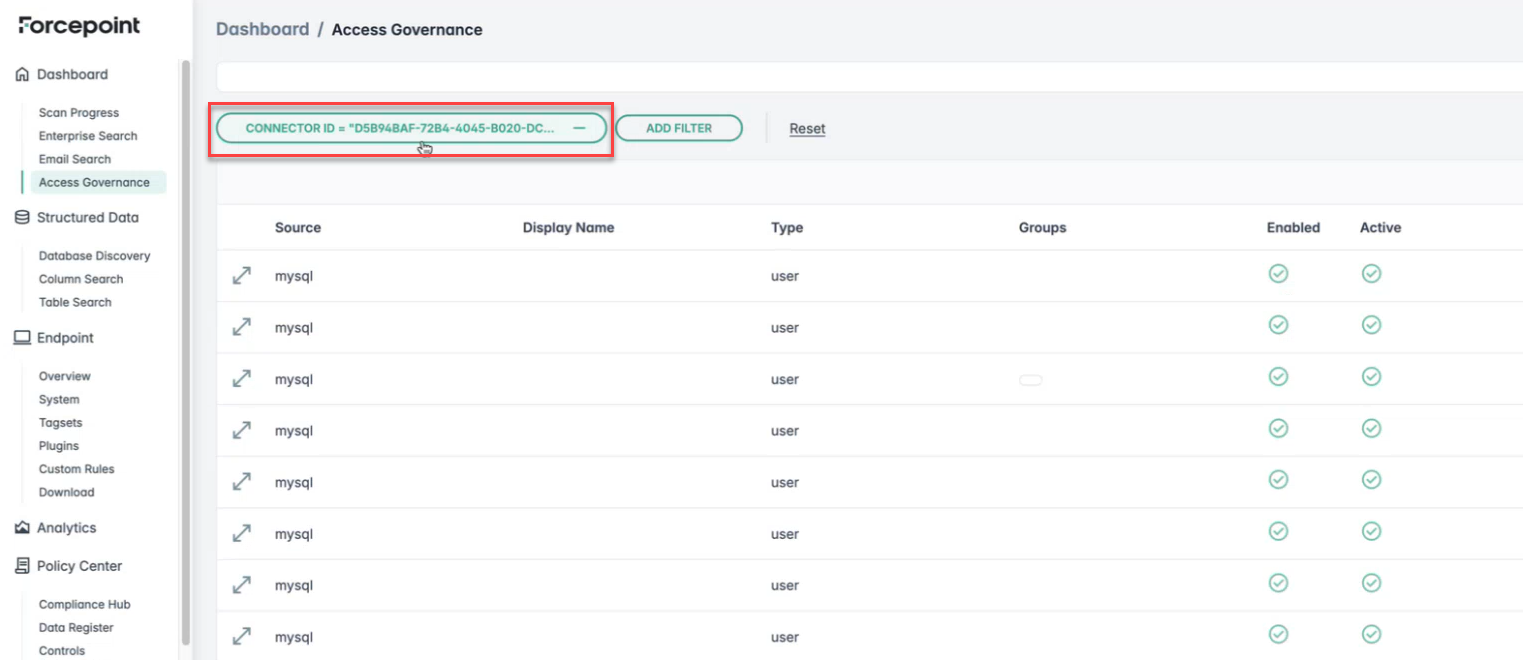
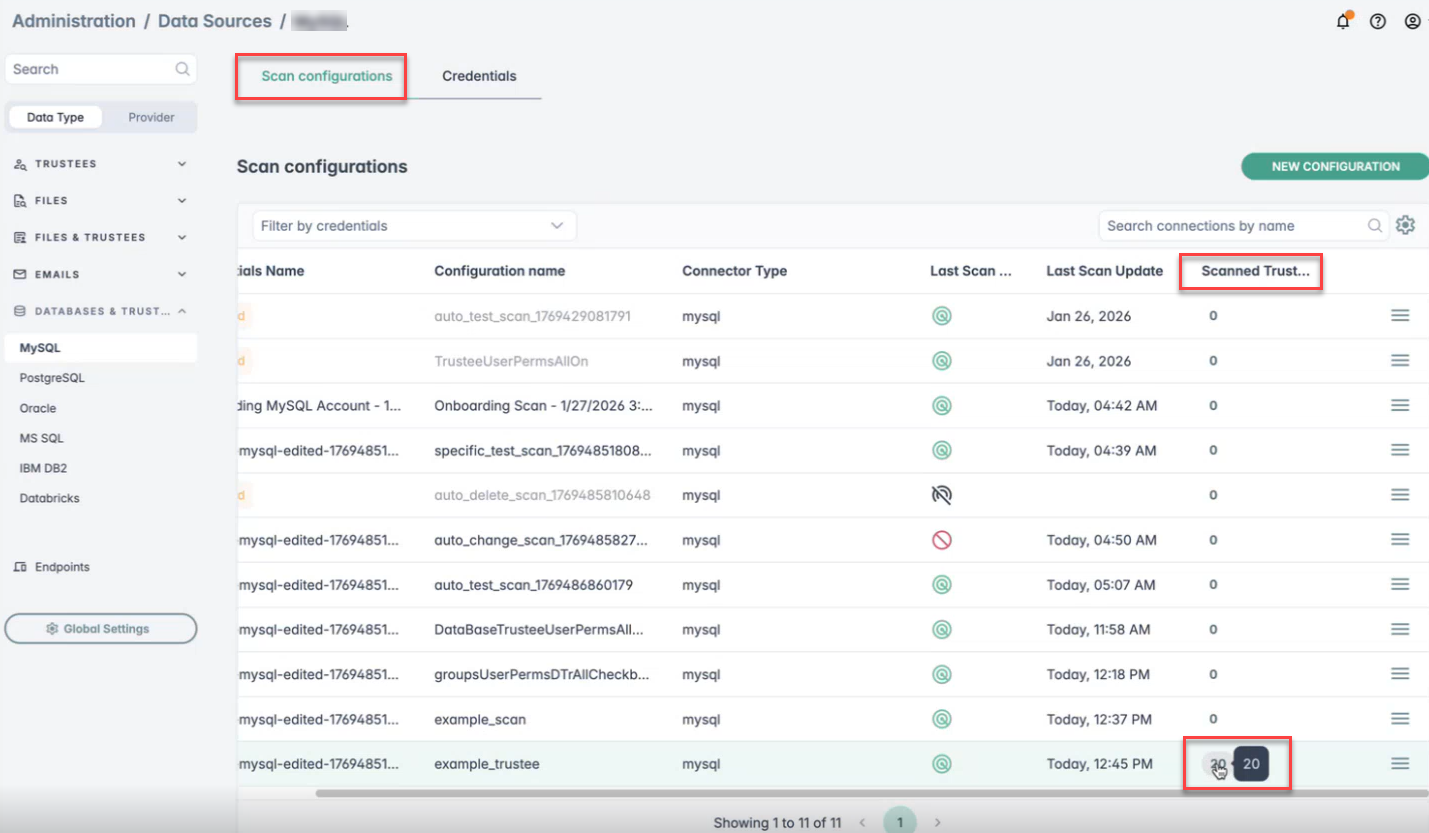
- Once the trustee scan is complete, navigate to to view the count of scanned trustees.
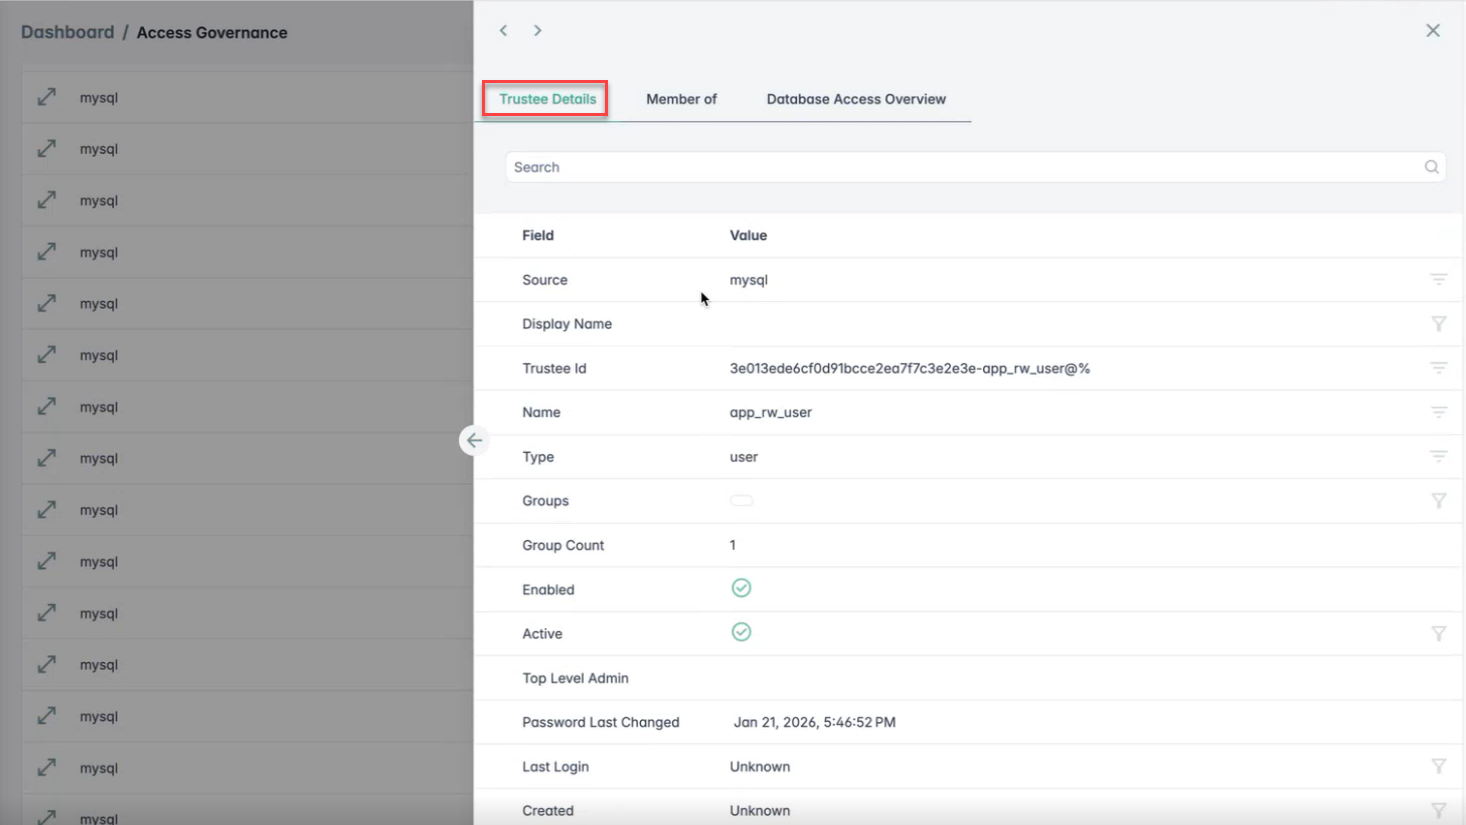
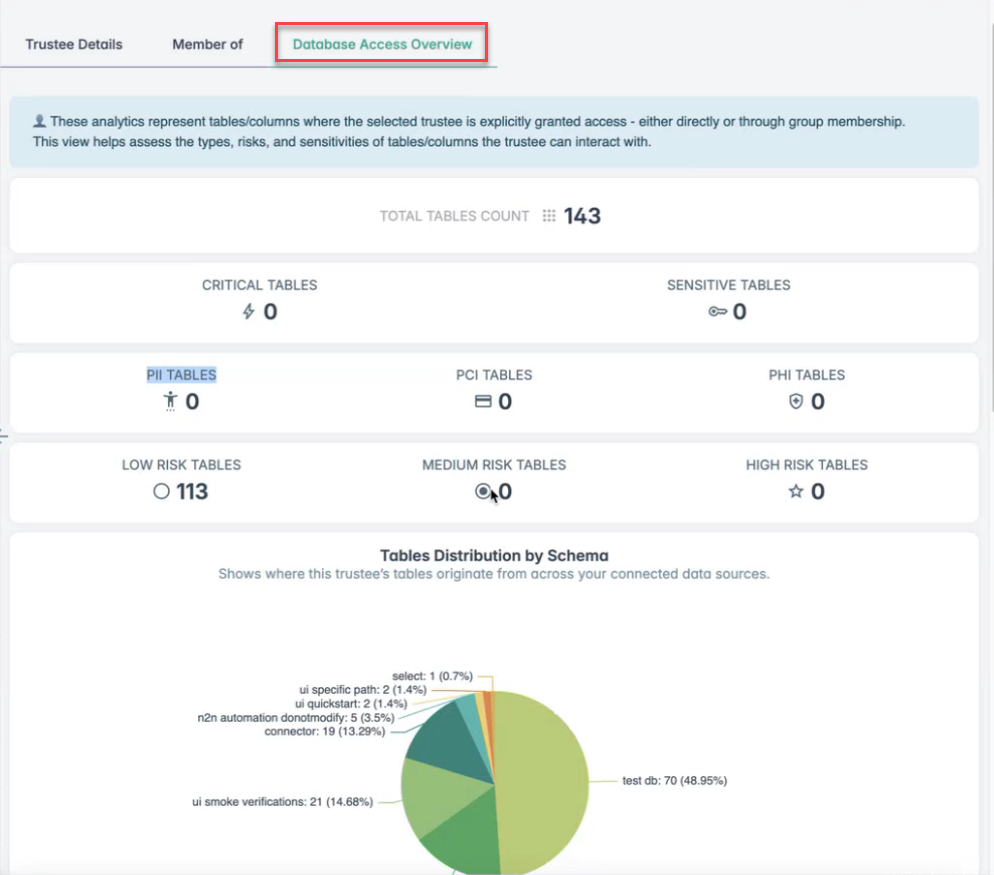
Also, navigate to to view the CONNECTOR ID, Trustee Details, Member of (Group information), and Database Access Overview information.