Registering an Azure App
Steps
-
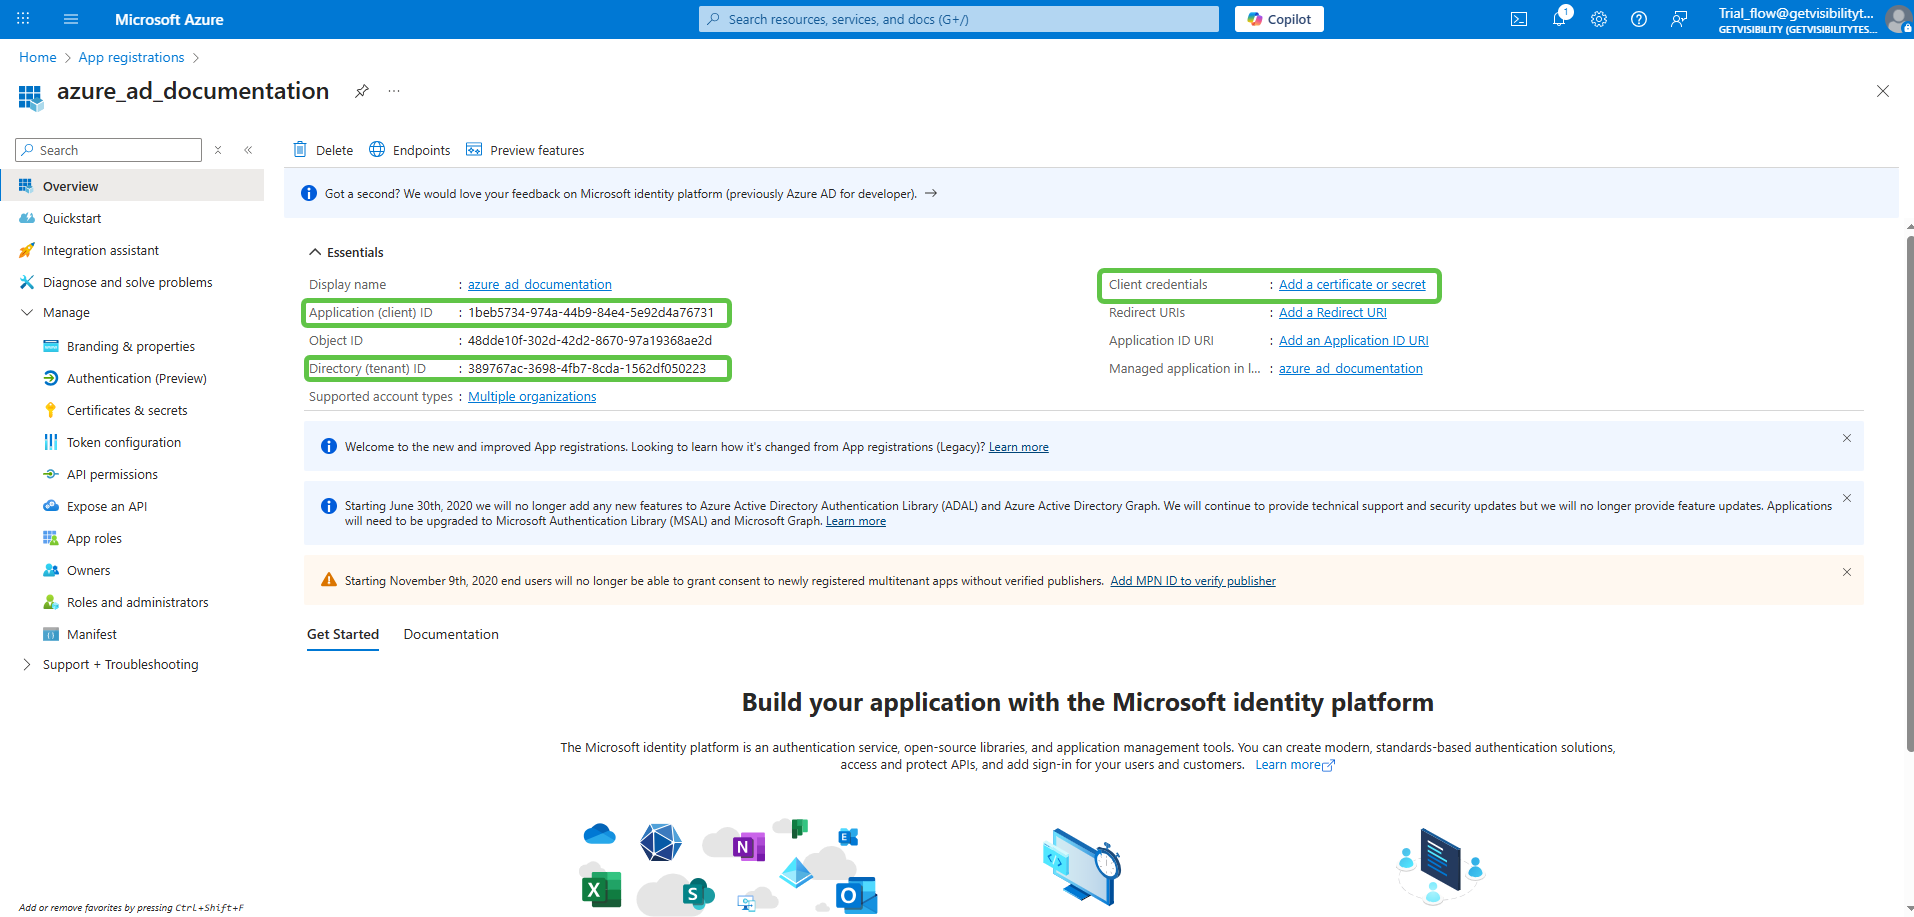
On the Home page select App registrations.
-
On the App Registration page enter the below information and click the Register button.
- Name: (Enter a meaningful application name that will be displayed to users of the app.)
- Supported account types: Select the option most suitable for your organization. Here we are selecting Accounts in any organizational directory (Any Microsoft Entra ID tenant - Multitenant).
- Redirect URI (Optional): This field need not be filled.

-
Note the Application (client) ID, Directory (tenant) ID values. Next, click Add a certificate or secret next
to the field Client credentials.
-
This opens the Certificates & secrets page under section . On this page, click New client secret.
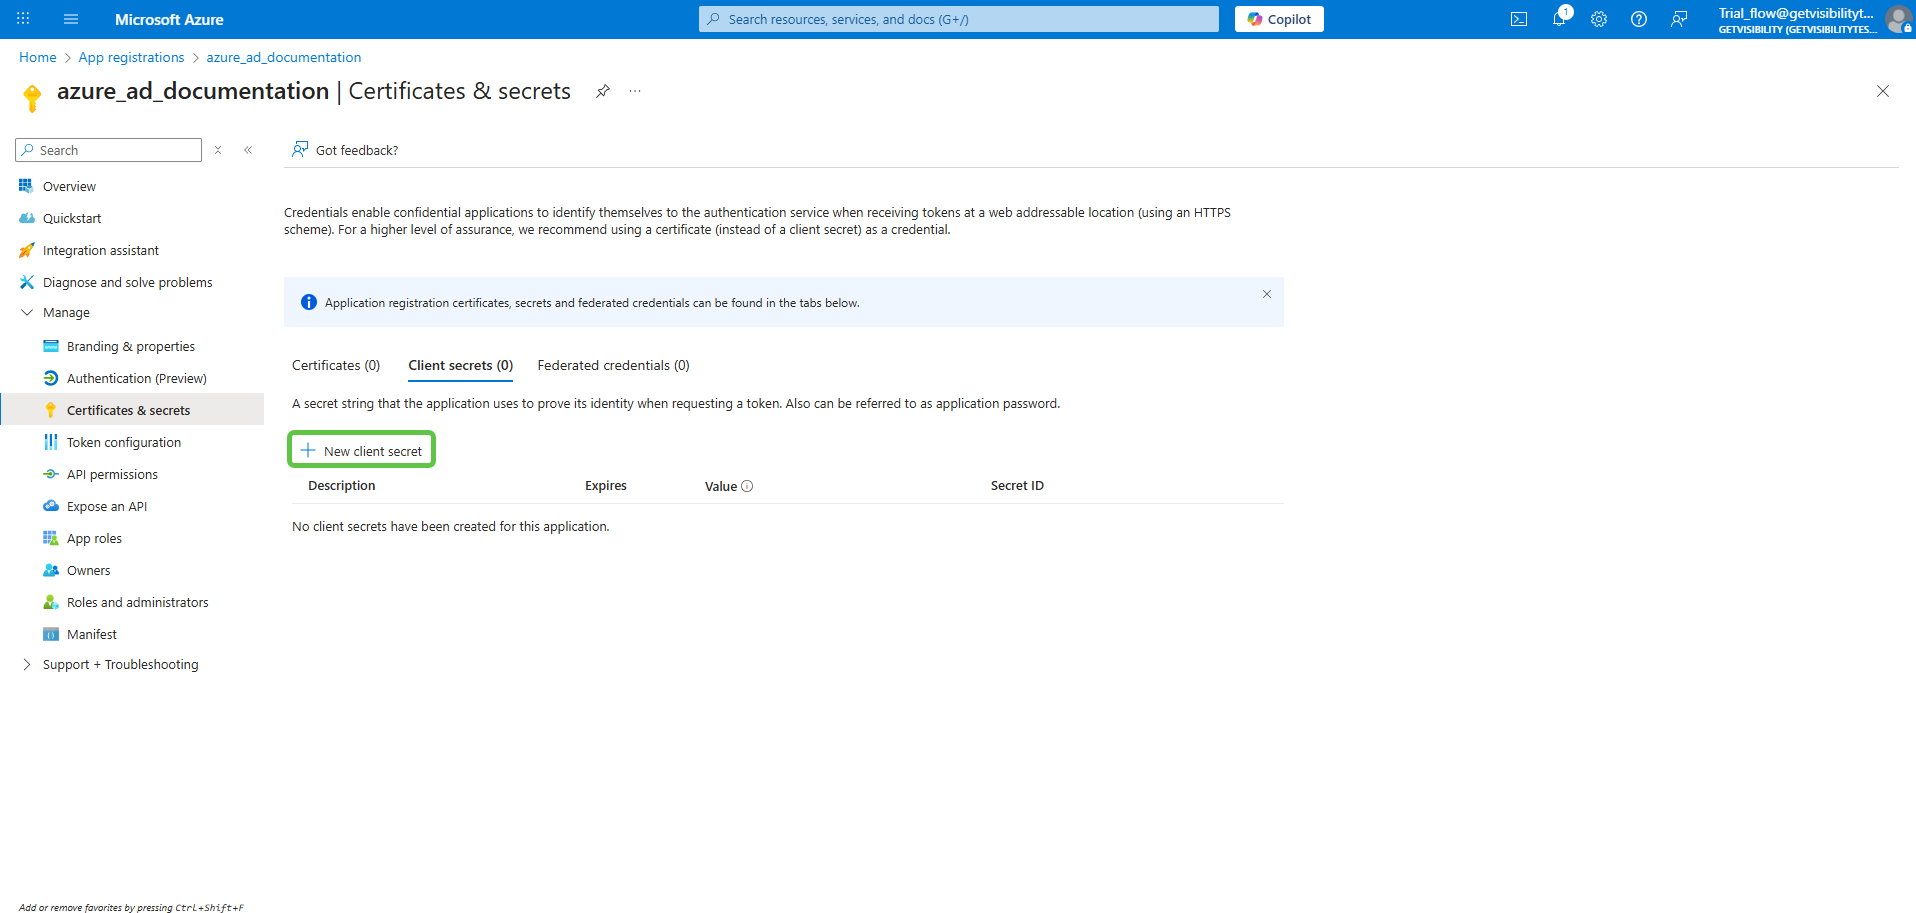
-
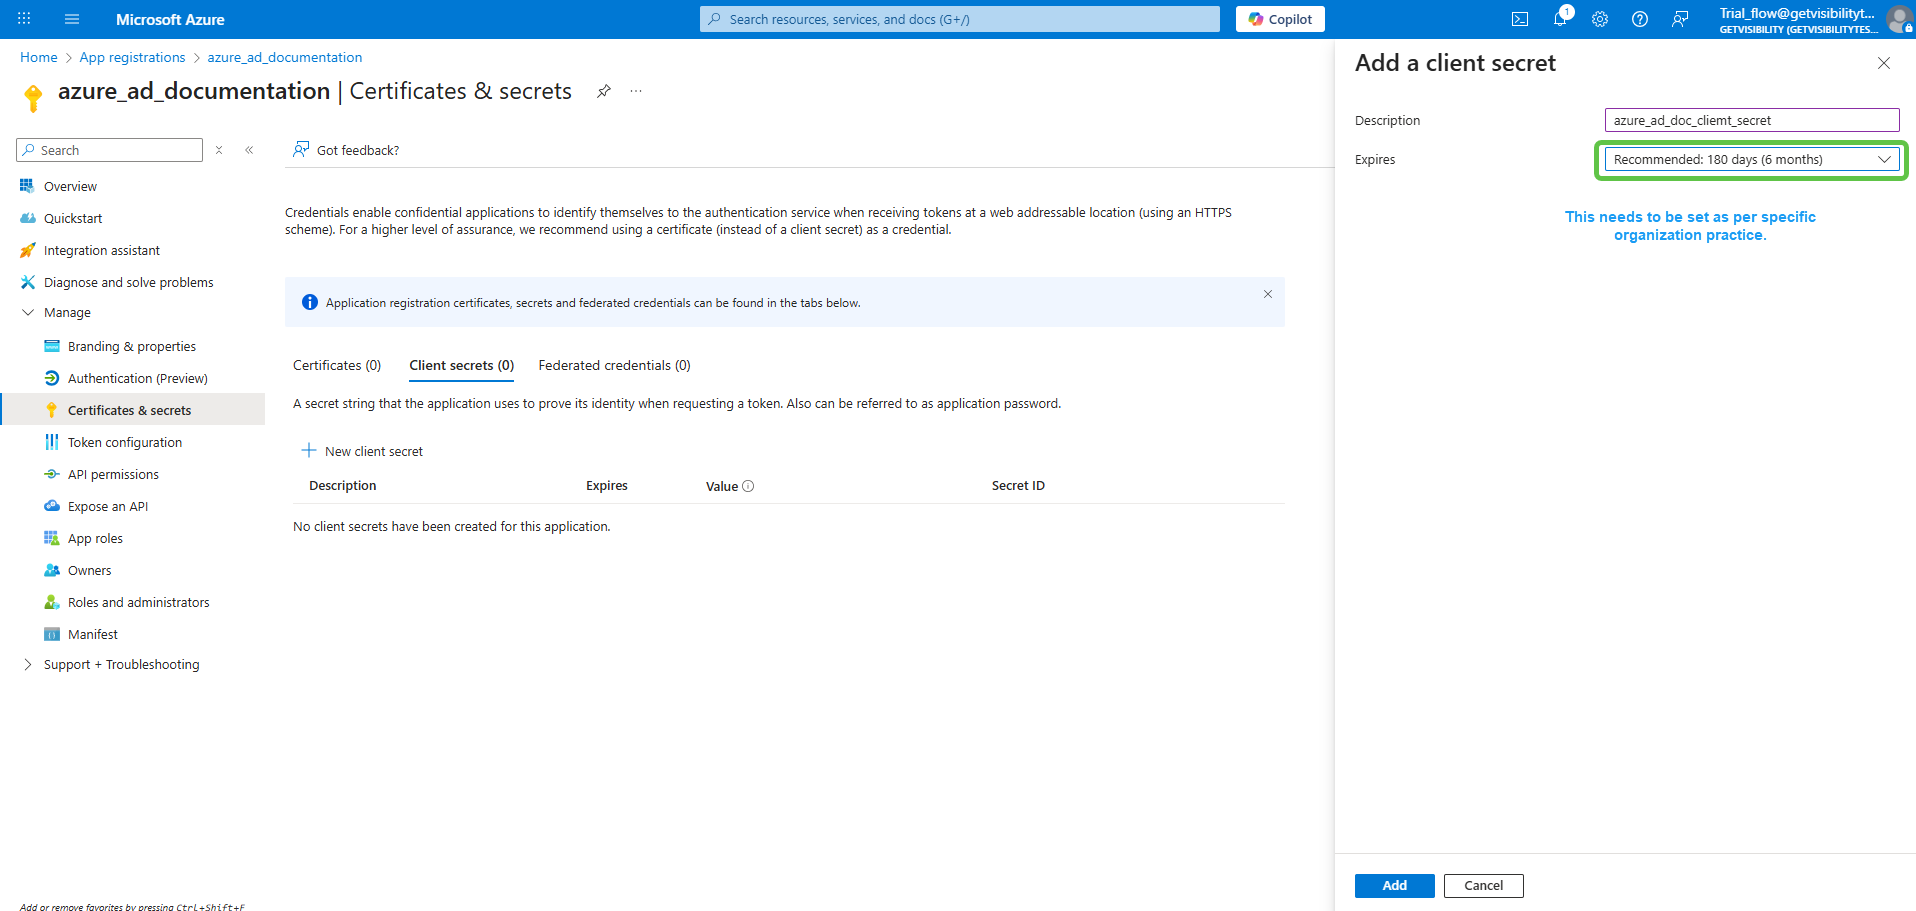
Provide a meaningful description and expiry to the secret and click on Add.
-
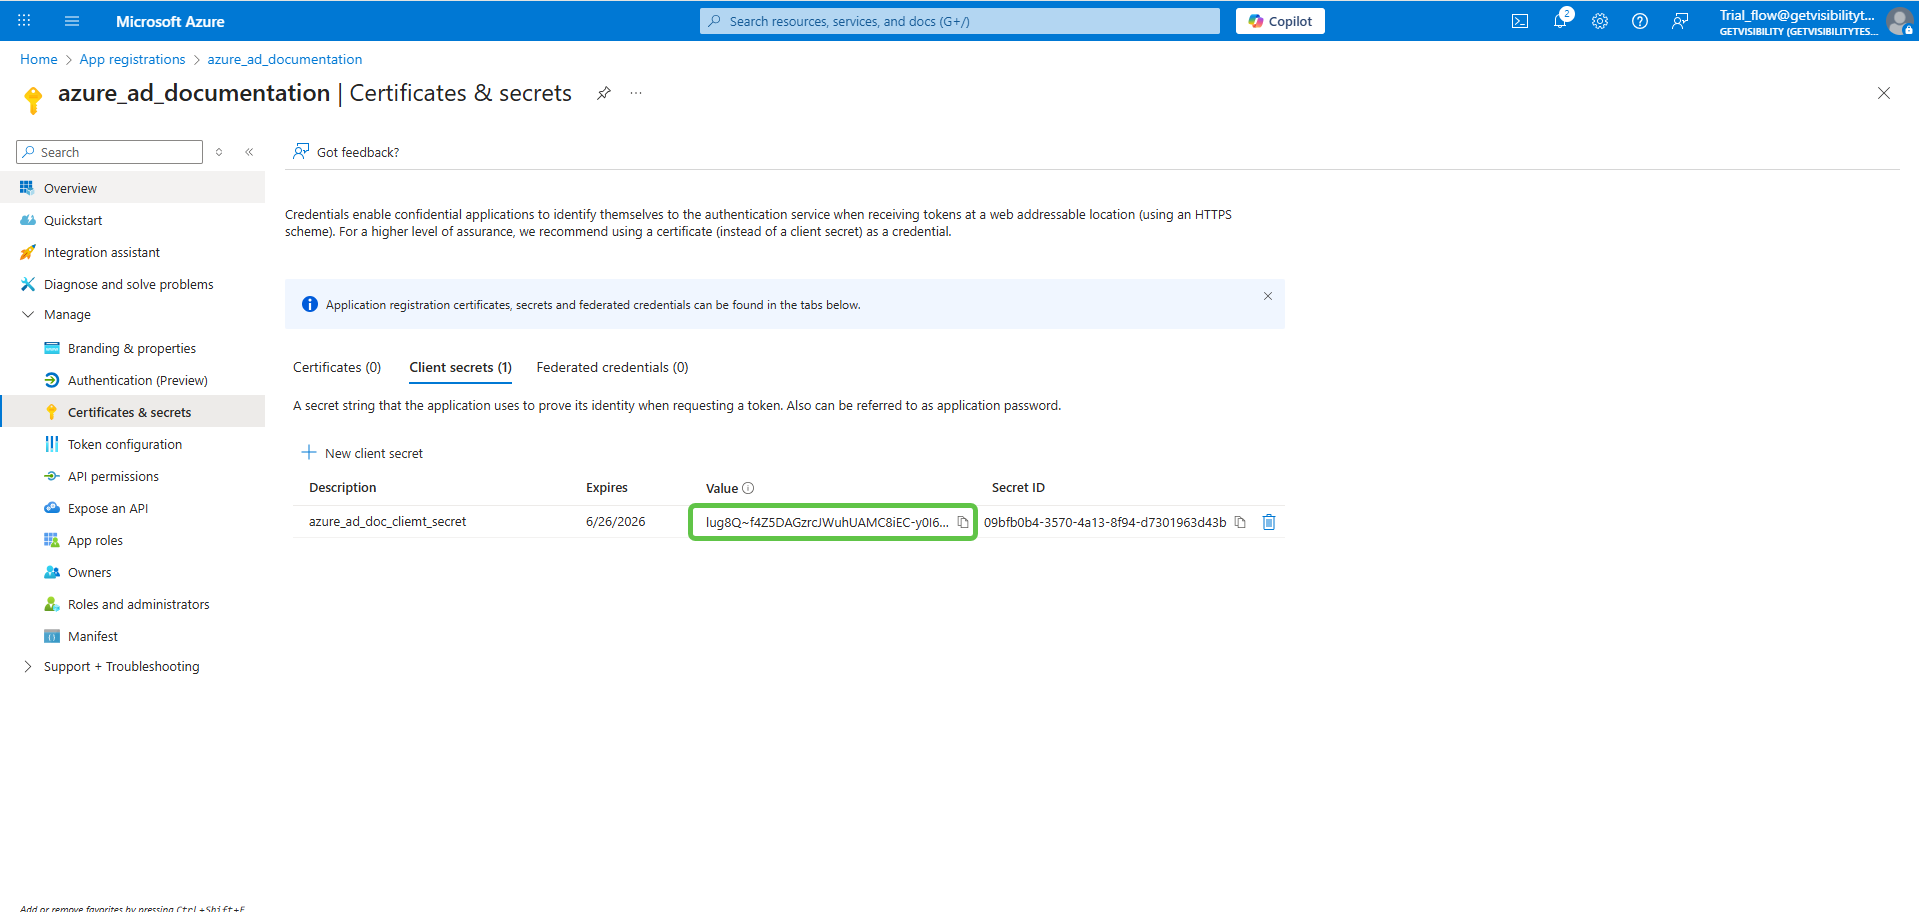
Once a client secret is created, note its Value and store it somewhere safe. This value cannot be viewed once this page is closed.
-
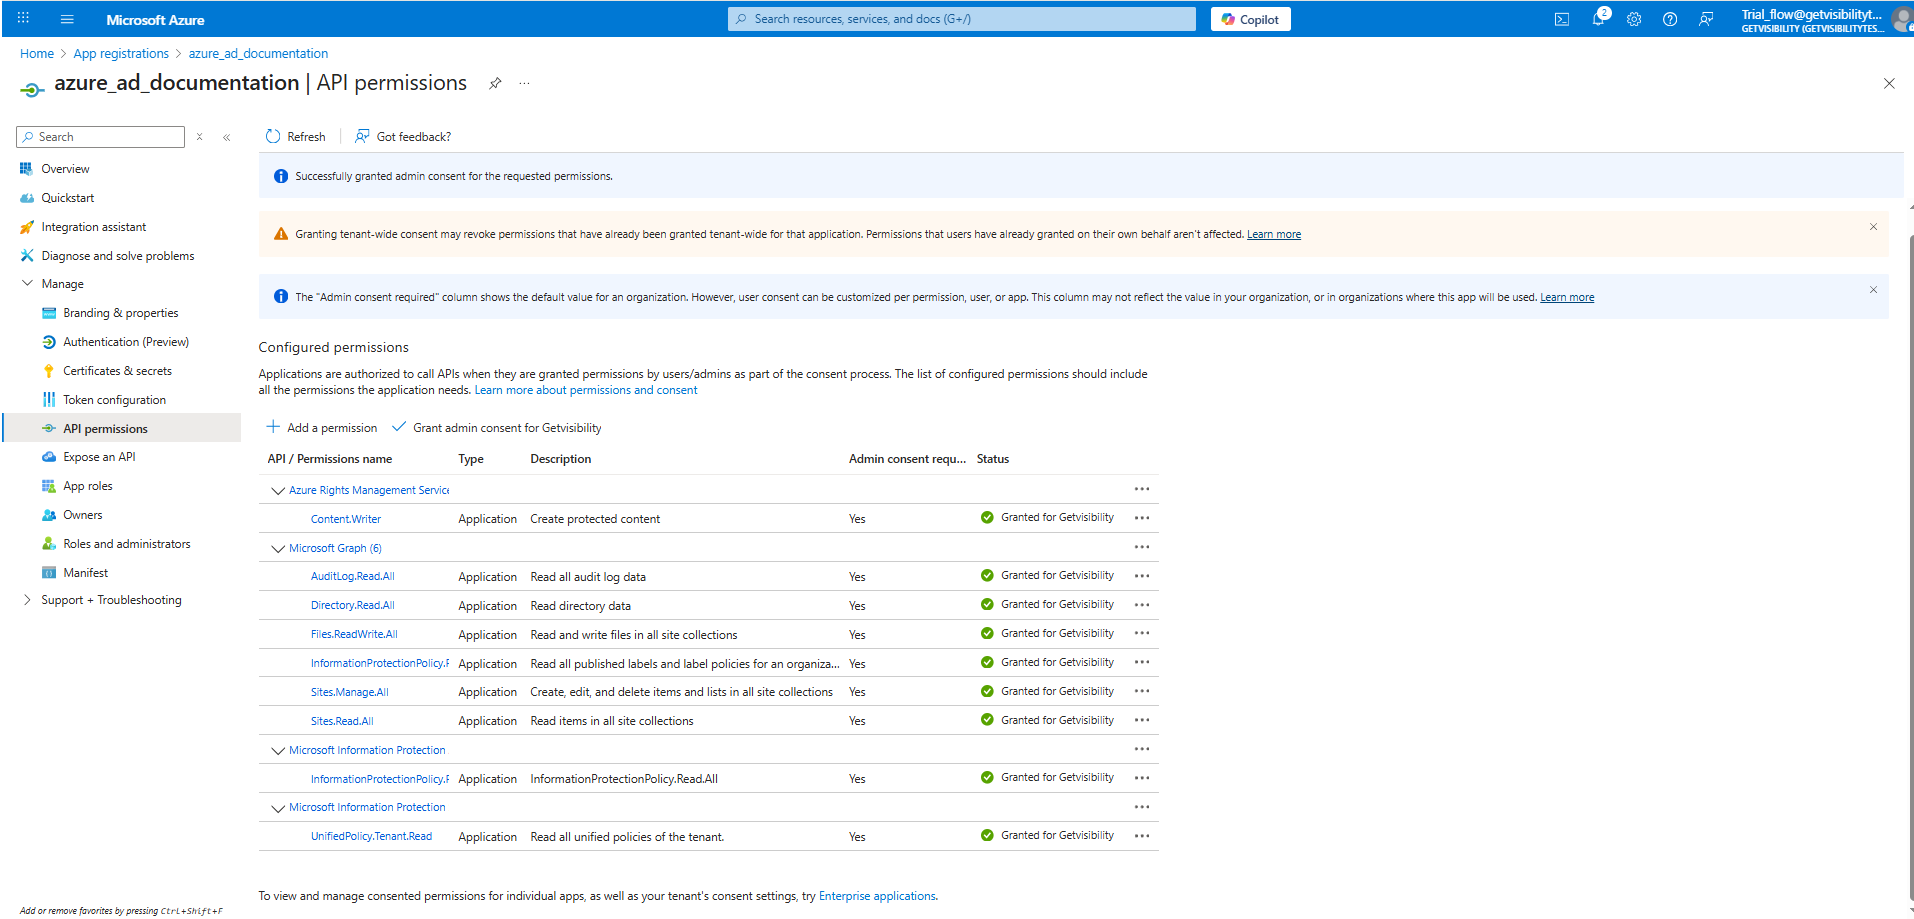
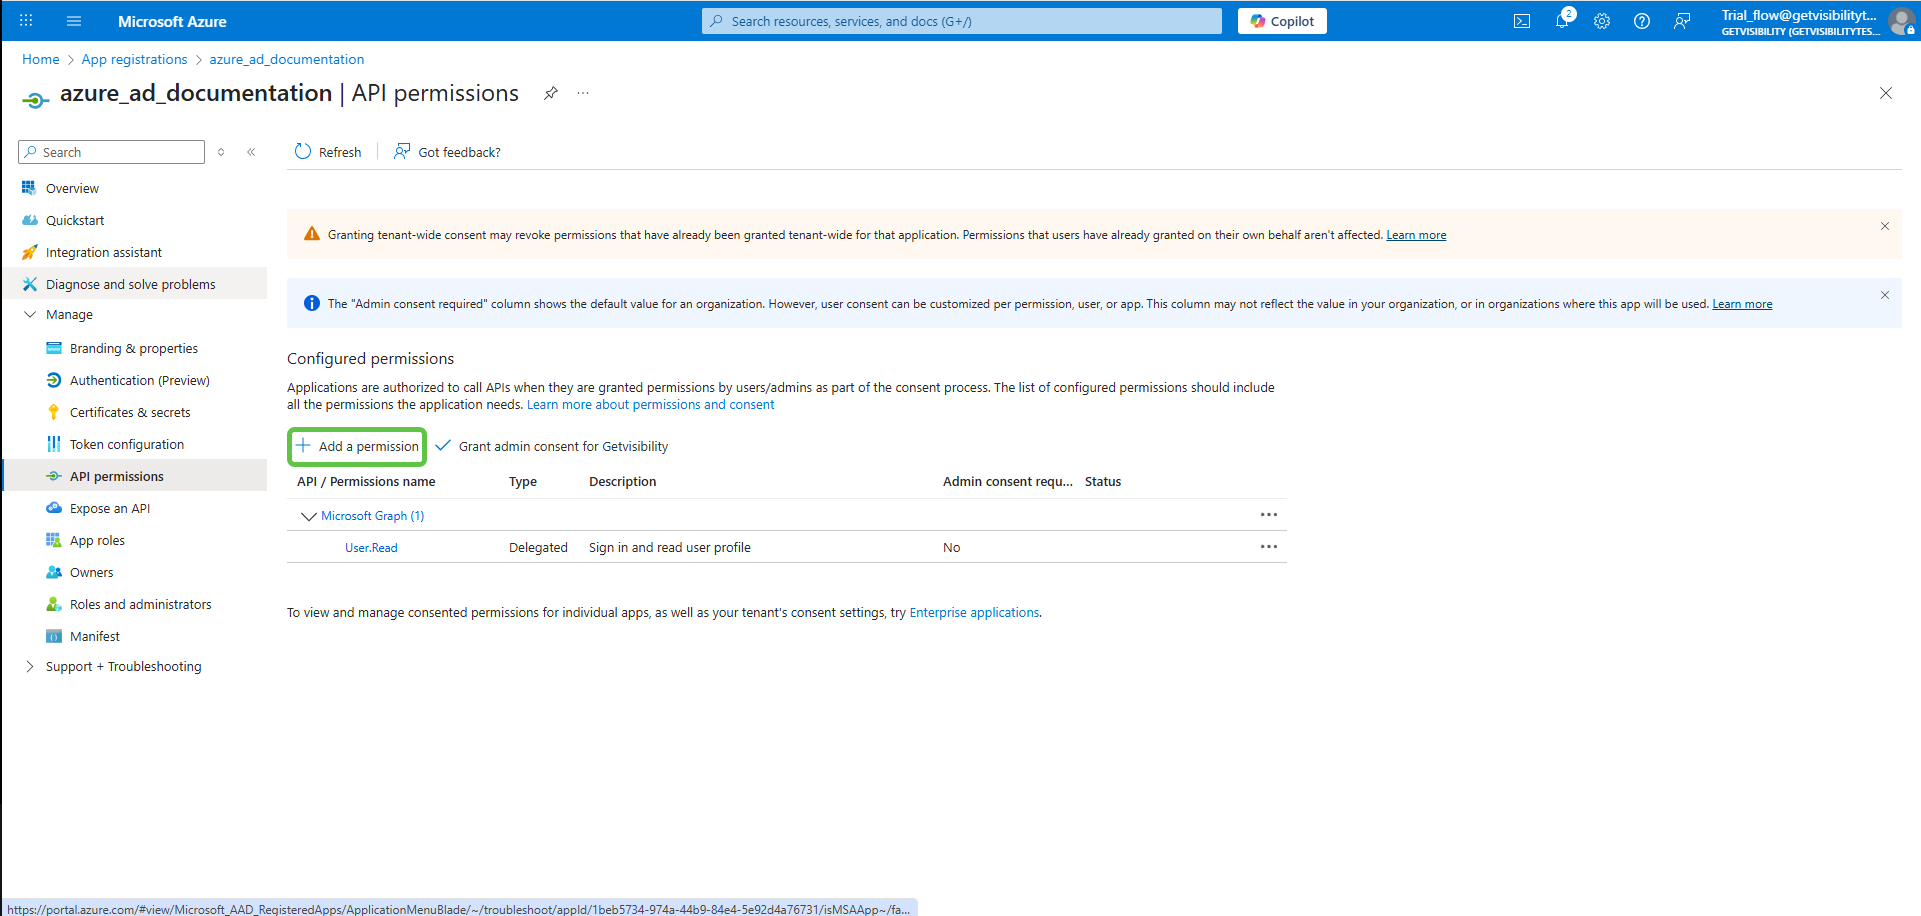
Navigate to on the left menu, and Add a permission. You must add all the permissions as listed below.
-
Once all the required permissions are added, click Grant admin consent.